|
TWGC 31 (145lbs, D4): Finals - Round 1 PBP Commentary |
Undercard bout
|
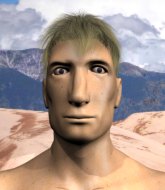
This TWGC bout is 1 fifteen minute round in the featherweight division. Introducing today's competitors. In the red corner, competing out of Montreal, with a TWGC record of 1 wins and 0 losses; Angelo Saldini! And in the blue corner, fighting out of Los Angeles, with a TWGC record of 1 wins and 0 losses; Jesse Pinkman!
The judges for this bout are Phil Schofield, James Atkins and Daniel Bishop.
The fighters bow as they face eachother in the middle of the mat and we are under way.#CL2#
Pinkman gets a clinch. #TD2#
Pinkman gets the body lock takedown. After a quick scramble, Saldini regains guard.
Score +2 for takedown into guard / half guard: Saldini (0) vs (2) Pinkman
Saldini lands a beautiful sweep and he's now moved into his opponent's guard. Score +2 for sweep to guard / half guard: Saldini (2) vs (2) Pinkman#SUB2#
Pinkman looking for submissions from the bottom but instead Saldini passes into half guard.
#SUB2#
Pinkman looking for submissions from an awkward position here.
Saldini is trying to control. Pinkman wants to improve his position but can't escape this time.
We've had a slow start to the round here - hopefully the action picks up.#SUB2#
Pinkman looking to work for a kimura from the bottom.
Pinkman won't allow Saldini to pass to mount. #T1#
Pinkman wants to control but Saldini is keeping busy.
The ref warns both fighters not to hold the cage as they work up against the meshing.
Saldini wants to pass the guard but Pinkman is defending well.
Pinkman wants to control but Saldini is keeping busy.
Saldini is looking to advance position but Pinkman won't allow it.
Saldini is figuring out what he wants to do next.
Pinkman wants to get back to full guard.#T2#
Saldini is thwarting Pinkman's attempts to control the position.
Saldini trying to control the action but Pinkman is working from the bottom.
Pinkman is working for an escape here. He's hooked one of Saldini's legs and he's managed to sneak out and take Saldini's back! Score +4 for clean sweep to past guard: Saldini (2) vs (6) Pinkman#SUB2#
Pinkman looking for the choke from the back.
Saldini prevents Pinkman from getting a body triangle.
Saldini trying to control but he's just got himself in more trouble. #T3##SUB2#
Pinkman has his hand under the chin of his opponent looking for the choke. He's nearly got it! This one could be all over! But no, Saldini has freed his hand and lives to survive another
well, another couple of seconds at least!
#SUB2#
Saldini defending nicely against the rear naked choke attempt.
#SUB2#
Pinkman looking to break Saldini's wrist control so he can sink in the choke. Saldini remaining controlled and patient though - he really has to keep calm otherwise Pinkman will wrap this one up with the rear naked choke!
Saldini looks to control his opponent's hands but he's not mananging it at the moment. #SUB2#
Pinkman tightening his grip on Saldini, looking for the choke. #T4##SUB2#
Saldini is staying cool under pressure, defending well against the rear naked choke attempt from his opponent.
Saldini breaks Pinkman's hooks off and manages to turn into his guard.
Score +2 for sweep to guard / half guard: Saldini (4) vs (6) Pinkman
Saldini slips effortlessly into side control - very nice. Score +3 for passing guard: Saldini (7) vs (6) Pinkman
Saldini trying to control the position but Pinkman is working away. #T5#
Pinkman is looking for a sweep.
Pinkman felt the need to train up his defensive grappling in the buildup to the fight. Presumably he was expecting to be in a difficult position like this, so let's see if he can get out of it.
Pinkman stops Saldini from passing to mount. #SUB#
Saldini tries for a kimura. Not really close to a finish though.
Saldini wants to lay and pray for a moment but Pinkman keeps working. #T6#
Pinkman is trying to control Saldini's posture but Saldini avoids it.
Pinkman manages to get one leg in to regain half guard.
Pinkman is looking to regain full guard. Not this time though. #SUB2#
Pinkman actively working from the bottom here.
Saldini wants to control but Pinkman is keeping him busy.
Saldini works his foot free and advances to mount. Score +3 for passing guard: Saldini (10) vs (6) Pinkman#T7#
Saldini trying to control but Pinkman is having none of it.
Saldini controlling the pace for now.
Pinkman tries to reverse the position but Saldini maintains control.
Pinkman is persisting with the attempt to improve his position.
Saldini can't quite control the action as he would like just now, as Pinkman is looking to escape. #T8#
Pinkman really trying hard to get back to half guard here.
Pinkman is squirming around, avoiding Saldini's attempts to control the action.
Pinkman stops Saldini from taking his back. Still, being mounted isn't any better.
Pinkman tries to reverse the position but Saldini maintains control.#T9#
Pinkman wants to hold on but Saldini pushes him away.
Pinkman regains half guard.
Pinkman is looking to improve his position.
Saldini has freed up his trapped foot and advances to mount. Score +3 for passing guard: Saldini (13) vs (6) Pinkman
Pinkman is wriggling around trying to escape.
Saldini wants to control the pace but Pinkman is squirming around nicely.
Saldini is looking to work his way around to Pinkman's back. He needs to be careful though, as he's in danger of losing this dominant position. #T10#
Saldini works his way to his opponent's back.
Score +3 for taking back: Saldini (16) vs (6) Pinkman
Pinkman is really stuck here.
Saldini avoiding Pinkman 's attempts to control his hands.
Pinkman is really stuck here.
Pinkman rolls and manages to get back to half guard. Nicely done.
Saldini seems very keen to just sit and control from half guard but Pinkman does not like that idea so much and is remaining active off his back.
Saldini is looking to pass the guard... He's managed it - he's now in full mount! Score +3 for passing guard: Saldini (19) vs (6) Pinkman#T11#
Saldini prevents Pinkman from getting the reversal.
Saldini tries to control but Pinkman wriggling away.
Saldini takes Pinkman's back. Score +3 for taking back: Saldini (22) vs (6) Pinkman
Pinkman is really stuck here.
A lull in the action here.
I really don't envy Pinkman right now.
#T12#
Saldini tries to get the hooks in deep but Pinkman pushed the leg off.
Pinkman trying to control the hands but Saldini won't let him.
Saldini trying to control momentarily.
Pinkman rolls and manages to get back to half guard. Nicely done.
The fighters are pressed up against the cage, both looking to find a bit of space to work.
Pinkman moves into full guard.
#T13##SUB2#
Pinkman looking for submissions from the bottom here. Moving his hips around, possibly looking for an armbar.
Pinkman tries to land a sweep but no joy. #SUB2#
Pinkman escapes his hips to the side and looks to be working for an armbar. Saldini gives him a little smile and shakes his head. No chance.
Pinkman is pulling down on Saldini's head to control his posture.
Saldini passes into half guard. #T14#
Saldini wants to pass the guard but Pinkman is defending well.
Pinkman tries to get to full guard but Saldini has control of the leg.
Pinkman won't allow Saldini to pass to mount.
Saldini wants to advance to full mount but Pinkman doesn't think that's going to happen and regains full guard instead.
Pinkman not looking particularly offensive just at the moment.
Boooooooooooooooooooo!!! God, this has been a terrible round. Come on you two, sort yourselves out!
Saldini wants to control from the top but Pinkman keeps moving.
And that's the end of the fight!
Saldini takes the fight on points by 22 to 6. |
|
|
|
Undercard bout
|
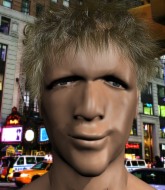
This TWGC bout is 1 fifteen minute round in the featherweight division. Introducing today's competitors. In the red corner, competing out of Tokyo, with a TWGC record of 2 wins and 1 losses; John Johns! And in the blue corner, fighting out of St Petersburg, with a TWGC record of 1 wins and 0 losses; Roger Galvao!
The judges for this bout are William Gold, Richard Clark and James Glass.
The official calls the fighters to the middle and the contest is under way.#TD2#
Galvao shoots in looking for a single leg takedown. Johns is trying to defend but Galvao finishes it well and ends up in half guard. Let's see if he can advance position further. Score +2 for takedown into guard / half guard: Johns (0) vs (2) Galvao
Galvao controlling the pace. #SUB2#
Galvao seems to be looking for submissions.
Johns controlling the position for now.#SUB2#
Galvao is working for a kimura but Johns is defending it quite comfortably.
Johns keeping control of the leg, stopping his opponent passing to mount.
We've had a slow start to the round here - hopefully the action picks up.
Galvao takes a deep breath and rests his weight momentarily on top of his opponent, to control the position.#T1#
Johns wants to get back to full guard.
Johns makes his way to full guard. A much better position for Johns.
Galvao wants to pass the guard but Johns is keeping the position.
Johns has his hands on Galvao's head, controlling the position.
Galvao preventing the sweep. #T2#
Johns wants to control here, rather than go for any submissions from the bottom. At least for now.
Johns tries to land a sweep but no joy.
Galvao trying to control the position from guard on top but Johns is wriggling around, looking for whatever he can.
Johns managing to control the position.
Galvao wants to control from the top but Johns keeps moving.
Johns has Galvao pulled in close to control his posture.
Galvao trying to pass the guard but can't manage it just yet.
The ref warns both fighters not to hold the cage as they work up against the meshing.#T3#
Galvao wants to control from the top but Johns keeps moving.
Johns seems keen to control Galvao's posture.
Galvao wants to control from the top but Johns keeps moving.
Galvao passes Johns's left leg - he's now in half guard.
Galvao prevents Johns from improving his position.#SUB2#
Galvao is looking for a kimura but he's never going to get it from there. #T4#
Johns tries to regain full guard. Instead though, Galvao has advanced to mount. Uh oh. Score +3 for passing guard: Johns (0) vs (5) Galvao#SUB2#
Galvao goes for an armbar but Johns turns quickly into his guard - lovely anticipation from Johns. Score +2 for sweep to guard / half guard: Johns (2) vs (5) Galvao
Johns passes into half guard.
Johns is working hard to pass the guard. He's done it - he's now in full mount! Trouble for Galvao! Score +3 for passing guard: Johns (5) vs (5) Galvao#T5##SUB#
Galvao defends a decent attempt at a guillotine from Johns.
Johns takes Galvao's back. Score +3 for taking back: Johns (8) vs (5) Galvao
Galvao trying to control but he's just got himself in more trouble. #SUB#
Galvao defending nicely against the rear naked choke attempt.
#SUB#
Galvao is displaying good submission defense - not really looking in danger of submitting to the rear naked choke at the moment. That could change in an instant of course if Johns gets his way!
I would not like to be Galvao right now.
#SUB#
Galvao defending nicely against the rear naked choke attempt.
#T6#
Galvao wants to escape the position.
Galvao trying to control the hands but Johns won't let him.
Galvao tries to escape the position.
#SUB#
Johns looking for the RNC. #SUB#
Johns is working on the RNC. He looks like he's got it but Galvao won't tap... Oh, he's out! The ref rips Johns off his unconscious opponent!
Ladies and gentlemen, after 7:56 of round 1, we have a winner by way of Submission (RNC). John Johns! |
|
|
|
Co-main event
|
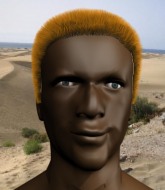
This TWGC bout is 1 fifteen minute round in the featherweight division. Introducing today's competitors. In the red corner, competing out of Montreal, with a TWGC record of 1 wins and 0 losses; Daniel Danault ! And in the blue corner, fighting out of Las Vegas, with a TWGC record of 1 wins and 0 losses; Richmond Belvedere!
The judges for this bout are Daniel Bishop, Phil Schofield and William Gold.
The fighters connect hands in the middle of the mat and we are under way.#TD2#
Belvedere is looking for a takedown here. He's shot in and has managed to get it, finishing up in Danault 's half guard. Score +2 for takedown into guard / half guard: Danault (0) vs (2) Belvedere
Belvedere seems content to maintain position for now, rather than mounting any offense.
Danault is controlling Belvedere's trapped leg to prevent Belvedere from advancing to side control.
Danault continues to stall.
Belvedere trying to control the pace.
We've had a slow start to the round here - hopefully the action picks up.
Danault tries to roll over but Belvedere keeps him under control.#SUB2#
Belvedere is thinking about going for an arm triangle but he can't free his leg.
#T1#
Danault is refusing to be controlled, as Belvedere sits in half guard.
Belvedere wants to pass the guard but Danault is defending well.
Danault works his way to full guard. Good work.#SUB2#
Belvedere thinks about going for a leg but decides against it, in order to maintain the position.
The ref warns both fighters not to hold the cage as they work up against the meshing.
Danault keeping moving, preventing Belvedere from controlling successfully. #T2#
Belvedere stays in close to Danault 's body and controls the position.
Danault looking to hit a scissor sweep but Belvedere is one step ahead there.
Belvedere showing good wrestling skills to control the position.
Danault wants to sweep but no luck.
Danault controls Belvedere momentarily but Belvedere frees himself.
A real slowdown in the pace of the fight for a moment, as Danault holds on and takes a little breather. #T3#
Belvedere wants to control from the top but Danault keeps moving.
Danault definitely looks more muscular than last time we saw him fight.
Belvedere slips nicely into half guard.
Belvedere passes to full mount! Score +3 for passing guard: Danault (0) vs (5) Belvedere
Belvedere trying to control but he's not successful this time. #SUB2#
Belvedere moves into side control, trying to work for a kimura. That looks painful! Will he finish!!?? No, Danault has worked his arm free - good work by Danault !
Belvedere tries to advance to mount but can't. #T4#
Belvedere is looking to take a break and control but Danault is keeping him honest, looking to work from the bottom.
Danault manages to land a sweep and he's now on top! Lovely Jiu Jitsu! Score +2 for sweep to guard / half guard: Danault (2) vs (5) Belvedere#SUB#
Danault trying to work for an americana but Belvedere has managed to regain full guard.
Belvedere trying to control the position here.
Danault looking to pass the guard. #T5##SUB2#
Belvedere has his foot on Danault 's thigh. He's trying to push off and get in position for a triangle, I think. Danault works his way back into a safe position though.
Belvedere keeping moving, preventing Danault from controlling successfully.
Danault knows he needs to get back to his feet asap. He's simply no match for Belvedere on the ground.
Danault won't allow Belvedere to sweep him here.
Danault wants to control from the top but Belvedere keeps moving.
Belvedere trying to keep a closed guard but Danault is proving a slippery customer.
#T6#
Danault wants to pass the guard but Belvedere is keeping the position.
Belvedere keeping moving, preventing Danault from controlling successfully.
Belvedere wants to sweep here but Danault controlling him for the moment.
Danault trying to control but Belvedere is working from the bottom. #SUB2#
Belvedere had isolated an arm as going for a kimura. Danault defends it easily.#SUB2#
Belvedere throws his legs up looking for a submission but Danault uses it to pass to side control.
Score +3 for passing guard: Danault (5) vs (5) Belvedere#T7#
Danault tries to move to mount but Belvedere blocks the move with his legs.
Belvedere wants to control but Danault postures up.#SUB#
Danault looking for an arm triangle but it's way too loose to do anything.
Belvedere is sneaking out the side here. He's bucked Danault off and has taken his back! Score +4 for clean sweep to past guard: Danault (5) vs (9) Belvedere
Danault trying to control but he's just got himself in more trouble.
Danault turns into Belvedere and is now in his guard.
Score +2 for sweep to guard / half guard: Danault (7) vs (9) Belvedere#SUB2#
Belvedere is looking to cinch up a triangle. Danault throws the leg off to one side though and gets in tight to Belvedere's body to avoid the submission. Belvedere has instead reached around Danault 's neck and now has a guillotine! Oh, this is biiiig trouble! Belvedere arches his back and squeezes and forces the tap from his hapless opponent.
Ladies and gentlemen, after 8:56 of round 1, we have a winner by way of Submission (Guillotine). Richmond Belvedere! |
|
|
|
Main event
|
This TWGC bout is 1 fifteen minute round in the featherweight division. Introducing today's competitors. In the red corner, competing out of Helsinki, with a TWGC record of 4 wins and 1 losses; Bob Brown! And in the blue corner, fighting out of Amsterdam, with a TWGC record of 1 wins and 0 losses; Kribbo Banino!
The judges for this bout are Paul Tew, Andrew Berry and James Ackerman.
The fighters connect hands in the middle of the mat and we are under way.#CL2#
Banino moves into the clinch.
Banino jumps guard but his hands slip and he falls flat on his back. Well, he's made himself look a right mug there, as Brown walks away with a smile on his face. Banino gets slowly back to his feet and shakes his head. #TD2#
Banino changes levels and drives through with a really nice takedown into side control. Brown looks really pissed at himself for not defending that better. Score +4 for clean takedown past guard: Brown (0) vs (4) Banino
Brown is not content to let Banino control the position.
Brown tries to get back to half guard but can't.
We've had a slow start to the round here - hopefully the action picks up.#T1#
Banino wants to control but Brown is keeping him busy. #SUB2#
Banino working hard here to secure a kimura but he's not really in the right position for it.
Banino trying to control the action but Brown is working from the bottom.
We've been hearing good reports from Brown's training camp. Apparently he has been rolling around with some good quality BJJ practitioners and has been sharpening his skills. Let's see if that has an impact on the fight today.
Banino slows the pace down.
Brown manages to work his way to half guard, despite Banino's best efforts.#T2#
Brown regains full guard. Nicely done. #SUB#
Banino avoids a guillotine attempt easily.
Banino pushing down on Brown's thigh, trying to pass to half guard. He's managed it... Nice work.
The ref warns both fighters not to hold the cage as they work up against the meshing.
Banino is trying to control the action in half guard but Brown is working away on the bottom, looking perhaps to get back to full guard.
Banino is stalling here. Brown is in no mood to hang around though. He's locked up a kimura from the bottom! Banino seems to be keeping calm but he's forced to roll out of the hold and Brown has ended up in side control on the top. Nice work. Score +4 for clean sweep to past guard: Brown (4) vs (4) Banino
The fighters are starting to get a bit slippery now, which will make submissions a bit more difficult.
Brown wants to control but Banino is keeping him busy. #T3#
Banino is looking to regain half guard here but Brown keeps moving and retains side control.
Brown tries to move into full mount but can't pass Banino's legs.
Brown wants to control but Banino is keeping him busy. #SUB#
Brown tries for a kimura but Banino is defending well. #T4##SUB#
Brown goes for an armbar here - this could be all over! But no, Banino has escaped beautifully and is now on top in side control! Oh, that's unlucky for Brown but great work by Banino. Score +4 for clean sweep to past guard: Brown (4) vs (8) Banino
Brown wants to control but Banino postures up.
Brown gets one leg under and gets the fight to half guard.
Brown moves into full guard.
#SUB#
Brown throwing his legs up looking for a triangle.
Brown keeping moving, preventing Banino from controlling successfully. #T5#
Banino sitting in guard here, content to control.
Brown trying to control the position.
#SUB#
Brown throwing his legs up looking for a triangle.
Banino wants to control from the top but Brown keeps moving. #T6##SUB#
Brown has a loose triangle. He'll be looking to tighten that up but Banino can see exactly what he's planning and manages to posture up and free himself.
Brown working a defensive guard here.
Banino must be cautious of submissions here, given that his opponent has the superior Jiu Jitsu.#SUB#
Brown is looking for a triangle but Banino pushes his legs off easily.
Banino pressing down on his opponent's thigh, looking to pass guard. Brown is keeping the position for now.
Banino pushing down on Brown's thigh, trying to pass to half guard. He's managed it... Nice work. #T7#
Banino takes a deep breath and rests his weight momentarily on top of his opponent, to control the position.
Brown is not content to let Banino control the position.
Still in half guard, Banino seems content to control.#T8#
Brown is looking to improve his position.
Still in half guard, Banino seems content to control.
Brown is trying to control but can't.
Brown manages to get to full guard.
Banino content to stall in guard here. #SUB#
Brown looking for a triangle here. Banino is fighting it but it looks tight! Brown pulls the arm across and this one won't last much longer! Nope, Banino is tapping out - this one is all over!
Ladies and gentlemen, after 9:58 of round 1, we have a winner by way of Submission (Triangle Choke). Bob Brown! |
|
|
|
|
|
|