 |
Highland 51 PBP Commentary |
Undercard bout
|
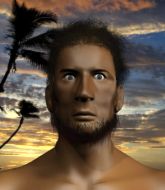
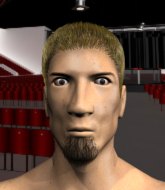
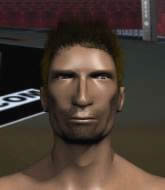
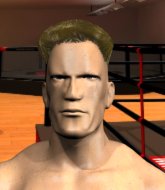
Coming up we have a middleweight MMA rules bout between Ryan Turnbull (ranked 6530 p4p, 25075 weight class) and Better Dead Ii (ranked 734 p4p, 811 weight class). Ryan Turnbull could well score a knockout today. He has the power to get to Better Dead Ii's chin.
 |
|
 |
| 185 cm
19
195
1 - 2 - 0 |
|
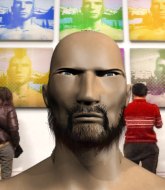
189 cm
19
181
0 - 4 - 0 |
Good takedowns
Brawler
KO power |
|
Good wrestler
Basic striking
Determined |
|
| |
|
Ladies and gentlemen. This fight is 3 rounds, in the middleweight division.
Introducing the fighter to my left, fighting out of the red corner.
With a record of 1 - 2 - 0, fighting out of The Island, Ryan Turnbull!
And introducing the fighter to my right, fighting out of the blue corner.
With a record of 0 - 4 - 0, fighting out of The Island, Better Dead Ii!
The judges for this bout are Winston Alpacca, Santiago Holmes and David Hoff.

The bell rings for round one and we are underway!
No luck for Turnbull with that takedown attempt.
Dead Ii punishes Turnbull's body with a nice straight punch.
Turnbull with a poor takedown

and Dead Ii counters by moving into the clinch. Good anticipation by Dead Ii.
Turnbull tries for a takedown. No joy.
Turnbull has been working on his balance at Walter J Abramowitz Center for Bigness, so perhaps that has help him stuff some of the takedown attempts by Dead Ii.
That's three failed takedown attempts in the round for Ryan Turnbull. That's going to take a lot out of him.

Dead Ii has dropped down and is working for a takedown. Turnbull is trying to keep an underhook but Dead Ii manages to get the takedown into half guard.
Dead Ii keeping composed on the top, looking to control the action.
Turnbull trying to control here.
Dead Ii with a momentary lay and pray from half guard.
Dead Ii's corner are shouting for him to control the position and he seems happy to oblige.
We've had a slow start to the round here - hopefully the action picks up.
Turnbull won't allow Dead Ii to pass to mount.
Turnbull trying to control but Dead Ii postures up.

That's one minute gone in the round.
Dead Ii stalling.
Turnbull is looking to regain full guard. Not this time though.
Dead Ii is thwarting Turnbull's attempts to control the position.
Turnbull is looking for a sweep. Dead Ii is wise to his cunning plan and keeps the top position.
Dead Ii content to sit in half guard and control for a moment.
The ref warns both fighters not to hold the cage as they work up against the meshing.
Dead Ii wants to free his trapped foot but Turnbull is holding on for dear life with his legs.
Dead Ii is controlling the pace.

That's two minutes gone in the round.
A few boos can be heard. I'm sure they will multiply if the fighters don't pick up the pace.
Turnbull is looking for a sweep. Dead Ii is wise to his cunning plan and keeps the top position.
Dead Ii is taking a breather. Turnbull says something to him but it's hard to make out. Perhaps he's telling him to get on with it and actually do something.
Turnbull works his way to full guard. Good work.
Dead Ii stands up and looks to throw the legs aside to pass to side control. Turnbull swivels though and keeps the full guard.
Dead Ii not doing a lot at the moment. He'll have to show some more aggression or the fight will get stood up.
Dead Ii really doesn't want to stay on the ground with Turnbull. If he can't get it back to his feet, it's only a matter of time before he'll be tapping out.

Turnbull has a loose triangle. He'll be looking to tighten that up but Dead Ii can see exactly what he's planning and manages to posture up and free himself.
Dead Ii looks more muscular than last time we saw him. He must have been on the weights.
Turnbull looking to control.

That's three minutes gone in the round.
Turnbull bucks up whilst keeping hold of a body lock, managing to reverse the position. Now he's in top in Dead Ii's guard.

Turnbull wants to control from the top but Dead Ii keeps moving.
Dead Ii wants to sweep here but Turnbull controlling him for the moment.
Turnbull in full guard, throwing the ground and pound. No damage this time.
Turnbull drops back for a leg but he's not going to get it - he lets go and Dead Ii dives on top into guard.

Dead Ii postures up.
Dead Ii stays in close to Turnbull's body and controls the position.
Dead Ii passes into half guard.
Turnbull wants to improve his position but Dead Ii is controlling well.
Dead Ii trying to control the pace.

That's four minutes gone in the round.
Turnbull wants to control but Dead Ii is keeping busy and won't allow it.
Turnbull is looking to regain full guard. Not this time though.
Dead Ii is just sitting in half guard, waiting for something to happen.
Turnbull trying to control but Dead Ii postures up.
Boooooooooooooooooooo!!! God, this has been a terrible round. Come on you two, sort yourselves out!
Dead Ii trying to control the pace.
Turnbull looking for submissions off his back.
And that is the end of the round. The fighters go back to their corners.
Better Dead Ii dominated that round.
That's the end of the interval. I'm sure that seemed a lot quicker than a minute for our two fighters! Back to the action.

Turnbull fails with a takedown attempt from distance.
Ryan Turnbull seems to be the more aggressive standup fighter in this bout.
Turnbull is looking to take this fight into the clinch.
Dead Ii is clearly trying to counter these attacks from Turnbull with a body shot.
Turnbull misses with a takedown attempt. He shot from a bit too far out.
Dead Ii circles away from the clinch attempt.
Turnbull uses good footwork to avoid the strikes from Dead Ii.
Dead Ii misses with a body shot.
Turnbull shoots in for a takedown. "Ole!" shouts Dead Ii as he jumps to the side.
That's three failed takedown attempts in the round for Ryan Turnbull. That's going to take a lot out of him.
Turnbull looks for a takedown but Dead Ii sprawls well.
We've had a slow start to the round here - hopefully the action picks up.
Dead Ii lands a straight punch to the body, keeping Turnbull at a distance.
Turnbull fails with a takedown attempt.
That's one minute gone in the round.
Dead Ii fakes high and swings low for a body shot but Turnbull manages to avoid it.
Turnbull misses with a takedown attempt - Dead Ii sprawls well and throws a nice strike on the way out which just misses.
Turnbull fakes high and shoots in for a takedown but Dead Ii avoids it really well and circles away.
Both fighters are absolutely exhausted here.
Nice defenses there by Turnbull.
Turnbull was looking to counter that last move with a shot to the body but he didn't commit.
Dead Ii shoots in looking for a takedown but Turnbull manages to keep the fight standing, pushing Dead Ii's face into the canvas for good measure before circling away.
Dead Ii looks to score with a jab to the body but Turnbull is just out of range.
Turnbull moves in looking to clinch but Dead Ii pushes him off.
Dead Ii looks to land a right hand but Turnbull moved out of range.
Dead Ii fails with a takedown attempt from distance.
Turnbull closes the distance and clinches up with Dead Ii, looking for a takedown. Turnbull pushes Dead Ii against the cage but Dead Ii circles to the side and manages to break the clinch.
Dead Ii scores with a shot to the body.
Dead Ii stuffs a takedown. It's all about dictating where the fight takes place and Dead Ii wants it to stay on the feet.
Dead Ii throws a right and a left that both miss.
That's two minutes gone in the round.
Dead Ii clinches.

Dead Ii's corner calls for him to break the clinch, which he does.
Dead Ii swings and misses with a hook to the body.
Turnbull drops down looking for a counter takedown but Dead Ii sprawls and moves away.
Turnbull uses some good footwork to avoid the body shot by Dead Ii.
Dead Ii connects with a body shot.
Turnbull will have to do better than that with his takedown attempts.
Dead Ii is throwing a lot of body shots here, looking to wear down Turnbull rather than just go for the knockout.
This has been an exciting period of action!
Turnbull keeping a good distance there, avoiding the body shot.
Dead Ii swings for the body but Turnbull moves out of range.
Dead Ii looks to throw the jab but Turnbull is out of range.
Turnbull shoots in looking for a double leg takedown. Dead Ii defends it nicely.
Turnbull fakes high and shoots in for a takedown but Dead Ii avoids it really well and circles away.
Dead Ii tries to land with a swinging hook to the body but Turnbull was well out of range. Poor timing from Dead Ii.
That's three minutes gone in the round.
Dead Ii just misses with a punch to the body.
Dead Ii moves out of range as Turnbull strikes.
Dead Ii misses with an uppercut. Turnbull saw that one coming.
Turnbull was looking to counter that move with a punch but didn't quite pull the trigger.
Dead Ii jabbing away but nothing is landing.
Dead Ii misses with an uppercut. Turnbull saw that one coming.
Dead Ii just misses with a punch to the body.
Turnbull throws a quick counter kick to the body but Dead Ii avoids it.
Turnbull fails with a takedown attempt.
Turnbull changes levels and looks for a double leg takedown. Dead Ii tries to avoid it but Turnbull manages to keep hold of a leg and drag Dead Ii to the ground. Dead Ii escapes though and pops straight back up to his feet.
Dead Ii throws a body punch but Turnbull moves out of range.
Dead Ii manages to get an easy takedown there - catching Turnbull on his heels. He'll look to pass Turnbull's guard now, I'm sure.
Dead Ii showing good wrestling skills to control the position.
Dead Ii avoids a guillotine attempt easily.
That's four minutes gone in the round.
Dead Ii looking to pass the guard.
Dead Ii keeps trying to improve his position.
Dead Ii is intent on slowing down the pace of the fight, simply looking to control.
Both fighters have adopted an aggressive gameplan on the ground!
The crowd thankful this round is nearly over.
Turnbull controls Dead Ii momentarily but Dead Ii frees himself.
And that is the end of the round. The fighters go back to their corners.
Better Dead Ii showed his class in that round. I'd imagine he'll take it on all the scorecards.
The corners get their ten second warning. Both fighters stand from their stools and stare each other down, ready to get back to the action. This is the final round!

Dead Ii clinches.
Dead Ii manages to pull guard.
Turnbull throwing strikes from guard but Dead Ii blocks nicely.
Turnbull wants to control from the top but Dead Ii keeps moving.
Turnbull throwing elbows and punches but not connecting, as Dead Ii works some decent striking defense from the bottom.
Dead Ii keeping moving, preventing Turnbull from controlling successfully.
Turnbull tries to free his leg and advance position but Dead Ii is retaining full guard.
We've had a slow start to the round here - hopefully the action picks up.
Dead Ii is adopting a defensive guard.
That's one minute gone in the round.
Turnbull trying to pass the guard but can't manage it just yet.
Dead Ii looking to sweep here. No luck so far.
Turnbull stands up and looks to throw the legs aside to pass to side control. Dead Ii swivels though and keeps the full guard.
Dead Ii keeping moving, preventing Turnbull from controlling successfully.

The ref stands the fighters back up due to a lack of activity.
Dead Ii has Turnbull up against the cage in a clinch.
Dead Ii breaks from the clinch.
Turnbull tries to grapple but his opponent circles
and Dead Ii counters with a nice jab to the body that keeps Turnbull thinking.
Dead Ii misses with an uppercut.
Dead Ii misses with a hook.
That's two minutes gone in the round.
Dead Ii swings and misses with a hook to the body.
Dead Ii shoots for a takedown but Turnbull saw that one coming a mile off and avoided it easily.
Turnbull shoots in but doesn't get the takedown
and Dead Ii counters by clinching up.
Turnbull jumps guard but Dead Ii turns him against the cage and keeps the fight standing.
Dead Ii breaks from the clinch.
Dead Ii shoots in for a takedown. "I don't think so" says Turnbull as he avoids it easily.
Turnbull moves out of range of the strikes.
Turnbull closes this distance looking for a takedown but Dead Ii circles away.
Dead Ii is trying to avoid his opponent's strikes and get into the clinch.
That's three failed takedown attempts in the round for Ryan Turnbull. That's going to take a lot out of him.
Dead Ii avoids the clinch attempt nicely.
A nice side step and Dead Ii releases a counter shot to the body, but it doesn't find it's home.
Dead Ii throws a body punch but Turnbull moves out of range.
Turnbull wants to take advantage of his opponent's missed offense by moving into the clinch.
Dead Ii throws a body punch but Turnbull moves out of range.
Turnbull fails with a takedown attempt.
Both fighters are breathing heavily.
Turnbull has his takedown stuffed
and Dead Ii counters into the clinch. Nicely done.
Better Dead Ii is fighting for a decision - hopefully he's judged it right and he's actually winning the fight.
That's three minutes gone in the round.
Dead Ii is working on a single leg takedown against the cage. Turnbull can't fight it off and eventually Dead Ii manages to take the fight to the floor. Turnbull looks annoyed but at least he's managed to land in guard.
Dead Ii working from the guard for now, landing some ground and pound.
Dead Ii tries to stand but Turnbull is controlling from the bottom.
Dead Ii is taking a break and basically stalling. The referee will not allow him to do that for long.
Turnbull working from the bottom, still in full guard. He's managed to get a loose triangle. Dead Ii doesn't seem to be doing much to defend here, obviously he feels comfortable in the position. Dead Ii manages to throw the legs off his shoulder and he's back into guard - no problem.
That's four minutes gone in the round.
Turnbull keeping full guard, as Dead Ii tries to pass.
Dead Ii controlling from the top position.
Turnbull controls Dead Ii momentarily but Dead Ii frees himself.
Ryan Turnbull has stepped it up - he knows he needs a finish here!
Boooooooooooooooooooo!!! God, this has been a terrible round. Come on you two, sort yourselves out!
Turnbull throws a couple of shots from the bottom but they don't land.
And that's the end of the fight!
Better Dead Ii comfortably won the final round on my scorecard.
Well Dead Ii has outworked and out performed his opponent in all aspects of the game today. He was simply too good and the decision should be no more than a formality. Over to the ring announcer for the scorecards.
Ladies and gentlemen, after 3 rounds of action, we go to the scorecards for a decision.
Judge Winston Alpacca scores the fight 26:30
Judge Santiago Holmes scores the fight 26:30
Judge David Hoff scores the fight 26:30
In favor of your winner, by unanimous decision... Better Dead Ii!
An out of breath Better Dead Ii thanked his loyal fans in his post fight interview, giving them credit for his success over the course of his career.
|
|
|
|
|
|
|
|
|
|
|
|
|
|
|
|
|
|
|
|
|
|
|
| S |
C
A |
G |
S |
C
B |
G |
|
S |
C |
G |
|
energy
A | B |
|
hype
A | B |
|
pop
A | B |
|
mgr
A | B |
|
FIGHT
RATING
30% |
|
|
|
|
|
|
|
Undercard bout
|
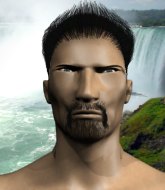
Coming up we have a welterweight MMA rules bout between Emmanuella Knapp (ranked 4782 p4p, 3845 weight class) and Tam Calderwood (ranked 576 p4p, 494 weight class). Both fighters look fresh as a daisy as they make their way towards the cage.
 |
|
 |
| 183 cm
25
170
2 - 4 - 0 |
|
178 cm
26
182
4 - 3 - 0 |
Decent wrestler
Solid boxing
Big right hand |
|
Good takedowns
Brawler
Knockout power |
|
| |
|
Ladies and gentlemen. This fight is 3 rounds, in the welterweight division.
Introducing the fighter to my left, fighting out of the red corner.
With a record of 2 - 4 - 0, fighting out of The Island, Emmanuella Knapp!
And introducing the fighter to my right, fighting out of the blue corner.
With a record of 4 - 3 - 0, fighting out of The Island, Tam Calderwood !
The judges for this bout are Sandra Marshall, Peter Branson and Santiago Holmes.
The bell rings for round one and we are underway!
Knapp walks forward and throws out a flicking leg kick. Calderwood checks it nicely though, as he moves to the side.

Knapp decides to change it up a bit and drives through with a nice takedown into half guard.
The ref warns both fighters not to hold the cage as they work up against the meshing.
Knapp missing with the ground and pound from half guard.
The fighters are pressed up against the cage, both looking to find a bit of space to work.

Calderwood is looking to sinch up a guillotine here but Knapp pulls his head out easily.
Calderwood looking for submissions from an awkward position here.
Knapp has improved his flexibility recently so we will have to see if he can use that to his advantage.
Knapp thows a wild elbow that connects with the canvas.
Calderwood is pressing down on Knapp's left leg trying to get back to full guard. He's managed it.
Calderwood is looking to cinch up a triangle. Knapp throws the leg off to one side though and gets in tight to Calderwood 's body to avoid the submission. Calderwood has instead reached around Knapp's neck and now has a guillotine! Oh, this is biiiig trouble! Calderwood arches his back and squeezes and forces the tap from his hapless opponent.
Ladies and gentlemen, after 0:45 of round 1, we have a winner by way of Submission (Guillotine). Tam Calderwood !
Tam Calderwood seemed lost for words in his post fight interview but he remembered to thank his fans and directed everyone to his website.
|
|
|
|
|
|
|
|
|
|
|
|
|
|
|
|
|
|
|
|
|
|
|
| S |
C
A |
G |
S |
C
B |
G |
|
S |
C |
G |
|
energy
A | B |
|
hype
A | B |
|
pop
A | B |
|
mgr
A | B |
|
FIGHT
RATING
100% |
|
|
|
|
|
|
|
Undercard bout
|
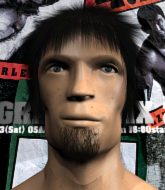
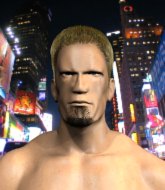
Coming up we have a light heavyweight MMA rules bout between Mandingo McMaggara (ranked 4310 p4p, 3240 weight class) and Hunter Holmes (ranked 557 p4p, 437 weight class). Hunter Holmes is staring across the cage at his opponent, tweaking his nipples.
 |
|
 |
| 160 cm
18
205
2 - 1 - 0 |
|
191 cm
26
205
2 - 3 - 0 |
Powerful takedowns
Basic striking
KO power |
|
BJJ White Belt
Excellent boxer
Powerful |
|
| |
|
Ladies and gentlemen. This fight is 3 rounds, in the light heavyweight division.
Introducing the fighter to my left, fighting out of the red corner.
With a record of 2 - 1 - 0, fighting out of The Island, Mandingo McMaggara!
And introducing the fighter to my right, fighting out of the blue corner.
With a record of 2 - 3 - 0, fighting out of The Island, Hunter Holmes!
The judges for this bout are Peter Branson, Winston Alpacca and David Hoff.
The bell rings for round one and we are underway!
Holmes closes the distance and gets a trip takedown into side control. McMaggara quickly recovers to half guard.
Holmes is trying to get back to his feet now but his leg is trapped.
McMaggara is pressing down on Holmes's left leg trying to get back to full guard. He's managed it.
Holmes is trying to tuck his arms in to keep them safe but McMaggara has managed to isolate one of them and has got a loose triangle. Holmes is looking to defend but McMaggara has done well to lock his legs together - this could be big trouble for Holmes! McMaggara pulls down on the head and a little smile comes across his face - he knows he's got it. Yep, Holmes taps out and this one is all over!
Ladies and gentlemen, after 0:25 of round 1, we have a winner by way of Submission (Triangle). Mandingo McMaggara!
In his post fight interview, Mandingo McMaggara started talking himself up. Luckily his charisma kept the crowd on side and gave him a good reception.
|
|
|
|
|
|
|
|
|
|
|
|
|
|
|
|
|
|
|
|
|
|
|
| S |
C
A |
G |
S |
C
B |
G |
|
S |
C |
G |
|
energy
A | B |
|
hype
A | B |
|
pop
A | B |
|
mgr
A | B |
|
FIGHT
RATING
100% |
|
|
|
|
|
|
|
Undercard bout
|
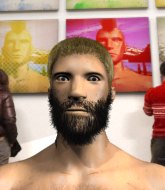
Coming up we have a heavyweight MMA rules bout between Eugene Whibley (ranked 3054 p4p, 2802 weight class) and Jani Honkanen (ranked 362 p4p, 333 weight class). The key to victory for Eugene Whibley has got to be keeping the fight on the feet.
 |
|
 |
| 190 cm
25
260
2 - 1 - 0 |
|
190 cm
26
280
2 - 2 - 0 |
BJJ Blue Belt
Solid Muay Thai
Granite chin |
|
Good takedowns
Counter fighter
Intelligent |
|
| |
|
Ladies and gentlemen. This fight is 3 rounds, in the heavyweight division.
Introducing the fighter to my left, fighting out of the red corner.
With a record of 2 - 1 - 0, fighting out of The Island, Eugene Whibley!
And introducing the fighter to my right, fighting out of the blue corner.
With a record of 2 - 2 - 0, fighting out of The Island, Jani Honkanen!
The judges for this bout are David Hoff, Daniel Franklin and Dirk Anderson.
The bell rings for round one and we are underway!
Whibley throws a body kick but he wasn't in range.
Whibley thows a left - swing and a miss!
Honkanen misses with a hook.
Honkanen has been spending a lot of time sparring his boxing in the run up to the fight, trying to sharpen up those hands and look for a knockout.
Whibley looks for the body kick but Honkanen saw that one coming.
Whibley tries to clinch but is not successful on this occasion.
Whibley misses with a head kick.
Honkanen dips to his left and cracks Whibley with an uppercut!
Whibley gets caught on his heels momentarily as he allows Honkanen to score an easy takedown into full guard.
Honkanen drops back for a leg! It's a sloppy attempt though and Honkanen jumps back into guard quickly, to retain the dominant position.
We've had a slow start to the round here - hopefully the action picks up.
Honkanen wants to pass the guard but Whibley is keeping the position.
Honkanen drops back for a leg but he's not going to get it - he lets go and Whibley dives on top into guard.
Whibley avoids a guillotine attempt easily.
That's one minute gone in the round.
Honkanen tries to land a sweep but no joy.
Honkanen manages to sweep nicely, so he's now on top. Whibley manages to get himself to full guard.
Whibley had isolated an arm as going for a kimura. Honkanen defends it easily.
Whibley definitely looks more muscular than last time we saw him fight.
Whibley knows he needs to get back to his feet asap. He's simply no match for Honkanen on the ground.
Whibley is throwing his legs up, looking for submissions. Honkanen is aware though and is defending well.
Honkanen thinks about going for a leg but decides against it, in order to maintain the position.
Honkanen trying to control the position from guard on top but Whibley is wriggling around, looking for whatever he can.
Honkanen pressing down on his opponent's thigh, looking to pass guard. Whibley is keeping the position for now.
That's two minutes gone in the round.
Whibley looking to control.
Honkanen throwing strikes but missing.
Honkanen advances to half guard.
Honkanen passes the half guard and he's now in mount! Big trouble for Whibley!
Honkanen prevents Whibley from getting the reversal.
Poor strikes thrown by Honkanen there. More accuracy and less frantic strikes would help!
Honkanen working away from the top, dropping strikes.
Honkanen throws some wild stikes that Whibley manages to avoid easily.
That's three minutes gone in the round.
Honkanen punching from mount but Whibley doing a good job of avoiding damage.
The ref warns both fighters not to hold the cage as they work up against the meshing.
Honkanen controlling from mount.
Whibley blocking the ground and pound.
Honkanen jumps to side control looking for an arm triangle but Whibley manages to avoid the submission attempt.
Honkanen thinks about going for a far side armbar but bails out and retains the dominant position instead.
Honkanen thinks about going for a far side armbar but bails out and retains the dominant position instead.
Whibley tries to buck Honkanen off but Honkanen is having none of it.
That's four minutes gone in the round.
Honkanen wants to work for a kimura but he's foiled early by Whibley, who protects the arm well.
Honkanen prevents Whibley from escaping the position.
Honkanen is looking for a kimura. He might have it! No, Whibley has escaped the position, nice work there.
Whibley prevents Honkanen from improving position.
Honkanen looking for an arm triangle but it's way too loose to do anything.
Honkanen has the superior BJJ but he's also working some ground strikes into his gameplan.
This is a great period of action - very entertaining stuff!
Whibley is not content to let Honkanen control the position.
And that is the end of the round. The fighters go back to their corners.
Jani Honkanen dominated that round.
That's time! Whibley's corner gives him a slap on the ass as he gets ready to fight.
Honkanen on the wrong end of a vicious looking body shot.
Eugene Whibley seems to be the more aggressive standup fighter in this bout.
Whibley takes a jab on the nose. He smiles like he loves it and keeps coming.
Honkanen fakes an overhand right and shoots for a takedown. Whibley sprawls well initially but Honkanen persists and gets the takedown into half guard.

Whibley makes some distance and scrambles quickly back to his feet. Nice work!
Whibley throws a series of punches but Honkanen avoids them all with ease.
Whibley tries to clinch but Honkanen moves out of range.
Wooooo! Give it up for these two warriors! They are putting on a show!
Honkanen displays some good footwork, moving neatly out of range as Whibley throws out the jab.
Honkanen takes a step towards his opponent and connects with a left hand, before circling away.
Whibley swings wildly with a couple of big hooks
and Honkanen counters with a nice shoot takedown that brings the fighters to the ground.
Honkanen advances position into side control!
Honkanen working the ground and pound but Whibley is defending the strikes.
Honkanen working the ground and pound but Whibley is defending the strikes.
That's one minute gone in the round.
Honkanen thinks about going for a far side armbar but bails out and retains the dominant position instead.
The fighters are pressed up against the cage, both looking to find a bit of space to work.
Whibley seems a little lost for a moment, as Honkanen dominates the positioning.
Honkanen is trying to get an arm triangle but Whibley is defending well.
Whibley on his back here. We all know that wrestlers don't like being on their back so let's see if Whibley tries to get out of the position.
Honkanen working the ground and pound but Whibley is defending the strikes.
Whibley is not content to let Honkanen control the position.
Honkanen working hard here to secure a kimura but he's not really in the right position for it.
That's two minutes gone in the round.
Honkanen advances to mount.
Whibley blocking the ground and pound.
Honkanen looking to control but Whibley is working nicely, looking to advance position himself.
Whibley prevents Honkanen from taking his back.
Whibley defends a decent attempt at a guillotine from Honkanen.
That's three minutes gone in the round.
Whibley holding onto his opponent's waist for dear life, as Honkanen tries to land some strikes to get him to release his grip.
Honkanen trying to control but Whibley is having none of it.
Whibley blocking the ground and pound.
Honkanen sends his fist crashing into the mat - the crowd let out a collective ooooooh. Let's hope he's not broken it!
Honkanen thowing strikes but they're hitting the gloves, not doing any damage.
Whibley wriggling around on the bottom manages to avoid the strikes thrown by Honkanen.
Jani Honkanen has got the better of the ground game so far.
Honkanen takes his opponent's back. Perhaps a chance to lock up a rear naked choke here.
Honkanen has both hooks in and is working for a choke. Whibley is in real trouble here. Honkanen gets an arm under the chin and tightens the submission attempt... is this the end? Yes, Whibley is tapping out! Honkanen wins by rear naked choke!
Ladies and gentlemen, after 4:57 of round 2, we have a winner by way of Submission (RNC). Jani Honkanen!
|
|
|
|
|
|
|
|
|
|
|
|
|
|
|
|
|
|
|
|
|
|
|
| S |
C
A |
G |
S |
C
B |
G |
|
S |
C |
G |
|
energy
A | B |
|
hype
A | B |
|
pop
A | B |
|
mgr
A | B |
|
FIGHT
RATING
48% |
|
|
|
|
|
|
|
Undercard bout
|
Coming up we have a middleweight MMA rules bout between Ottaa Koppia (ranked 2180 p4p, 3049 weight class) and Hank Pecker (ranked 327 p4p, 442 weight class). Well, the cameraman is lingering on a pretty young lady for a bit too long there. Keep your eyes on the prize buddy or you'll miss the fighter intros!
 |
|
 |
| 183 cm
26
189
3 - 2 - 0 |
|
185 cm
26
189
2 - 3 - 0 |
Good wrestling
Solid boxing
KO power |
|
Good takedowns
Counter fighter
Determined |
|
| |
|
Ladies and gentlemen. This fight is 3 rounds, in the middleweight division.
Introducing the fighter to my left, fighting out of the red corner.
With a record of 3 - 2 - 0, fighting out of The Island, Ottaa Koppia!
And introducing the fighter to my right, fighting out of the blue corner.
With a record of 2 - 3 - 0, fighting out of The Island, Hank Pecker!
The judges for this bout are Michael Johnstone, Peter Branson and Sandra Marshall.
The bell rings for round one and we are underway!
Pecker is looking to clinch but Koppia is avoiding it.
Koppia has been working on his boxing with his coaches at Tez’s Stand N Bang ! in the buildup to the fight.
Pecker throws a head kick that misses
and Koppia counters with a straight right hand.
Pecker closes the distance looking to clinch

and Koppia counters with a nice right hand that sends Pecker toppling to the canvas! Pecker scrambles and gets back to his feet - can Koppia finish him?!
 Pecker is rocked! Pecker is rocked!
Pecker swings widly with a right hand
and Koppia makes him pay by landing a nice hook to the body before moving out of range.
The crowd are loving this. Great action here.
Koppia lands a big uppercut and Pecker crumbles to the floor! The ref thinks about stopping the fight but Pecker looks OK. Koppia waves Pecker back to his feet!
Pecker is still on wobbly legs! Can Koppia finish him?
Pecker with a poor takedown
and Koppia counters with a massive hook, right on the button! He's out cold! Damn, that was naaaaaasty! Hopefully he'll be OK.
Ladies and gentlemen, after 0:50 of round 1, we have a winner by way of KO (Punch). Ottaa Koppia!
|
|
|
|
|
|
|
|
|
|
|
|
|
|
|
|
|
|
|
|
|
|
|
| S |
C
A |
G |
S |
C
B |
G |
|
S |
C |
G |
|
energy
A | B |
|
hype
A | B |
|
pop
A | B |
|
mgr
A | B |
|
FIGHT
RATING
100% |
|
|
|
|
|
|
|
Undercard bout
|
Coming up we have a heavyweight MMA rules bout between Ching Chong (ranked 2676 p4p, 2289 weight class) and Dick Hickock (ranked 316 p4p, 272 weight class). There are an array of beautiful celebrities at ringside tonight! I wonder if any of them paid for their tickets.
 |
|
 |
| 205 cm
25
265
4 - 1 - 0 |
|
200 cm
26
270
4 - 2 - 0 |
Good wrestling
Basic striking
KO power |
|
BJJ Purple Belt
Excellent boxer
Good gas tank |
|
| |
|
Ladies and gentlemen. This fight is 3 rounds, in the heavyweight division.
Introducing the fighter to my left, fighting out of the red corner.
With a record of 4 - 1 - 0, fighting out of The Island, Ching Chong!
And introducing the fighter to my right, fighting out of the blue corner.
With a record of 4 - 2 - 0, fighting out of The Island, Dick Hickock!
The judges for this bout are Daniel Franklin, Peter Branson and Dirk Anderson.
The bell rings for round one and we are underway!

Chong gets to the clinch - let's see what his plan is here.
Chong stalling against the cage.
Hickock looks more muscular than last time we saw him. He must have been on the weights.
Hickock pulls Chong into guard.
Chong throws a big elbow that misses.
Chong has been talking about how he's improved his wrestling in the run up to the fight so let's see if that's enough to sway the balance.
Chong controls the pace of the fight for a moment.
The fighters are pressed up against the cage, both looking to find a bit of space to work.
Hickock has his foot on Chong's thigh. He's trying to push off and get in position for a triangle, I think. Chong works his way back into a safe position though.
Hickock can't do much from the bottom at the moment, as Chong controls the pace.
Chong seems to have a rather negative gameplan on the ground. He seems keen to just score the takedown and hold down Hickock for as long as he can get away with.
We've had a slow start to the round here - hopefully the action picks up.
That's one minute gone in the round.
Hickock working for a triangle but Chong defends it easily.
Hickock being controlled here, momentarily.
Hickock trying to keep a closed guard but Chong is proving a slippery customer.
We've had a lack of effective grappling in the last minute or so, which could well see a referee standup.
Hickock keeping full guard, as Chong tries to pass.
The referee has stepped in and called for a break in the action. We'll restart on the feet.
That's two minutes gone in the round.
Well. There's a bit of a lull in the action here and the crowd are starting to get restless.
Chong gets his takedown attempt stuffed easily
and Hickock counters with a lovely shot to the body.
Chong scores with a takedown into Hickock's guard.
Hickock working from the bottom, still in full guard. He's managed to get a loose triangle. Chong doesn't seem to be doing much to defend here, obviously he feels comfortable in the position. Chong manages to throw the legs off his shoulder and he's back into guard - no problem.
Chong's corner is telling him to maintain position.
Chong's ground tactics aren't going to win him many fans. Let's hope he's got fireworks for us if he gets back to his feet because he's not doing much on the ground.
Chong has gone for a leg lock! Hickock slips out almost immediately though and dives into Chong's guard.
That's three minutes gone in the round.
Hickock slips nicely into half guard.
Chong controlling the position for now.
Hickock tries to pass to full mount but Chong defends it.
Chong keeping control of the position.
Chong tries to roll over but Hickock keeps him under control.
Chong slips a foot under and gets full guard. Nice work.
That's four minutes gone in the round.
Neither fighter has done anything of merit for a good minute or two here and the crowd are not happy about it.
Chong controlling Hickock's posture.
Hickock tries to free his leg and advance position but Chong is retaining full guard.
Chong controlling the position.
Hickock trying to control the position from guard on top but Chong is wriggling around, looking for whatever he can.
Boooooooooooooooooooo!!! God, this has been a terrible round. Come on you two, sort yourselves out!
Chong has control of Hickock's left arm, preventing Hickock from doing any damage.
And that is the end of the round. The fighters go back to their corners.
That was a close round but I would say that Ching Chong will probably get the nod.
OK. That's time! The bell goes and we're back to the action.
Nice uppercut lands for Hickock. That snapped Chong's head back.
Nice jab there from Hickock.
Nice cross by Hickock.
Hickock has been the more effective fighter overall so far.
Chong misses with a wild body shot.
Nice uppercut there from Hickock.
Chong moves into range and clinches up with Hickock.
Hickock blocks an elbow strike from Chong.
Hickock takes an elbow to the temple.
 It looks like Dick Hickock has been cut. It looks like Dick Hickock has been cut.
Chong wants the takedown. Hickock is fighting it off but Chong persists and manages to bring the fight to the ground, ending up in Hickock's guard against the cage.
The fans in attendance giving it up for the two fighters, who have really let it all hang out in the last minute or so!
Hickock looking for submissions off his back, moving his hips, looking for an opening.
Hickock being controlled here, momentarily.
Chong trying to pass the guard but can't manage it just yet.
That's one minute gone in the round.
Chong seems content to control from guard here. He's going to have to remain active though if he doesn't want to get stood back up.
Chong is pushing down on Hickock's leg trying to pass to half guard. Hickock is fighting to maintain full guard but Chong has managed to sneak the leg through.
Chong is figuring out what he wants to do next.
Hickock won't allow Chong to pass to mount.
The ref warns both fighters not to hold the cage as they work up against the meshing.
Chong is working hard here to advance position.
Chong slows the pace down in half guard.
That's two minutes gone in the round.
The crowd are starting to boo a lack of action.
Chong prevents Hickock from improving his position.
Chong trying to pass the guard but Hickock defending well.
Hickock tries to roll over but Chong keeps him under control.
Chong seems content to maintain position for now, rather than mounting any offense.
The referee decides to stand the fighters back up.
That's three minutes gone in the round.
Hickock uses some good footwork to avoid the body shot by Chong.
Chong ducks down and throws a hook to the body but Hickock moves away.
Chong throws a body punch but Hickock moves out of range.
Chong throws a hard body shot but it just misses.
Nice uppercut lands for Hickock. That snapped Chong's head back.
Chong drives through and clinches with Hickock against the cage.
An uppercut on the inside fails to land for Chong.
Chong working aggressively here.
Chong misses the knee to the body. Nice hip positioning from Hickock.
Chong works for the underhooks and manages to get a trip takedown into guard.
Chong throwing strikes from guard but Hickock blocks nicely.
Hickock is trying to control the position but Chong postures up.
Chong is looking to advance position but Hickock has hit a scissor sweep - now he's on top in mount!
Chong slips a leg in and gets back to half guard.
That's four minutes gone in the round.
Hickock is sneakily working for an arm triangle but Chong sees it coming and defends easily.
The fans in attendance giving it up for the two fighters, who have really let it all hang out in the last minute or so!
Chong won't allow Hickock to pass to mount.
Hickock is looking for an arm triangle, whilst trying to pass to side control. Chong doesn't seem that keen to cooperate though. No luck this time Hickock.
Chong tries to get to full guard but Hickock has control of the leg.
Chong is doing well to control the position and prevent Hickock from advancing to side control.
Chong is pressing down on Hickock's left leg trying to get back to full guard. He's managed it.
And that is the end of the round. The fighters go back to their corners.
Ching Chong dominated that second round.
The cut man is working on Dick Hickock's cut.
That's the end of the interval. I'm sure that seemed a lot quicker than a minute for our two fighters! Back to the action. This is the final round!
Chong ducks down and throws a hook to the body but Hickock moves away.
Chong moves into the clinch successfully.
Hickock successfully pulls guard.
Chong slows down the pace of the fight for a moment. He'll need to remain active if he doesn't want to see the fight stood back up.
Chong looking to pass the guard.
Chong slows down the pace of the fight, as he sits in guard.
Hickock keeping full guard, as Chong tries to pass.
We've had a slow start to the round here - hopefully the action picks up.
Chong slips effortlessly into side control - very nice.
Hickock is trying to improve his position.
That's one minute gone in the round.
Chong is maintaining the dominant position - no doubt Hickock will start to get frustrated soon if he's not already.
Chong working the ground and pound but he's contacting the mat, not the fighter.
The referee asks Chong politely if he wouldn't mind getting on with it and actually doing something. Chong prefers to stall for the moment though.
Hickock wants to control but Chong postures up.
Ching Chong overall seems to be getting the better of the ground position in the fight so far.
Chong in side control, just content to control the action for now.
Hickock can't do much from the bottom here.
That's two minutes gone in the round.
There's not a lot going on here and the crowd are letting the fighters know they're not willing to tolerate a lack of action.
Chong just content to control the position.
The referee must be thinking about standing these guys back up.
Chong has controlled the position for a good 20 seconds, which will no doubt be starting to frustrate his opponent.
Chong goes for an armbar! This could be all over! Wait, no, Hickock rolls with the submission and now he's on top in Chong's guard! Nice work there by Hickock!
Chong seems keen to control Hickock's posture.
Further stalling from Chong.
That's three minutes gone in the round.
Hickock wants to pass the guard but Chong is keeping the position.
Chong pulls Hickock in close to his closed guard and prevents Hickock from doing any damage or advancing position.
Hickock stopping the sweep attempt from Chong.
That's four minutes gone in the round.
A few boos can be heard. I'm sure they will multiply if the fighters don't pick up the pace.
The referee has stepped in and called for a break in the action. We'll restart on the feet.
Hickock gets tackled into the cage by Chong. Chong maintains the clinch.
Hickock manages to pull guard.
Chong seems content to control from guard here. He's going to have to remain active though if he doesn't want to get stood back up.
Chong is posturing up here but Hickock has hold of an arm and he's gone for an armbar! Chong tries to roll out but it's too tight and Chong has to tap! Slick submission there by Hickock!
Ladies and gentlemen, after 4:39 of round 3, we have a winner by way of Submission (Armbar). Dick Hickock!
|
|
|
|
|
|
|
|
|
|
|
|
|
|
|
|
|
|
|
|
|
|
|
| S |
C
A |
G |
S |
C
B |
G |
|
S |
C |
G |
|
energy
A | B |
|
hype
A | B |
|
pop
A | B |
|
mgr
A | B |
|
FIGHT
RATING
37% |
|
|
|
|
|
|
|
Undercard bout
|
Coming up we have a heavyweight MMA rules bout between Ricky Thompson (ranked 2091 p4p, 3023 weight class) and Boyd Fitzgerald (ranked 251 p4p, 356 weight class). Ricky Thompson could well score a knockout today. He has the power to get to Boyd Fitzgerald's chin.
 |
|
 |
| 190 cm
26
280
5 - 4 - 0 |
|
192 cm
26
220
2 - 2 - 0 |
Good wrestling
Brawler
Cardio machine |
|
BJJ Blue Belt
Excellent MT
Determined |
|
| |
|
Ladies and gentlemen. This fight is 3 rounds, in the heavyweight division.
Introducing the fighter to my left, fighting out of the red corner.
With a record of 5 - 4 - 0, fighting out of The Island, Ricky Thompson!
And introducing the fighter to my right, fighting out of the blue corner.
With a record of 2 - 2 - 0, fighting out of The Island, Boyd Fitzgerald!
The judges for this bout are Dirk Anderson, Winston Alpacca and Michael Johnstone.
The bell rings for round one and we are underway!
Nice takedown defense from Fitzgerald. No joy for Thompson on that attempt.
Thompson shoots in but doesn't get the takedown
and Fitzgerald counters with a leg kick.
Fitzgerald looks more muscular than last time we saw him. He must have been on the weights.
No luck for Thompson with that takedown attempt.
Fitzgerald throws a big counter head kick but Thompson avoids it with no problem.
That's three failed takedown attempts in the round for Ricky Thompson. That's going to take a lot out of him.
Thompson closes the distance and looks for a trip takedown... aaaand he's got it - Thompson lands in his opponent's guard.
We could do with one of the fighters taking the initiative a bit more on the ground - they're both waiting to capitalize on a mistake.
Thompson is taking a break and basically stalling. The referee will not allow him to do that for long.
Thompson postures up in Fitzgerald's guard and throws a big left but Fitzgerald blocks it.
We've had a slow start to the round here - hopefully the action picks up.
Thompson is stalling in the full guard.
Thompson with a nice head shot there.
Fitzgerald really doesn't want to stay on the ground with Thompson. If he can't get it back to his feet, it's only a matter of time before he'll be tapping out.
That's one minute gone in the round.
Thompson keeps in close for a moment and lands a decent shot to the side of Fitzgerald's head.
Thompson with a flurry of punches that miss.
Thompson postures up to throw the ground and pound strikes but they don't connect.
Thompson definitely looks more muscular than last time we saw him fight.
Thompson postures up to throw the ground and pound strikes but they don't connect.
Thompson chips away with some ground and pound.
Thompson throwing elbows and punches but not connecting, as Fitzgerald works some decent striking defense from the bottom.
Thompson with a flurry of punches that miss.
Thompson missing there with some ground and pound from the guard.
Thompson is taking a break and basically stalling. The referee will not allow him to do that for long.
Thompson has been looking to land a fair amount of strikes on the ground. He might be looking to soften his opponent up in order to work for a submission.
Thompson makes a bit of distance and scores with some ground and pound, still in guard.
Thompson trying to land body shots but he keeps hitting the mat.
Thompson loading up with the ground and pound but he's missing more than he's landing in this flurry.
The fighters are pressed up against the cage, both looking to find a bit of space to work.
Thompson postures up to throw the ground and pound strikes but they don't connect.
That's two minutes gone in the round.
Thompson controls the pace of the fight for a moment.
Thompson stands up over Fitzgerald, holding his feet. He dives back in and lands a decent shot to the head.
Thompson works over Fitzgerald with some ground and pound from guard.
Fitzgerald is rocked!
Thompson throwing elbows and punches but not connecting, as Fitzgerald works some decent striking defense from the bottom.
Thompson trying to control the position from guard on top but Fitzgerald is wriggling around, looking for whatever he can.
Thompson postures up in Fitzgerald's guard and throws a big left but Fitzgerald blocks it.
Thompson is taking a break and basically stalling. The referee will not allow him to do that for long.
Thompson lands a couple of decent looking shots.
Thompson not doing a lot at the moment. He'll have to show some more aggression or the fight will get stood up.
We get told so often about how wrestlers don't like to be on their backs. Let's see if Fitzgerald can do anything to dispel that myth.
Fitzgerald avoiding any damage from the ground and pound.
A big thud reverberates around the arena there as Thompson accidentally thumps the mat. Hopefully he's not broken his hand.
That's three minutes gone in the round.
Thompson connects with a couple of short punches.
Thompson advances position into side control!
Fitzgerald is working hard to escape and get back to his feet. After a battle for position, Thompson asserts his dominance and retains side control.
Thompson in side control, throwing shots but Fitzgerald defends.
Thompson throws an elbow but Fitzgerald slips to the side and avoids it well.
Fitzgerald is working to avoid the ground and pound but Thompson connects with a decent elbow.
Thompson in side control lands a nice looking series of punches and elbows.
Fitzgerald taking punishment in the form of punches.
Thompson lands a knee to the body and follows it up with some ground and pound to the head. That will wear Fitzgerald down.
Fitzgerald is still in real trouble! Can Thompson finish him?
Thompson lands a big left to the face of Fitzgerald, bouncing his head like a basketball. Another shot from Thompson and another - Fitzgerald is out! Thompson stands up and salutes his fans, who are going crazy in the stands.
Ladies and gentlemen, after 4:55 of round 1, we have a winner by way of KO (Strikes). Ricky Thompson!
|
|
|
|
|
|
|
|
|
|
|
|
|
|
|
|
|
|
|
|
|
|
|
| S |
C
A |
G |
S |
C
B |
G |
|
S |
C |
G |
|
energy
A | B |
|
hype
A | B |
|
pop
A | B |
|
mgr
A | B |
|
FIGHT
RATING
36% |
|
|
|
|
|
|
|
Undercard bout
|
Coming up we have a light heavyweight MMA rules bout between Mara Tantor (ranked 1611 p4p, 1684 weight class) and Aisland Bounser (ranked 229 p4p, 238 weight class). Both these guys have really solid chins. Will we see a standup war or will they both decide that a knockout is unlikely and try to win the fight elsewhere?
 |
|
 |
| 196 cm
24
212
3 - 0 - 0 |
|
188 cm
26
205
4 - 1 - 0 |
BJJ White Belt
Excellent boxer
Very strong |
|
Good wrestler
Counter fighter
Granite chin |
|
| |
|
Ladies and gentlemen. This fight is 3 rounds, in the light heavyweight division.
Introducing the fighter to my left, fighting out of the red corner.
With a record of 3 - 0 - 0, fighting out of The Island, Mara Tantor!
And introducing the fighter to my right, fighting out of the blue corner.
With a record of 4 - 1 - 0, fighting out of The Island, Aisland Bounser!
The judges for this bout are Winston Alpacca, Bart Greer and Michael Johnstone.
The bell rings for round one and we are underway!
Bounser has his head snapped back a nice jab. A little nod from Bounser there as he acknowledges the shot.
It looks like Aisland Bounser has been cut.
Bounser misses with a looping right.
Tantor scores with a crisp jab that stopped Bounser in his tracks.
Tantor throws a couple of head shots and lands with the final one - a decent hook, which struck Bounser on the side of the head.
Bounser on the wrong end of a decent looking cross there.
Bounser is rocked!
That has opened up Aisland Bounser's cut even more.
A head kick by Bounser misses
and Tantor counters with a huge overhand right that connects right on the temple, sending him crumpling, face first to the floor! This one is all over! What a knockout!
Ladies and gentlemen, after 0:26 of round 1, we have a winner by way of KO (Punch). Mara Tantor!
Our winner, Mara Tantor, made sure he spent some time buttering up the crowd during his post fight interview, which will no doubt bring him a few more fans.
|
|
|
|
|
|
|
|
|
|
|
|
|
|
|
|
|
|
|
|
|
|
|
| S |
C
A |
G |
S |
C
B |
G |
|
S |
C |
G |
|
energy
A | B |
|
hype
A | B |
|
pop
A | B |
|
mgr
A | B |
|
FIGHT
RATING
100% |
|
|
|
|
|
|
|
Co-main event
|
Coming up we have a heavyweight MMA rules bout between Needle Dick (ranked 831 p4p, 3418 weight class) and Borys Frontrero (ranked 104 p4p, 404 weight class). The crowd seem to be enjoying Frontrero's choice of entrance music: Attitude . Both fighters look fresh as a daisy as they make their way towards the cage.
 |
|
 |
| 190 cm
26
278
6 - 1 - 0 |
|
192 cm
25
275
4 - 2 - 0 |
Decent wrestler
Solid boxing
Granite chin |
|
Good wrestler
Counter fighter
Experienced |
|
| |
|
Ladies and gentlemen. This fight is 3 rounds, in the heavyweight division.
Introducing the fighter to my left, fighting out of the red corner.
With a record of 6 - 1 - 0, fighting out of The Island, Needle Dick!
And introducing the fighter to my right, fighting out of the blue corner.
With a record of 4 - 2 - 0, fighting out of The Island, Borys Frontrero!
The judges for this bout are Santiago Holmes, Winston Alpacca and Sandra Marshall.
The bell rings for round one and we are underway!
Frontrero misses with a takedown
and Dick counters with a quick right hand to the jaw.
It looks like Borys Frontrero has been cut.
Frontrero shoots in and scores a nice double leg takedown into half guard.
Dick on his back here. We all know that wrestlers don't like being on their back so let's see if Dick tries to get out of the position.
Dick wants to improve his position but Frontrero is controlling well.
Frontrero not landing any meaningful shots this time.
We've had a slow start to the round here - hopefully the action picks up.
Frontrero is trying to control the action in half guard but Dick is working away on the bottom, looking perhaps to get back to full guard.
Dick knows he needs to get back to his feet asap. He's simply no match for Frontrero on the ground.
Dick is positioning himself well to prevent Frontrero advancing to mount.
Dick blocking the ground and pound attempt from Frontrero.
That's one minute gone in the round.
Dick is trying is best to control the position here.
Frontrero has the superior BJJ but he's also working some ground strikes into his gameplan.
Nice strikes from Frontrero there.
Frontrero missing with the ground and pound from half guard.
Frontrero scores with a couple of good hammerfists.
Dick has improved his flexibility recently so we will have to see if he can use that to his advantage.
Frontrero slips a nice elbow through Dick's hands, connecting with Dick's forehead.
Frontrero thows a huge punch but Dick dodges it nicely.
Frontrero missing with some ground and pound from the half guard.
Frontrero not landing any meaningful shots this time.
Frontrero not landing any meaningful shots this time.
Dick holds on for dear life, maintaining half guard for now.
Dick keeping his head moving to avoid the ground and pound.
That's two minutes gone in the round.
Frontrero not throwing his punches with enough precision this time.
Dick avoiding damage under a succession of punches from Frontrero.
Dick keeping his head moving to avoid the ground and pound.
Frontrero throwing shots but Dick is blocking nicely.
The ref stands the fighters back up due to a lack of activity.
Frontrero fails with a takedown attempt from distance.
Dick throws a hook to the body but it doesn't connect.
Frontrero throws a jab when Dick was well out of range.
Dick works Frontrero's body with a nice hook.
Dick tries to clinch up.
Frontrero goes for a double leg but Dick avoids the attempt and the two fighters end up clinched against the cage as Dick continues to drive forward.
Needle Dick has stuffed three takedown attempts in the round now. That's going to take a lot out of Borys Frontrero.
That's three minutes gone in the round.
Dick tries to close the distance and clinch up against the cage but Frontrero paws at him with a jab and circles away.
And Frontrero tries to counter it with a takedown but Dick pushes his down on his head and steps out.
Dick scores with a sloppy punch to the body. Not much technique there but it did the business.
Frontrero has his takedown stuffed
and Dick counters with a left to the body.
Frontrero looks winded!
Dick has Frontrero up against the cage in a clinch.
Dick misses with a punch to the body.
Dick tries to throw a body punch but Frontrero avoids it by throwing Dick back against the cage.
Dick working on landing some head shots here - that one got through nicely.
A short right hand to the side of the head by Dick.
Dick lands punches inside but they're not really causing much damage.
Dick digs a right hand into Frontrero's ribs. Those have got to be taking their toll on Frontrero's gas tank.
That's four minutes gone in the round.
A hook to the body from Dick.
Dick lands a nice looking hook to the body, against the cage.
Dick lands a body punch.
Dick lands a left hand that snaps the head of Frontrero backwards.
The crowd are loving this. Great action here.
A body shot lands from Dick.
Dick dips a shoulder and cracks Frontrero with a mighty uppercut! Frontrero falls back against the cage and Dick unloads with a barrage of strikes! Frontrero is completely out with his eyes open, only supported by the cage! Save him ref! Eventually the ref decides to do his job and jumps in - Dick screams abuse at the incompetent official before going over to celebrate with his corner. Brutal stuff!
Ladies and gentlemen, after 4:22 of round 1, we have a winner by way of TKO (Strikes). Needle Dick!
A determined Needle Dick didn't want to dwell on this fight in his post fight interview. Instead he was more keen to state he wants a title shot. Let's see if he gets it!
|
|
|
|
|
|
|
|
|
|
|
|
|
|
|
|
|
|
|
|
|
|
|
| S |
C
A |
G |
S |
C
B |
G |
|
S |
C |
G |
|
energy
A | B |
|
hype
A | B |
|
pop
A | B |
|
mgr
A | B |
|
FIGHT
RATING
34% |
|
|
|
|
|
|
|
Main event
|
Coming up we have a light heavyweight MMA rules bout between Archie Laird (ranked 920 p4p, 1526 weight class) and Murtaz Vatsadze (ranked 143 p4p, 218 weight class). Murtaz Vatsadze will no doubt be trying to keep this one on the feet, where he has a distinct advantage.
 |
|
 |
| 180 cm
26
211
5 - 0 - 0 |
|
186 cm
26
205
5 - 1 - 0 |
Good wrestling
Basic striking
Granite chin |
|
Decent wrestler
Solid Muay Thai
Good gas tank |
|
| |
|
Ladies and gentlemen. This fight is 3 rounds, in the light heavyweight division.
Introducing the fighter to my left, fighting out of the red corner.
With a record of 5 - 0 - 0, fighting out of The Island, Archie Laird!
And introducing the fighter to my right, fighting out of the blue corner.
With a record of 5 - 1 - 0, fighting out of The Island, Murtaz Vatsadze!
The judges for this bout are Santiago Holmes, Peter Branson and Bart Greer.
The bell rings for round one and we are underway!
Vatsadze throws a shot to the body.
Vatsadze clinches up with Laird and pushes him back against the cage.
Laird blocks a punch to the side of the head.
Vatsadze misses with a hook from the clinch.
Vatsadze lands a left hand that snaps the head of Laird backwards.
An uppercut on the inside fails to land for Vatsadze.
Laird misses the knee to the body. Nice hip positioning from Vatsadze.
Vatsadze looks more muscular than last time we saw him. He must have been on the weights.
Vatsadze lands a body shot.
Vatsadze is looking to take this one to the mat.
Vatsadze lands an uppercut.
Laird tries a body shot but Vatsadze blocks it.
Vatsadze lands a body shot.
Vatsadze lands a hook to the side of the head.
Vatsadze lands a nice uppercut.
Laird blocks a couple of punches on the inside.
This has been an exciting period of action!
Good body shot from Vatsadze.
Laird is breathing heavily.
Laird has dropped down and is looking to force the takedown but it's defended by Vatsadze after a bit of a struggle.
Vatsadze softening up his opponent with strikes, against the cage.
Vatsadze lands with a right to the head.
Vatsadze cracks Laird with a nice body shot.
Vatsadze lands a right hand that snaps the head of Laird backwards.
That's one minute gone in the round.
Vatsadze lands with a short shot to the head.
Vatsadze lands with a short punch from the clinch.
Vatsadze scores with a nice hook to the head.
Vatsadze lands a body punch.
A short right from Vatsadze.
Vatsadze working some nice short punches in the clinch.
Vatsadze lands a body punch in the clinch.
Vatsadze lands a hook that snaps the head of Laird backwards.
Vatsadze taking a breather.
Vatsadze lands a hook to the body. It's hard to tell if that hurt Laird or not.
Laird definitely looks more muscular than last time we saw him fight.
Vatsadze scores with an uppercut up the middle.
Vatsadze has Laird pressed up against the cage and is working for takedown. Laird manages to improve position though and keeps the fight standing.
Vatsadze lands with a quick shot inside that doesn't really do much damage.
Wooooo! Give it up for these two warriors! They are putting on a show!
Vatsadze works for underhooks and lands a body shot in the process.
Vatsadze makes some space for himself and lands an uppercut.
Vatsadze lands with a right to the head.
Vatsadze lands a hook that snaps the head of Laird backwards.
With the fighters clinched against the cage, Vatsadze creates a bit of distance for himself and scores with a nice uppercut.
Vatsadze wants a takedown but no success here.
Archie Laird has stuffed three takedown attempts in the round now. That's going to take a lot out of Murtaz Vatsadze.
That's two minutes gone in the round.
Vatsadze digs a right hand underneath Laird's ribcage. Laird let out a lung full of air as it connected.
Vatsadze lands a right uppercut that snaps the head of Laird backwards.
Still in the clinch, Vatsadze scores with a nice short uppercut.
A short body shot lands from Vatsadze as the two fighters clinch.
A right hook to the body lands for Vatsadze.
Vatsadze lands a right hand that snaps the head of Laird backwards.
Vatsadze pushes Laird back against the cage and lands a hook to the side of the head.
A nice left hand lands by Vatsadze.
 Laird is rocked! Laird is rocked!
Vatsadze lands a shoulder strike.
Oh Laird is still all over the place! His legs are completely gone! Will he be able to recover?!!
Vatsadze lands a nice uppercut.
Vatsadze creates some distance for himself and unleashes a massive uppercut that sends Laird's eyes rolling into the back of his head! Laird drops to his knees and Vatsadze pours it on with more strikes until the referee steps in to end the bout!
Ladies and gentlemen, after 2:41 of round 1, we have a winner by way of TKO (Strikes). Murtaz Vatsadze!
During a confident post fight interview, Murtaz Vatsadze thanked all his fans. He seemed very genuine when describing how motivated his fans keep him.
|
|
|
|
|
|
|
|
|
|
|
|
|
|
|
|
|
|
|
|
|
|
|
| S |
C
A |
G |
S |
C
B |
G |
|
S |
C |
G |
|
energy
A | B |
|
hype
A | B |
|
pop
A | B |
|
mgr
A | B |
|
FIGHT
RATING
74% |
|
|
|
|
|
|
|
|
|
|
