 |
SSSD 25: Cartwright vs ST PBP Commentary |
Undercard bout
|
Coming up we have a light heavyweight MMA rules bout between Chris Vick (ranked 6424 p4p, 5730 weight class) and Liam Robinson (ranked 661 p4p, 620 weight class). Vick's entrance music is Ultimate Warrior Theme. A fine choice. Liam Robinson will no doubt be trying to keep this one on the feet, where he has a distinct advantage.
 |
|
 |
| 188 cm
22
205
0 - 1 - 0 |
|
184 cm
18
205
0 - 1 - 0 |
BJJ Brown Belt
Counter fighter
Good chin |
|
BJJ Blue Belt
Brawler
Solid chin |
|
| |
|
Ladies and gentlemen. This fight is 3 rounds, in the light heavyweight division.
Introducing the fighter to my left, fighting out of the red corner.
With a record of 0 - 1 - 0, fighting out of Las Vegas, Chris Vick!
And introducing the fighter to my right, fighting out of the blue corner.
With a record of 0 - 1 - 0, fighting out of London, Liam Robinson!
The judges for this bout are Topper Green, Ron Honeybunn and Bruno Hogan.

The bell rings for round one and we are underway!

Vick gets caught napping as Robinson dives in and scores a takedown. Vick manages to retain guard.
Robinson looks really tired already! That doesn't bode well for a good, competitive fight!
Vick lands some strikes from the bottom.

Vick looking to try and escape his hips here, looking for a submission. It looks like he's going for a triangle but Robinson is defending well. Vick quickly switches to an armbar and extends the arm! Robinson has no choice but to tap, to a very quick submission! Wow, that was lightning fast! Vick celebrates on the ropes, with the crowd.
Ladies and gentlemen, after 0:22 of round 1, we have a winner by way of Submission (Armbar). Chris Vick!
|
|
|
|
|
|
|
|
|
|
|
|
|
|
|
|
|
|
|
|
|
|
|
| S |
C
A |
G |
S |
C
B |
G |
|
S |
C |
G |
|
energy
A | B |
|
hype
A | B |
|
pop
A | B |
|
mgr
A | B |
|
FIGHT
RATING
100% |
|
|
|
|
|
|
|
Undercard bout
|
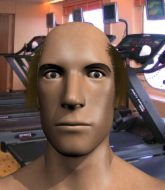
Coming up we have a heavyweight MMA rules bout between Solo Aca (ranked 5578 p4p, 4178 weight class) and Kid James (ranked 552 p4p, 482 weight class). Solo Aca could well score a knockout today. He has the power to get to Kid James's chin.
 |
|
 |
| 186 cm
19
225
0 - 0 - 0 |
|
178 cm
25
245
1 - 0 - 0 |
BJJ Blue Belt
Brawler
Good chin |
|
BJJ Blue Belt
Solid Muay Thai
Solid chin |
|
| |
|
Ladies and gentlemen. This fight is 3 rounds, in the heavyweight division.
Introducing the fighter to my left, fighting out of the red corner.
With a record of 0 - 0 - 0, fighting out of Hilo, Solo Aca!
And introducing the fighter to my right, fighting out of the blue corner.
With a record of 1 - 0 - 0, fighting out of Hilo, Kid James!
The judges for this bout are Ben Watson, Chris Dean and Winston Howard.
The bell rings for round one and we are underway!

James closes the distance and clinches.

James breaks the clinch and we're back to striking at distance.
Aca with a poor takedown
and James counters with a one-two to the body.
Aca defends well against a solid takedown attempt from James.

Aca takes the fight into the clinch.
James breaks the clinch and we're back to striking at distance.
James darts in and lands a nice takedown into half guard.
Aca is trying to escape back to his feet but James uses the scramble to pass into side control.
The fighters are tangled up in the ropes here. We might need a restart if the fighters can't break free themselves.
The fans in attendance giving it up for the two fighters, who have really let it all hang out in the last minute or so!
James controlling the position from side mount.
Aca is looking to work his way out of this bad position but James is controlling him well.

That's one minute gone in the round.
Aca tries to bench press James off him but James keeps the position.
James tries to score with some ground and pound. Aca controls his posture well this time though and the shots don't do any damage.
Aca looks to move to half guard but instead James has passed into mount! Damn!
James looking to control but Aca is working nicely, looking to advance position himself.
James tucks in and makes sure he doesn't lose the dominant position.
James thuds his fist into the canvas! Oooouch!

That's two minutes gone in the round.
Aca slips a leg in and gets back to half guard.
Aca trying to control here but he's found himself mounted! Oh no!
James takes a little breather and maintains the position. The referee will be looking for him to stay active from such a dominant position though.
James takes Aca's back.
James is controlling his opponent, waiting for an opportunity to finish.
Aca trying to control the action but James just sinks the hooks in.

James looking for the choke but no joy.

That's three minutes gone in the round.
The fighters are starting to get a bit slippery now, which will make submissions a bit more difficult.
James patiently working for the choke. Which fighter will keep their nerve here?
James controls the position.
Aca covering up well under a barage of strikes.

That's four minutes gone in the round.
Well. There's a bit of a lull in the action here and the crowd are starting to get restless.
Aca tries to escape but James has the hooks in and won't let him break free.
James controls the position.
Aca can't escape the position.
Aca trying to control the hands but James breaks the grip.
We're hearing some news coming in from back stage. It's official - James has eaten all the pies!
Aca is trying to get back to his feet but James has full control of the position and if anything, Aca has just worked his way into a worse spot.
Aca trying to control but not successfully.
Aca is being controlled on the ground here - he must escape this position otherwise surely the end is near.
The crowd thankful this round is nearly over.
Aca covering up well under a barage of strikes.
And that is the end of the round. The fighters go back to their corners.
Kid James dominated that round.
The fighters get back to their feet, the hooter sounds and we're back to the action!

Aca moves into the clinch.
James is trying to pull guard but Aca turns him against the ropes and we stay in the clinch.
James breaks from the clinch.
Aca is looking to take this fight into the clinch.
James throws a looping left and ducks down for a takedown. He's got his arms around Aca's waist but Aca gets an underhook and avoids the takedown by throwing James off to one side.
Aca tries to counter by clinching up but James breaks away and moves out of range.
James clinches up against the ropes.
Aca fails to pull guard.
Aca tries to pull guard but James won't allow it.
James wants a takedown but no success here.
Solo Aca has stuffed three takedown attempts in the round now. That's going to take a lot out of Kid James.
We've had a slow start to the round here - hopefully the action picks up.
James is trying to trip Aca. He has hold of a leg but Aca is hopping around, keeping his balance for the moment. James persists though and gets the takedown into guard.
James looking to pass the guard.
Aca is trying to stand up but he's not managed so far.
That's one minute gone in the round.
James throws a big right hand that misses.
The fighters are trapped in the ropes so we're going to have a reposition here. The ref calls for a break and repositions the fighters in the center of the ring.
Aca keeping moving, preventing James from controlling successfully.
Aca had isolated an arm as going for a kimura. James defends it easily.
Aca looking for a sweep. Not yet Aca, not yet.
Aca keeping full guard, as James tries to pass.
James in full guard, throwing the ground and pound. No damage this time.

The referee decides to stand the fighters back up.
That's two minutes gone in the round.
A lull in the action here being met with boos from the crowd.
James fakes a head shot and lands one to the body.
James lands with a good body shot.
Aca looks to clinch
and James counters with a series of strikes. Aca will be more careful next time no doubt.
Solo Aca seems to be the more aggressive standup fighter in this bout.
Aca darts in trying to clinch
and James counters with a kick to the head that grazes his opponent. Aca is lucky that one didn't land flush.
James has done a lot of speed work in the buildup to this fight.
Solo Aca is looking to throw some combinations by the looks of things.
James has Aca up against the ropes in a clinch.
James jumps guard but Aca turns him against the ropes and keeps the fight standing.
James is working for a takedown up against the ropes. He can't get it on this occasion though.
James prevents Aca from breaking the clinch.
Aca has had enough of the clinch and is looking to separate.
That's three minutes gone in the round.
Aca tries to stall but James uses the opportunity to gain a better position.
James breaks the clinch and we're back to striking at distance.
Aca stuffs the takedown attempt from James. James gets slowly back to his feet.
Aca doesn't succeed with the takedown
and James moves into the clinch.
Both fighters working to control the clinch.
Nice body punch from Aca - that landed with a thud.
James wants a takedown.
James is breathing heavily.
James stops a takedown attempt from Aca.
James manages to pull guard.
Aca wants to pass the guard but James is keeping the position.
That's four minutes gone in the round.
James working for submissions but it's allowed Aca to get to half guard.

James has managed to escape just enough to sneak back to his feet but Aca is on him like a limpet, forcing James back against the ropes.
James pulls guard effortlessly.
James is trying to control the position but Aca postures up.
The crowd thankful this round is nearly over.
Aca postures up as if he's going to throw some strikes but drops back for an ankle! James is in big trouble! He looks ready to tap! But no, he's escaped and dives on top of Aca, into his guard.

This has been an exciting period of action!
Aca trying to keep a closed guard but James is proving a slippery customer.
And that is the end of the round. The fighters go back to their corners.
Kid James showed his class in that round. I'd imagine he'll take it on all the scorecards.
That's the end of the interval. I'm sure that seemed a lot quicker than a minute for our two fighters! Back to the action. Let's hear some noise people - this is the final round!

Aca keeps the fight standing with a nice sprawl.
Aca throws a body kick but he wasn't in range.
James follows through with a counter body kick but it doesn't land.
Aca wants to clinch.
James shoots in for a takedown but Aca shows good takedown defense.
Aca displays good takedown defense there as he swats away a double leg from James.
Solo Aca has stuffed three takedown attempts in the round now. That's going to take a lot out of Kid James.
Aca shoots for a double leg takedown but James sprawls well. He's pushed Aca's face into the mat and manages to get back to his feet relatively easily.
We've had a slow start to the round here - hopefully the action picks up.
James fails with a rather predictable takedown attempt.
Aca dives in for a single leg takedown but James sprawls and the fighters end up clinched against the ropes.
Aca's corner are urging him to control the action in the clinch for a moment, rather than mount any serious offense. I'm sure the crowd appreciate those instructions... not.
That's one minute gone in the round.

Aca gets control of James's arms and successfully pulls guard. Aca will no doubt be looking for submissions off his back.
Aca looking for submissions from the bottom but instead James passes into side control.
Both fighters are breathing heavily.
You can see the frustration on Aca's face, being in this tough position on the bottom.
Aca tries to control but end up mounted... ooooh, that's bad.
James misses with a series of strikes from mount. He'll no doubt be working on his ground and pound when he gets back to the gym.
James has been the more effective fighter overall so far.
That's two minutes gone in the round.
Aca is flailing around like a fish out of water, trying to land strikes.
Aca working to try and regain half guard.
James punching from mount but Aca doing a good job of avoiding damage.
James working for a submission but Aca is keeping him at bay.
James controlling the position easily from mount.
James manages to capitalize on a mistake by Aca to take his back!
That's three minutes gone in the round.
James tries to keep control of the position but Aca is staying busy.
You know, I was talking to some of our celebrities at ringside tonight and they were split right down the middle on who was going to win this fight.
Aca breaks James's hooks off and manages to turn into his guard.
Aca stopping the sweep attempt from James.
Aca wants to control from the top but James keeps moving.
That's four minutes gone in the round.
Aca wants to get up but he can't break James's closed guard. He needs to be careful trying to break the legs open, as he's open to submissions here.
James not looking particularly offensive just at the moment.
Aca preventing the sweep.
Aca in full guard, throwing the ground and pound. No damage this time.
James looking to hit a scissor sweep but Aca is one step ahead there.
The referee claps his hands together and tells the fighters to work.
James wants to get back to his feet but Aca is in a dominant position and won't allow it.
The referee has decided to stand the fighters back up, so we'll restart on the feet.
Solo Aca has stepped it up - he knows he needs a finish here!
Kid James is fighting for a decision - hopefully he's judged it right and he's actually winning the fight.
Boooooooooooooooooooo!!! God, this has been a terrible round. Come on you two, sort yourselves out!
Aca looks to score with a combo but nothing lands.
And that's the end of the fight!
I would just about give that final round to Kid James.
Well James has outworked and out performed his opponent in all aspects of the game today. He was simply too good and the decision should be no more than a formality. Over to the ring announcer for the scorecards.
Ladies and gentlemen, after 3 rounds of action, we go to the scorecards for a decision.
Judge Ben Watson scores the fight 27:30
Judge Chris Dean scores the fight 27:30
Judge Winston Howard scores the fight 28:29
In favor of your winner, by unanimous decision... Kid James!
|
|
|
|
|
|
|
|
|
|
|
|
|
|
|
|
|
|
|
|
|
|
|
| S |
C
A |
G |
S |
C
B |
G |
|
S |
C |
G |
|
energy
A | B |
|
hype
A | B |
|
pop
A | B |
|
mgr
A | B |
|
FIGHT
RATING
32% |
|
|
|
|
|
|
|
Undercard bout
|
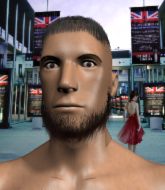
Coming up we have a welterweight MMA rules bout between Tolby Tovington (ranked 3238 p4p, 4918 weight class) and Marco Dasilva (ranked 423 p4p, 550 weight class). Marco Dasilva will no doubt be trying to keep this one on the feet, where he has a distinct advantage.
 |
|
 |
| 181 cm
23
181
4 - 3 - 0 |
|
179 cm
20
170
0 - 0 - 0 |
Decent wrestler
Brawler
Very strong |
|
BJJ White Belt
Excellent boxer
Tends to cut |
|
| |
|
Ladies and gentlemen. This fight is 3 rounds, in the welterweight division.
Introducing the fighter to my left, fighting out of the red corner.
With a record of 4 - 3 - 0, fighting out of Las Vegas, Tolby Tovington!
And introducing the fighter to my right, fighting out of the blue corner.
With a record of 0 - 0 - 0, fighting out of Los Angeles, Marco Dasilva!
The judges for this bout are Ben Hemmingworth, Chris Dean and Damien Edna.
The bell rings for round one and we are underway!
Dasilva tries to clinch up but Tovington circles away and keeps his distance.
Tovington feinted with a counter takedown.
Dasilva tries to clinch up.
An attempted straight right counter from Tovington misses the target.
Dasilva looking to land some kicks to the body here.
Tovington throws a series of punches but Dasilva avoids them all with ease.
Dasilva throws a head kick that misses and slips in the process. He scrambles back to his feet and the fighters circle.
Tovington avoids the clinch attempt nicely.
A slapping body kick lands there for Dasilva.
Dasilva tries a head kick but it misses.
Tovington takes a head kick and keeps coming.
Tovington showing good head movement there, avoiding the strikes from Dasilva.
Tovington clobbers Dasilva with an overhand right that has the crowd gasping. That made a horrendous noise.
 It looks like Marco Dasilva has been cut. It looks like Marco Dasilva has been cut.
Tovington keeping at a good range here, avoiding a leg kick.
Tovington lands with a nice body punch.
Marco Dasilva seems to be the more aggressive standup fighter in this bout.
Dasilva has his head snapped back a nice jab. A little nod from Dasilva there as he acknowledges the shot.
The crowd cheering loudly, showing their appreciation for the quality fight we're seeing here.
Dasilva throws a low kick but his opponent is out of range.
Dasilva falls off balance throwing a combination
and Tovington counters with a three punch combination, finished off with a leg kick. Nice work.
Tovington is really turning it up, unleashing another crisp combination which drops Dasilva like a ton of bricks! The referee dives in to stop the fight, saving Dasilva from another fist facial!
Ladies and gentlemen, after 1:58 of round 1, we have a winner by way of TKO (Strikes). Tolby Tovington!
|
|
|
|
|
|
|
|
|
|
|
|
|
|
|
|
|
|
|
|
|
|
|
| S |
C
A |
G |
S |
C
B |
G |
|
S |
C |
G |
|
energy
A | B |
|
hype
A | B |
|
pop
A | B |
|
mgr
A | B |
|
FIGHT
RATING
83% |
|
|
|
|
|
|
|
Undercard bout
|
Ronan Vella really struggled with his weight cut for this fight. After coming in at 149.8, he had two hours to cut the additional weight. He was unable to do so and as a result, his fight with Edward Smart was cancelled. |
|
|
|
Co-main event
|
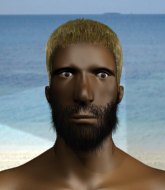
Coming up we have a featherweight MMA rules bout between Sterling Draper (ranked 2761 p4p, 4211 weight class) and Danny Rand (ranked 277 p4p, 379 weight class). Draper comes to the ring accompanied by Asshole. Rand is bouncing up and down as he enters the arena, backed by Wu Tang-Protect Ya Neck. These two fighters really are very evenly matched on the feet - it will be fascinating to see who can assert themselves in that aspect of the fight.
 |
|
 |
| 180 cm
20
158
1 - 2 - 0 |
|
176 cm
31
144
8 - 7 - 1 |
BJJ Brown Belt
Basic striking
Self confident |
|
BJJ Purple Belt
Decent boxing
Determined |
|
| |
|
Ladies and gentlemen. This fight is 5 rounds, for the featherweight championship of the world!
Introducing the champion to my left, fighting out of the red corner.
With a record of 1 - 2 - 0, fighting out of Hilo, Sterling Draper!
And introducing the challenger to my right, fighting out of the blue corner.
With a record of 8 - 7 - 1, fighting out of Sydney, Danny Rand!
The judges for this bout are Ben Hemmingworth, Topper Green and John Mangel.
The bell rings for round one and we are underway!
Draper is looking to take this fight into the clinch.
Draper definitely looks more muscular than last time we saw him fight.
Draper shoots in for a takedown but doesn't get it.
Rand wants to counter the offense by Draper and move into the clinch position.
Rand throws a leg kick but Draper sees it coming and checks it nicely.
Rand comes forward and lands a shot to the body, then darts back out of range.
Draper gets a clinch.

Draper breaks from the clinch.
Rand closes the distance and looks for a trip takedown... aaaand he's got it - Rand lands in his opponent's guard.
Draper lands a beautiful sweep and he's now moved into his opponent's guard.

Rand wants to stand but Draper is controlling the position.
Draper thinks about going for a leg but decides against it, in order to maintain the position.
Draper passes Rand's left leg - he's now in half guard.
Rand missing with punches from the bottom.
That's one minute gone in the round.
Draper seems very keen to just sit and control from half guard but Rand does not like that idea so much and is remaining active off his back.
Rand is in trouble now - Draper has advanced to mount!
Draper has control of Rand's right arm, working for a kimura. It's a bit of a token attempt though and Rand regains control of the situation pretty easily.
Draper working for a guillotine from mount but Rand is in no mood to give up.
Draper goes for an armbar but Rand turns quickly into his guard - lovely anticipation from Rand.
Draper is looking for a triangle but Rand pushes his legs off easily.
Draper not looking particularly offensive just at the moment.
Rand looking to pass the guard.
Rand pushes down on Draper's leg and manages to get into half guard.
That's two minutes gone in the round.
Draper is doing well to avoid being mounted. He's controlling the position at the moment.
Rand throwing shots but they're hitting the canvas more than the man.
Rand throwing shots but Draper is blocking nicely.
Rand is thwarting Draper's attempts to control the position.
The fighters are starting to get a bit slippery now, which will make submissions a bit more difficult.
Rand winds up and cracks Draper with a swinging punch to the side of the head.
Draper is looking to improve his position.
Draper wants to get back to his feet.
Well, if Rand is going to just lie there, perhaps we should talk about what we're having for dinner tonight� I'm having a ham and pineapple pizza� Yum. Can't wait.
Draper is defending against the submission attempts here by Rand.
That's three minutes gone in the round.
Draper is trying to maintain the position but Rand is very close to passing his half guard.
Draper tries to roll over but Rand keeps him under control.
Rand is looking to take a break and control but Draper is keeping him honest, looking to work from the bottom.
Rand wants to work for an arm triangle but Draper is really keeping half guard well and defending the submission attempt.
Draper wants to control but Rand is keeping busy and won't allow it.
Rand is looking for a kimura but Draper is holding onto that half guard position, so it's hard for Rand to get the leverage.
That's four minutes gone in the round.
My god... these two guys really need to pick up the pace or everyone will leave to go get a beer.
Rand throwing shots but they're hitting the canvas more than the man.
Draper wants to control but Rand is keeping busy and won't allow it.
We must be close to a standup if these guys don't pick up the pace.
Draper tries to roll over but Rand keeps him under control.
Rand trying to control from half guard but Draper is working away.
The referee decides to stand the fighters back up.
Draper is looking to clinch but Rand is avoiding it.
Rand wants to clinch.
Rand misses with a few strikes there.
Draper displays good takedown defense there as he swats away a double leg from Rand.
The crowd thankful this round is nearly over.
Draper shoots in for a takedown but doesn't get it.
Draper pushes Rand up against the ropes in a clinch.
Rand breaks the clinch and we're back to striking at distance.
Rand has managed to clinch.
Draper is trying to work for a single leg takedown but Rand pulls him back up using the underhooks.
And that is the end of the round. The fighters go back to their corners.
Danny Rand dominated that round.
That's time! Back to the action!
Draper doesn't manage to clinch there - Rand circles away.
Rand tries to close the distance and clinch but Draper swats him to one side with an open hand palm strike and circles away.
Draper wants to clinch up but Rand keeps it at a distance.
Rand connects with the punch.
Draper has taken the fight to the clinch.
Draper has dropped down and is looking to force the takedown but it's defended by Rand after a bit of a struggle.
Rand has been the more effective fighter overall so far.
Rand is looking for a takedown.
Draper wants a takedown but no success here.
Draper gets a nice trip takedown into half guard.
Rand looking for submissions off his back.
Draper is looking for an arm triangle, whilst trying to pass to side control. Rand doesn't seem that keen to cooperate though. No luck this time Draper.
We've had a slow start to the round here - hopefully the action picks up.
Draper seems to be looking for submissions.
That's one minute gone in the round.
Draper is trying for a guillotine from the top but the pressure isn't in the right place so Rand is just riding it out for now. Draper eventually gives up the hold.
Rand wants to get back to full guard.
Rand tries to kick Draper off but Draper keeps his base steady and stays in half guard.
Rand gets back to full guard.
Draper is looking to pass into half guard but Rand pushes him away with his feet and jumps on top - now Rand is in guard.
The fighters are trapped in the ropes so we're going to have a reposition here. The ref calls for a break and repositions the fighters in the center of the ring.
Rand won't allow Draper to sweep him here.
Draper being controlled here, momentarily.
Draper is looking to get back to his feet but can't, whilst Rand is controlling him.
Draper looking to sweep here. No luck so far.
That's two minutes gone in the round.
Draper lands a beautiful sweep and he's now moved into his opponent's guard.
Rand looking to hit a scissor sweep but Draper is one step ahead there.
Rand throwing his legs up looking for a triangle.
Draper trying to control but Rand is working from the bottom.
Rand looking to sweep here. No luck so far.
Rand trying to keep a closed guard but Draper is proving a slippery customer.
Draper pushing down on Rand's thigh, trying to pass to half guard. He's managed it... Nice work.
That's three minutes gone in the round.
Draper is looking for a kimura but he's never going to get it from there.
Draper trying to mount his opponent but Rand defends it.
Rand regains full guard. Nicely done.
Draper sitting in guard, not really doing much.
Rand is working an open guard here, looking to improve his position. No doubt that will leave him open to counters but at least he's being more offensive.
Draper drops back looking for a heel hook - he quickly realises he's not going to get it but Rand manages to dive on top of him before he can escape and now Draper has Rand in his guard.
Draper working a defensive guard here.
That's four minutes gone in the round.
Rand is fighting to break Draper's control of his arms but Draper is doing a good job of controlling the position at the moment.
Draper keeping moving, preventing Rand from controlling successfully.
Rand throwing strikes but missing.
Rand wants to control from the top but Draper keeps moving.
Draper not looking particularly offensive just at the moment.
Rand trying to control but Draper is working from the bottom.
Boooooooooooooooooooo!!! God, this has been a terrible round. Come on you two, sort yourselves out!
Draper is working from a closed guard but he's struggling to control his opponent.
Draper is adopting a defensive guard.
And that is the end of the round. The fighters go back to their corners.
A close second round but Danny Rand will probably get the nod - 10:9.
The minute break is over - no more time for sponges and pep talks - back to the action!
Rand gets taken down but at least he's managed to land in guard.
Rand keeping full guard, as Draper tries to pass.
Draper is trying to work a guillotine from the top, or something like that? Don't know how he thinks he's going to get a finish from there.
Draper controls from within his opponent's guard.
Rand keeping moving, preventing Draper from controlling successfully.
We've had a slow start to the round here - hopefully the action picks up.
Rand is working actively off his back, looking to secure an arm or perhaps work for a triangle.
Draper passes into half guard.
That's one minute gone in the round.
Draper seems to be working for a kimura but Rand defends the submission attempt.
Rand trying to control from the bottom.
Draper is working for submissions here but there's nothing on.
Draper is looking for a kimura but Rand is holding onto that half guard position, so it's hard for Draper to get the leverage.
Rand is trying to stand back up but Draper is controlling him
Draper is looking for a kimura. It's going to be difficult to finish that from half guard though and Rand defends it well.
Draper wants to work for an arm triangle but Rand is really keeping half guard well and defending the submission attempt.
Rand is defending against the submission attempts here by Draper.
Draper is working for a kimura but Rand is defending it quite comfortably.
That's two minutes gone in the round.
Rand is working for an escape here. He's hooked one of Draper's legs and he's managed to sneak out and take Draper's back!
The fighters are tangled up in the ropes here. We might need a restart if the fighters can't break free themselves.
Rand working for a choke but Draper is defending well.
Rand trying to control.
Rand not allowing Draper to control his hands.
Draper tries to escape the position - he's now mounted. Is that better or worse? Hard to tell!
That's three minutes gone in the round.
Rand working for a guillotine from mount but Draper is in no mood to give up.
Draper tries to hold on but Rand pushes him away.
Draper regains half guard.
Draper regains full guard. Nicely done.
Rand trying to pass the guard but can't manage it just yet.
Draper is working actively off his back, looking to secure an arm or perhaps work for a triangle.
Draper is looking to get back to his feet but can't, whilst Rand is controlling him.
Draper pulls Rand in close to prevent any damage.
Draper is trying to control the position from the bottom.
Rand must be cautious of submissions here, given that his opponent has the superior Jiu Jitsu.
That's four minutes gone in the round.
Draper keeping moving, preventing Rand from controlling successfully.
Draper keeping full guard, as Rand tries to pass.
Draper wants to sweep here but Rand controlling him for the moment.
Rand is looking to work some ground and pound but Draper has wrist control.
Boooooooooooooooooooo!!! God, this has been a terrible round. Come on you two, sort yourselves out!
Draper controlling the position.
Draper working the defensive guard well to avoid strikes from Rand.
The ref stands the fighters back up due to a lack of activity.
Nice sprawl there from Rand as Draper shoots in.
And that is the end of the round. The fighters go back to their corners.
Sterling Draper clearly takes that round.
The referee calls time. The cornermen exit stage left and we're back to business.

Draper displays good takedown defense there as he swats away a double leg from Rand.
Rand shoots in and gets a takedown into half guard. Rand showed some decent athleticism there.
Draper looking to work for a kimura from the bottom.
Rand seems to be looking for submissions.
We've had a slow start to the round here - hopefully the action picks up.
Rand performing his best blanket impression for a moment.
Rand is trying to control. Draper wants to improve his position but can't escape this time.
That's one minute gone in the round.
Rand controlling the action here.
It looks like Rand is going to stand back up.
Draper trying to control from the bottom.
Draper wants to get back to full guard but Rand has passed into side control.

Rand decides to stand back up. Rand steps back and let's Draper get back to his feet.
Draper tries to close the distance and clinch but Rand swats him to one side with an open hand palm strike and circles away.
It seemed like Rand was going to counter with the hook but didn't fully commit to it.
Wow, both these guys are really going for it!
A punch combination from Rand misses.
Draper fails with the takedown.
Draper steps to the side to avoid the strikes from Rand.
Rand will need to tighten up his combinations if he doesn't want to gas himself out, swinging at thin air.
That's two minutes gone in the round.
Rand will need to tighten up his combinations if he doesn't want to gas himself out, swinging at thin air.
Rand swings and misses with a hook to the body.
Draper moves into the clinch.
Draper is looking to take this one to the mat.
Draper is looking for a takedown.
That's three failed takedown attempts in the round for Sterling Draper. That's going to take a lot out of him.
Draper is stalling here. The referee will be looking to step in if he doesn't pick up the pace.
Rand throws a punch but it's blocked by Draper.
Rand wants to stall.
Rand trying to land knees to the body.
Rand lands on the inside with an uppercut.
Rand is defending well against a takedown attempt.
Rand gets underhooks to prevent Draper's takedown attempt.
That's three minutes gone in the round.
Draper wants a takedown but no success here.
It's got to the stage where if one of these guys blows hard enough, the other might fall over.
Rand scores with an uppercut up the middle.
Rand escapes the clinch and we're back to striking.
A shot to the liver by Rand. Beautiful body shot.
Draper forces Rand back against the ropes and clinches.
Rand prevents a takedown attempt there.
Rand stalling in the clinch but Draper improves position.
Draper is working for a takedown up against the ropes. He can't get it on this occasion though.
Rand throws a vicious knee straight up the middle but Draper blocks it with crossed arms.
Rand doesn't land with the attempted body shot.
Draper gets underhooks to prevent Rand's takedown attempt.
An uppercut on the inside fails to land for Rand.
A head punch blocked on the inside by Rand.
Draper can't get the takedown.
Rand tries to land knees in the clinch but Draper avoids the damage to the body.
That's four minutes gone in the round.
Draper lands a takedown into guard.
Danny Rand has got the better of the ground game so far.
Draper wants to control from the top but Rand keeps moving.
Rand looking to sweep here. No luck so far.
Draper looking to sit in guard and control but Rand gets the butterfly guard and sweeps. He's now in the guard on the top.
Wooooo! Give it up for these two warriors! They are putting on a show!
Rand trying to control the position from guard on top but Draper is wriggling around, looking for whatever he can.
Rand trying to stand up but can't free himself from Draper's guard.
Draper trying to control the position here.
The crowd thankful this round is nearly over.
Rand is looking to stand up but Draper won't let him.
And that is the end of the round. The fighters go back to their corners.
Danny Rand dominated that fourth round.
The minute break is over - no more time for sponges and pep talks - back to the action! This is the final round!

Draper has taken the fight to the clinch.
Rand using the Thai plumb to throw knees but Draper has his back arched nicely, preventing the strike.
Draper drops down for a takedown but doesn't get it.
Rand gets underhooks to prevent Draper's takedown attempt.
Draper is looking for a takedown.
That's three failed takedown attempts in the round for Sterling Draper. That's going to take a lot out of him.
Rand pushes off and circles away, back to the middle of the mat.
Rand lets the fists fly and connects with a left straight followed by a right hook.
Sterling Draper is looking to throw some combinations by the looks of things.
Rand with the inside leg kick.
Rand throws a feint and then finishes with a kick to the body.
We've had a slow start to the round here - hopefully the action picks up.
Draper tries to drive through with a takedown attempt but Rand defends well and Draper ends up having to push Rand into the ropes where they will battle it out in the clinch.
Rand looking to stall.
Rand is looking to score with knees to the body. Maybe he'll change it up and go body then head. Draper is defending well for now.
Draper tries for a takedown but Rand manages to get underhooks.
Draper drops to a knee looking for a takedown but Rand gets the underhooks and prevents it.
Both of our modern day gladiators look out of it here - a gruelling 5 rounds of action taking it's toll on them, no doubt.
That's one minute gone in the round.
Rand pushes off and circles away, back to the middle of the mat.
Good leg kick by Rand.
Rand throws a leg kick but Draper checks it.
Rand throws a right hand that Draper ducks under and follows up with a left that Draper also avoids with ease.
Draper fails with a rather predictable takedown attempt.
Draper tries to clinch but Rand is having none of it.
Rand swats away the attempt to clinch by Draper.
A really sloppy takedown attempt there from Rand.
Danny Rand seems to be getting the better of the standup.
Draper just misses with a punch to the body.
Rand is looking to clinch.
Draper keeps the fight on the outside.
That's two minutes gone in the round.
Draper tries to clinch up but Rand circles away and keeps his distance.
Rand lets it all go there with a big combo counter but none of the punches connected.
Draper shoots in for a takedown and gets it. Let's see what he's got on the mat.
Draper passes Rand's left leg - he's now in half guard.
Rand is trying to get back to full guard.
Draper prevents Rand from standing back up.
Draper wants to lay and pray for a moment but Rand keeps working.
Draper wants to work for an arm triangle but Rand is really keeping half guard well and defending the submission attempt.
Rand is trying to get back to full guard.
Rand is trying to stand back up but Draper is controlling him
Draper is looking for a kimura here.
This has been an exciting period of action!
The fighters are battling for position here. Rand manages to regain full guard. Nice work.
That's three minutes gone in the round.
Draper stands and throws Rand's legs to the side, diving into side control.
Draper tries for an arm triangle. That looks pretty tight to me. Is this one over!?! Possibly, maybe, no Draper has let go of the choke. Obviously it wasn't as tight as we thought!
Rand tries to bench press Draper off him but Draper keeps the position.
Draper tries for an arm triangle. That looks pretty tight to me. Is this one over!?! Possibly, maybe, no Draper has let go of the choke. Obviously it wasn't as tight as we thought!
Draper working hard here to secure a kimura but he's not really in the right position for it.
Rand tries to get back to half guard but can't.
Sterling Draper has stepped it up - he knows he needs a finish here!
Danny Rand is fighting for a decision - hopefully he's judged it right and he's actually winning the fight.
That's four minutes gone in the round.
Draper tries for an arm triangle. That looks pretty tight to me. Is this one over!?! Possibly, maybe, no Draper has let go of the choke. Obviously it wasn't as tight as we thought!
Rand can't do much from the bottom here.
Draper tries for an arm triangle. That looks pretty tight to me. Is this one over!?! Possibly, maybe, no Draper has let go of the choke. Obviously it wasn't as tight as we thought!
Draper is trying to get an arm triangle but Rand is defending well.
Draper wants to work for a kimura but he's foiled early by Rand, who protects the arm well.
The crowd thankful this round is nearly over.
Rand manages to land a sweep and he's now on top! Lovely Jiu Jitsu!
And that's the end of the fight!
I would just about give that final round to Danny Rand.
I think Rand has won this one but let's see whether the judges agree with me. Over to the ring announcer for the scorecards.
Ladies and gentlemen, after 5 rounds of action, we go to the scorecards for a decision.
Judge Ben Hemmingworth scores the fight 46:49
Judge Topper Green scores the fight 46:49
Judge John Mangel scores the fight 46:49
In favor of your winner, by unanimous decision... Danny Rand!
Danny Rand is the new featherweight champion!
Danny Rand gave a mention to KOMBAT KLOTHING in his post fight interview. That will please them (and hopefully generate some sales).
|
|
|
|
|
|
|
|
|
|
|
|
|
|
|
|
|
|
|
|
|
|
|
| S |
C
A |
G |
S |
C
B |
G |
|
S |
C |
G |
|
energy
A | B |
|
hype
A | B |
|
pop
A | B |
|
mgr
A | B |
|
FIGHT
RATING
35% |
|
|
|
|
|
|
|
Main event
|
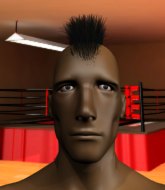
Coming up we have a featherweight MMA rules bout between Catchy Cartwright (ranked 2231 p4p, 2066 weight class) and AU ST (ranked 221 p4p, 203 weight class). Cartwright's entrance music is Spiders. A fine choice. Both fighters will be looking to make this an exciting fight for the fans, I'm sure!
 |
|
 |
| 171 cm
26
150
4 - 0 - 0 |
|
168 cm
26
155
3 - 0 - 0 |
BJJ Brown Belt
Counter fighter
Big heart |
|
Good wrestler
Brawler
Can Moonwalk |
|
| |
|
Ladies and gentlemen. This fight is 3 rounds, in the featherweight division.
Introducing the fighter to my left, fighting out of the red corner.
With a record of 4 - 0 - 0, fighting out of Hilo, Catchy Cartwright!
And introducing the fighter to my right, fighting out of the blue corner.
With a record of 3 - 0 - 0, fighting out of Sydney, AU ST!
The judges for this bout are Francis DeMontford, Ben Watson and Bruno Hogan.
The bell rings for round one and we are underway!
ST tries to score a power double leg takedown but Cartwright sees that one coming and sprawls well. That will dishearten ST somewhat.
Cartwright tries to counter by clinching up but ST breaks away and moves out of range.
Cartwright lands with an uppercut that bounces ST off the ropes and back into range.
ST keeps the fight on the outside.
Cartwright fails to land with a series of punches.
We've had a slow start to the round here - hopefully the action picks up.
ST fails with the takedown
and Cartwright counters by moving into the clinch.
Cartwright looking to slow down the pace here.
ST is pressed up against the ropes. Cartwright has hold of a leg and is looking to drag ST down to the mat. ST avoids the attempt though and has circled away. We're back to striking at a distance.
That's one minute gone in the round.
ST shoots in from a long way out. He's driving through with the takedown attempt and he eventually gets it, landing in Cartwright's guard.
Cartwright isolates an arm and boxes in a triangle. ST stacks Cartwright on his neck as he steps over and passes to the side. He's now in a much more dominant position where he can look to do some serious damage. Nice move by ST!
ST working away.
ST misses with a strike but at least he's keeping busy, looking to cause some damage - that will still help him when it comes to the judges scorecards.
ST tries to cartwheel into mount but he doesn't manage it.
ST is looking for a kimura. He might have it! No, Cartwright has escaped the position, nice work there.
That's two minutes gone in the round.
ST wants to control but Cartwright is keeping him busy.
Cartwright is looking to reverse the position.
ST really doesn't want to stay on the ground with Cartwright. If he can't get it back to his feet, it's only a matter of time before he'll be tapping out.
Cartwright manages to work his way to half guard, despite ST's best efforts.
Cartwright looking for submissions from an awkward position here.
Cartwright wants to improve his position but ST is controlling well.
Cartwright tries to kick ST off but ST keeps his base steady and stays in half guard.
That's three minutes gone in the round.
ST thumps the canvas. Not on purpose obviously - he just missed Cartwright's head.
ST is sneakily working for an arm triangle but Cartwright sees it coming and defends easily.
Cartwright is trying to stand back up but ST is controlling him
Cartwright taking some punishment here, with ST in his half guard.
Cartwright is looking to improve his position.
ST missing with some ground and pound from the half guard.
ST is looking for a kimura. It's going to be difficult to finish that from half guard though and Cartwright defends it well.
Cartwright trying to control but ST postures up.
That's four minutes gone in the round.
My god... these two guys really need to pick up the pace or everyone will leave to go get a beer.
ST thumps the canvas. Not on purpose obviously - he just missed Cartwright's head.
ST thows a wild elbow that connects with the canvas.
Cartwright has guillotine here! It looks pretty tight! Could this be all over! No, ST escapes and passes into side control at the same time. Nice work there by ST!
Cartwright sneaks a leg under to get back to half guard.
Boooooooooooooooooooo!!! God, this has been a terrible round. Come on you two, sort yourselves out!
ST wants to lay and pray for a moment but Cartwright keeps working.
ST tries to pass to full mount but Cartwright defends it.
And that is the end of the round. The fighters go back to their corners.
AU ST dominated that round.
That's the end of the round. The referee orders the cornermen out of the ring so we can get back down to business.
ST fails with a takedown attempt from distance.
ST moves into the clinch.
ST has moved round to his opponent's back and is looking for a suplex! Oh snap! He's tossed Cartwright clear over his head and slammed him to the mat!
Cartwright fending off the submission attempt from ST.
ST has his opponent trapped and is landing shots. Not a good position for Cartwright.
We've had a slow start to the round here - hopefully the action picks up.
ST trying desperately to keep hold of the dominant position.
Cartwright is in bad spot here.
That's one minute gone in the round.
Cartwright turns into ST and is now in his guard.
ST wants to stand up but Cartwright is controlling him.
The fighters are trapped in the ropes so we're going to have a reposition here. The ref calls for a break and repositions the fighters in the center of the ring.
ST keeping moving, preventing Cartwright from controlling successfully.
ST can't keep his opponent in guard - Cartwright advances to half guard, no doubt looking to mount.
ST taking some punishment here, with Cartwright in his half guard.
Cartwright seems to be working for a kimura but ST defends the submission attempt.
ST is trying to get back to full guard.
We get told so often about how wrestlers don't like to be on their backs. Let's see if ST can do anything to dispel that myth.
That's two minutes gone in the round.
ST is refusing to be controlled, as Cartwright sits in half guard.
ST is looking to sinch up a guillotine here but Cartwright pulls his head out easily.
Ground and pound from Cartwright.
ST is looking to improve his position.
The fighters are tangled up in the ropes here. We might need a restart if the fighters can't break free themselves.
ST is in trouble now - Cartwright has advanced to mount!
ST tries to hold on but Cartwright pushes him away.
Cartwright goes for an armbar but he's not got it� ST turns into him and now he's in Cartwright's guard.
ST wants to control from the top but Cartwright keeps moving.
That's three minutes gone in the round.
ST tries to free his leg and advance position but Cartwright is retaining full guard.
Cartwright looking for a guillotine here but ST defends easily.
AU ST has got the better of the ground game so far.
That's four minutes gone in the round.
A few boos can be heard. I'm sure they will multiply if the fighters don't pick up the pace.
Cartwright looking for submissions from the bottom here. Moving his hips around, possibly looking for an armbar.
ST postures up to throw the ground and pound strikes but they don't connect.
Cartwright keeping full guard, as ST tries to pass.
The crowd thankful this round is nearly over.
Cartwright looking for subs off his back but ST has passed one foot through into half guard.
And that is the end of the round. The fighters go back to their corners.
That was a close second round but I would say that Catchy Cartwright will probably get the nod.
That's the end of the interval. I'm sure that seemed a lot quicker than a minute for our two fighters! Back to the action. This is the final round!
ST darts in looking for a takedown but Cartwright gets double underhooks and turns ST into the ropes.
ST looks for a takedown but Cartwright sprawls well.
Cartwright tries to counter by clinching up but ST breaks away and moves out of range.
ST shoots in and scores a nice double leg takedown into half guard.
Cartwright is defending against the submission attempts here by ST.
We've had a slow start to the round here - hopefully the action picks up.
Cartwright is trying to stand up here but ST is controlling him well.
That's one minute gone in the round.
Cartwright gets full guard.
Cartwright is working the butterfly guard. He manages to land a nice scissor sweep and is now in half guard on the top. Nice move.
ST is in trouble now - Cartwright has advanced to mount!
Cartwright cracks ST with a nasty head shot there - the crowd let out an audible gasp there, as the noise reverberated around the arena.
Cartwright lands a couple of good shots and ST has given up his back, trying to escape the position!
ST tries to escape but Cartwright has the hooks in and won't let him break free.
Cartwright is working really hard to secure the rear naked choke. ST defends successfully for a significant amount of time. Both fighters are looking very determined.
The referee is taking a good look at ST as he is on the wrong end of some big shots from Cartwright!
 ST is rocked! ST is rocked!
That's two minutes gone in the round.
Cartwright lands a series of strikes from the back and ST goes limp! The ref jumps in to save him!
Ladies and gentlemen, after 2:28 of round 3, we have a winner by way of TKO (Strikes). Catchy Cartwright!
Our winner, Catchy Cartwright, made sure he spent some time buttering up the crowd during his post fight interview, which will no doubt bring him a few more fans.
|
|
|
|
|
|
|
|
|
|
|
|
|
|
|
|
|
|
|
|
|
|
|
| S |
C
A |
G |
S |
C
B |
G |
|
S |
C |
G |
|
energy
A | B |
|
hype
A | B |
|
pop
A | B |
|
mgr
A | B |
|
FIGHT
RATING
39% |
|
|
|
|
|
|
|
|
|
|
