 |
GFC 5 - We Are Legion PBP Commentary |
Undercard bout
|
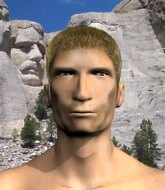
Coming up we have a light heavyweight MMA rules bout between Donald Eibert (ranked 5245 p4p, 5965 weight class) and John Cox (ranked 579 p4p, 609 weight class). Over to our ring announcer for the fighter introductions!
 |
|
 |
| 195 cm
18
203
0 - 0 - 0 |
|
190 cm
21
205
0 - 1 - 0 |
BJJ Purple Belt
Good knees
Very strong |
|
BJJ White Belt
Basic striking
Granite chin |
|
| |
|
Ladies and gentlemen. This fight is 3 rounds, in the light heavyweight division.
Introducing the fighter to my left, fighting out of the red corner.
With a record of 0 - 0 - 0, fighting out of Montreal, Donald Eibert!
And introducing the fighter to my right, fighting out of the blue corner.
With a record of 0 - 1 - 0, fighting out of Montreal, John Cox!
The judges for this bout are Robert Douchet, William Peck and Steve Smith.

The bell rings for round one and we are underway!
Eibert tries to close the distance and clinch up but Cox swats him away and circles back towards the center.
Eibert tries to close the distance and clinch up against the cage but Cox paws at him with a jab and circles away.
Eibert moves to clinch but Cox breaks away
and Cox counters with a quick right hand to the jaw.
Cox lands with a straight right. Eibert didn't see that one coming.
Eibert is looking to clinch.
Eibert tries to clinch up
and Cox counters with a shot to the ribs. That looked like it hurt.
Eibert dodges the punch combination from Cox.
We've had a slow start to the round here - hopefully the action picks up.
A head kick misses from Eibert.
Cox swings away with a counter right hand but no contact made.
Donald Eibert seems to be the more aggressive standup fighter in this bout.
Eibert looking to take his opponent's legs away with the low kicks.
Eibert lands a head kick!
 It looks like John Cox has been cut. It looks like John Cox has been cut.
Eibert ducks down and throws a hook to the body but Cox moves away.
Cox swats away the attempt to clinch by Eibert.
Cox swings away with a counter right hand but no contact made.

That's one minute gone in the round.
Eibert doesn't manage to clinch there - Cox circles away.
Eibert tries to clinch up but Cox circles away and keeps his distance.
Cox throws a body shot but no joy.
Cox misses the shot to the body.
Eibert is looking to clinch.

Cox bobs and weaves into range and then changes levels and scores with a nice takedown into side control.

Cox thinks about going for a far side armbar but bails out and retains the dominant position instead.
Cox working away.
Eibert is moving his hips around well on the bottom and has managed to get back to half guard.
Eibert tries to roll over but Cox keeps him under control.

Eibert looking for submissions from an awkward position here.

That's two minutes gone in the round.
Eibert actively working from the bottom here.
Eibert is looking to regain full guard. Not this time though.
Eibert trying to control from the bottom.
Eibert looking for submissions from an awkward position here.
Eibert looking for submissions off his back.
Eibert holds on for dear life, maintaining half guard for now.
Eibert is looking to sinch up a guillotine here but Cox pulls his head out easily.

That's three minutes gone in the round.
Cox controlling the pace.
Eibert trying to control here but he's found himself mounted! Oh no!
We've been informed that Cox has been working hard on his conditioning in the buildup to the fight.
Cox really doesn't want to stay on the ground with Eibert. If he can't get it back to his feet, it's only a matter of time before he'll be tapping out.
Cox lands a shot to the body, followed up by a shot to the exposed head of his trapped opponent.
Eibert regains half guard.
Eibert is looking to sinch up a guillotine here but Cox pulls his head out easily.
Eibert wants to get back to full guard.
Eibert looking to work for a kimura from the bottom.
Cox wants to control but Eibert is keeping him busy.

That's four minutes gone in the round.
Cox looks over to his corner - he wants some instructions but his corner are not responding.
Cox is looking to take a break and control but Eibert is keeping him honest, looking to work from the bottom.
The ref warns both fighters not to hold the cage as they work up against the meshing.
Cox missing with some ground and pound from the half guard.
The crowd thankful this round is nearly over.
Eibert looking to work for a kimura from the bottom.
Eibert has hold of a guillotine but he's not going to be able to crank on it really with only half guard, so it's no trouble for Cox. Oh but Eibert has got full guard now! Oh boy! This one could be over very soon! Cox goes limp - he's gone! Eibert jumps up and celebrates with the crowd - fantastic submission finish!
Ladies and gentlemen, after 4:56 of round 1, we have a winner by way of Submission (Guillotine). Donald Eibert!
|
|
|
|
|
|
|
|
|
|
|
|
|
|
|
|
|
|
|
|
|
|
|
| S |
C
A |
G |
S |
C
B |
G |
|
S |
C |
G |
|
energy
A | B |
|
hype
A | B |
|
pop
A | B |
|
mgr
A | B |
|
FIGHT
RATING
35% |
|
|
|
|
|
|
|
Undercard bout
|
Coming up we have a middleweight MMA rules bout between John Rackham (ranked 5444 p4p, 6559 weight class) and Jakub Shea (ranked 615 p4p, 655 weight class). I don't know about you partner, but I'm pumped for this one!
 |
|
 |
| 186 cm
20
195
4 - 4 - 0 |
|
195 cm
20
195
1 - 3 - 0 |
Decent wrestler
Solid boxing
Very quick |
|
Good wrestler
Solid Muay Thai
Very confident |
|
| |
|
Ladies and gentlemen. This fight is 3 rounds, in the middleweight division.
Introducing the fighter to my left, fighting out of the red corner.
With a record of 4 - 4 - 0, fighting out of Las Vegas, John Rackham!
And introducing the fighter to my right, fighting out of the blue corner.
With a record of 1 - 3 - 0, fighting out of Montreal, Jakub Shea!
The judges for this bout are Trevor Gratis, Steve Smith and Elvis Blanc.
The bell rings for round one and we are underway!
Rackham throws a sloppy head kick and Shea moves out of range easily.

Rackham closes the distance and after a bit of a stuggle, scores a takedown into Shea's guard.
Shea working a defensive guard here.
Shea is pulling down on Rackham's head to control his posture.
Shea working the defensive guard well to avoid strikes from Rackham.
Shea utilising some decent striking defenses from the guard, preventing the ground and pound.
Rackham wants to control from the top but Shea keeps moving.
Shea seems keen to control rather than go for a submission, at least for now.
We've had a slow start to the round here - hopefully the action picks up.
Rackham throwing strikes but missing.
Rackham has been looking to land a fair amount of strikes on the ground. He might be looking to soften his opponent up in order to work for a submission.
Rackham trying to control the position from guard on top but Shea is wriggling around, looking for whatever he can.
Shea is trying to control the position from the bottom.
That's one minute gone in the round.
Rackham preventing the sweep.
Rackham keeps in close for a moment and lands a decent shot to the side of Shea's head.
The fighters are pressed up against the cage, both looking to find a bit of space to work.
Rackham stopping the sweep attempt from Shea.
Rackham scores with a decent looking elbow strike.
Rackham with a flurry of punches that miss.
Shea looking to sweep here. No luck so far.
Rackham postures up in Shea's guard and throws a big left but Shea blocks it.
Rackham preventing the sweep.
Rackham is sitting in guard, working some ground and pound.
Rackham throwing elbows and punches but not connecting, as Shea works some decent striking defense from the bottom.
Shea preventing the ground and pound from doing any damage.
That's two minutes gone in the round.
Rackham postures up and scores with a shot to the body and a follow up elbow to the head.
Shea tries to land a sweep but no joy.
Shea looking to control.
We get told so often about how wrestlers don't like to be on their backs. Let's see if Shea can do anything to dispel that myth.
Shea looking to sweep here. No luck so far.
Rackham postures up and lands some nice ground and pound.
Rackham tries to free his leg and advance position but Shea is retaining full guard.
Rackham loading up with the ground and pound but he's missing more than he's landing in this flurry.
Rackham loading up with the ground and pound but he's missing more than he's landing in this flurry.
Shea wants to sweep but no luck.
Rackham postures up.
The fighters are starting to perspire pretty heavily.
Shea has momentary wrist control but Rackham slips an elbow through the middle.
Shea preventing the ground and pound from doing any damage.
Shea wants to sweep but no luck.
That's three minutes gone in the round.
Shea is pulling down on Rackham's head to control his posture.
Rackham won't allow Shea to sweep him here.
Rackham throws a big right hand that misses.
The ref warns both fighters not to hold the cage as they work up against the meshing.
Shea working a defensive guard here.

The referee has motioned to the fighters to stand back up.
Rackham misses with a half-hearted attempt at a head kick.
Shea blocks a head kick by Rackham.
Shea tries a head kick but it misses.
Shea is looking to land body kicks.
Shea pivots as if he's going to throw a leg kick but stops half way.
Rackham throws a head kick that misses and slips in the process. He scrambles back to his feet and the fighters circle.
Shea tries a head kick but it misses.
Rackham keeping at a good range here, avoiding a leg kick.
Shea blocks a head kick by Rackham.
Shea with the counter takedown but Rackham avoids it easily.
Shea shoots in for a takedown and gets it. Let's see what he's got on the mat.
That's four minutes gone in the round.
Rackham bucks up whilst keeping hold of a body lock, managing to reverse the position. Now he's in top in Shea's guard.

Rackham trying to control the position from guard on top but Shea is wriggling around, looking for whatever he can.
Shea is working the butterfly guard. He manages to land a nice scissor sweep and is now in half guard on the top. Nice move.

The crowd are loving this. Great action here.
Shea throwing shots but Rackham is blocking nicely.
Shea prevents Rackham from improving his position.
Rackham has no desire to be mounted, so is trying to control. Shea is working away from the top position though.
Rackham tries to strike from the bottom but it doesn't land.
Rackham is pressing down on Shea's left leg trying to get back to full guard. He's managed it.
And that is the end of the round. The fighters go back to their corners.
John Rackham dominated that round.
OK. That's time! The bell goes and we're back to the action.

Rackham throws a head kick that misses and slips in the process. He scrambles back to his feet and the fighters circle.
Rackham throws a head kick that misses and slips in the process. He scrambles back to his feet and the fighters circle.
Shea looking to land some kicks to the body here.
Rackham drops down looking for a counter takedown but Shea sprawls and moves away.
Shea throws a head kick that misses.

Rackham has Shea up against the cage in a clinch.
Rackham misses the knee to the body. Nice hip positioning from Shea.
Rackham with the Thai clinch. He's looking to land a big knee but he's not managed it this time.
Shea looking to throw knees to the head but Rackham is blocking nicely.
Rackham blocks an elbow strike.
Rackham managing to block the knees to the body from Shea.
Shea is looking to score with knees to the body. Maybe he'll change it up and go body then head. Rackham is defending well for now.
Rackham is struggling to control the position.
Shea misses the knee to the body. Nice hip positioning from Rackham.
We've had a slow start to the round here - hopefully the action picks up.
Rackham tries to land a knee to the body but he is off balance and Shea avoids it.
Shea with an attempt at a knee that misses.
Both guys are working to get underhooks.
Shea blocks a knee to the body. He'll have a nicely bruised forearm in the morning.
Rackham wants a takedown.
That's one minute gone in the round.
Kneeeeees! The crowd are calling for knees to the body. Shea obliges.
Rackham avoiding damage as Shea throws knees to the body.
Shea is trying to stall.
Rackham managing to block the knees to the body from Shea.
Rackham is trying to trip Shea. He has hold of a leg but Shea is hopping around, keeping his balance for the moment. Rackham persists though and gets the takedown into guard.
Rackham won't allow Shea to sweep him here.
Shea working a defensive guard here.
Rackham tries to free his leg and advance position but Shea is retaining full guard.
Rackham throwing strikes but missing.
Shea trying to keep a closed guard but Rackham is proving a slippery customer.
Rackham throws a big right hand that misses.
That's two minutes gone in the round.
Rackham in full guard, throwing the ground and pound. No damage this time.
Rackham is fighting to break Shea's control of his arms but Shea is doing a good job of controlling the position at the moment.
Shea preventing the ground and pound from doing any damage.
Rackham working from the guard for now, landing some ground and pound.
Shea managing to control the position.
Shea trying to keep a closed guard but Rackham is proving a slippery customer.
Rackham advances position into side control!
You can see the frustration on Shea's face, being in this tough position on the bottom.
That's three minutes gone in the round.
Shea is positioning himself to get back to half guard.
Rackham lands a decent elbow from side control.
Shea takes a nasty elbow to the side of the head.
Shea struggling a bit here.
Rackham working away diligently from side control. Landing strikes effectively there - that will score him some points on the judges scorecards.
Rackham working the ground and pound but Shea is defending the strikes.
Rackham fails to land a wild elbow strike.
Rackham fails to land a wild elbow strike.
Rackham in side control lands a nice looking series of punches and elbows.
That's four minutes gone in the round.
Shea tries to improve position but can't.
Rackham tries to score with some ground and pound. Shea controls his posture well this time though and the shots don't do any damage.
Shea is looking to reverse the position.
Rackham tries to land with some ground and pound but misses.
Rackham throws an elbow but Shea slips to the side and avoids it well.
Rackham working away.
Rackham lands a nice forearm strike.
Rackham throwing ground and pound but whilst doing so, he forgets to control position and Shea works his way back to half guard. Good composure under pressure.
The crowd thankful this round is nearly over.
Rackham drops an elbow to the side of Shea's head.
The crowd are loving this. Great action here.
Rackham throwing shots but they're hitting the canvas more than the man.
And that is the end of the round. The fighters go back to their corners.
John Rackham dominated that second round.
The referee calls time. The cornermen exit stage left and we're back to business. Ladies and gentlemen, this is the final round!

Shea throws a sloppy head kick and Rackham moves out of range easily.
Shea looks frustrated there after his takedown attempt is stuffed easily.
Shea misses with a low kick.
Rackham tries a head kick but it misses.
Shea changes levels for a counter takedown but doesn't follow through with his attempt.
Rackham blocks a leg kick.
Rackham sees a low kick coming and goes to check it, but it's actually a body kick and it thuds into his unprotected ribs.
Rackham shoots in and gets a takedown into half guard. Rackham showed some decent athleticism there.
Rackham throwing shots but Shea is blocking nicely.
Rackham throwing shots but Shea is blocking nicely.
We've had a slow start to the round here - hopefully the action picks up.
Rackham missing with the ground and pound from half guard.
Rackham sitting in half guard, looking to land shots. Shea defending well though.
Rackham scoring with strikes to the body and head.
Rackham thumps the canvas. Not on purpose obviously - he just missed Shea's head.
That's one minute gone in the round.
Shea regains full guard. Nicely done.
Rackham loading up with the ground and pound but he's missing more than he's landing in this flurry.
Shea is trying to keep Rackham in close.
Shea preventing the ground and pound from doing any damage.
Rackham lands a couple of digs.
Rackham being controlled here momentarily.
Rackham with a flurry of punches that miss.
Rackham trying to control but Shea is working from the bottom.
Rackham postures up.
That's two minutes gone in the round.
There's not a lot going on here and the crowd are letting the fighters know they're not willing to tolerate a lack of action.
Rackham postures up and lands some nice ground and pound.
Rackham working some ground and pound from guard but it's not doing any damage.
Shea working a defensive guard here.
Shea is working the butterfly guard. He manages to land a nice scissor sweep and is now in half guard on the top. Nice move.
Rackham tries to get to full guard but Shea has control of the leg.
Shea scoring with strikes to the body and head.
Shea prevents Rackham from improving his position.
Rackham moves into full guard.
That's three minutes gone in the round.
Rackham lands a beautiful sweep and he's now moved into his opponent's guard.
Shea looking for a sweep. Not yet Shea, not yet.
Rackham being controlled here momentarily.
Rackham makes a bit of distance and scores with some ground and pound, still in guard.
John Rackham overall seems to be getting the better of the ground position in the fight so far.
Shea looking to hit a scissor sweep but Rackham is one step ahead there.
Rackham is looking to work some ground and pound but Shea has wrist control.
That's four minutes gone in the round.
Rackham with a nice head shot there.
Shea is trying to control the position from the bottom.
Rackham throwing strikes but missing.
Rackham preventing the sweep.
Rackham throwing shots from guard but he's hitting more mat than opponent.
Shea working a defensive guard but Rackham manages to pass into side control anyway.
The crowd thankful this round is nearly over.
Rackham is putting a hurting on Shea here, landing some big shots from side control.
Jakub Shea has stepped it up - he knows he needs a finish here!
John Rackham is fighting for a decision here - he's started to take the cautious approach.
Rackham lands a knee to the body and follows it up with some ground and pound to the head. That will wear Shea down.
And that's the end of the fight!
John Rackham showed his dominance in that final round.
Well I reckon that's a shut out for Rackham, winning every round. Will the judges agree? They are the ones who matter, even if they are often depressingly incompetent. Over to the ring announcer for the scorecards.
Ladies and gentlemen, after 3 rounds of action, we go to the scorecards for a decision.
Judge Trevor Gratis scores the fight 30:27
Judge Steve Smith scores the fight 30:27
Judge Elvis Blanc scores the fight 30:27
In favor of your winner, by unanimous decision... John Rackham!
John Rackham thanked the fans post fight for their support.
|
|
|
|
|
|
|
|
|
|
|
|
|
|
|
|
|
|
|
|
|
|
|
| S |
C
A |
G |
S |
C
B |
G |
|
S |
C |
G |
|
energy
A | B |
|
hype
A | B |
|
pop
A | B |
|
mgr
A | B |
|
FIGHT
RATING
37% |
|
|
|
|
|
|
|
Undercard bout
|
Coming up we have a heavyweight MMA rules bout between Chris Tamburello (ranked 4591 p4p, 6468 weight class) and Scott Thompson (ranked 508 p4p, 595 weight class). Rumors backstage are that the fighters have been paid to keep it standing but we know that would never happen in MMA!
 |
|
 |
| 192 cm
18
255
1 - 1 - 0 |
|
195 cm
19
280
1 - 1 - 0 |
BJJ White Belt
Solid boxing
Very strong |
|
BJJ White Belt
Brawler
Powerful |
|
| |
|
Ladies and gentlemen. This fight is 3 rounds, in the heavyweight division.
Introducing the fighter to my left, fighting out of the red corner.
With a record of 1 - 1 - 0, fighting out of Montreal, Chris Tamburello!
And introducing the fighter to my right, fighting out of the blue corner.
With a record of 1 - 1 - 0, fighting out of Montreal, Scott Thompson!
The judges for this bout are Alec Ball, Trevor Gratis and William Peck.
The bell rings for round one and we are underway!

The fight moves into the clinch position.
Thompson tried to land a shot to the body but connects with Tamburello's elbow.
Thompson presses Tamburello against the cage and delivers a mid-strength body shot.
Thompson pushes Tamburello back against the cage and lands a hook to the side of the head.
Tamburello has been talking about how he's improved his wrestling in the run up to the fight so let's see if that's enough to sway the balance.
Thompson's head jolts backwards as he takes an uppercut right on the button!
Thompson tries a body shot but Tamburello blocks it.
A short right from Thompson.
Thompson on the defensive, avoiding the knees to the body.
A head punch blocked on the inside by Tamburello.
Thompson lands a left hand.
A short body shot lands from Thompson as the two fighters clinch.
Thompson lands a body shot.
Tamburello is breathing heavily.
Nice body punch from Thompson - that landed with a thud.
Tamburello prevents a body shot from Thompson.
Thompson working on landing some head shots here - that one got through nicely.
We've seen a great period of action over the last minute or so - credit to both fighters for going all out!
Nice body punch from Thompson.
Thompson misses with a punch to the body.
That's one minute gone in the round.
Thompson lands on the inside with an uppercut.
Thompson tries to work over Tamburello's body with a swooping hook but it only glances the target.
Tamburello is looking to score with knees to the body. Maybe he'll change it up and go body then head. Thompson is defending well for now.
Thompson tries a knee to the head but he's missed.
Thompson misses with a punch to the body.
Thompson misses with a shot to the kidneys.
Thompson gets through Tamburello's defenses to land a nice punch to the side of the head.
Thompson lands a body shot in the clinch.
Thompson lands a body shot.
A short body shot lands from Thompson as the two fighters clinch.
Nice body punch from Thompson - that landed with a thud.
Thompson lands a hook to the side of the head.
A head punch on the inside from Thompson fails to land.
Thompson holding his opponent close, against the cage.
Thompson tries to throw a body punch but Tamburello avoids it by throwing Thompson back against the cage.
That's two minutes gone in the round.
Thompson slows down the pace here.
Tamburello's head jolts backwards as he takes an uppercut right on the button!
Thompson misses with some punches.
Tamburello lands a nice uppercut.
This has been an exciting period of action!
A right handed body shot lands from Thompson.
Thompson tries a body shot but Tamburello blocks it.
A body shot lands from Thompson.
Thompson lands with a light punch inside.
Thompson lands a good knee to the midsection. Tamburello won't want to take too many of those.
Thompson misses with a hook to the ribs.
Thompson tries to work over Tamburello's body with a swooping hook but it only glances the target.
Thompson doesn't land with the attempted body shot.
Thompson leaning his opponent against the cage.
Thompson taking a break, stalling in the clinch.
That's three minutes gone in the round.
The two fighters are working to gain dominance in the clinch.
Thompson misses with a punch to the body.
Tamburello leaning against his opponent.
An uppercut on the inside fails to land for Thompson.
With the fighters up against the cage, Tamburello throws an elbow but misses.
Tamburello throws an elbow but it's blocked.
Tamburello lands with a short shot to the head.
Thompson avoiding damage as Tamburello throws knees to the body.
Thompson missing with knees to the body.
Thompson doesn't land with the attempted body shot.
Thompson lands a right hand that snaps the head of Tamburello backwards.
Thompson throws a head punch that misses.
Tamburello takes a shot to the head.
Thompson tried to land a shot to the body but connects with Tamburello's elbow.
That's four minutes gone in the round.
Thompson misses with a punch on the inside.
Tamburello tries to land knees in the clinch but Thompson avoids the damage to the body.
Tamburello blocks an uppercut.
Thompson manages to get underhooks and slows down the pace for a moment.
Thompson lands a hook to the body. It's hard to tell if that hurt Tamburello or not.
Tamburello misses with a body punch.
Thompson is leaning against Tamburello and scores with a nice uppercut to the body.
Thompson content to slow the pace in the clinch.
Thompson misses with a punch on the inside.
Thompson tries to land a shot to the body but it's blocked.
A left hand lands to the body for Thompson.
This is a great period of action - very entertaining stuff!
Thompson misses with a punch on the inside.
Tamburello struggles to land a body shot inside as Thompson controls his hands.
And that is the end of the round. The fighters go back to their corners.
Scott Thompson dominated that round.
The fighters' corners scream their final instructions, as the referee calls time. Here we go, back to the action!
Tamburello connects with a lovely jab that went straight through the gap between Thompson's hands.
Thompson forces Tamburello back against the cage and clinches.
Tamburello missing with knees to the body.
Thompson can't find room to land a body shot as Tamburello controls the action.
A short left from Thompson.
Still in the clinch, Thompson scores with a nice short uppercut.
Thompson misses with a shot to the kidneys.
Tamburello letting Thompson take a breather here.
Thompson lands with a short head shot on the inside.
Thompson working Tamburello over with knees to the body.
Thompson tries a shoulder strike but it doesn't do any damage.
Both fighters are absolutely exhausted here.
We've had a slow start to the round here - hopefully the action picks up.
Come on Thompson - let's have some action - none of this stalling nonsense.
Tamburello blocks a body shot from Thompson.
Thompson has been the more effective fighter overall so far.
Tamburello swings away with an uppercut that misses.
Tamburello working hard to break the clinch.
That's one minute gone in the round.
Thompson throws a vicious knee straight up the middle but Tamburello blocks it with crossed arms.
Tamburello lands with a short shot to the head.
Thompson stalling in the clinch.
Thompson missing with knees to the body.
Tamburello blocks a couple of punches on the inside.
Tamburello wants to break free but Thompson has control.
Thompson tries to land a shot to the body but it's blocked.
Tamburello takes a knee to the side of the body.
Thompson tried to land a shot to the body but connects with Tamburello's elbow.
Tamburello blocks a couple of punches on the inside.
Thompson tries to throw a body punch but Tamburello avoids it by throwing Thompson back against the cage.
Tamburello blocking some punches.
Thompson lands a body punch.
Thompson tries to work over Tamburello's body with a swooping hook but it only glances the target.
Thompson lands with a left to the head.
That's two minutes gone in the round.
Thompson scores with a shoulder strike.
Tamburello has had enough of the clinch and is looking to separate.
Thompson lands a body shot.
Thompson landing knees to the body. They look like they could hurt.
Tamburello takes an elbow to the forehead.
 It looks like Chris Tamburello has been cut. It looks like Chris Tamburello has been cut.
Wooooo! Give it up for these two warriors! They are putting on a show!
Thompson goes for a body shot but it's blocked.
Thompson works on Tamburello's body with a couple of short punches.
Tamburello blocks a body shot from Thompson.
Thompson misses with a punch on the inside.
Thompson misses with the head strike.
Thompson lands a nice looking hook to the body, against the cage.
Thompson misses with a punch to the body.
Thompson lands a left hand that snaps the head of Tamburello backwards.
Tamburello throws an elbow but it misses.
Thompson tries to land a shot to the body but it's blocked.
That's three minutes gone in the round.
Thompson lands a left hand that snaps the head of Tamburello backwards.
Thompson works on Tamburello's body with a couple of short punches.
Tamburello prevents a body shot from Thompson.
Thompson has Tamburello pressed up against the cage in a tight Thai clinch. Tamburello is arching his back, trying to avoid the knees but a big one sneaks through from Thompson - that's hurt Tamburello badly! Oh, another knee lands and Tamburello is covering up! The referee steps in to save him - possibly a bit early but Tamburello doesn't seem to be complaining.
Ladies and gentlemen, after 3:23 of round 2, we have a winner by way of TKO (Knees). Scott Thompson!
|
|
|
|
|
|
|
|
|
|
|
|
|
|
|
|
|
|
|
|
|
|
|
| S |
C
A |
G |
S |
C
B |
G |
|
S |
C |
G |
|
energy
A | B |
|
hype
A | B |
|
pop
A | B |
|
mgr
A | B |
|
FIGHT
RATING
50% |
|
|
|
|
|
|
|
Undercard bout
|
Coming up we have a middleweight MMA rules bout between Zied Hakimi (ranked 5154 p4p, 5603 weight class) and Taavi Tiivi (ranked 598 p4p, 621 weight class). We have two fighters making their debuts here, so let's see who comes out of this one with their first professional victory.
 |
|
 |
| 186 cm
18
195
0 - 0 - 0 |
|
184 cm
19
192
0 - 0 - 0 |
BJJ Blue Belt
Basic striking
Very strong |
|
BJJ Blue Belt
Excellent boxer
Powerful |
|
| |
|
Ladies and gentlemen. This fight is 3 rounds, in the middleweight division.
Introducing the fighter to my left, fighting out of the red corner.
With a record of 0 - 0 - 0, fighting out of Montreal, Zied Hakimi!
And introducing the fighter to my right, fighting out of the blue corner.
With a record of 0 - 0 - 0, fighting out of Las Vegas, Taavi Tiivi!
The judges for this bout are Alec Ball, Trevor Gratis and Dillan Fox.
The bell rings for round one and we are underway!
Hakimi throws a leg kick that is checked
and Tiivi counters with a crisp hook to the side of the head.
Hakimi misses with a lunging right hand
and Tiivi counters with a lovely straight right hand!
A big left from Hakimi misses.
Zied Hakimi seems to be the more aggressive standup fighter in this bout.
An inside leg kick from Hakimi misses.
Tiivi shoots in for a takedown but Hakimi shows good takedown defense there and keeps this one on the feet.
Tiivi checks a low kick. Bone on bone - not my idea of a good time.
Hakimi defends well against a solid takedown attempt from Tiivi.
Tiivi closes the distance and after a bit of a stuggle, scores a takedown into Hakimi's guard.
The ref warns both fighters not to hold the cage as they work up against the meshing.
Hakimi throwing his legs up looking for a triangle.
Hakimi looking for a guillotine here but Tiivi defends easily.
The fighters are pressed up against the cage, both looking to find a bit of space to work.
Hakimi escapes his hips to the side and looks to be working for an armbar. Tiivi gives him a little smile and shakes his head. No chance.
That's one minute gone in the round.
Hakimi keeping moving, preventing Tiivi from controlling successfully.
Hakimi looks to be working for a triangle here. Oh, it looks like he might have it! Tiivi has picked Hakimi up and slammed him! Hakimi can't keep hold of the triangle and Tiivi manages to pass to side control!
You can see the frustration on Hakimi's face, being in this tough position on the bottom.
Hakimi is trying to get back to half guard.
Hakimi is not content to let Tiivi control the position.
Hakimi dodges the ground and pound from Tiivi.
Tiivi tries for an arm triangle. That looks pretty tight to me. Is this one over!?! Possibly, maybe, no Tiivi has let go of the choke. Obviously it wasn't as tight as we thought!
That's two minutes gone in the round.
Hakimi is looking to regain half guard here but Tiivi keeps moving and retains side control.
Tiivi controlling from side mount.
Hakimi wants to control but Tiivi postures up.
Hakimi is trying to improve his position.
The strikes coming from Tiivi are missing the target in this wave of attacks.
Hakimi can't do much from the bottom here.
That's three minutes gone in the round.
Hakimi is trying to get back to half guard.
Hakimi avoids any damage from the ground and pound of Tiivi.
Hakimi is looking for a sweep.
Tiivi tries for a kimura. Not really close to a finish though.
Hakimi tries to improve position but can't.

Tiivi stands up and we're back to a striking position.
Tiivi lands a jab, followed by a cross and another cross, as Hakimi backs up against the cage.
That's four minutes gone in the round.
Hakimi pulls out of a head kick attempt.
Hakimi gets caught napping as Tiivi dives in and scores a takedown. Hakimi manages to retain guard.
Hakimi looking for a guillotine here but Tiivi defends easily.
Hakimi working from the bottom, still in full guard. He's managed to get a loose triangle. Tiivi doesn't seem to be doing much to defend here, obviously he feels comfortable in the position. Tiivi manages to throw the legs off his shoulder and he's back into guard - no problem.
Tiivi in full guard, throwing the ground and pound. No damage this time.
The crowd thankful this round is nearly over.
Hakimi had isolated an arm as going for a kimura. Tiivi defends it easily.
Hakimi working for submissions but it's allowed Tiivi to get to half guard.
And that is the end of the round. The fighters go back to their corners.
Taavi Tiivi dominated that round.
That's time! Hakimi's corner gives him a slap on the ass as he gets ready to fight.
Hakimi misses with a head kick.
Hakimi takes a shot to the body in his stride.
Tiivi checks a low kick. Bone on bone - not my idea of a good time.
Tiivi looks for a takedown here. Will he get it? Hakimi is fending him off so far but Tiivi persists. Nope, Hakimi circles away and we're back to standing.
Tiivi is looking to land body kicks.
Hakimi slips a jab and a cross from Tiivi.
Thud! ouch! good body kick from Hakimi - that will leave a mark!
Tiivi checks a low kick from Hakimi.
Hakimi throws a hook but Tiivi avoids it easily.
Nice takedown defense from Tiivi. No joy for Hakimi on that attempt.
We've had a slow start to the round here - hopefully the action picks up.
Tiivi fakes a head shot and lands one to the body.
Hakimi throws a series of punches but Tiivi moves out of range.
A nice side step and Tiivi releases a counter shot to the body, but it doesn't find it's home.
Tiivi scores with a takedown into Hakimi's guard.
The crowd are loving this. Great action here.
Tiivi preventing the sweep.
That's one minute gone in the round.
Tiivi wants to control from the top but Hakimi keeps moving.
Hakimi escapes his hips to the side and looks to be working for an armbar. Tiivi gives him a little smile and shakes his head. No chance.
Tiivi trying to control but Hakimi is working from the bottom.
Hakimi escapes his hips to the side and looks to be working for an armbar. Tiivi gives him a little smile and shakes his head. No chance.
Hakimi keeping moving, preventing Tiivi from controlling successfully.
Hakimi wants to control but Tiivi passes easily into half guard.
That's two minutes gone in the round.
A lull in the action here being met with boos from the crowd.
Hakimi looking to work for a kimura from the bottom.
Hakimi wants to improve his position but Tiivi is controlling well.
Hakimi is looking to sinch up a guillotine here but Tiivi pulls his head out easily.
Tiivi performing his best blanket impression for a moment.
Hakimi actively working from the bottom here.
Tiivi is just sitting in half guard, waiting for something to happen.
That's three minutes gone in the round.
Hakimi looking to work for a kimura from the bottom.
Hakimi looking for submissions off his back.
Tiivi not throwing his punches with enough precision this time.
Tiivi controlling the pace.
Tiivi sitting in half guard, looking to land shots. Hakimi defending well though.
Hakimi is pressing down on Tiivi's left leg trying to get back to full guard. He's managed it.
That's four minutes gone in the round.
The crowd are hurling abuse towards the fighters... You can hardly blame them though because there isn't a lot going on in the fight.
Hakimi is looking for a guillotine. You can't force these things though and Tiivi defends well.
Tiivi has been the more effective fighter overall so far.
Tiivi controls the pace of the fight for a moment.
Tiivi throws a big elbow that misses.
Tiivi postures up and lands some nice ground and pound.
Hakimi looking to sweep here. No luck so far.
Tiivi sneaks a leg through and gets to half guard. That was like a knife through butter how easily he passed Hakimi's guard.
Tiivi perhaps working for something from half guard, or maybe not. It looks like he's just sitting there.
Hakimi blocking the ground and pound attempt from Tiivi.
Hakimi actively working from the bottom here.
Both fighters are absolutely exhausted here.
Boooooooooooooooooooo!!! God, this has been a terrible round. Come on you two, sort yourselves out!
Tiivi seems very keen to just sit and control from half guard but Hakimi does not like that idea so much and is remaining active off his back.
Tiivi wants to stand but Hakimi has hold of a leg and an arm, so he's trapped for now.
And that is the end of the round. The fighters go back to their corners.
Taavi Tiivi showed his class in that round. I'd imagine he'll take it on all the scorecards.
That's the end of the round. The referee orders the cornermen out of the cage so we can get back down to business. This is the final round!
Hakimi throws a solid leg kick but Tiivi takes the impact on his shin and smiles at Hakimi.
Tiivi throws a counter combo.
Hakimi throws a head kick that misses and slips in the process. He scrambles back to his feet and the fighters circle.
Hakimi scores with a leg kick.
Tiivi lands a jab-cross combination.
Hakimi lands a leg kick and bounces back out of range.
Some bone on bone action there as Tiivi checks a low kick. Luckily it wasn't a particularly hard one.
Tiivi wants to clinch.
Hakimi stuffs the takedown attempt from Tiivi. Tiivi gets slowly back to his feet.
We've had a slow start to the round here - hopefully the action picks up.
Hakimi misses with a hook
and Tiivi counters with a good right hand that lands right on the jaw.
Hakimi throws a low kick but Tiivi moves out of range easily.
Despite the aggression on Tiivi's face he doesn't fully commit to the counter.
Tiivi looking to shoot here. He's gone for it and he's landed a takedown into side control! Oh, that's bad for Hakimi!
That's one minute gone in the round.
Hakimi tries to improve position but can't.
Hakimi is trying to control Tiivi's posture but Tiivi avoids it.
Tiivi throws a knee to the body but it doesn't do much damage.
Hakimi looking for a sweep but Tiivi has passed into full mount! Oh no!
Tiivi controlling the pace for now.
Hakimi can't escape the position.
That's two minutes gone in the round.
Tiivi tries to control but Hakimi wriggling away.
Hakimi is desperately trying to get back to half guard.
The referee warns Hakimi that he has to improve his position here as he takes two more clean shots to the head.
Hakimi is desperately trying to improve his position but Tiivi has a good base and remains in mount.
Taavi Tiivi has got the better of the ground game so far.
Tiivi misses with a series of strikes from mount. He'll no doubt be working on his ground and pound when he gets back to the gym.
Hakimi can't escape the position.
Both fighters are breathing heavily.
Tiivi wants to control the pace but Hakimi is squirming around nicely.
Hakimi tries to lock up and control but Tiivi gives him a forearm to the face and pushes him away.
Tiivi working for a submission but Hakimi is keeping him at bay.
Hakimi is desperately trying to get back to half guard.
That's three minutes gone in the round.
Hakimi tries to lock up and control but Tiivi gives him a forearm to the face and pushes him away.
Hakimi tries to get back to half guard but can't.
Tiivi tucks in and makes sure he doesn't lose the dominant position.
Tiivi landing strikes from the mount.
Hakimi really trying hard to get back to half guard here.
Tiivi throws some wild stikes that Hakimi manages to avoid easily.
Hakimi tries to improve his position but instead Tiivi has taken his back!
Hakimi prevents Tiivi from getting a body triangle.
Hakimi tries to roll but Tiivi sticks to his back.
That's four minutes gone in the round.
Tiivi working for a RNC but it's not happening just yet.
Hakimi rolls, trying to escape but Tiivi keeps control of the position.
Tiivi punches the canvas rather than the man.
Hakimi tries to break free.
Tiivi is looking cool and calm here, just waiting for a good opportunity to attack and finish the fight from this dominant position.
Even with his hooks in, Tiivi manages to miss with strikes from the back.
Tiivi wants to control the position but Hakimi frees himself and scrambles - Tiivi manages to regain control in side control.
Hakimi tries to bench press Tiivi off him but Tiivi keeps the position.
Zied Hakimi has stepped it up - he knows he needs a finish here!
Taavi Tiivi is fighting for a decision - hopefully he's judged it right and he's actually winning the fight.
Hakimi tries to wriggle free to get back to his feet but he's given up his back! Oops.
And that's the end of the fight!
Taavi Tiivi comfortably won the final round on my scorecard.
Well Tiivi has outworked and out performed his opponent in all aspects of the game today. He was simply too good and the decision should be no more than a formality. Over to the ring announcer for the scorecards.
Ladies and gentlemen, after 3 rounds of action, we go to the scorecards for a decision.
Judge Alec Ball scores the fight 27:30
Judge Trevor Gratis scores the fight 27:30
Judge Dillan Fox scores the fight 27:30
In favor of your winner, by unanimous decision... Taavi Tiivi!
|
|
|
|
|
|
|
|
|
|
|
|
|
|
|
|
|
|
|
|
|
|
|
| S |
C
A |
G |
S |
C
B |
G |
|
S |
C |
G |
|
energy
A | B |
|
hype
A | B |
|
pop
A | B |
|
mgr
A | B |
|
FIGHT
RATING
35% |
|
|
|
|
|
|
|
Undercard bout
|
Coming up we have a middleweight MMA rules bout between Alexei Brovarnik (ranked 5240 p4p, 5675 weight class) and Greg Cox (ranked 603 p4p, 624 weight class). Alexei Brovarnik could well score a knockout today. He has the power to get to Greg Cox's chin.
 |
|
 |
| 186 cm
18
182
0 - 0 - 0 |
|
170 cm
18
190
0 - 1 - 0 |
BJJ Purple Belt
Decent elbows
Very strong |
|
BJJ Blue Belt
Counter fighter
Determined |
|
| |
|
Ladies and gentlemen. This fight is 3 rounds, in the middleweight division.
Introducing the fighter to my left, fighting out of the red corner.
With a record of 0 - 0 - 0, fighting out of Montreal, Alexei Brovarnik!
And introducing the fighter to my right, fighting out of the blue corner.
With a record of 0 - 1 - 0, fighting out of Montreal, Greg Cox!
The judges for this bout are Steve Smith, Trevor Gratis and Yves DeLean.
The bell rings for round one and we are underway!
Cox tries to keep at a distance but Brovarnik has taken the fight into the clinch.
Brovarnik misses with a knee to the head.
Brovarnik is trying to slow down the pace in the clinch, to catch his breath.
Cox can't find room to land a body shot as Brovarnik controls the action.
Brovarnik lands a glancing elbow in the clinch.
Cox blocks an elbow strike.
Knees in the clinch landing for Brovarnik.
Brovarnik is stalling here. The referee will be looking to step in if he doesn't pick up the pace.
Cox can't get the takedown.
We've had a slow start to the round here - hopefully the action picks up.
Brovarnik is defending well against a takedown attempt.
Brovarnik prevents a takedown attempt there.
Alexei Brovarnik has stuffed three takedown attempts in the round now. That's going to take a lot out of Greg Cox.
Brovarnik lands a glancing elbow in the clinch.
Good body shot from Brovarnik.
That's one minute gone in the round.
Brovarnik misses with the head strike.
Brovarnik is defending well against a takedown attempt.
Brovarnik stops a takedown attempt from Cox.
Knees to the body from Brovarnik.
Cox looks winded!
Brovarnik prevents a takedown attempt there.
Brovarnik lands an elbow that stopped Cox in his tracks for a moment.
A nice glancing elbow lands by Brovarnik.
It looks like Greg Cox has been cut.
Knees in the clinch landing for Brovarnik.
Cox blocks a body shot from Brovarnik.
Cox prevents a body shot from Brovarnik.

Brovarnik drops Cox with a big knee straight up the middle! Cox is covering up against the cage but manages to escape and gets back to his feet!
 Cox is rocked! Cox is rocked!
This has been an exciting period of action!
Cox is keeping his hands low and just asking to be knocked out. Brovarnik Raises his leg and lands a stunning axe kick! Cox is out cold, face down on the mat!
Ladies and gentlemen, after 1:53 of round 1, we have a winner by way of KO (Head Kick). Alexei Brovarnik!
|
|
|
|
|
|
|
|
|
|
|
|
|
|
|
|
|
|
|
|
|
|
|
| S |
C
A |
G |
S |
C
B |
G |
|
S |
C |
G |
|
energy
A | B |
|
hype
A | B |
|
pop
A | B |
|
mgr
A | B |
|
FIGHT
RATING
58% |
|
|
|
|
|
|
|
Undercard bout
|
Coming up we have a light heavyweight MMA rules bout between Tony Neer (ranked 5009 p4p, 4302 weight class) and Syngin Colchester (ranked 569 p4p, 529 weight class). This should be a great matchup!
 |
|
 |
| 189 cm
19
210
0 - 0 - 0 |
|
188 cm
18
200
1 - 0 - 0 |
BJJ White Belt
Excellent MT
Granite chin |
|
BJJ White Belt
Decent boxing
Tends to cut |
|
| |
|
Ladies and gentlemen. This fight is 3 rounds, in the light heavyweight division.
Introducing the fighter to my left, fighting out of the red corner.
With a record of 0 - 0 - 0, fighting out of Sydney, Tony Neer!
And introducing the fighter to my right, fighting out of the blue corner.
With a record of 1 - 0 - 0, fighting out of Montreal, Syngin Colchester!
The judges for this bout are Steve Smith, Alec Ball and Yves DeLean.
The bell rings for round one and we are underway!
Colchester throws a nice looking combination but Neer bobs and weaves to avoid any damage.
Colchester connects with the punch.
Colchester misses with an uppercut.
Colchester misses with an uppercut.
Neer moves into the clinch successfully.
Neer prevents Colchester from breaking the clinch.
Colchester tries for a takedown. No joy.
Neer decides to pull guard.
Colchester chips away with some ground and pound.
Colchester keeps in close for a moment and lands a decent shot to the side of Neer's head.
Colchester must be cautious of submissions here, given that his opponent has the superior Jiu Jitsu.
Colchester makes a bit of distance and scores with some ground and pound, still in guard.
Colchester stopping the sweep attempt from Neer.
We've had a slow start to the round here - hopefully the action picks up.
Colchester scoring with some ground and pound.
Neer trying to control the position.
Colchester working in close now, lands a nice elbow to the side of Neer's head.
Colchester trying to control but Neer is working from the bottom.
That's one minute gone in the round.
Colchester landing with the ground and pound.
Colchester connects with a couple of short punches.
Colchester avoids a guillotine attempt easily.
Colchester postures up and scores with a shot to the body and a follow up elbow to the head.
Colchester prevents Neer from getting back to his feet.
Colchester wants to control from the top but Neer keeps moving.
Colchester is working Neer over from the guard. He should look to pass the guard and do a little more damage with these strikes.
Colchester lands a nice shot whilst sitting in his opponent's guard.
Hammerfist, elbow! yells Colchester's corner. There ya go! There ya go!
Colchester is working the ground and pound from guard. He might want to try advancing position though to get more of an impact.
That's two minutes gone in the round.
Colchester working from the guard for now, landing some ground and pound.
Colchester postures up.
Colchester chips away with some ground and pound.
Neer is throwing his legs up, looking for submissions. Colchester is aware though and is defending well.
Colchester postures up and lands a big shot to Neer's brow.
Colchester with a couple of shots to the head there. Not particularly brutal.
Colchester slows down the pace of the fight, as he sits in guard.
The fighters are starting to get a bit slippery now, which will make submissions a bit more difficult.
Colchester lands a couple of digs.
The fighters are pressed up against the cage, both looking to find a bit of space to work.
Colchester is in close to Neer's body, working some short punches and elbows.
Colchester content to strike from guard, landing some decent shots.
 Neer is rocked! Neer is rocked!
Colchester arches his back and unloads with a massive left and a right! Neer's eyes roll back into his head, he's out cold! The ref dives in to stop the fight - wow, they were hard shots!
Ladies and gentlemen, after 3:59 of round 1, we have a winner by way of KO (Strikes). Syngin Colchester!
|
|
|
|
|
|
|
|
|
|
|
|
|
|
|
|
|
|
|
|
|
|
|
| S |
C
A |
G |
S |
C
B |
G |
|
S |
C |
G |
|
energy
A | B |
|
hype
A | B |
|
pop
A | B |
|
mgr
A | B |
|
FIGHT
RATING
34% |
|
|
|
|
|
|
|
Undercard bout
|
Coming up we have a welterweight MMA rules bout between Jordan Lisko (ranked 2930 p4p, 3869 weight class) and Tony Paulik (ranked 389 p4p, 464 weight class). The key to victory for Jordan Lisko has got to be keeping the fight on the feet.
 |
|
 |
| 179 cm
19
182
2 - 1 - 0 |
|
180 cm
26
175
2 - 4 - 0 |
BJJ Brown Belt
Excellent MT
Good chin |
|
Good wrestler
Brawler
Granite chin |
|
| |
|
Ladies and gentlemen. This fight is 3 rounds, in the welterweight division.
Introducing the fighter to my left, fighting out of the red corner.
With a record of 2 - 1 - 0, fighting out of Montreal, Jordan Lisko!
And introducing the fighter to my right, fighting out of the blue corner.
With a record of 2 - 4 - 0, fighting out of Las Vegas, Tony Paulik!
The judges for this bout are Gregory Folan, Dillan Fox and Steve Smith.
The bell rings for round one and we are underway!
Paulik fails with a rather predictable takedown attempt.
Paulik shoots in for a takedown and gets it. Let's see what he's got on the mat.
Paulik wants to pass the guard but Lisko is keeping the position.
Lisko throws his legs up looking for a submission but Paulik uses it to pass to side control.
Lisko is trying to get back to half guard.
The ref warns both fighters not to hold the cage as they work up against the meshing.
Lisko tries to control the position but he's not in luck - Paulik easily slips into full mount!
Paulik has control of Lisko's right arm, working for a kimura. It's a bit of a token attempt though and Lisko regains control of the situation pretty easily.
We've had a slow start to the round here - hopefully the action picks up.
Lisko defends a decent attempt at a guillotine from Paulik.
We've been hearing good reports from Lisko's training camp. Apparently he has been rolling around with some good quality BJJ practitioners and has been sharpening his skills. Let's see if that has an impact on the fight today.
That's one minute gone in the round.
Paulik looks like he's working for a submission but he's not found anything just yet.
Paulik looking for a guillotine from mount but Lisko is having none of it.
Paulik has hold of Lisko's left arm, perhaps looking for a submission. The two fighters tussle over control of the isolated limb and Lisko manages to get his arm back to his side and away from danger.
Paulik looking to secure an arm triangle but Lisko defends it well.
Lisko wants to hold on but Paulik pushes him away.
Lisko is in all sorts of trouble here.
Paulik working to secure an arm triangle but it's not happening for him just yet.
Lisko wants to hold on but Paulik pushes him away.
That's two minutes gone in the round.
Lisko regains half guard.
Paulik is trying to work for a kimura but Lisko is defending well.
Lisko is defending against the submission attempts here by Paulik.
Paulik is trying to work for a kimura. This could be trouble! No, Lisko has managed to free his arm - good work.
Paulik is looking for a kimura but Lisko is holding onto that half guard position, so it's hard for Paulik to get the leverage.
Lisko looking to work for a kimura from the bottom.
Lisko looking for submissions from an awkward position here.
That's three minutes gone in the round.
Lisko is looking for a sweep. Paulik is wise to his cunning plan and keeps the top position.
Lisko moves into full guard.
Lisko can't keep his opponent in guard - Paulik advances to half guard, no doubt looking to mount.
Paulik prevents Lisko from improving his position.
Paulik wants to pass the guard but Lisko is defending well.
Lisko looking for subs from the bottom but Paulik mounts him!
Lisko tries to lock up and control but Paulik gives him a forearm to the face and pushes him away.
That's four minutes gone in the round.
Paulik goes for an armbar but Lisko turns quickly into his guard - lovely anticipation from Lisko.
Lisko trying to control the position from guard on top but Paulik is wriggling around, looking for whatever he can.
Paulik wants to sweep but no luck.
Paulik is looking for a guillotine. You can't force these things though and Lisko defends well.
Lisko is holding a leg here, probably looking for an ankle lock - he drops back and goes for it! Paulik is in trouble! Is it all over??? No! Paulik has escaped and now he's on top!
The crowd thankful this round is nearly over.
Lisko had isolated an arm as going for a kimura. Paulik defends it easily.
And that is the end of the round. The fighters go back to their corners.
Tony Paulik dominated that round.
That's time! Back to the action!
Paulik blocks a head kick by Lisko.
Paulik is definitely looking for the counter takedowns here.
Paulik closes the distance and gets a double leg, slamming Lisko to the mat! Lisko manages to get full guard.
Paulik thinks about going for a leg but decides against it, in order to maintain the position.
Lisko keeping full guard, as Paulik tries to pass.
Lisko looking to hit a scissor sweep but Paulik is one step ahead there.
Lisko looking for submissions off his back, moving his hips, looking for an opening.
Lisko looking for submissions off his back, moving his hips, looking for an opening.
We've had a slow start to the round here - hopefully the action picks up.
Paulik thinks about going for a leg but decides against it, in order to maintain the position.
Paulik is trying to work a guillotine from the top, or something like that? Don't know how he thinks he's going to get a finish from there.
That's one minute gone in the round.
Paulik looking to pass the guard.
Lisko is throwing his legs up, looking for submissions. Paulik is aware though and is defending well.
Lisko looking for submissions from the bottom here. Moving his hips around, possibly looking for an armbar.
Paulik trying to move into half guard but instead Lisko has managed to sweep!
Paulik keeping moving, preventing Lisko from controlling successfully.
Paulik has his hands on Lisko's head, controlling the position.
Paulik looking for subs off his back but Lisko has passed one foot through into half guard.
Paulik has been the more effective fighter overall so far.
That's two minutes gone in the round.
Lisko wants to control but Paulik is keeping him busy.
Paulik wants to get back to full guard.
Lisko is trying to control the action in half guard but Paulik is working away on the bottom, looking perhaps to get back to full guard.
Lisko seems to be looking for submissions.
Paulik wants to get back to full guard.
That's three minutes gone in the round.
Paulik wants to sweep but Lisko has passed to side control!
Paulik felt the need to train up his defensive grappling in the buildup to the fight. Presumably he was expecting to be in a difficult position like this, so let's see if he can get out of it.
Paulik is looking for a sweep.
Lisko advances to mount.
The fighters are pressed up against the cage, both looking to find a bit of space to work.
Lisko looking to control but Paulik is working nicely, looking to advance position himself.
Lisko is looking to secure an arm. He's managed it! He's pivoting for an armbar - that looks tight! But Paulik has managed to get out of it and now he's in a dominant position. Nice work from Paulik!
Lisko is active off his back here, looking for submissions.
That's four minutes gone in the round.
Lisko is trying to control the position but Paulik postures up.
Paulik drops back looking for a leg! Lisko is in trouble here! The fighters roll with the hold and Lisko manages to kick Paulik off! Paulik jumps back into Lisko's guard.
Lisko keeping full guard, as Paulik tries to pass.
Lisko throwing his legs up looking for a triangle.
Paulik drops back for a leg! It's a sloppy attempt though and Paulik jumps back into guard quickly, to retain the dominant position.
Boooooooooooooooooooo!!! God, this has been a terrible round. Come on you two, sort yourselves out!
Paulik advances position into side control!
Lisko can't do much from the bottom here.
And that is the end of the round. The fighters go back to their corners.
A close second round but Tony Paulik will probably get the nod - 10:9.
The fighters' corners scream their final instructions, as the referee calls time. Here we go, back to the action! This is the final round!
Lisko stuffs the takedown.
Paulik shoots in for a takedown. "Ole!" shouts Lisko as he jumps to the side.
Lisko keeps the fight standing with a nice sprawl.
Jordan Lisko has stuffed three takedown attempts in the round now. That's going to take a lot out of Tony Paulik.
Lisko has taken the fight to the clinch.
Paulik takes an elbow to the temple.
Paulik blocks an elbow strike from Lisko.
Paulik throws a vicious knee straight up the middle but Lisko blocks it with crossed arms.
Paulik is looking to take this one to the mat.
Lisko prevents the takedown attempt.
We've had a slow start to the round here - hopefully the action picks up.
Lisko stalling in the clinch.
Paulik is trying to work for a single leg takedown but Lisko pulls him back up using the underhooks.
Paulik has hold of a leg and is looking for a trip takedown. Lisko avoids it nicely though and we remain in the clinch.
Paulik takes a big intake of breath there - he's definitely tired.
Lisko stalling.
A battle for position here, against the cage.
That's one minute gone in the round.
Lisko lands a good knee to the midsection. Paulik won't want to take too many of those.
Lisko utilising his Muay Thai to score with a knee to the body.
Lisko misses with a knee strike.
Paulik managing to block the knees to the body from Lisko.
Lisko jumps guard and drags Paulik to the mat. He's obviously going to be looking for submissions off his back.
Paulik has gone for a leg lock! Lisko slips out almost immediately though and dives into Paulik's guard.
Lisko trying to control but Paulik is working from the bottom.
That's two minutes gone in the round.
Paulik had isolated an arm as going for a kimura. Lisko defends it easily.
Paulik keeping moving, preventing Lisko from controlling successfully.
Lisko is going to have to think about doing something other than just controlling because Paulik is managing to avoid having the position dictated to him.
That's three minutes gone in the round.
Paulik is trying to control the position but Lisko postures up.
Lisko stands and throws Paulik's legs to the side, diving into side control.
Lisko wants to lay and pray for a moment but Paulik keeps working.
Tony Paulik has got the better of the ground game so far.
Lisko goes for an armbar here - this could be all over! But no, Paulik has escaped beautifully and is now on top in side control! Oh, that's unlucky for Lisko but great work by Paulik.
Lisko wants to control but Paulik postures up.
Paulik tries for an arm triangle. That looks pretty tight to me. Is this one over!?! Possibly, maybe, no Paulik has let go of the choke. Obviously it wasn't as tight as we thought!
Lisko sneaks a leg under to get back to half guard.
That's four minutes gone in the round.
Lisko gets back to full guard.
Paulik has gone for a leg lock! Lisko slips out almost immediately though and dives into Paulik's guard.
Lisko drops back for a leg! It's a sloppy attempt though and Lisko jumps back into guard quickly, to retain the dominant position.
Lisko trying to control but Paulik is working from the bottom.
The crowd thankful this round is nearly over.
Jordan Lisko has stepped it up - he knows he needs a finish here!
Tony Paulik is fighting for a decision - hopefully he's judged it right and he's actually winning the fight.
Paulik controls Lisko momentarily but Lisko frees himself.
And that's the end of the fight!
Jordan Lisko showed his dominance in that final round.
I think Paulik has won this one but let's see whether the judges agree with me. Over to the ring announcer for the scorecards.
Ladies and gentlemen, after 3 rounds of action, we go to the scorecards for a decision.
Judge Gregory Folan scores the fight 29:29
Judge Dillan Fox scores the fight 29:29
Judge Steve Smith scores the fight 29:29
The fight is ruled a draw!
|
|
|
|
|
|
|
|
|
|
|
|
|
|
|
|
|
|
|
|
|
|
|
| S |
C
A |
G |
S |
C
B |
G |
|
S |
C |
G |
|
energy
A | B |
|
hype
A | B |
|
pop
A | B |
|
mgr
A | B |
|
FIGHT
RATING
28% |
|
|
|
|
|
|
|
Undercard bout
|
Coming up we have a middleweight MMA rules bout between Huma Dragonsbane (ranked 2954 p4p, 3127 weight class) and Bruno Fortuna (ranked 412 p4p, 429 weight class). The crowd seem to be enjoying Fortuna's choice of entrance music: Godfather Theme by Nino Rota. There are an array of beautiful celebrities at ringside tonight! I wonder if any of them paid for their tickets.
 |
|
 |
| 194 cm
19
194
2 - 1 - 0 |
|
188 cm
19
198
1 - 0 - 0 |
Decent wrestler
Solid Muay Thai
KO power |
|
BJJ Blue Belt
Excellent boxer
Heavy handed |
|
| |
|
Ladies and gentlemen. This fight is 3 rounds, in the middleweight division.
Introducing the fighter to my left, fighting out of the red corner.
With a record of 2 - 1 - 0, fighting out of Montreal, Huma Dragonsbane!
And introducing the fighter to my right, fighting out of the blue corner.
With a record of 1 - 0 - 0, fighting out of Montreal, Bruno Fortuna!
The judges for this bout are Yves DeLean, Elvis Blanc and Ian Loll.
The bell rings for round one and we are underway!
Dragonsbane cracks Fortuna with a good jab.
A head kick from Dragonsbane lands but Fortuna takes it in his stride.
Fortuna throws a sloppy head kick and Dragonsbane moves out of range easily.
Dragonsbane fakes a jab and scores with a low kick.
Dragonsbane has been talking about how he's improved his wrestling in the run up to the fight so let's see if that's enough to sway the balance.
Fortuna fakes with an overhand right and moves in to clinch with Dragonsbane, pushing him back against the cage.
Both fighters working to control the clinch.
Fortuna digs a right hand underneath Dragonsbane's ribcage. Dragonsbane let out a lung full of air as it connected.
Fortuna tries to circle away but Dragonsbane has him pinned against the cage.
Dragonsbane lands an elbow inside.

Dragonsbane breaks from the clinch.
Dragonsbane throws an off balance right hand
and Fortuna counters with a quick right hand to the jaw.
Fortuna ducks low and lands a nice hook to the body of his opponent.
Fortuna wants to clinch up but Dragonsbane keeps it at a distance.
The fans in attendance giving it up for the two fighters, who have really let it all hang out in the last minute or so!
Dragonsbane on the wrong end of a decent looking cross there.
Dragonsbane avoids a punch combination nicely.
That's one minute gone in the round.
Fortuna moves away from the strike by Dragonsbane.
A jab from Fortuna finds it's way through Dragonsbane's defenses.
Fortuna tries to clinch up against the cage, rushing in to close the distance. Dragonsbane manages to break the clinch and circles back to the middle of the mat.
Dragonsbane's corner calls for a 1-2. Dragonsbane obliges with the 1 part as he scores the single shot and moves back out of range.
Good leg kick by Fortuna.
A clash of legs there as Fortuna blocks the low kick.
Fortuna is clearly trying to counter these attacks from Dragonsbane with a body shot.
Fortuna avoids the head kick by Dragonsbane.
Dragonsbane avoids the clinch attempt nicely.
Dragonsbane throws a lazy body kick
and Fortuna counters with a right hand to the body.
Dragonsbane throws a lazy uppercut
and Fortuna counters with a straight right hand.
Dragonsbane motions for Fortuna to come forward. Dragonsbane throws a leg kick but it misses it's target.
Fortuna moving in and out of range nicely, whilst landing the scoring shot.
Fortuna wants to clinch.
That's two minutes gone in the round.
Dragonsbane throws a leg kick
and Fortuna counters with a huge uppercut, hook combination that drops Dragonsbane! The ref has seen enough - he's dived in to stop the fight! Brutal strikes by Fortuna!
Ladies and gentlemen, after 2:19 of round 1, we have a winner by way of TKO (Strikes). Bruno Fortuna!
In his post fight interview, Bruno Fortuna started talking himself up. Luckily his charisma kept the crowd on side and gave him a good reception.
|
|
|
|
|
|
|
|
|
|
|
|
|
|
|
|
|
|
|
|
|
|
|
| S |
C
A |
G |
S |
C
B |
G |
|
S |
C |
G |
|
energy
A | B |
|
hype
A | B |
|
pop
A | B |
|
mgr
A | B |
|
FIGHT
RATING
46% |
|
|
|
|
|
|
|
Co-main event
|
Coming up we have a lightweight MMA rules bout between Izzy Fisher (ranked 2111 p4p, 5268 weight class) and Justin Boyington (ranked 272 p4p, 516 weight class). Fisher kept the crowd waiting but all that was forgotten when his ring entrance music started. The incomparable musical genius that is Bad Motherf-er. There are an array of beautiful celebrities at ringside tonight! I wonder if any of them paid for their tickets.
 |
|
 |
| 179 cm
26
159
3 - 0 - 0 |
|
178 cm
20
164
2 - 2 - 0 |
Powerful takedowns
Counter fighter
Cardio machine |
|
BJJ Purple Belt
Solid Muay Thai
Granite chin |
|
| |
|
Ladies and gentlemen. This fight is 3 rounds, in the lightweight division.
Introducing the fighter to my left, fighting out of the red corner.
With a record of 3 - 0 - 0, fighting out of Tokyo, Izzy Fisher!
And introducing the fighter to my right, fighting out of the blue corner.
With a record of 2 - 2 - 0, fighting out of Montreal, Justin Boyington!
The judges for this bout are Dillan Fox, Robert Douchet and Steve Smith.
The bell rings for round one and we are underway!
Fisher shoots in and drives through. Boyington sprawls well.
Fisher has his head slapped from side to side by a 3 punch combination. That must have hurt him.
Boyington works Fisher's body with a nice hook.
A low kick lands for Boyington.
Boyington scores with a nice body kick.
Boyington swings away with a body shot that misses
and Fisher counters with a takedown into side control! That could mean trouble for Boyington!
Fantastic stuff here - a very entertaining period of action, which has drawn cheers from the crowd.
Fisher is looking to finish here, going for an Americana. Boyington knows the correct defense though, so he's OK.
Boyington is not content to let Fisher control the position.
The ref warns both fighters not to hold the cage as they work up against the meshing.
Fisher thinks about going for a far side armbar but bails out and retains the dominant position instead.
Fisher is trying to land an Americana. He has the arm isolated but Boyington is keeping cool and he's avoided the danger for now.
That's one minute gone in the round.
Boyington tries to buck Fisher off but Fisher is having none of it.
Fisher trying to control the position but Boyington is working away.
Boyington tries to get back to half guard but can't.
Fisher trying to control the action but Boyington is working from the bottom.
Boyington is trying to get back to half guard.
Fisher is looking for a kimura. He might have it! No, Boyington has escaped the position, nice work there.
That's two minutes gone in the round.
A few boos can be heard. I'm sure they will multiply if the fighters don't pick up the pace.
Fisher trying to control the position but Boyington is working away.
Fisher looking for an arm triangle but it's way too loose to do anything.
Boyington tries to work a leg under to get back to half guard but Fisher wriggles his own leg back out and remains in side control.
Fisher trying to control the position but Boyington is working away.
Boyington is looking to reverse the position.
Fisher is working for what looks like an arm triangle here. Boyington is trying to escape and Fisher transitions quickly into an armbar! He's slapped it on tight and Boyington is forced to tap! Nice work there by Fisher! Very nice indeed!
Ladies and gentlemen, after 3:59 of round 1, we have a winner by way of Submission (Armbar). Izzy Fisher!
After winning the bout, Izzy Fisher thanked all his fans and promised he'd do even better in his next fight. The crowd seemed to love his humility.
|
|
|
|
|
|
|
|
|
|
|
|
|
|
|
|
|
|
|
|
|
|
|
| S |
C
A |
G |
S |
C
B |
G |
|
S |
C |
G |
|
energy
A | B |
|
hype
A | B |
|
pop
A | B |
|
mgr
A | B |
|
FIGHT
RATING
37% |
|
|
|
|
|
|
|
Main event
|
Coming up we have a heavyweight MMA rules bout between Harris Brown (ranked 2840 p4p, 3101 weight class) and Charlie Potthast (ranked 340 p4p, 374 weight class). Over to our ring announcer for the fighter introductions!
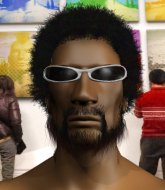 |
|
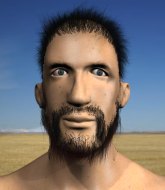 |
| 196 cm
26
258
2 - 0 - 0 |
|
185 cm
18
235
2 - 0 - 0 |
BJJ Blue Belt
Excellent boxer
Very quick |
|
BJJ White Belt
Decent boxing
Powerful |
|
| |
|
Ladies and gentlemen. This fight is 3 rounds, in the heavyweight division.
Introducing the fighter to my left, fighting out of the red corner.
With a record of 2 - 0 - 0, fighting out of New York, Harris Brown!
And introducing the fighter to my right, fighting out of the blue corner.
With a record of 2 - 0 - 0, fighting out of Montreal, Charlie Potthast!
The judges for this bout are Elvis Blanc, William Peck and Alec Ball.
The bell rings for round one and we are underway!
Potthast moves away from the strike by Brown.
Brown scores with a jab to the head.
Potthast looking to score a takedown here. Brown is defending well but Potthast drives through and ends up in Brown's guard.
Brown has improved his flexibility recently so we will have to see if he can use that to his advantage.
The ref warns both fighters not to hold the cage as they work up against the meshing.
Brown has managed to work for a loose triangle. I think Potthast should be able to defend this one pretty easily though. Oh, Brown has tightened it up now! Potthast should have reacted faster there - he's in big trouble and yes, he's tapped out! This one is all over!
Ladies and gentlemen, after 0:29 of round 1, we have a winner by way of Submission (Triangle). Harris Brown!
Our winner, Harris Brown, made sure he spent some time buttering up the crowd during his post fight interview, which will no doubt bring him a few more fans.
|
|
|
|
|
|
|
|
|
|
|
|
|
|
|
|
|
|
|
|
|
|
|
| S |
C
A |
G |
S |
C
B |
G |
|
S |
C |
G |
|
energy
A | B |
|
hype
A | B |
|
pop
A | B |
|
mgr
A | B |
|
FIGHT
RATING
100% |
|
|
|
|
|
|
|
|
|
|
