 |
The Island Season 12, 170 lbs, Round 4 PBP Commentary |
Co-main event
|
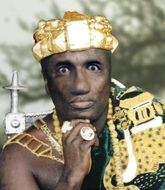
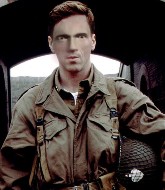
Coming up we have a welterweight MMA rules bout between Kwasi Kwong (ranked 428 p4p, 149 weight class) and Dick Winters (ranked 68 p4p, 24 weight class). Winters is bouncing up and down as he enters the arena, backed by All Along the Watchtower. Both fighters look pumped up here. Let's hope this is a good fight!
 |
|
 |
| 180 cm
20
171
12 - 0 - 0 |
|
183 cm
27
161
14 - 4 - 0 |
Good wrestling
Solid boxing
Granite chin |
|
Good wrestler
Basic striking
Granite chin |
|
| |
|
Ladies and gentlemen. This fight is 3 rounds, in the welterweight division.
Introducing the fighter to my left, fighting out of the red corner.
With a record of 12 - 0 - 0, fighting out of The Island, Kwasi Kwong!
And introducing the fighter to my right, fighting out of the blue corner.
With a record of 14 - 4 - 0, fighting out of The Island, Dick Winters!
The judges for this bout are David Hoff, Dirk Anderson and Sandra Marshall.

The bell rings for round one and we are underway!
Winters tries to close the distance and clinch up against the cage but Kwong paws at him with a jab and circles away.
Winters blocks a jab.
Kwong swings away but doesn't land with a series of punches.
Kwong moves out of the way of the counter high kick fromWinters.

A momentary lapse in concentration from Kwong enables Winters to shoot in and score with a neat double leg. Kwong manages to secure a closed guard as the fighters hit the mat.
Kwong looking to sweep here. No luck so far.
Kwong keeping full guard, as Winters tries to pass.
Winters in full guard, throwing the ground and pound. No damage this time.
Winters wants to pass the guard but Kwong is keeping the position.
Winters trying to control but Kwong is working from the bottom.
We've had a slow start to the round here - hopefully the action picks up.
Kwong looking to hit a scissor sweep but Winters is one step ahead there.

That's one minute gone in the round.
Winters passes Kwong's right leg, so he's now in half guard.
Winters prevents Kwong from improving his position.
Kwong moves his hips nicely and gets into full guard.
Kwong not looking particularly offensive just at the moment.
The ref warns both fighters not to hold the cage as they work up against the meshing.
Kwong keeping full guard, as Winters tries to pass.
Winters wants to control from the top but Kwong keeps moving.

That's two minutes gone in the round.
A lull in the action here being met with boos from the crowd.
Winters looking to pass the guard.
Winters controlling from the guard. I say controlling but really, he's stalling.

The referee decides to stand the fighters back up.
Dick Winters seems to be the more aggressive standup fighter in this bout.
Winters shoots in and drives through. Kwong sprawls well.
Kwong throws a wild combination but nothing lands.
Winters drops down looking to force a counter takedown but Kwong defends it well.
Winters changes levels and looks for a double leg takedown. Kwong tries to avoid it but Winters manages to keep hold of a leg and drag Kwong to the ground. Kwong escapes though and pops straight back up to his feet.
Kwong pushes forward with a 1-2 combination that forces Winters back to the cage. Kwong follows up with a solid lead hook to the liver.
Kwong scores with a jab to the jaw of his opponent.
Winters shoots in looking for a double leg takedown. Kwong defends it nicely.
Kwasi Kwong has stuffed three takedown attempts in the round now. That's going to take a lot out of Dick Winters.
Kwong stuns Winters with a nice body shot, before stepping back out of range.
Kwong moves into range and throws a lovely three punch combination.

That's three minutes gone in the round.
Kwong throws a hook but Winters blocks it.
Kwong avoids the clinch attempt nicely.
Kwong scores with a jab.
Winters on the wrong end of an overhand right that came out of nowhere.
Winters tries to drive through with a takedown attempt but Kwong defends well and Winters ends up having to push Kwong into the cage where they will battle it out in the clinch.
Kwong is looking to counter with a shot to the body.
Kwong comes forward and lands a shot to the body, then darts back out of range.
Kwong pushes forward with a 1-2 combination that forces Winters back to the cage. Kwong follows up with a solid lead hook to the liver.
Winters fails with a takedown attempt from distance.
A quick step to the side and Kwong tries to counter with a shot to the body but it doesn't connect.
Winters misses with a takedown attempt. He shot from a bit too far out.
Kwong scores with a shot to the body.
Kwong lands with a hook. Winters tried to avoid it but it clipped the top of his head.
The crowd are loving this. Great action here.
Winters walks into a straight right hand from Kwong.
Winters shoots in looking for a takedown. Kwong tries to sprawl out of it but Winters keeps driving through. The fighters are pinned against the cage. Kwong manages to get underhooks and after a bit of a struggle, circles away and we're back to standing.
Kwong lands with a cross.
Kwong scores with the left hand. Winters knows he should have avoided that one.
Winters takes one on the chin but keeps coming.
Kwasi Kwong is looking to keep the fight on the feet at all costs.

That's four minutes gone in the round.
Kwong jabs Winters right on the nose. Winters blinks but takes it well.
 Winters is rocked! Winters is rocked!
Wow, both these guys are really going for it!
Kwong misses with a two punch combination.
Kwong keeps the fight standing with a nice sprawl.
Kwong lands a jab to the nose.
Kwong fakes a head shot and lands one to the body.
Kwong ducks down and throws a hook to the body but Winters moves away.
Kwong missing with a left hand there. Winters was out of range so wasted energy throwing that one.
Winters wants to clinch up but Kwong keeps it at a distance.
Winters wants to clinch up but Kwong keeps it at a distance.
Kwong lands with a straight right. Winters didn't see that one coming.
Kwong jabbing away but nothing is landing.
Kwong lands a nice shot that snaps Winters's head back.
Winters is looking to take this fight into the clinch.
Winters avoids the body shot from Kwong.
Kwong pushing out the jab but it's not landing.
Kwong throws a jab when Winters was well out of range.
Winters takes a jab right on the kisser.
Winters scores with a takedown into Kwong's guard.
And that is the end of the round. The fighters go back to their corners.
Kwasi Kwong dominated that round.
That's the end of the interval. I'm sure that seemed a lot quicker than a minute for our two fighters! Back to the action.


Winters moves into range and clinches up with Kwong.
Winters lands on the inside with an uppercut.
Winters gets a trip takedown into half guard.
Kwong has improved his flexibility recently so we will have to see if he can use that to his advantage.
Winters is pressing down on Kwong's thigh, looking to free his foot. Kwong is holding on for now.
Winters passes into side control, despite Kwong's attempt to control the position.
Winters working away.
The fighters are pressed up against the cage, both looking to find a bit of space to work.
We've had a slow start to the round here - hopefully the action picks up.
Kwong prevents Winters from improving position.
Winters is looking to take a break and control but Kwong is keeping him honest, looking to work from the bottom.
That's one minute gone in the round.
You can see the frustration on Kwong's face, being in this tough position on the bottom.
Winters wants to control for a moment but Kwong uses the opportunity to move back to half guard.
Kwong tries to roll over but Winters keeps him under control.
Winters throwing shots but Kwong is blocking nicely.
That's two minutes gone in the round.
The crowd are hurling abuse towards the fighters... You can hardly blame them though because there isn't a lot going on in the fight.

Kwong is defending against the submission attempts here by Winters.
Winters is working hard to pass the guard. He's done it - he's now in full mount! Trouble for Kwong!
Kwong holding onto his opponent's waist for dear life, as Winters tries to land some strikes to get him to release his grip.
Kwong can't escape the position.
Winters wants to control the pace but Kwong is squirming around nicely.
Winters with some aggressive grappling here. He's looking for submissions here, rather than waiting for the opportunity to counter.
That's three minutes gone in the round.
Kwong keeping his composure momentarily, calmly looking to get back to half guard.
Winters thowing shots but they're missing.
Winters misses with a series of strikes from mount. He'll no doubt be working on his ground and pound when he gets back to the gym.
Kwong is desperately trying to get back to half guard.
Kwong blocking the ground and pound.
That's four minutes gone in the round.
A lull in the action here being met with boos from the crowd.
Winters looking to control but Kwong is working nicely, looking to advance position himself.
Kwong is really dominating this fight. Is there anything that Winters can do to turn this around?
Winters fails to take his opponent's back.
Kwong has given up his back here.
Winters looking for the choke but no joy.
Boooooooooooooooooooo!!! God, this has been a terrible round. Come on you two, sort yourselves out!
Kwong fending off the submission attempt from Winters.
And that is the end of the round. The fighters go back to their corners.
Dick Winters showed his class in that round. I'd imagine he'll take it on all the scorecards.
That's time! Kwong's corner gives him a slap on the ass as he gets ready to fight. Let's hear some noise people - this is the final round!

Winters has a takedown stuffed.
Winters has his head snapped back a nice jab. A little nod from Winters there as he acknowledges the shot.
The fight stays on the outside here - Winters looks like he's thinking about clinching though.
Some wild striking there from Kwong.
Winters looks shocked there as he takes a right hand to the temple.
Winters uses good footwork to avoid the strikes from Kwong.
Kwong misses with a double jab.
Winters is looking to take this fight into the clinch.
Kwong stuffs the takedown.
We've had a slow start to the round here - hopefully the action picks up.
Winters closes the distance and clinches up with Kwong, looking for a takedown. Winters pushes Kwong against the cage but Kwong circles to the side and manages to break the clinch.
Kwasi Kwong has stuffed three takedown attempts in the round now. That's going to take a lot out of Dick Winters.
Winters shoots and misses
and Kwong counters with a crisp hook to the side of the head.
Winters walks into a jab.
Kwong connects nicely with a jab. Noted by the judges no doubt.
Dick Winters is looking to throw some combinations by the looks of things.
This is a great period of action - very entertaining stuff!
Winters staying out of range there.
Kwong lands a nice looking body shot.
Kwasi Kwong is winning the standup battle so far.
Kwong connects with a jab.
That's one minute gone in the round.
Jab, jab by Kwong - just one landing.
Winters is still on wobbly legs! Can Kwong finish him?
Winters tries to drive through with a takedown attempt but Kwong defends well and Winters ends up having to push Kwong into the cage where they will battle it out in the clinch.
Kwong walks forward and throws a big overhand right! Winters drops to the floor like a sack of potatoes! Kwong swarms on him with more punches until the referee wrestles him away from Winters's unconscious body! Wow, that was brutal!
Ladies and gentlemen, after 1:12 of round 3, we have a winner by way of TKO (Strikes). Kwasi Kwong!
Our winner, Kwasi Kwong, made sure he spent some time buttering up the crowd during his post fight interview, which will no doubt bring him a few more fans.
|
|
|
|
|
|
|
|
|
|
|
|
|
|
|
|
|
|
|
|
|
|
|
| S |
C
A |
G |
S |
C
B |
G |
|
S |
C |
G |
|
energy
A | B |
|
hype
A | B |
|
pop
A | B |
|
mgr
A | B |
|
FIGHT
RATING
57% |
|
|
|
|
|
|
|
Main event
|
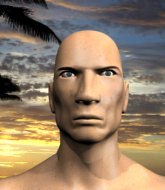
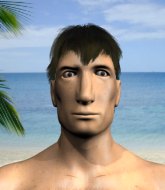
Coming up we have a welterweight MMA rules bout between Maurice Tillet (ranked 134 p4p, 438 weight class) and Auric Gallahad (ranked 22 p4p, 69 weight class). Gallahad is bouncing up and down as he enters the arena, backed by Go to War. I can't wait for this one - let's get the fighter introductions out of the way and get this one started!
 |
|
 |
| 178 cm
27
183
13 - 2 - 0 |
|
170 cm
20
170
9 - 1 - 0 |
Good wrestling
Counter fighter
Cardio machine |
|
Good wrestler
Basic striking
Good gas tank |
|
| |
|
Ladies and gentlemen. This fight is 3 rounds, in the welterweight division.
Introducing the fighter to my left, fighting out of the red corner.
With a record of 13 - 2 - 0, fighting out of The Island, Maurice Tillet!
And introducing the fighter to my right, fighting out of the blue corner.
With a record of 9 - 1 - 0, fighting out of The Island, Auric Gallahad!
The judges for this bout are Sandra Marshall, David Hoff and Peter Branson.
The bell rings for round one and we are underway!
A momentary lapse in concentration from Tillet enables Gallahad to shoot in and score with a neat double leg. Tillet manages to secure a closed guard as the fighters hit the mat.
Gallahad working some strikes from top position.
Tillet keeping moving, preventing Gallahad from controlling successfully.
Gallahad won't allow Tillet to sweep him here.
Gallahad pushes down on Tillet's leg and manages to get into half guard.
Gallahad is trying to work for a kimura. This could be trouble! No, Tillet has managed to free his arm - good work.
Gallahad takes advantage of the dominant position to land a couple of big hammer fists.
Tillet's coaches at have been working on his defensive grappling in preparation for this fight so let's see if he can get out of this tricky position.
We've had a slow start to the round here - hopefully the action picks up.
Gallahad trying to control the action but Tillet is working from the bottom.
Tillet keeping control of the position.
Gallahad is looking for a kimura here.
That's one minute gone in the round.
Tillet regains full guard. Nicely done.
Gallahad tries to free his leg and advance position but Tillet is retaining full guard.
Gallahad wants to control from the top but Tillet keeps moving.
Tillet working a defensive guard here.
Tillet preventing the ground and pound from doing any damage.
Gallahad has the superior BJJ but he's also working some ground strikes into his gameplan.
Tillet keeping moving, preventing Gallahad from controlling successfully.
Gallahad stands up and looks to throw the legs aside to pass to side control. Tillet swivels though and keeps the full guard.
That's two minutes gone in the round.
A few boos can be heard. I'm sure they will multiply if the fighters don't pick up the pace.
Gallahad stopping the sweep attempt from Tillet.
Gallahad looking to sit in guard and control but Tillet gets the butterfly guard and sweeps. He's now in the guard on the top.

The fighters are starting to get a bit slippery now, which will make submissions a bit more difficult.
Gallahad throws his legs up looking to secure a triangle. Oh, that looks pretty tight, I gotta say! Tillet escapes and throws Gallahad's legs to the side, diving into side control!
Tillet working away.
Gallahad tries to control but Tillet manages to take his back.
Gallahad manages to reverse the position and now he's in Tillet's guard. Nice work there by Gallahad.
Gallahad lands a couple of decent looking shots.
Gallahad is stalling in the full guard.
That's three minutes gone in the round.
Tillet is pulling down on Gallahad's head to control his posture.
Tillet is trying to control the position but Gallahad postures up.
Gallahad trying to control the position from guard on top but Tillet is wriggling around, looking for whatever he can.
Tillet is doing well to control the posture of his opponent and prevent any damage.
Gallahad trying to control the position from guard on top but Tillet is wriggling around, looking for whatever he can.
The fighters are pressed up against the cage, both looking to find a bit of space to work.
Gallahad slows down the pace of the fight for a moment. He'll need to remain active if he doesn't want to see the fight stood back up.
That's four minutes gone in the round.
A few boos can be heard. I'm sure they will multiply if the fighters don't pick up the pace.
Gallahad has gone for a leg lock! Tillet slips out almost immediately though and dives into Gallahad's guard.
Gallahad trying to control the position.
Gallahad is looking for a guillotine. You can't force these things though and Tillet defends well.
Gallahad looking for subs off his back but Tillet has passed one foot through into half guard.
Gallahad looking for submissions from an awkward position here.
Boooooooooooooooooooo!!! God, this has been a terrible round. Come on you two, sort yourselves out!
Tillet perhaps working for something from half guard, or maybe not. It looks like he's just sitting there.
And that is the end of the round. The fighters go back to their corners.
Auric Gallahad dominated that round.
The referee calls time. The cornermen exit stage left and we're back to business.
Gallahad ducks under a wild hook from Tillet.
Gallahad looks for a takedown but Tillet sprawls well.
A telegraphed right hand from Tillet misses the target.
Gallahad darts in looking for a takedown but Tillet gets double underhooks and turns Gallahad into the cage.
Gallahad tries to score a power double leg takedown but Tillet sees that one coming and sprawls well. That will dishearten Gallahad somewhat.
Tillet is looking to counter punch.
Maurice Tillet has stuffed three takedown attempts in the round now. That's going to take a lot out of Auric Gallahad.
Gallahad scores with a takedown into Tillet's guard.
Gallahad throwing strikes from guard but Tillet blocks nicely.
We've had a slow start to the round here - hopefully the action picks up.
Tillet striking off his back but it's not causing Gallahad any problems.
The ref warns both fighters not to hold the cage as they work up against the meshing.
Tillet manages to sweep nicely, so he's now on top. Gallahad manages to get himself to full guard.
That's one minute gone in the round.
Gallahad controlling the position.
Tillet with a couple of shots to the head there. Not particularly brutal.
Gallahad working away from the bottom but not quite defensive enough there because Tillet has passed into half guard!
Gallahad is trying to defend against the ground and pound but Tillet scores with a couple of nice shots.
Gallahad trying to control but Tillet postures up.
Tillet working the head and body with strikes.
Auric Gallahad has got the better of the ground game so far.
Tillet missing with the ground and pound from half guard.
Gallahad looking for submissions from an awkward position here.
Tillet winds up and cracks Gallahad with a swinging punch to the side of the head.
Tillet is trying to control the action in half guard but Gallahad is working away on the bottom, looking perhaps to get back to full guard.
That's two minutes gone in the round.
Gallahad looking for submissions off his back.
Tillet tries to pass to full mount but Gallahad defends it.
Tillet seems very keen to just sit and control from half guard but Gallahad does not like that idea so much and is remaining active off his back.
Gallahad has found himself in a tricky position here. He's been working his transitions in training so let's see if he can work his way out of it.
Gallahad trying to control but Tillet postures up.
Gallahad tries to get to full guard but Tillet has control of the leg.

Tillet seems to be looking for submissions.
Gallahad is looking to sinch up a guillotine here but Tillet pulls his head out easily.
Gallahad trying to control here.
That's three minutes gone in the round.
Gallahad is looking to sinch up a guillotine here but Tillet pulls his head out easily.
Tillet sitting in half guard, looking to land shots. Gallahad defending well though.
Gallahad wants to control but Tillet is keeping busy.
Gallahad wants to get back to full guard but Tillet has passed into side control.
Gallahad is looking to slip a leg under and get half guard but Tillet is one step ahead and moves to full mount!
Gallahad is in all sorts of trouble here.
Tillet fakes a shot to the body and cracks his opponent in the head. Nice ground and pound there!
Tillet sitting in mount, just looking to control for the moment.
Gallahad working to try and regain half guard.
That's four minutes gone in the round.
Gallahad wants to hold on but Tillet pushes him away.
Tillet tries to control but Gallahad wriggling away.
Tillet with the ground and pound from mount.
Tillet takes a little breather and maintains the position. The referee will be looking for him to stay active from such a dominant position though.
Tillet is really dominating this fight. Is there anything that Gallahad can do to turn this around?
Gallahad is wriggling around trying to escape.
The crowd thankful this round is nearly over.
Tillet controlling his opponent.
Tillet with a couple of short strikes.
And that is the end of the round. The fighters go back to their corners.
Maurice Tillet dominated that second round.
That's the end of the round. The referee orders the cornermen out of the cage so we can get back down to business. Let's get this one finished - here comes the final round!
Tillet connects with a jab.
Tillet cracks Gallahad with a nice right hand that draws applause from the crowd.
Gallahad tries to score a power double leg takedown but Tillet sees that one coming and sprawls well. That will dishearten Gallahad somewhat.
Gallahad fails with a rather predictable takedown attempt.
Tillet throws a big counter combination but Gallahad scrambles out of danger and avoids any damage.
Gallahad has his takedown stuffed
and Tillet counters with a lovely straight right hand!
Maurice Tillet has stuffed three takedown attempts in the round now. That's going to take a lot out of Auric Gallahad.
Gallahad shoots in but Tillet avoids the takedown attempt easily.
Maurice Tillet is looking to throw some combinations by the looks of things.
We've had a slow start to the round here - hopefully the action picks up.
Gallahad will have to do better than that with his takedown attempts.
Gallahad changes levels and looks for a double leg takedown. Tillet tries to avoid it but Gallahad manages to keep hold of a leg and drag Tillet to the ground. Tillet escapes though and pops straight back up to his feet.
Tillet stuffs the takedown attempt from Gallahad. Gallahad gets slowly back to his feet.
Gallahad tries to shoot in for a takedown. He's got hold of a leg but Tillet swivels and escapes.
That's one minute gone in the round.
Tillet throws a lazy right hand but Gallahad sees it coming a mile off and sidesteps it easily.
Gallahad misses with a takedown attempt - Tillet sprawls well and throws a nice strike on the way out which just misses.
Gallahad takes a big intake of breath there - he's definitely tired.
Gallahad with a poor takedown
and Tillet counters with a left and a right that stings Gallahad.
No luck with that takedown attempt from Gallahad.
Nice takedown defense from Tillet. No joy for Gallahad on that attempt.
Gallahad shoots in for a takedown but Tillet shows good takedown defense there and keeps this one on the feet.
Maurice Tillet is winning the standup battle so far.
Gallahad ducks under an overhand right and circles away with a smile on his face.
Tillet sets himself, and Gallahad steps forward looking for the clinch! Tillet avoids it this time.
Gallahad shoots in but Tillet avoids the takedown attempt easily.
Tillet swung with a counter right hand that didn't connect.

Tillet drops down and drives through with a powerful takedown into guard.
Tillet throws a big elbow that misses.
Tillet got a little sloppy there for a moment and Gallahad has worked his way into a loose triangle - can he finish it?! No, Tillet has managed to get both his arms back between Gallahad's legs - danger averted.
Gallahad trying to control the position.
That's two minutes gone in the round.
Tillet looking to control the position here, rather than advance.
Tillet trying to control the position from guard on top but Gallahad is wriggling around, looking for whatever he can.
Gallahad looking for a sweep. Not yet Gallahad, not yet.
Tillet landing some decent shots from guard.
We've seen a great period of action over the last minute or so - credit to both fighters for going all out!
Gallahad has an active guard here but Tillet has managed to pass into half guard.
Gallahad is working for an escape here. He's hooked one of Tillet's legs and he's managed to sneak out and take Tillet's back!
That's three minutes gone in the round.
Gallahad is looking to control Tillet but Tillet is wriggling around and keeping busy.
Tillet trying to control the position but Gallahad manages to sink in the hooks.
Tillet is defending well here and trying to improve his position.
Gallahad is staying calm and holding on to the back position, whilst working on a rear naked choke. Tillet is defending well though. Gallahad let's go of the attempt for now.
Tillet tries to escape the position.
Tillet is displaying good submission defense - not really looking in danger of submitting to the rear naked choke at the moment. That could change in an instant of course if Gallahad gets his way!
That's four minutes gone in the round.
Gallahad is trying to stick to Tillet's back but Tillet is turning into Gallahad. He's managed to reverse the position - now he's in Gallahad's guard. Polite applause from the crowd in appreciation of some nice Jiu Jitsu by Tillet.
Gallahad looking for submissions off his back, moving his hips, looking for an opening.
Gallahad looking to control.
Tillet working some strikes from top position.
Gallahad throwing his legs up looking for a triangle.
Tillet trying to control but Gallahad is working from the bottom.
Tillet trying to land body shots but he keeps hitting the mat.
Auric Gallahad has stepped it up - he knows he needs a finish here!
Maurice Tillet is fighting for a decision here - he's started to take the cautious approach.
Gallahad has an active guard here but Tillet has managed to pass into half guard.
And that's the end of the fight!
Maurice Tillet showed his dominance in that final round.
Well Tillet has outscored his opponent in every aspect of the fight today. Only a scarily incompetent judge or two will keep him from a well deserved win... Over to the ring announcer for the scorecards.
Ladies and gentlemen, after 3 rounds of action, we go to the scorecards for a decision.
Judge Sandra Marshall scores the fight for Maurice Tillet!
Judge David Hoff scores the fight for Maurice Tillet!
Judge Peter Branson scores the fight for Maurice Tillet!
Maurice Tillet wins by unanimous decision!
|
|
|
|
|
|
|
|
|
|
|
|
|
|
|
|
|
|
|
|
|
|
|
| S |
C
A |
G |
S |
C
B |
G |
|
S |
C |
G |
|
energy
A | B |
|
hype
A | B |
|
pop
A | B |
|
mgr
A | B |
|
FIGHT
RATING
37% |
|
|
|
|
|
|
|
|
|
|
