 |
EFC 29 PBP Commentary |
Undercard bout
|
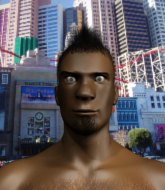
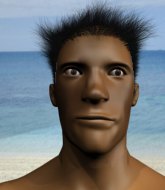
Coming up we have a featherweight MMA rules bout between Giancarlo Ferrari (ranked 23636 p4p, 23993 weight class) and Nick Law (ranked 456 p4p, 496 weight class). Ferrari comes into the arena with Me in honey blaring out of the sound system. Nick Law will no doubt be looking to use his reach advantage to good effect.
 |
|
 |
| 167 cm
20
141
0 - 4 - 0 |
|
185 cm
22
145
1 - 2 - 0 |
BJJ Purple Belt
Solid Muay Thai
Granite chin |
|
BJJ Brown Belt
Counter fighter
Solid chin |
|
| |
|
Ladies and gentlemen. This fight is 4 rounds, in the featherweight division.
Introducing the fighter to my left, fighting out of the red corner.
With a record of 0 - 4 - 0, fighting out of Helsinki, Giancarlo Ferrari!
And introducing the fighter to my right, fighting out of the blue corner.
With a record of 1 - 2 - 0, fighting out of Los Angeles, Nick Law!
The judges for this bout are Don Winkell, Jack Bonds and Timothy Bukovac.

The bell rings for round one and we are underway!
Ferrari wants to clinch.
Law unleashes a big counter combination but Ferrari bobs and weaves and avoids any damage.
Ferrari tries to clinch but Law moves out of range.
As Ferrari backs off Law throws a huge counter combo but Ferrari manages to avoid it all.
Ferrari tries to close the distance and clinch up against the cage but Law paws at him with a jab and circles away.
Law unleashes a big counter combination but Ferrari bobs and weaves and avoids any damage.
We've been told by Ferrari's head coaches at EFC Gym that he's been working on his takedown defense in preparation for this fight.
Sloppy strikes from Ferrari. Those never looked like landing.
Despite the aggression on Law's face he doesn't fully commit to the counter.
Ferrari misses with a series of wild punches.
Ferrari fails with a takedown attempt.
Law is looking for the big counter here.
We've had a slow start to the round here - hopefully the action picks up.
Ferrari tries a switch kick but it misses it's target.
Law lets it all go there with a big combo counter but none of the punches connected.
Law avoids the clinch attempt nicely.
Law is loading up here, looking for a big counter of his own.

That's one minute gone in the round.
Ferrari moves into range and throws a lovely three punch combination.
This fight brought to you by 5M nutrition - it's mmmmm tasty. Nice jab by Ferrari.
Ferrari tries to clinch up.
Ferrari wants to clinch up but Law keeps it at a distance.
As Ferrari backs off Law throws a huge counter combo but Ferrari manages to avoid it all.
Law swats away the attempt to clinch by Ferrari.
Law takes a thudding leg kick, right into the meat of the thigh.
A thudding body kick lands there by Ferrari!
Ferrari tries to clinch there but Law circles away.
Law is loading up here, looking for a big counter of his own.
Law is a painfully thin specimen of a man. You do wonder whether a good body kick would snap him clean in two.
Law has his front leg slapped to the side - a nice low kick landing there from Ferrari.
Ferrari tries to clinch but Law moves out of range.

That's two minutes gone in the round.
Ferrari wants to clinch.

Law tries to keep at a distance but Ferrari has taken the fight into the clinch.
Law can't get the takedown.

Ferrari escapes the clinch and we're back to striking.
The crowd are loving this. Great action here.
Ferrari fails in his attempt to clinch.
Ferrari throws a nice outside leg kick.
A low kick lands for Ferrari.

That's three minutes gone in the round.
Ferrari doesn't manage to clinch there - Law circles away.
Despite the aggression on Law's face he doesn't fully commit to the counter.

Ferrari throws a head kick that lands with a deafening thwack! The crowd roars as Law stumbles backwards and falls to the mat. Ferrari follows into mount!
 It looks like Nick Law has been cut. It looks like Nick Law has been cut.
Law is in all sorts of trouble here.
Law slips a leg in and gets back to half guard.
Wooooo! Give it up for these two warriors! They are putting on a show!
Law moves his hips nicely and gets into full guard.

Law looking for submissions from the bottom here. Moving his hips around, possibly looking for an armbar.
Law has an omoplata and is looking to use it perhaps as a submission or perhaps to transition. Ferrari is in a bit of discomfort here, but he's managed to free himself and has dived into side control! That didn't work out too well for Law.
Law looks winded!
Ferrari gets to mount! Law was on the offensive and wasn't defending properly.
Ferrari content just to control the position here.

That's four minutes gone in the round.
Law is trying to escape the mount.
Ferrari controlling his opponent.
Law is working to get back to half guard.
And that is the end of the round. The fighters go back to their corners.
Giancarlo Ferrari dominated that round.
The cut man is working on Nick Law's cut.
That's the end of the round. The referee orders the cornermen out of the cage so we can get back down to business.

Ferrari fails with a takedown attempt.
Law unleashes a big counter combination but Ferrari bobs and weaves and avoids any damage.
Ferrari lands with a nice low kick. That'll leave a bruise.
Ferrari tries to clinch up against the cage, rushing in to close the distance. Law manages to break the clinch and circles back to the middle of the mat.
Law is looking for the big counter here.
Ferrari lands a high kick!
Ferrari tries to close the distance and clinch but Law swats him to one side with an open hand palm strike and circles away.
Law throws a counter combo.
Ferrari tries to clinch up against the cage, rushing in to close the distance. Law manages to break the clinch and circles back to the middle of the mat.
We've had a slow start to the round here - hopefully the action picks up.
Ferrari fails in his attempt to clinch.
Law is looking for the big counter here.
Giancarlo Ferrari is winning the standup battle so far.
The fight stays on the outside here - Ferrari looks like he's thinking about clinching though.
Law lets it all go there with a big combo counter but none of the punches connected.
Ferrari lands with a nice combination. Law backs away looking to recover.
That's one minute gone in the round.
Good leg kick by Ferrari.
Left hook, right uppercut from Ferrari.
Ferrari tries to clinch but is not successful on this occasion.
Despite the aggression on Law's face he doesn't fully commit to the counter.
Ferrari tries to close the distance and clinch up but Law swats him away and circles back towards the center.
As Ferrari backs off Law throws a huge counter combo but Ferrari manages to avoid it all.
Law avoids the head kick by Ferrari.
Despite the aggression on Law's face he doesn't fully commit to the counter.
Ferrari moves in looking to clinch but Law pushes him off.
Law unleashes a big counter combination but Ferrari bobs and weaves and avoids any damage.
Ferrari doesn't manage to clinch there - Law circles away.
Ferrari throws a left that rocks Law and follows with a right that sends him tumbling to the canvas! Ferrari dives into side control, looking to finish! Can Law regain composure!
 Law is rocked! Law is rocked!
The crowd cheering loudly, showing their appreciation for the quality fight we're seeing here.

Ferrari has had enough of the ground for now and decides to stand.
Law is still on wobbly legs! Can Ferrari finish him?

Ferrari closes the distance and gets a double leg, slamming Law to the mat! Law manages to get full guard.
Law is breathing heavily.
That's two minutes gone in the round.
Ferrari is just sitting in guard, looking to avoid any submissions.
Law seems to have recovered his senses.
Ferrari is really dominating this fight. Is there anything that Law can do to turn this around?
Law is active off his back here, looking for submissions.
Giancarlo Ferrari overall seems to be getting the better of the ground position in the fight so far.
Ferrari avoids a guillotine attempt easily.
Law is working an open guard so Ferrari takes the opportunity to get back to his feet.
Ferrari turns his hip over beautifully as he lands a nice leg kick.
Ferrari is looking to take this fight into the clinch.
Law throws a counter combo.
That's three minutes gone in the round.
Ferrari misses with a double jab.
Giancarlo Ferrari seems to be the more aggressive standup fighter in this bout.
Ferrari thuds his shin into the meat of Law's side.
A jab-cross combination lands for Ferrari and sends Law crashing to the mat! Ferrari follows him down to the mat - Law regains half guard but he's not out of trouble yet!
Ferrari works his foot free and advances to mount.
Wooooo! Give it up for these two warriors! They are putting on a show!
Law is trying to escape the mount.
Ferrari sitting in mount, just looking to control for the moment.
Law working to try and regain half guard.
Ferrari sitting in mount, just looking to control for the moment.
That's four minutes gone in the round.
Law is trying to escape the mount.
Ferrari controlling his opponent.
Ferrari knows he needs to get back to his feet asap. He's simply no match for Law on the ground.
Law is desperately trying to get back to half guard.
And that is the end of the round. The fighters go back to their corners.
Giancarlo Ferrari dominated that second round.
The cut man is working on Nick Law's cut.
The fighters get back to their feet, the hooter sounds and we're back to the action!

A chopping leg kick lands by Ferrari.
Law blocks a head kick by Ferrari.
Ferrari tries to clinch but is not successful on this occasion.
Ferrari throws a head kick that misses.
Law lets it all go there with a big combo counter but none of the punches connected.
Ferrari fails in his attempt to clinch.
Ferrari throws a right hand that Law ducks under and follows up with a left that Law also avoids with ease.
Law is loading up here, looking for a big counter of his own.
Ferrari wants to clinch up but Law keeps it at a distance.
Giancarlo Ferrari is looking to throw some combinations by the looks of things.
We've had a slow start to the round here - hopefully the action picks up.
Ferrari gets the takedown into side control.
Law is looking to regain half guard here but Ferrari keeps moving and retains side control.
Law is still trying to improve position.
Law takes a big intake of breath there - he's definitely tired.
That's one minute gone in the round.
Ferrari decides to stand up, so the ref orders Law to his feet.
Ferrari throws a combination. Law tries to block but a couple of punches get through.
A nice inside leg kick there by Ferrari. That's going to slow Law down.
Ferrari moves into range and lands a nice leg kick.
The fight stays on the outside here - Ferrari looks like he's thinking about clinching though.
Law unleashes a big counter combination but Ferrari bobs and weaves and avoids any damage.
Law circles away from the clinch attempt.
Ferrari tries to clinch but Law is having none of it.
As Ferrari backs off Law throws a huge counter combo but Ferrari manages to avoid it all.
That's two minutes gone in the round.
A solid leg kick lands there for Ferrari.
Ferrari closes the distance and scores a nice trip takedown into half guard. Law did well to prevent Ferrari getting side control.
The fighters are pressed up against the cage, both looking to find a bit of space to work.
Ferrari content to control rather than advance.

Ferrari is looking for a kimura but Law is holding onto that half guard position, so it's hard for Ferrari to get the leverage.
Ferrari wants to stand up but Law has a hold of him and won't allow it.
Law with the active half guard here but Ferrari passes nicely into side control.
We've seen a great period of action over the last minute or so - credit to both fighters for going all out!
Ferrari has had enough of the ground for now and decides to stand.
Ferrari lands a jab, followed by a cross and another cross, as Law backs up against the cage.
That's three minutes gone in the round.
Good leg kick by Ferrari.
Ferrari moves into range and clinches up with Law.
Ferrari prevents the takedown attempt.
Ferrari breaks the clinch.
Good leg kick by Ferrari.
A really sloppy takedown attempt there from Ferrari.
Ferrari lands with a thumping leg kick.
Law gets cracked there but stands up to it.
That's four minutes gone in the round.
An inside leg kick lands from Ferrari.
Ferrari tries to clinch up against the cage, rushing in to close the distance. Law manages to break the clinch and circles back to the middle of the mat.
Law unleashes a big counter combination but Ferrari bobs and weaves and avoids any damage.
Ferrari moves in looking to clinch but Law pushes him off.
Ferrari lands a leg kick that knocks Law off balance momentarily.
Ferrari drives through with a takedown into Law's guard. Let's see what he can do from the top position.
Law throws his legs up looking for a submission but Ferrari uses it to pass to side control.
The crowd cheering loudly, showing their appreciation for the quality fight we're seeing here.
Law is being controlled here.
Ferrari tries to move to mount but Law blocks the move with his legs.
Law is looking for a sweep.
Ferrari stands up and we're back to a striking position.
And that is the end of the round. The fighters go back to their corners.
Giancarlo Ferrari clearly takes that round.
The cut man is working on Nick Law's cut.
The corners get their ten second warning. Both fighters stand from their stools and stare each other down, ready to get back to the action. This is the final round!

Law circles away from the clinch attempt.
Law throws a counter combo.
The fight stays on the outside here - Ferrari looks like he's thinking about clinching though.
Law is looking for the big counter here.
Ferrari doesn't manage to clinch there - Law circles away.
Ferrari with a nice looking leg kick. You could hear that one land in a back row.
Sloppy strikes from Ferrari. Those never looked like landing.
Ferrari tries to clinch up against the cage, rushing in to close the distance. Law manages to break the clinch and circles back to the middle of the mat.
As Ferrari backs off Law throws a huge counter combo but Ferrari manages to avoid it all.
We've had a slow start to the round here - hopefully the action picks up.
Ferrari instigates a clinch.
Ferrari escapes the clinch and we're back to striking.
Ferrari fails in his attempt to clinch.
Ferrari lands a leg kick that knocks Law off balance momentarily.
That's one minute gone in the round.
Ferrari tries to close the distance and clinch up against the cage but Law paws at him with a jab and circles away.
Ferrari is looking to slow Law down with leg kicks.
Ferrari wants to clinch up but Law keeps it at a distance.
Ferrari takes the fight into the clinch.
Ferrari drags the fight down to the ground.
Ferrari bucks up whilst keeping hold of a body lock, managing to reverse the position. Now he's in top in Law's guard.

Ferrari is looking to stand up but Law won't let him.
Law looking for a guillotine here but Ferrari defends easily.
Law is absolutely dripping with sweat - he looks exhausted.
Ferrari seems content to control from guard here. He's going to have to remain active though if he doesn't want to get stood back up.
Ferrari might be looking to lock onto one of his opponent's long limbs for a submission, whilst we're on the ground.
That's two minutes gone in the round.
Law looking for a guillotine here but Ferrari defends easily.
Ferrari gets to his feet. Law looking to butt scoot but the ref puts an end to that. On your feet son!
Ferrari tries to clinch but Law is having none of it.
Law unleashes a big counter combination but Ferrari bobs and weaves and avoids any damage.
Ferrari scoring well with a low kick there.
Ferrari throws a head kick but Law moves out of range.
Ferrari tries to clinch but Law is having none of it.
Ferrari has taken the fight to the clinch.
That's three minutes gone in the round.
Ferrari breaks the clinch and we return to the middle of the mat.
Ferrari doesn't manage to clinch there - Law circles away.
Law is loading up here, looking for a big counter of his own.
Ferrari tries to clinch up but Law circles away and keeps his distance.
Law is loading up here, looking for a big counter of his own.
Ferrari rushes Law and pushes him back against the cage in a clinch.
Ferrari lands an elbow inside that Law shrugs off.
Ferrari drops to a knee looking for a takedown but Law gets the underhooks and prevents it.
Ferrari's corner calls for him to break the clinch, which he does.
Law takes a head kick and shrugs it off.
Ferrari tries to clinch but Law is having none of it.
Ferrari is trying hard to land a takedown here. Law sprawls well and keeps this one on the feet.
Law is loading up here, looking for a big counter of his own.
That's four minutes gone in the round.
Ferrari tries to clinch there but Law circles away.
A punch combination from Ferrari misses.
The fight stays on the outside here - Ferrari looks like he's thinking about clinching though.
Law is loading up here, looking for a big counter of his own.
Ferrari fails in his attempt to clinch.
As Ferrari backs off Law throws a huge counter combo but Ferrari manages to avoid it all.
Ferrari scores with a head kick.
Ferrari tries to clinch up.
Despite the aggression on Law's face he doesn't fully commit to the counter.
Giancarlo Ferrari is fighting for a decision here - he's started to take the cautious approach.
The crowd thankful this round is nearly over.
Ferrari tries to close the distance and clinch up against the cage but Law paws at him with a jab and circles away.
Ferrari tries to clinch but is not successful on this occasion.
Nick Law has stepped it up - he knows he needs a finish here!
Ferrari thuds his shin into the meat of Law's side.
And that's the end of the fight!
Giancarlo Ferrari showed his dominance in that final round.
Well Ferrari has outscored his opponent in every aspect of the fight today. Only a scarily incompetent judge or two will keep him from a well deserved win... Over to the ring announcer for the scorecards.
Ladies and gentlemen, after 4 rounds of action, we go to the scorecards for a decision.
Judge Don Winkell scores the fight for Giancarlo Ferrari!
Judge Jack Bonds scores the fight for Giancarlo Ferrari!
Judge Timothy Bukovac scores the fight for Giancarlo Ferrari!
Giancarlo Ferrari wins by unanimous decision!
Giancarlo Ferrari got down on his knees post fight and begged the management for a title shot. 'Please, I want that title shot so bad! Give it to me!'
|
|
|
|
|
|
|
|
|
|
|
|
|
|
|
|
|
|
|
|
|
|
|
| S |
C
A |
G |
S |
C
B |
G |
|
S |
C |
G |
|
energy
A | B |
|
hype
A | B |
|
pop
A | B |
|
mgr
A | B |
|
FIGHT
RATING
53% |
|
|
|
|
|
|
|
Undercard bout
|
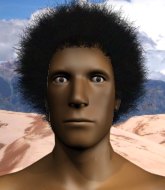
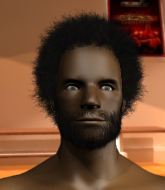
Coming up we have a middleweight MMA rules bout between Petr Amagov (ranked 24196 p4p, 23420 weight class) and Kuba Dog (ranked 645 p4p, 638 weight class). Kuba Dog will no doubt be looking to use his reach advantage to good effect.
 |
|
 |
| 184 cm
26
196
2 - 4 - 0 |
|
197 cm
22
188
0 - 7 - 0 |
BJJ Blue Belt
Basic striking
Experienced |
|
BJJ Blue Belt
Good kicks
Solid chin |
|
| |
|
Ladies and gentlemen. This fight is 4 rounds, in the middleweight division.
Introducing the fighter to my left, fighting out of the red corner.
With a record of 2 - 4 - 0, fighting out of London, Petr Amagov!
And introducing the fighter to my right, fighting out of the blue corner.
With a record of 0 - 7 - 0, fighting out of Rio de Janeiro, Kuba Dog!
The judges for this bout are Timothy Bukovac, Percy O'Donnell and Don Winkell.
The bell rings for round one and we are underway!
Dog is trying hard to land a takedown here. Amagov sprawls well and keeps this one on the feet.
Amagov throws a shot to the body.
Amagov stuffs the takedown attempt from Dog. Dog gets slowly back to his feet.
Dog is a painfully thin specimen of a man. You do wonder whether a good body kick would snap him clean in two.
Amagov works over Dog's head and body with a nice combination.
It looks like Kuba Dog has been cut.
Amagov lands a jab, followed by a cross and another cross, as Dog backs up against the cage.
Amagov closes the distance and lands a one-two.
Dog is rocked!
We've seen a great period of action over the last minute or so - credit to both fighters for going all out!
A swing and a miss from Dog.
Amagov looks to score with a combo but nothing lands.
And an attempted straight right on the counter from Dog! But no joy.
Amagov throws a series of punches but Dog avoids them all with ease.
Dog throws a nice looking combination but Amagov bobs and weaves to avoid any damage.
Amagov closes the distance and scores a nice trip takedown into half guard. Dog did well to prevent Amagov getting side control.
Dog is still in real trouble! Can Amagov finish him?
Amagov is working for a submission here. He's got hold of the far side arm and he's looking for a kimura. He's cranking on the arm and he's got it! Dog is tapping out! Ouch, that looked like it hurt!
Ladies and gentlemen, after 1:57 of round 1, we have a winner by way of Submission (Kimura). Petr Amagov!
|
|
|
|
|
|
|
|
|
|
|
|
|
|
|
|
|
|
|
|
|
|
|
| S |
C
A |
G |
S |
C
B |
G |
|
S |
C |
G |
|
energy
A | B |
|
hype
A | B |
|
pop
A | B |
|
mgr
A | B |
|
FIGHT
RATING
100% |
|
|
|
|
|
|
|
Undercard bout
|
Coming up we have a welterweight MMA rules bout between Lazarus Petrov (ranked 5679 p4p, 5985 weight class) and Titoxo Podric (ranked 589 p4p, 598 weight class). Lazarus Petrov looks tired to me. Hopefully he has got enough gas left in the tank to put in a good performance.
 |
|
 |
| 180 cm
26
165
1 - 1 - 0 |
|
176 cm
26
160
0 - 1 - 0 |
BJJ Blue Belt
Counter fighter
Intelligent |
|
Decent wrestler
Decent boxing
Heavy handed |
|
| |
|
Ladies and gentlemen. This fight is 4 rounds, in the welterweight division.
Introducing the fighter to my left, fighting out of the red corner.
With a record of 1 - 1 - 0, fighting out of St Petersburg, Lazarus Petrov!
And introducing the fighter to my right, fighting out of the blue corner.
With a record of 0 - 1 - 0, fighting out of New York, Titoxo Podric!
The judges for this bout are Jack Bonds, Percy O'Donnell and Don Winkell.
The bell rings for round one and we are underway!
Podric throws a one two combo.
Petrov throws a sloppy head kick and Podric moves out of range easily.
And Podric tries to counter it with a takedown but Petrov pushes his down on his head and steps out.
Podric scores with the left hand. Petrov knows he should have avoided that one.
Podric scores to the head and body with a nice combination!
Petrov is looking to land body kicks.
Petrov gets a clinch.

Podric breaks from the clinch.
Petrov lands a head kick. Podric smiles back at him and beckons him forward.
Petrov wants to clinch.
Podric drops down looking to force a counter takedown but Petrov defends it well.
That's one minute gone in the round.
Petrov looks to land a body kick but Podric moved away.
Podric feints a jab promting Petrov to slip. Podric then demonstrates his capabilities by jabbing again. Petrov slips again and ducks right into an uppercut.
Petrov tries to close the distance and clinch up against the cage but Podric paws at him with a jab and circles away.
Podric looks to land a combination but Petrov avoids it well.
It appears Petrov was looking to counter with a kick there.
Podric misses with a series of wild punches.
A head kick misses from Petrov.
Petrov looks to have improved his striking defense since last time we saw him fight.
Podric misses with the combination.
That's two minutes gone in the round.
Podric blocks a head kick by Petrov.
Petrov throws a right hand that Podric ducks under and follows up with a left that Podric also avoids with ease.
Podric tries a counter takedown but it's more of a dummy move, and he uses it to push himself away.
Podric throws a series of punches but Petrov moves out of range.
Petrov tries a switch kick but it misses it's target.
A head kick misses from Petrov.
Petrov is breathing heavily.
Petrov thows a leg kick but Podric checks it

and Podric counters with a nice shoot takedown that brings the fighters to the ground.
Wooooo! Give it up for these two warriors! They are putting on a show!
Petrov is looking to get back to his feet but can't, whilst Podric is controlling him.
Petrov preventing the ground and pound from doing any damage.
That's three minutes gone in the round.
Podric is frustrating his opponent with some stalling tactics from top position.
Podric must be cautious of submissions here, given that his opponent has the superior Jiu Jitsu.
Podric stands up over Petrov, holding his feet. He dives back in and lands a decent shot to the head.

Podric stands and steps away. Petrov gets to his feet too and we're back to the striking game.
Podric moves out of range as Petrov throws a body kick.
Podric feints the counter takedown.
Petrov dodges the punch combination from Podric.
That's four minutes gone in the round.
The crowd are hurling abuse towards the fighters... You can hardly blame them though because there isn't a lot going on in the fight.
A combination from Podric does no damage.
Podric lands a jab-cross combination.
Podric lands three nice shots there - that looked like it hurt!
 Petrov is rocked! Petrov is rocked!
I'm just looking down at my notes here and I see that.... oh! Podric has cracked Petrov with a big right, followed by a left! He's out on his feet! Podric lands another huge swinging hook and Petrov tumbles to the canvas! The ref dives in to save Petrov, before Podric can land any more shots!
Ladies and gentlemen, after 4:29 of round 1, we have a winner by way of KO (Punches). Titoxo Podric!
|
|
|
|
|
|
|
|
|
|
|
|
|
|
|
|
|
|
|
|
|
|
|
| S |
C
A |
G |
S |
C
B |
G |
|
S |
C |
G |
|
energy
A | B |
|
hype
A | B |
|
pop
A | B |
|
mgr
A | B |
|
FIGHT
RATING
36% |
|
|
|
|
|
|
|
Co-main event
|
Coming up we have a super heavyweight MMA rules bout between Ron Austin (ranked 24133 p4p, 4964 weight class) and Marley Bobby Ii (ranked 127 p4p, 96 weight class). Marley Bobby Ii acknowledges the crowd's support as he enters the cage.
 |
|
 |
| 200 cm
23
223
3 - 4 - 0 |
|
184 cm
24
154
1 - 1 - 0 |
Good wrestling
Basic striking
Granite chin |
|
BJJ Blue Belt
Decent boxing
Tends to cut |
|
| |
|
Ladies and gentlemen. This fight is 4 rounds, in the super heavyweight division.
Introducing the fighter to my left, fighting out of the red corner.
With a record of 3 - 4 - 0, fighting out of Los Angeles, Ron Austin!
And introducing the fighter to my right, fighting out of the blue corner.
With a record of 1 - 1 - 0, fighting out of Helsinki, Marley Bobby Ii!
The judges for this bout are Timothy Bukovac, Jack Bonds and Frank Antenori.
The bell rings for round one and we are underway!
Austin circles away from the clinch attempt.
Austin takes a shot right to the bread basket.
Bobby Ii throws a nice hook to the body that draws an oooh from the crowd.
Austin shoots in for a takedown. He's persisting with it as Bobby Ii sprawls well. Bobby Ii wins this battle and keeps the fight standing. Austin gets slowly back to his feet.
Bobby Ii scores with a jab to the jaw of his opponent.
Austin fails with a takedown attempt.
Austin dives in and grabs Bobby Ii's left leg, looking for a takedown. Bobby Ii pushes down on Austin's head and hops out.
That's three failed takedown attempts in the round for Ron Austin. That's going to take a lot out of him.
Austin feints and as Bobby Ii raises his hands in defense, Austin changes levels and drives through with a takedown into guard.
Bobby Ii bucks up whilst keeping hold of a body lock, managing to reverse the position. Now he's in top in Austin's guard.

Austin looking for a guillotine here but Bobby Ii defends easily.
Bobby Ii is looking to stand up but Austin won't let him.
That's one minute gone in the round.
Austin looking for submissions from the bottom here. Moving his hips around, possibly looking for an armbar.
Austin looking for a guillotine here but Bobby Ii defends easily.
Bobby Ii gets to his feet - Austin follows without any prompting.
Bobby Ii misses with a wild combination.

Bobby Ii has managed to clinch.
Austin turns his hips and lands a very nice judo throw into side control!
Bobby Ii tries to work a leg under to get back to half guard but Austin wriggles his own leg back out and remains in side control.
Bobby Ii is sneaking out the side here. He's bucked Austin off and has taken his back!
Bobby Ii stands up from back control! Strange decision that!
Austin gets his takedown attempt stuffed easily
and Bobby Ii counters with a right hand to the body.
That's two minutes gone in the round.
This is a great period of action - very entertaining stuff!
Bobby Ii lands with a good body shot.
Donk. Bobby Ii catches Austin right on the button with a cross.
Bobby Ii dips down and scores with a jab to the body.
Austin on the wrong end of a nice jab.
Bobby Ii has taken the fight to the clinch.
Austin drops down looking for an ankle pick but Bobby Ii pulls his leg out and moves away.
Bobby Ii is looking to clinch but Austin is avoiding it.
Austin looking to score a takedown here. Bobby Ii is defending well but Austin drives through and ends up in Bobby Ii's guard.
Austin is breathing heavily.
Austin stands up and looks to throw the legs aside to pass to side control. Bobby Ii swivels though and keeps the full guard.
Bobby Ii looking to sweep here. No luck so far.
Austin postures up.
That's three minutes gone in the round.
Bobby Ii looking to sweep here. No luck so far.
Austin trying to pass the guard but can't manage it just yet.
Austin is working hard here to advance position.
The fighters are going at a pretty good pace and they're both starting to sweat now.
The referee claps his hands together and tells the fighters to work.
We've been informed that Bobby Ii has been working hard on his conditioning in the buildup to the fight.
That's four minutes gone in the round.
My god... these two guys really need to pick up the pace or everyone will leave to go get a beer.
Bobby Ii looking to hit a scissor sweep but Austin is one step ahead there.

The referee has motioned to the fighters to stand back up.
Bobby Ii tries to clinch but Austin is having none of it.
Bobby Ii leaves Austin with his face pressed against the mat as he sprawls beautifully, defending against a solid takedown attempt.
Bobby Ii is throwing a lot of body shots here, looking to wear down Austin rather than just go for the knockout.
Bobby Ii pushes Austin up against the cage in a clinch.
Austin drops to a knee looking for a takedown but Bobby Ii gets the underhooks and prevents it.
Bobby Ii softening up his opponent with strikes, against the cage.
Bobby Ii tries a knee to the head but Austin blocks it.
A short uppercut from Bobby Ii.
Nice body punch from Bobby Ii.
Bobby Ii is fighting off a takedown attempt but Austin is just too persistent for him and manages to trip Bobby Ii to the mat. Bobby Ii regains guard as soon as the fighters hit the mat.

Bobby Ii has his feet on Austin's hips. He pushes off and gets to his feet. Nice work.
A punch combination from Bobby Ii misses.
And that is the end of the round. The fighters go back to their corners.
Marley Bobby Ii dominated that round.
The minute break is over - no more time for sponges and pep talks - back to the action!
Bobby Ii scores with a punch to the head.
Austin shoots in for a takedown - he's clinched up with Bobby Ii but Bobby Ii pushes him off and we're back to square one.
Austin fails with a takedown attempt.
Bobby Ii works Austin's body with a nice hook.
A really sloppy takedown attempt there from Austin.
Bobby Ii drops down looking to force a counter takedown but Austin defends it well.
That's three failed takedown attempts in the round for Ron Austin. That's going to take a lot out of him.
Bobby Ii connects with a good right hand that stumbles Austin. Austin circles away out of range and recomposes himself.
We've had a slow start to the round here - hopefully the action picks up.
Danga de danga de dang - Bobby Ii scores with a four punch combination!
Ron Austin is looking to throw some combinations by the looks of things.
Austin shoots for a double leg takedown but Bobby Ii sprawls well. He's pushed Austin's face into the mat and manages to get back to his feet relatively easily.
Bobby Ii lands three nice shots there - that looked like it hurt!
Both fighters are absolutely exhausted here.
Austin with poor footwork there. He got himself in a bit of a tangle, enabling Bobby Ii to score with a decent uppercut.
We've seen a great period of action over the last minute or so - credit to both fighters for going all out!
Bobby Ii tries to clinch but is not successful on this occasion.
Austin avoids the clinch attempt nicely.
That's one minute gone in the round.
Left hook, right uppercut from Bobby Ii.
Bobby Ii jabs Austin right on the nose. Austin blinks but takes it well.
Bobby Ii is a painfully thin specimen of a man. You do wonder whether a good body kick would snap him clean in two.
Austin throws a looping left and ducks down for a takedown. He's got his arms around Bobby Ii's waist but Bobby Ii gets an underhook and avoids the takedown by throwing Austin off to one side.
Ron Austin seems to be the more aggressive standup fighter in this bout.
Bobby Ii scores with a punch to the gut of his opponent.
Marley Bobby Ii seems to be getting the better of the standup.
Bobby Ii stalks Austin and leaps in with a furious combination of punches. Uppercuts and crosses smash into Austin's face. Austin staggers backwards, shaken.
Bobby Ii lands a jab.
Bobby Ii throws a right hand that Austin ducks under and follows up with a left that Austin also avoids with ease.
Bobby Ii misses with a double jab.
Bobby Ii forces Austin back against the cage and clinches.
We've seen a great period of action over the last minute or so - credit to both fighters for going all out!
Austin has dropped down and is looking to force the takedown but it's defended by Bobby Ii after a bit of a struggle.
Austin has double underhooks and is working for a body lock takedown. He's got it. The fighters land in half guard but Bobby Ii regains guard immediately.

Bobby Ii pushes Austin off and scrambles back to his feet.
Bobby Ii thuds a left hand into Austin's body.
That's two minutes gone in the round.
Bobby Ii jabs at Austin's body.
Austin gets tackled into the cage by Bobby Ii. Bobby Ii maintains the clinch.
A nice right hand lands inside from Bobby Ii.
A hook to the body from Bobby Ii.
Austin avoiding damage as Bobby Ii throws knees to the body.
Bobby Ii throws a knee to the head but misses.
Bobby Ii throws a hook to the body. More of an arm punch but it's all scoring with the judges.
Bobby Ii lands a hook to the body. It's hard to tell if that hurt Austin or not.
Bobby Ii lands a body shot.
Bobby Ii cracks Austin with a nice body shot.
Austin has Bobby Ii pressed against the cage, preventing Bobby Ii from circling away and getting back to striking at range.
Bobby Ii works on Austin's body with a couple of short punches.
A short right from Bobby Ii.
Bobby Ii lands a hook to the body. It's hard to tell if that hurt Austin or not.
Bobby Ii lands a body punch.
Bobby Ii lands a body punch - he's looking to wear down Austin.
Bobby Ii gets underhooks to prevent Austin's takedown attempt.
A hook to the body from Bobby Ii.
That's three minutes gone in the round.
Bobby Ii misses with a knee to the head.
Bobby Ii cracks Austin with a nice body shot.
A right handed body shot lands from Bobby Ii.
Bobby Ii is trying to push Austin away but Austin has him pressed against the cage, so he's going nowhere.
Bobby Ii wants to break the clinch but can't.
Bobby Ii lands a body shot in the clinch.
Bobby Ii makes some space for himself and lands an uppercut.
Bobby Ii lands a body punch.
A right hook to the body lands for Bobby Ii.
Bobby Ii tries to break the clinch but Austin is controlling the position.
Bobby Ii cracks Austin with a nice body shot.
Bobby Ii with an attempt at a knee that misses.
Austin tries for a takedown but Bobby Ii manages to get underhooks.
Bobby Ii stalling in the clinch but Austin improves position.
Bobby Ii works on Austin's body with a couple of short punches.
Bobby Ii is looking to control Austin's arms but Austin gets an underhook and turns him. Now Bobby Ii has his back to the cage.
Bobby Ii is working Austin over against the cage.
A right hand to the body from Bobby Ii.
Marley Bobby Ii seems to be working more effectively in the clinch in the fight so far.
Bobby Ii scores with a shot to the side of Austin's head.
That's four minutes gone in the round.
Bobby Ii can't break the clinch.
A right handed body shot lands from Bobby Ii.
Bobby Ii lands a left hand that snaps the head of Austin backwards.
Bobby Ii has Austin pressed against the cage.
Bobby Ii digs a right hand into Austin's ribs. Those have got to be taking their toll on Austin's gas tank.
With the fighters clinched against the cage, Bobby Ii creates a bit of distance for himself and scores with a nice uppercut.
This is a great period of action - very entertaining stuff!
Austin is looking to take this one to the mat.
Bobby Ii just leaning against Austin, taking a breather.
A right hand to the body from Bobby Ii.
A right handed body shot lands from Bobby Ii.
Bobby Ii has Austin pressed against the cage.
Bobby Ii scores with a shot to the side of Austin's head.
The crowd applaud the fighters' efforts here as the round comes to an end.
Bobby Ii gets through Austin's defenses to land a nice punch to the side of the head.
Bobby Ii is trying to break free.
Bobby Ii lands with a short shot to the head.
A body shot lands from Bobby Ii.
And that is the end of the round. The fighters go back to their corners.
Marley Bobby Ii showed his class in that round. I'd imagine he'll take it on all the scorecards.
The minute break is over - no more time for sponges and pep talks - back to the action!
Bobby Ii throws a series of strikes that have Austin backpedaling.
Austin shoots in with a takedown attempt and he has Bobby Ii pinned against the cage. Bobby Ii gets the underhooks and manages to circle away.
Bobby Ii tries to close the distance and clinch up against the cage but Austin paws at him with a jab and circles away.
Bobby Ii lands a jab. Then a cross. Then finally a nice hook to the body. Good work there by Bobby Ii.
Austin is trying hard to land a takedown here. Bobby Ii sprawls well and keeps this one on the feet.
Bobby Ii tries to clinch but Austin is having none of it.
Bobby Ii tries to clinch up.
Austin takes one to the chin there.
Austin shoots in for a takedown. "I don't think so" says Bobby Ii as he avoids it easily.
That's three failed takedown attempts in the round for Ron Austin. That's going to take a lot out of him.
We've had a slow start to the round here - hopefully the action picks up.
Austin walks straight into an uppercut. Luckily it didn't land flush.
Both fighters are breathing heavily.
No luck with that takedown attempt from Austin.
Austin sets himself, and Bobby Ii steps forward looking for the clinch! Austin avoids it this time.
Nice takedown defense from Bobby Ii. No joy for Austin on that attempt.
Bobby Ii tries a counter takedown but it's more of a dummy move, and he uses it to push himself away.
Austin tries to score a power double leg takedown but Bobby Ii sees that one coming and sprawls well. That will dishearten Austin somewhat.
That's one minute gone in the round.
Bobby Ii lands a nice looking body shot.
Bobby Ii moves into range and throws a lovely three punch combination.
Austin avoids a punch combination nicely.
Austin is looking for a counter combo.
Bobby Ii scores with a reasonable looking shot to the body. Austin doesn't seem bothered though.
Good shot there by Bobby Ii.
Bobby Ii moves into the clinch successfully.
Bobby Ii prevents a takedown attempt there.
Bobby Ii digs a right hand underneath Austin's ribcage. Austin let out a lung full of air as it connected.
Bobby Ii is looking to break free of the clinch but Austin has double underhooks.
That's two minutes gone in the round.
Bobby Ii lands with a quick shot inside that doesn't really do much damage.
Bobby Ii has been the more effective fighter overall so far.
A left hand lands to the body for Bobby Ii.
Bobby Ii lands a nice uppercut.
Fantastic stuff here - a very entertaining period of action, which has drawn cheers from the crowd.
Austin has Bobby Ii pressed against the cage, preventing Bobby Ii from circling away and getting back to striking at range.
Bobby Ii lands a shot to the body.
Bobby Ii lands a right hand.
Bobby Ii stays in close to his opponent and throws a right hand to the body.
A short body shot lands from Bobby Ii as the two fighters clinch.
Bobby Ii pushes Austin back against the cage and unloads with a body punch.
Bobby Ii tries a knee to the head but he's missed.
Good anti-grappling being displayed by Austin as Bobby Ii tries to tie him up.
Austin's head jolts backwards as he takes an uppercut right on the button!
Bobby Ii wants to get back to striking at distance but Austin won't allow it.
Bobby Ii lands a left hand that snaps the head of Austin backwards.
Bobby Ii cracks Austin with a nice body shot.
Bobby Ii stays in close to his opponent and throws a right hand to the body.
Bobby Ii prevents a takedown attempt there.
That's three minutes gone in the round.
Bobby Ii lands a body punch.
Bobby Ii lands an uppercut.
Bobby Ii is trying to break the clinch but Austin has him pressed against the cage.
Bobby Ii with an attempt at a knee that misses.
Bobby Ii tries to land a knee to the body but he is off balance and Austin avoids it.
Bobby Ii tries to land a knee to the head but misses.
Bobby Ii wants to strike at distance but he can't break free of the clinch.
Bobby Ii lands a body punch.
Bobby Ii is looking to break free of the clinch but Austin has double underhooks.
Bobby Ii is trying to push Austin away but Austin has him pressed against the cage, so he's going nowhere.
Bobby Ii manages to break the clinch.
Austin looks frustrated there after his takedown attempt is stuffed easily.
Marley Bobby Ii is looking to keep the fight on the feet at all costs.
Bobby Ii moves into range and clinches up with Austin.
Austin drops to a knee looking for a takedown but Bobby Ii gets the underhooks and prevents it.
That's four minutes gone in the round.
Bobby Ii works for underhooks and lands a body shot in the process.
Bobby Ii throws a hook to the body. More of an arm punch but it's all scoring with the judges.
Bobby Ii misses with a knee to the head.
Bobby Ii working on landing some head shots here - that one got through nicely.
A left hand lands to the body for Bobby Ii.
Bobby Ii lands a body punch.
Bobby Ii lands punches inside but they're not really causing much damage.
Bobby Ii lands a body punch in the clinch.
Austin keeps the fight in the clinch, despite Bobby Ii's efforts to push away.
Bobby Ii lands a nice looking hook to the body, against the cage.
The crowd are loving this. Great action here.
Bobby Ii working some nice short punches in the clinch.
Austin's head jolts backwards as he takes an uppercut right on the button!
Bobby Ii tries to land a knee to the head but Austin blocks with his arms.
A body shot lands from Bobby Ii.
Bobby Ii is working Austin over against the cage.
And that is the end of the round. The fighters go back to their corners.
Marley Bobby Ii really dominated that round.
The corners get their ten second warning. Both fighters stand from their stools and stare each other down, ready to get back to the action. This is the final round!
Bobby Ii clinches up with Austin and pushes him back against the cage.
Austin changes levels and goes for a takedown here. Bobby Ii fights it off and pushes away nicely.
Bobby Ii leaves Austin with his face pressed against the mat as he sprawls beautifully, defending against a solid takedown attempt.
Bobby Ii's corner calls for a 1, 2 combination and Bobby Ii duly obliges.
Austin shoots in looking for a takedown but Bobby Ii manages to keep the fight standing, pushing Austin's face into the canvas for good measure before circling away.
That's three failed takedown attempts in the round for Ron Austin. That's going to take a lot out of him.
Austin with a poor takedown
and Bobby Ii counters with a good right hand that lands right on the jaw.
Austin takes a big uppercut there. He seems a bit wobbly but no, he's OK.
Bobby Ii works his jab well there, keeping his opponent at a distance.
Austin takes a punch to the jaw and another one to the bread basket.
Bobby Ii fails to land with the punch combination there - jab, cross, hook, miss, miss, miss.
Wooooo! Give it up for these two warriors! They are putting on a show!
Bobby Ii tries to clinch there but Austin circles away.
Bobby Ii throws a wild combination but nothing lands.
It's got to the stage where if one of these guys blows hard enough, the other might fall over.
Bobby Ii pushes forward with a 1-2 combination that forces Austin back to the cage. Bobby Ii follows up with a solid lead hook to the liver.
Bobby Ii gets to the clinch - let's see what his plan is here.
That's one minute gone in the round.
A short uppercut from Bobby Ii.
Austin prevents Bobby Ii from breaking the clinch.
Bobby Ii softening up his opponent with strikes, against the cage.
Bobby Ii is pressed up against the cage. Austin has hold of a leg and is looking to drag Bobby Ii down to the mat. Bobby Ii avoids the attempt though and has circled away. We're back to striking at a distance.
Bobby Ii fakes and then throws a beautiful body shot. Austin looks a bit winded and takes a step backwards to take a breath.
Austin fails with a rather predictable takedown attempt.
Bobby Ii's corner calls for a 1, 2 combination and Bobby Ii duly obliges.
Bobby Ii feints a jab promting Austin to slip. Bobby Ii then demonstrates his capabilities by jabbing again. Austin slips again and ducks right into an uppercut.
Bobby Ii throws a series of punches but Austin moves out of range.
Bobby Ii scores to the head and body with a nice combination!
This is a great period of action - very entertaining stuff!
Bobby Ii tries to sprawl but Austin drives through with a takedown into half guard.
Bobby Ii is working for an escape here. He's hooked one of Austin's legs and he's managed to sneak out and take Austin's back!
Bobby Ii gets to his feet! The crowd go wild in anticipation of a knockout!
That's two minutes gone in the round.
A nice combination there by Bobby Ii.
Austin doesn't succeed with the takedown
and Bobby Ii counters with a good right hand that lands right on the jaw.
Bobby Ii lunges in with an uppercut that skims his opponent's chin.
Horrible takedown attempt by Austin or perhaps it was just good defense by Bobby Ii, which made it look bad.
Bobby Ii jabs at Austin's body.
Bobby Ii cracks Austin with a good shot that sees him stumbling back into the cage.
Bobby Ii lets the fists fly and connects with a left straight followed by a right hook.
Bobby Ii displaying good standup as he scores with a three punch combination.
Austin closes this distance looking for a takedown but Bobby Ii circles away.
Bobby Ii will need to tighten up his combinations if he doesn't want to gas himself out, swinging at thin air.
That's three minutes gone in the round.
Austin looks for a takedown here. Will he get it? Bobby Ii is fending him off so far but Austin persists. Nope, Bobby Ii circles away and we're back to standing.
Bobby Ii lands a jab-cross combination.
Sloppy strikes from Bobby Ii. Those never looked like landing.
Austin fails with the takedown
and Bobby Ii connects with a straight left hand counter down the middle.
Bobby Ii jabs. That one connects to the head of his opponent.
Bobby Ii is working the combinations to good effect here.
Nice body punch from Bobby Ii.
Bobby Ii scores with a one two! Austin had his feet all tangled up there and couldn't avoid the strikes.
Bobby Ii feints a jab promting Austin to slip. Bobby Ii then demonstrates his capabilities by jabbing again. Austin slips again and ducks right into an uppercut.
Austin shoots in for a takedown from distance. He catches Bobby Ii napping and manages to drive through into side control!
This is a great period of action - very entertaining stuff!
Bobby Ii is trying to get back to half guard.
Bobby Ii stops Austin from passing to mount.
That's four minutes gone in the round.
Austin looking for an arm triangle but it's way too loose to do anything.
Bobby Ii prevents Austin from moving into mount.
Bobby Ii regains half guard.
The crowd applaud the fighters' efforts here as the round comes to an end.
Austin looking to pass the half guard. Not this time.
Bobby Ii makes his way to full guard. A much better position for Bobby Ii.
Ron Austin has stepped it up - he knows he needs a finish here!
Austin content to strike from guard, landing some decent shots.
And that's the end of the fight!
Marley Bobby Ii comfortably won the final round on my scorecard.
Well Bobby Ii has outworked and out performed his opponent in all aspects of the game today. He was simply too good and the decision should be no more than a formality. Over to the ring announcer for the scorecards.
Ladies and gentlemen, after 4 rounds of action, we go to the scorecards for a decision.
Judge Timothy Bukovac scores the fight for Marley Bobby Ii!
Judge Jack Bonds scores the fight for Marley Bobby Ii!
Judge Frank Antenori scores the fight for Marley Bobby Ii!
Marley Bobby Ii wins by unanimous decision!
|
|
|
|
|
|
|
|
|
|
|
|
|
|
|
|
|
|
|
|
|
|
|
| S |
C
A |
G |
S |
C
B |
G |
|
S |
C |
G |
|
energy
A | B |
|
hype
A | B |
|
pop
A | B |
|
mgr
A | B |
|
FIGHT
RATING
77% |
|
|
|
|
|
|
|
Main event
|
Coming up we have a middleweight MMA rules bout between Kazuya Mishima (ranked 2533 p4p, 3166 weight class) and Tugsbayar Enkhtulga (ranked 342 p4p, 412 weight class). Mishima kept the crowd waiting but all that was forgotten when his ring entrance music started. The incomparable musical genius that is Techno Syndrome Mortal Kombat. These two fighters really are very evenly matched on the feet - it will be fascinating to see who can assert themselves in that aspect of the fight.
 |
|
 |
| 180 cm
27
190
4 - 2 - 0 |
|
180 cm
27
185
3 - 3 - 0 |
BJJ Purple Belt
Lethal high kicks
Granite chin |
|
Decent wrestler
Good kicks
Heavy handed |
|
| |
|
Ladies and gentlemen. This fight is 4 rounds, in the middleweight division.
Introducing the fighter to my left, fighting out of the red corner.
With a record of 4 - 2 - 0, fighting out of Montreal, Kazuya Mishima!
And introducing the fighter to my right, fighting out of the blue corner.
With a record of 3 - 3 - 0, fighting out of Sydney, Tugsbayar Enkhtulga!
The judges for this bout are Timothy Bukovac, Jack Bonds and Frank Antenori.
The bell rings for round one and we are underway!
Enkhtulga buckles his opponent's knee momentarily with a nice leg kick.
Enkhtulga misses with a half-hearted attempt at a head kick.
Enkhtulga paws at his opponent with the jab and then lunges in with a straight, right on the button.
Mishima misses with a straight right.
Mishima throws a low kick but Enkhtulga avoids it.
Mishima rushes Enkhtulga and pushes him back against the cage in a clinch.
A head punch blocked on the inside by Enkhtulga.
Mishima has Enkhtulga pressed against the cage, preventing Enkhtulga from circling away and getting back to striking at range.
Mishima slows down the pace here.
Enkhtulga wants to break the clinch but can't.
Mishima misses with a shot to the kidneys.
Mishima lands a short shot on the inside that snaps the head of Enkhtulga backwards.
Mishima keeps the fight in the clinch, despite Enkhtulga's efforts to push away.
We've had a slow start to the round here - hopefully the action picks up.
Enkhtulga is trying to break the clinch but Mishima has him pressed against the cage.
Mishima effectively controlling the action here.
Enkhtulga has had enough of the clinch but Mishima keeps him there for the moment.
Mishima lands a shot to the body.
Mishima tries to stall but Enkhtulga uses the opportunity to gain a better position.
We've been hearing reports that Mishima has been drilling takedowns in recent sessions so let's see if that has an impact on the result of this fight.
That's one minute gone in the round.
Enkhtulga can't break the clinch.
Mishima lands with a quick shot inside that doesn't really do much damage.
Enkhtulga is trying to push Mishima away but Mishima has him pressed against the cage, so he's going nowhere.
Mishima working some nice short punches in the clinch.
Mishima scores with a nice hook to the head.
A bit of stalling here from Mishima.
Enkhtulga has had enough of the clinch but Mishima keeps him there for the moment.
Mishima scores with a nice hook to the head.
Enkhtulga has had enough of the clinch but Mishima keeps him there for the moment.
Enkhtulga tries to break free but Mishima pushes him back against the cage.
Enkhtulga wants to break the clinch but can't.
Mishima leaning against his opponent.
Mishima leaning his opponent against the cage.
Enkhtulga tries to circle away but Mishima has him pinned against the cage.
Mishima keeps the fight in the clinch, despite Enkhtulga's efforts to push away.
Both fighters working to control the clinch.
Enkhtulga working hard to break the clinch.
Enkhtulga is trying to break the clinch but Mishima has him pressed against the cage.
Enkhtulga can't break the clinch.
Mishima tries to throw a body punch but Enkhtulga avoids it by throwing Mishima back against the cage.
That's two minutes gone in the round.
Mishima will no doubt start fighting again in a minute but for now he's just having a little rest, leaning Enkhtulga up against the cage.
Enkhtulga wants to get back to striking at distance but Mishima won't allow it.
Mishima stalling in the clinch but Enkhtulga improves position.
Mishima tried to land a shot to the body but connects with Enkhtulga's elbow.
Enkhtulga wants to break free but Mishima has control.
Enkhtulga working hard to break the clinch.
Mishima digs a right hand into Enkhtulga's ribs. Those have got to be taking their toll on Enkhtulga's gas tank.
Mishima lands with a good tight uppercut to the head.
A right hand to the body from Mishima.
Enkhtulga wants to break the clinch but can't.
Mishima stalling the fight.
Mishima lands with a short shot to the head.
Enkhtulga tries to circle away but Mishima has him pinned against the cage.
Enkhtulga wants to push off and get back to the center of the mat but Mishima has him pressed against the cage.
Enkhtulga wants to break free but Mishima has control.
Mishima tries to stall but Enkhtulga uses the opportunity to gain a better position.
A shot in the inside from Mishima.
This is a great period of action - very entertaining stuff!
Enkhtulga is trying to break free.
Mishima working on landing some head shots here - that one got through nicely.
Enkhtulga wants to break the clinch but can't.
That's three minutes gone in the round.
Mishima lands a hook to the side of the head.
Enkhtulga is trying to break the clinch but Mishima has him pressed against the cage.
Mishima has Enkhtulga pressed against the cage, preventing Enkhtulga from circling away and getting back to striking at range.
Enkhtulga wants to break free. God knows he wants to breaaaak freeee.
Enkhtulga takes a shot to the head.
Enkhtulga has had enough of the clinch but Mishima keeps him there for the moment.
Enkhtulga has had enough of the clinch but Mishima keeps him there for the moment.
Mishima lands a body shot.
Enkhtulga looks winded!
With the fighters clinched against the cage, Mishima creates a bit of distance for himself and scores with a nice uppercut.
Mishima is leaning against Enkhtulga and scores with a nice uppercut to the body.
Mishima lands a body shot.
Mishima scores with a hook to the body.
Mishima lands with a left to the head.
Enkhtulga is trying to work out of this bad position, with his back against the cage.
Enkhtulga's head jolts backwards as he takes an uppercut right on the button!
Mishima pressing his opponent against the cage.
A frustrated look appears on Enkhtulga's face as he tries to break the clinch.
Enkhtulga letting Mishima take a breather here.
Mishima digs a right hand underneath Enkhtulga's ribcage. Enkhtulga let out a lung full of air as it connected.
That's four minutes gone in the round.
Mishima works on Enkhtulga's body with a couple of short punches.
Mishima leaning his opponent against the cage.
Mishima scores with a shot to the side of Enkhtulga's head.
We've seen a great period of action over the last minute or so - credit to both fighters for going all out!
Mishima just leaning against Enkhtulga, taking a breather.
Enkhtulga can't break the clinch.
Mishima lands a right uppercut that snaps the head of Enkhtulga backwards.
With the fighters clinched against the cage, Mishima creates a bit of distance for himself and scores with a nice uppercut.
Enkhtulga wants to break the clinch but can't.
Mishima effectively controlling the action here.
Enkhtulga wants to break the clinch but can't.
Mishima leaning his opponent against the cage.
The fighters are starting to get sweaty, which will make takedowns a bit more tricky.
Mishima is working Enkhtulga over against the cage.
Mishima stays in close to his opponent and throws a right hand to the body.
Mishima lands with a light punch inside.
Mishima is leaning against Enkhtulga and scores with a nice uppercut to the body.
Mishima will no doubt start fighting again in a minute but for now he's just having a little rest, leaning Enkhtulga up against the cage.
And that is the end of the round. The fighters go back to their corners.
Kazuya Mishima dominated that round.
That's time! Back to the action!
Mishima pulls out of a head kick attempt.
Enkhtulga rushes forward with a series of wild hooks but Mishima moves out of range and avoids them all easily.
Mishima throws a sloppy head kick
and Enkhtulga counters with a nice body kick.
Mishima tries to grapple but his opponent circles
and Enkhtulga counters with a nice uppercut.
Enkhtulga uses good head movement to avoid the hook from Mishima.
Enkhtulga misses with a double jab.
Mishima has closed the distance and engaged Enkhtulga in a clinch.
Mishima is trying to maintain a safe position but Enkhtulga gets an underhook and turns Mishima into the cage.
We've had a slow start to the round here - hopefully the action picks up.
Mishima is trying to stall.
Enkhtulga takes a shot to the head.
Mishima lands a hook to the side of the head.
Enkhtulga is rocked!
Enkhtulga wants to strike at distance but he can't break free of the clinch.
Enkhtulga is still on wobbly legs! Can Mishima finish him?
Mishima keeps the fight in the clinch, despite Enkhtulga's efforts to push away.
A hook to the body from Mishima.
Mishima digs a right hand into Enkhtulga's ribs. Those have got to be taking their toll on Enkhtulga's gas tank.
The two fighters are working to gain dominance in the clinch.
Enkhtulga is breathing heavily.
That's one minute gone in the round.
Mishima lands with a quick shot inside that doesn't really do much damage.
Mishima lands a big right hand that drops Enkhtulga! The killer instinct kicks in and Mishima finishes his opponent with a series of strikes from mount. A dominating finish by Mishima!
Ladies and gentlemen, after 1:10 of round 2, we have a winner by way of TKO (Strikes). Kazuya Mishima!
After the fight, Kazuya Mishima was humble in paying tribute to his opponent but made it clear he wants to go on to bigger and better things. It seemed to go down well with the crowd who cheered him loudly.
|
|
|
|
|
|
|
|
|
|
|
|
|
|
|
|
|
|
|
|
|
|
|
| S |
C
A |
G |
S |
C
B |
G |
|
S |
C |
G |
|
energy
A | B |
|
hype
A | B |
|
pop
A | B |
|
mgr
A | B |
|
FIGHT
RATING
41% |
|
|
|
|
|
|
|
|
|
|

