 |
QFC Tournament 1083 Round 1 PBP Commentary |
Undercard bout
|
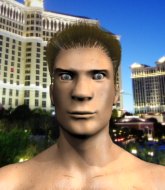
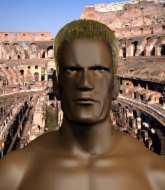
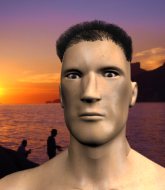
Coming up we have a welterweight MMA rules bout between Serghei Vasilescu (ranked 4485 p4p, 4475 weight class) and Ryan Kee (ranked 0 p4p, 0 weight class). We have two fighters making their debuts here, so let's see who comes out of this one with their first professional victory.
 |
|
 |
| 180 cm
24
160
0 - 0 - 0 |
|
170 cm
24
178
0 - 0 - 0 |
BJJ Blue Belt
Solid Muay Thai
Inexperienced |
|
Good takedowns
Basic striking
Experienced |
|
| |
|
Ladies and gentlemen. This fight is 3 rounds, in the welterweight division.
Introducing the fighter to my left, fighting out of the red corner.
With a record of 0 - 0 - 0, fighting out of Amsterdam, Serghei Vasilescu!
And introducing the fighter to my right, fighting out of the blue corner.
With a record of 0 - 0 - 0, fighting out of Amsterdam, Ryan Kee!
The judges for this bout are Wagner Zegers, Patrick Alders and Paulsen Ambrosius.

The bell rings for round one and we are underway!
Vasilescu connects with a high kick.
Vasilescu looks to clinch

and Kee counters with a takedown into side control.
Vasilescu bucks up and tries to throw Kee off but instead Kee has got his back!
The fighters are pressed up against the cage, both looking to find a bit of space to work.

Vasilescu showing good submission defense here.
Vasilescu is trapped and Kee is scoring with shots to the head and body.
This has been an exciting period of action!
Kee scores with a nice shot to the head of his opponent. Vasilescu is looking for a way out.
Vasilescu has hold of Kee's leg, trying to break free but it's let Kee lock up a rear naked choke! This could be big trouble! Vasilescu is turning an unusual color here� he's out! Kee throws him to one side and jumps onto the cage to celebrate with his fans.
Ladies and gentlemen, after 0:55 of round 1, we have a winner by way of Submission (RNC). Ryan Kee!
|
|
|
|
|
|
|
|
|
|
|
|
|
|
|
|
|
|
|
|
|
|
|
| S |
C
A |
G |
S |
C
B |
G |
|
S |
C |
G |
|
energy
A | B |
|
hype
A | B |
|
pop
A | B |
|
mgr
A | B |
|
FIGHT
RATING
100% |
|
|
|
|
|
|
|
Undercard bout
|
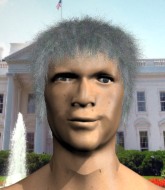
Coming up we have a welterweight MMA rules bout between Akumu Frosty (ranked 4660 p4p, 4820 weight class) and Nate Young (ranked 0 p4p, 0 weight class). Young has chosen Eye of the tiger as his entrance music. We have two fighters making their debuts here, so let's see who comes out of this one with their first professional victory.
 |
|
 |
| 180 cm
18
155
0 - 0 - 0 |
|
180 cm
21
145
0 - 0 - 0 |
BJJ Blue Belt
Brawler
Cuts easily |
|
BJJ Blue Belt
Solid Muay Thai
Intelligent |
|
| |
|
Ladies and gentlemen. This fight is 3 rounds, in the welterweight division.
Introducing the fighter to my left, fighting out of the red corner.
With a record of 0 - 0 - 0, fighting out of Amsterdam, Akumu Frosty!
And introducing the fighter to my right, fighting out of the blue corner.
With a record of 0 - 0 - 0, fighting out of Amsterdam, Nate Young!
The judges for this bout are Paulsen Ambrosius, Saam Ante and Aafke Stam.
The bell rings for round one and we are underway!
Frosty shoots in but Young avoids the takedown attempt easily.
And Young tries to counter it with a takedown but Frosty pushes his down on his head and steps out.
Young shoots in and drives through. Frosty sprawls well.
Frosty tries to score a power double leg takedown but Young sees that one coming and sprawls well. That will dishearten Frosty somewhat.
Frosty lands a kick to the ribs of his opponent. Nice work there - in and out in a flash.
Frosty fails with a takedown attempt.
That's three failed takedown attempts in the round for Akumu Frosty. That's going to take a lot out of him.
We've had a slow start to the round here - hopefully the action picks up.
Young shoots in with a takedown attempt and he has Frosty pinned against the cage. Frosty gets the underhooks and manages to circle away.
Frosty doesn't manage to clinch there - Young circles away.

That's one minute gone in the round.
Frosty shoots in for a takedown - he's clinched up with Young but Young pushes him off and we're back to square one.
Young scores with a head kick.
 It looks like Akumu Frosty has been cut. It looks like Akumu Frosty has been cut.
Young is a painfully thin specimen of a man. You do wonder whether a good body kick would snap him clean in two.
A head kick misses from Young.
Frosty takes a swing at Young's ribcage but misses.
Young throws a hard body shot but it just misses.
Young steps to his left, right into the path of a big body kick from Frosty. That one must have hurt.

The fight moves into the clinch position.
Frosty can't find room to land a body shot as Young controls the action.
Young is looking to take this one to the mat.
Frosty has dropped down and is looking to force the takedown but it's defended by Young after a bit of a struggle.

That's two minutes gone in the round.
A bit of stalling here from Frosty.

Young breaks from the clinch.
Frosty clinches.
Frosty is trying to work out of this bad position, with his back against the cage.
Young is trying to pull guard but being pressed up against the cage enables Frosty to keep the fight standing.

Frosty drags the fight down to the ground.

Frosty escapes his hips to the side and looks to be working for an armbar. Young gives him a little smile and shakes his head. No chance.
Young throws a big elbow that misses.
Young pressing down on his opponent's thigh, looking to pass guard. Frosty is keeping the position for now.

That's three minutes gone in the round.
Young controlling from the top position.

Young stands up from guard. Let's bang!
Frosty tries to shoot in for a takedown. He's got hold of a leg but Young swivels and escapes.
Frosty stuffs the takedown.
Frosty fails in his attempt to clinch.
Young is trying hard to land a takedown here. Frosty sprawls well and keeps this one on the feet.
Young dives in and grabs Frosty's left leg, looking for a takedown. Frosty pushes down on Young's head and hops out.
Frosty is looking to clinch.

That's four minutes gone in the round.
Young shoots in for a takedown. "I don't think so" says Frosty as he avoids it easily.
Young looks winded!
Frosty rushes Young and presses him up against the cage.
Frosty drops to a knee looking for a takedown but Young gets the underhooks and prevents it.
Young breaks from the clinch.
Frosty shoots in looking for a takedown. Young tries to sprawl out of it but Frosty keeps driving through. The fighters are pinned against the cage. Young manages to get underhooks and after a bit of a struggle, circles away and we're back to standing.
The crowd thankful this round is nearly over.
Young misses with a half-hearted attempt at a head kick.
Frosty stuffs the takedown.
Frosty thuds a mid kick into his opponent's body. That will wear on Young if he has to take too many more of those.
And that is the end of the round. The fighters go back to their corners.
That was a close round but I would say that Akumu Frosty will probably get the nod.
The cut man is working on Akumu Frosty's cut.
That's time! Frosty's corner gives him a slap on the ass as he gets ready to fight.

Frosty shoots in looking for a takedown. Young tries to sprawl out of it but Frosty keeps driving through. The fighters are pinned against the cage. Young manages to get underhooks and after a bit of a struggle, circles away and we're back to standing.

Young clinches up against the cage.
Frosty letting Young take a breather here.
Frosty has had enough of the clinch and is looking to separate.
We've had a slow start to the round here - hopefully the action picks up.
Young gets through Frosty's defenses to land a nice punch to the side of the head.
Young using the Thai plumb to throw knees but Frosty has his back arched nicely, preventing the strike.
Young gets control of Frosty's arms and successfully pulls guard. Young will no doubt be looking for submissions off his back.
Young wants to control but instead he gets his guard passed and Frosty is now in half guard.
That's one minute gone in the round.
Frosty is trying a forearm choke� I don't think that's going to do much at this level of the game.
Frosty trying to control from Young's half guard. Young has other ideas though and has regained full guard.
Young wants to sweep here but Frosty controlling him for the moment.
Frosty wants to control from the top but Young keeps moving.
That's two minutes gone in the round.
A few boos can be heard. I'm sure they will multiply if the fighters don't pick up the pace.
Frosty stands up and looks to throw the legs aside to pass to side control. Young swivels though and keeps the full guard.
Young is trying to control the position from the bottom.
Frosty wants to get up but he can't break Young's closed guard. He needs to be careful trying to break the legs open, as he's open to submissions here.
The fighters are pressed up against the cage, both looking to find a bit of space to work.
Frosty wants to pass the guard but Young is keeping the position.
Frosty wants to stand but Young has a closed guard, so he can't escape.

The referee decides to stand the fighters back up.
Young looks frustrated there after his takedown attempt is stuffed easily.
That's three minutes gone in the round.
Young throws a looping left and ducks down for a takedown. He's got his arms around Frosty's waist but Frosty gets an underhook and avoids the takedown by throwing Young off to one side.
Frosty goes for a double leg but Young avoids the attempt and the two fighters end up clinched against the cage as Young continues to drive forward.

Frosty pushes off and circles away, back to the middle of the mat.
Frosty shoots for a takedown but Young saw that one coming a mile off and avoided it easily.
That's three failed takedown attempts in the round for Akumu Frosty. That's going to take a lot out of him.
Frosty goes for a double leg but Young avoids the attempt and the two fighters end up clinched against the cage as Young continues to drive forward.
Both fighters are absolutely exhausted here.
Frosty jumps guard but Young turns him against the cage and keeps the fight standing.
Frosty prevents the takedown attempt.
Young pulls guard successfully.
Young working for a triangle but Frosty defends it easily.
Frosty in full guard, throwing the ground and pound. No damage this time.
That's four minutes gone in the round.
Frosty wants to control from the top but Young keeps moving.
Young is pulling down on Frosty's head to control his posture.
Frosty stopping the sweep attempt from Young.
Boooooooooooooooooooo!!! God, this has been a terrible round. Come on you two, sort yourselves out!
Frosty in full guard, throwing the ground and pound. No damage this time.
We've had a lack of effective grappling in the last minute or so, which could well see a referee standup.
And that is the end of the round. The fighters go back to their corners.
Nate Young showed his class in that round. I'd imagine he'll take it on all the scorecards.
The cut man is working on Akumu Frosty's cut.
The referee calls time. The cornermen exit stage left and we're back to business. This is the final round!

Young dives in for a single leg takedown but Frosty sprawls and the fighters end up clinched against the cage.
Frosty seemed to be looking to counter by closing the distance.
Young throws a sloppy head kick and Frosty moves out of range easily.
Young rushes Frosty and pushes him back against the cage in a clinch.
Young missing with knees to the body.
Frosty wants to take the fight to the mat but Young manages to get underhooks and keep the fight in the clinch.
Frosty is trying to pull guard but Young has him pressed against the cage.
Frosty has had enough of the clinch but Young keeps him there for the moment.
Frosty tries to pull guard but can't drag his opponent to the mat. Young just stands there and leans against the cage.
That's three failed takedown attempts in the round for Akumu Frosty. That's going to take a lot out of him.
Young's corner calls for him to break the clinch, which he does.
We've had a slow start to the round here - hopefully the action picks up.
Young tries to clinch up but Frosty circles away and keeps his distance.
Frosty is trying to close the distance and clinch up, after that failed offence from Young.
Young rushes forward with a series of wild hooks but Frosty moves out of range and avoids them all easily.
Young circles away from the clinch attempt.
Young slaps away a takedown attempt from Frosty, before circling back to the center of the mat.
That's one minute gone in the round.
Young slips under a jab.
Frosty looks frustrated there after his takedown attempt is stuffed easily.
Both fighters are breathing heavily.
Young forces Frosty back against the cage and clinches.
Frosty tries to pull guard but Young holds him up against the cage and eventually Frosty drops back down to his feet.
Young breaks from the clinch.
Frosty throws a looping left and ducks down for a takedown. He's got his arms around Young's waist but Young gets an underhook and avoids the takedown by throwing Frosty off to one side.
Young fakes high and shoots in for a takedown but Frosty avoids it really well and circles away.
That's two minutes gone in the round.
Frosty goes for a double leg but Young avoids the attempt and the two fighters end up clinched against the cage as Young continues to drive forward.
Young leaning his opponent against the cage.
Young pressing his opponent against the cage.
Frosty is trying to work out of this bad position, with his back against the cage.
Young goes for a takedown in the clinch but Frosty prevents it.
Young is working for a takedown up against the cage. He can't get it on this occasion though.
That's three minutes gone in the round.
Frosty with an attempt at a knee that misses.
Young escapes the clinch and we're back to striking.
Young stuffs the takedown.
Nice takedown defense from Frosty. No joy for Young on that attempt.
Young has been the more effective fighter overall so far.
Frosty stuffs the takedown.
Young shoots for a takedown but Frosty saw that one coming a mile off and avoided it easily.
Frosty moves into the clinch.
Young breaks from the clinch.
Frosty stuffs a takedown. It's all about dictating where the fight takes place and Frosty wants it to stay on the feet.
Frosty closes the distance and clinches up with Young, looking for a takedown. Frosty pushes Young against the cage but Young circles to the side and manages to break the clinch.
That's four minutes gone in the round.
Young stuffs the takedown.
Young has Frosty up against the cage in a clinch.
Young wants to take the fight to the mat but Frosty manages to get underhooks and keep the fight in the clinch.
Frosty's corner calls for him to break the clinch, which he does.
Young shoots in for a takedown but doesn't get it.
Young tries to drive through with a takedown attempt but Frosty defends well and Young ends up having to push Frosty into the cage where they will battle it out in the clinch.
Young stuffs the takedown.
Nate Young seems to be getting the better of the standup.
The crowd thankful this round is nearly over.
Young throws a head kick that half lands.
This is a great period of action - very entertaining stuff!
Young shoots and misses
and Frosty cracks him with a counter punch right on the button.
Akumu Frosty has stepped it up - he knows he needs a finish here!
A really sloppy takedown attempt there from Frosty.
And that's the end of the fight!
Nate Young comfortably won the final round on my scorecard.
Well Young has outworked and out performed his opponent in all aspects of the game today. He was simply too good and the decision should be no more than a formality. Over to the ring announcer for the scorecards.
Ladies and gentlemen, after 3 rounds of action, we go to the scorecards for a decision.
Judge Paulsen Ambrosius scores the fight for Nate Young!
Judge Saam Ante scores the fight for Nate Young!
Judge Aafke Stam scores the fight for Nate Young!
Nate Young wins by unanimous decision!
An out of breath Nate Young thanked his loyal fans in his post fight interview, giving them credit for his success over the course of his career.
|
|
|
|
|
|
|
|
|
|
|
|
|
|
|
|
|
|
|
|
|
|
|
| S |
C
A |
G |
S |
C
B |
G |
|
S |
C |
G |
|
energy
A | B |
|
hype
A | B |
|
pop
A | B |
|
mgr
A | B |
|
FIGHT
RATING
30% |
|
|
|
|
|
|
|
Undercard bout
|
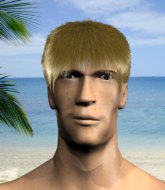
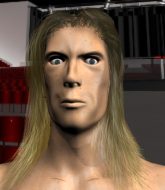
Coming up we have a welterweight MMA rules bout between Clay Mann (ranked 4477 p4p, 3027 weight class) and Dan Hooker (ranked 0 p4p, 367 weight class). We have two fighters making their debuts here, so let's see who comes out of this one with their first professional victory.
 |
|
 |
| 179 cm
24
178
0 - 0 - 0 |
|
175 cm
20
155
0 - 0 - 0 |
Good takedowns
Brawler
KO power |
|
BJJ Blue Belt
Brawler
Can Moonwalk |
|
| |
|
Ladies and gentlemen. This fight is 3 rounds, in the welterweight division.
Introducing the fighter to my left, fighting out of the red corner.
With a record of 0 - 0 - 0, fighting out of Amsterdam, Clay Mann!
And introducing the fighter to my right, fighting out of the blue corner.
With a record of 0 - 0 - 0, fighting out of London, Dan Hooker!
The judges for this bout are Paul Aken, Radbod Blank and Aafke Stam.
The bell rings for round one and we are underway!
Decent striking displayed by Hooker there.
Hooker scores with a jab. Mann acknowledges it with a nod of the head.
Mann looking for a takedown here - he's got it.
The fighters are pressed up against the cage, both looking to find a bit of space to work.
Mann drops back looking for a leg! Hooker is in trouble here! The fighters roll with the hold and Hooker manages to kick Mann off! Mann jumps back into Hooker's guard.
Mann slows down the pace of the fight for a moment. He'll need to remain active if he doesn't want to see the fight stood back up.
Mann stops Hooker from standing up.
We've had a slow start to the round here - hopefully the action picks up.
Mann chips away with some ground and pound.
Hooker has momentary wrist control but Mann slips an elbow through the middle.
Hooker is looking to stand back up... there's a bit of a scramble and Mann dives into side control.
Mann lands a knee to the body and a forearm to the face.
That's one minute gone in the round.
Hooker stops Mann from passing to mount.
Mann is looking to take a break and control but Hooker is keeping him honest, looking to work from the bottom.
Mann in side control lands a nice looking series of punches and elbows.
Mann has been looking to land a fair amount of strikes on the ground. He might be looking to soften his opponent up in order to work for a submission.
Hooker pushes Mann away and creates a bit of space to escape. He's almost out here... but no, Mann gets a good hold of his legs and remains firmly in side control.
Hooker is not content to let Mann control the position.
Mann working hard here to secure a kimura but he's not really in the right position for it.
That's two minutes gone in the round.
Hooker tries to improve position but can't.
Mann wants to lay and pray for a moment but Hooker keeps working.
Mann lands a knee to the body and a forearm to the face.
Mann lands an elbow.
Mann working away.
Mann in side control lands a decent elbow.
Mann working the ground and pound from side control.
That's three minutes gone in the round.
Hooker is looking to regain half guard here but Mann keeps moving and retains side control.
Check out the look on Mann's face as he threw that strike - that's one determined fighter!
 Hooker is rocked! Hooker is rocked!
Mann cracks Hooker with a big elbow.
Hooker is still in real trouble! Can Mann finish him?
Mann scores with a big shot from side control... and another... and another! Oh Hooker is done here - save him referee! More strikes land and eventually the ref does step in and Mann can finally stop beating on his defenseless opponent!
Ladies and gentlemen, after 3:39 of round 1, we have a winner by way of TKO (Strikes). Clay Mann!
|
|
|
|
|
|
|
|
|
|
|
|
|
|
|
|
|
|
|
|
|
|
|
| S |
C
A |
G |
S |
C
B |
G |
|
S |
C |
G |
|
energy
A | B |
|
hype
A | B |
|
pop
A | B |
|
mgr
A | B |
|
FIGHT
RATING
38% |
|
|
|
|
|
|
|
Undercard bout
|
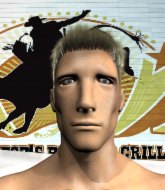
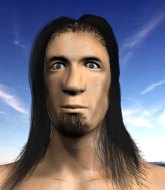
Coming up we have a welterweight MMA rules bout between Luke Menzies (ranked 4850 p4p, 3003 weight class) and Losene Keita (ranked 390 p4p, 302 weight class). Menzies's ring entrance music is that housewives' favourite, Madison Beer - Blue (Live from The Ellen DeGeneres Show). We have two fighters making their debuts here, so let's see who comes out of this one with their first professional victory.
 |
|
 |
| 150 cm
23
130
0 - 0 - 0 |
|
176 cm
23
150
0 - 0 - 0 |
BJJ Blue Belt
Solid boxing
Inexperienced |
|
BJJ White Belt
Good kicks
Determined |
|
| |
|
Ladies and gentlemen. This fight is 3 rounds, in the welterweight division.
Introducing the fighter to my left, fighting out of the red corner.
With a record of 0 - 0 - 0, fighting out of Amsterdam, Luke Menzies!
And introducing the fighter to my right, fighting out of the blue corner.
With a record of 0 - 0 - 0, fighting out of Amsterdam, Losene Keita!
The judges for this bout are Albert Achterberg, Saam Ante and Radbod Blank.
The bell rings for round one and we are underway!
Keita is looking for a takedown here. He's shot in and has managed to get it, finishing up in Menzies's half guard.

Menzies has managed to escape just enough to sneak back to his feet but Keita is on him like a limpet, forcing Menzies back against the cage.
Menzies tries to pull guard but Keita won't allow it.
Keita is trying to stall.
The pace really dropping off here, momentarily.
The referee calls for Menzies to work.
Menzies is looking for a takedown.
Menzies pushes off and circles away, back to the middle of the mat.
That's one minute gone in the round.
Menzies moves into range and clinches up with Keita.
Menzies's corner calls for him to break the clinch, which he does.
Menzies dodges the punch combination from Keita.
Menzies misses with a takedown attempt. He shot from a bit too far out.
That's three failed takedown attempts in the round for Luke Menzies. That's going to take a lot out of him.
Keita closes the distance, clinches up and gets a nice trip takedown into side control. Very smooth.
Menzies bucks up and manages to escape back to his feet!
Keita shoots in for a takedown! He's got it and he's managed to land in side control! That's better than Keita was expecting from the takedown attempt, I'm sure!
Menzies sneaks out the side door and pushes Keita away - he's back to his feet. The crowd show their appreciation for the escape.
The fans in attendance giving it up for the two fighters, who have really let it all hang out in the last minute or so!
Keita misses with a body shot. Nice footwork from Menzies.
That's two minutes gone in the round.
Menzies fakes high and shoots in for a takedown but Keita avoids it really well and circles away.
Keita fakes the leg kick and cracks Menzies in the body.
Losene Keita seems to be the more aggressive standup fighter in this bout.
Menzies avoids a punch combination nicely.
Keita gets a double leg takedown into Menzies's guard.
Menzies scrambles and gets back to his feet.
Menzies moves into the clinch successfully.
Menzies manages to pull guard.
That's three minutes gone in the round.
Menzies is pulling down on Keita's head. It's preventing any offense from Keita, at least for the moment.
Menzies is active off his back here, looking for submissions.
Keita trying to control the position from guard on top but Menzies is wriggling around, looking for whatever he can.
Menzies looking to sweep here. No luck so far.
Keita gets to his feet and steps away from his opponent.
Menzies shoots in for a takedown but doesn't get it.
Keita looks like he wants to counter punch here.
That's four minutes gone in the round.
My god... these two guys really need to pick up the pace or everyone will leave to go get a beer.
Keita with a nice looking leg kick. You could hear that one land in a back row.
Menzies rushes Keita and presses him up against the cage.
Menzies dictating the pace here, as the fighters clinch against the cage.
Menzies has a body lock and is looking for a takedown. Keita is bouncing around trying to prevent the takedown and somehow he has indeed managed to stay on his feet.
Menzies is fighting off a takedown attempt but Keita is just too persistent for him and manages to trip Menzies to the mat. Menzies regains guard as soon as the fighters hit the mat.
Menzies scrambles and gets back to his feet.
Keita gets to the clinch - let's see what his plan is here.
Keita breaks the clinch and we return to the middle of the mat.
Menzies shoots in for a takedown but doesn't get it.
And that is the end of the round. The fighters go back to their corners.
Luke Menzies dominated that round.
The fighters get back to their feet, the hooter sounds and we're back to the action!
Keita has closed the distance and engaged Menzies in a clinch.
Keita manages to break the clinch.
Menzies takes a head kick and keeps coming.
Keita rushes Menzies and pushes him back against the cage in a clinch.
Menzies using the Thai plumb to throw knees but Keita has his back arched nicely, preventing the strike.
Menzies is working on a leg, looking for a takedown but Keita is defending well.
Menzies pulls guard effortlessly.
Keita gets to his feet. Menzies looking to butt scoot but the ref puts an end to that. On your feet son!
We've had a slow start to the round here - hopefully the action picks up.
Keita throws a head kick that connects with a bit of head and a bit of hand.
Menzies feints and as Keita raises his hands in defense, Menzies changes levels and drives through with a takedown into guard.
We've seen a great period of action over the last minute or so - credit to both fighters for going all out!
Menzies sitting in guard, not really doing much.
That's one minute gone in the round.
Menzies throwing strikes from guard but Keita blocks nicely.
Menzies sitting in guard here, content to control.
Keita is working from a closed guard but he's struggling to control his opponent.
That's two minutes gone in the round.
My god... these two guys really need to pick up the pace or everyone will leave to go get a beer.
Keita tries to land a sweep but no joy.
Menzies is intent on slowing down the pace of the fight, simply looking to control.

Menzies gets to his feet and steps away from his opponent.
Keita misses with a body shot.
Keita looking to score a takedown here. Menzies is defending well but Keita drives through and ends up in Menzies's guard.
Menzies pushes Keita off and gets back to his feet.
Keita is breathing heavily.
Horrible takedown attempt by Menzies or perhaps it was just good defense by Keita, which made it look bad.
That's three minutes gone in the round.
Menzies shoots for a double leg takedown but Keita sprawls well. He's pushed Menzies's face into the mat and manages to get back to his feet relatively easily.
That's three failed takedown attempts in the round for Luke Menzies. That's going to take a lot out of him.
Keita lands a high kick!
Menzies shoots in for a takedown. He's persisting with it as Keita sprawls well. Keita wins this battle and keeps the fight standing. Menzies gets slowly back to his feet.
Menzies has his takedown stuffed
and Keita counters with a straight right hand.
Menzies moves in looking to clinch but Keita pushes him off.
Luke Menzies is looking to throw some combinations by the looks of things.
Keita has managed to clinch.
Menzies pushes off and circles away, back to the middle of the mat.
Keita closes the distance and clinches.
Menzies managing to block the knees to the body from Keita.
Keita breaks from the clinch.
That's four minutes gone in the round.
Menzies misses with a takedown attempt - Keita sprawls well and throws a nice strike on the way out which just misses.
Losene Keita seems to be getting the better of the standup.
Menzies takes a big uppercut there. He seems a bit wobbly but no, he's OK.
Keita fakes with an overhand right and moves in to clinch with Menzies, pushing him back against the cage.
Keita manages to break the clinch.
Menzies shoots in but no luck this time.
Despite the aggression on Keita's face he doesn't fully commit to the counter.
The crowd are loving this. Great action here.
Menzies shoots in with a takedown attempt and he has Keita pinned against the cage. Keita gets the underhooks and manages to circle away.
Keita lands a jab-cross combination.
And that is the end of the round. The fighters go back to their corners.
Losene Keita showed his class in that round. I'd imagine he'll take it on all the scorecards.
The fighters' corners scream their final instructions, as the referee calls time. Here we go, back to the action! This is the final round!
Keita keeping at a good range here, avoiding a leg kick.
A telegraphed takedown attempt from Menzies is defended easily by Keita.
Keita swings wildly with a couple of big hooks
and Menzies counters into the clinch. Nicely done.
Menzies stalling.
Menzies jumps into guard, dragging Keita to the mat.
Luke Menzies overall seems to be getting the better of the ground position in the fight so far.
Keita decides he's had enough of playing guard and decides to stand. Come on Menzies, up you get!
Menzies tries a head kick but it misses.
We've had a slow start to the round here - hopefully the action picks up.
Menzies misses with a takedown attempt - Keita sprawls well and throws a nice strike on the way out which just misses.
Keita throws a head kick that half lands.
Both fighters are breathing heavily.
Menzies takes a kick to the side of the head.
That's one minute gone in the round.
Keita moves into the clinch.
Menzies jumps guard but Keita stands there with Menzies around his waist. Menzies gives up and drops back to his feet. We remain in the clinch.
That's three failed takedown attempts in the round for Luke Menzies. That's going to take a lot out of him.
Keita has clasped his hands together around Menzies's back... aaand, he's got a takedown into side control. Nicely done.
Menzies bucks up and manages to escape back to his feet!
Keita fakes with an overhand right and moves in to clinch with Menzies, pushing him back against the cage.
Menzies escapes the clinch and we're back to striking.
A head kick misses from Keita.
Fantastic stuff here - a very entertaining period of action, which has drawn cheers from the crowd.
Menzies has managed to clinch.
Keita breaks the clinch and we're back to striking at distance.
That's two minutes gone in the round.
Keita drives through with a really nice takedown into side control.
Menzies sneaks out the side door and pushes Keita away - he's back to his feet. The crowd show their appreciation for the escape.
Keita throws a body shot but no joy.
Menzies tries to land with a swinging hook to the body but Keita was well out of range. Poor timing from Menzies.
Keita tries to keep at a distance but Menzies has taken the fight into the clinch.
Keita manages to break the clinch.
Menzies fails miserably with a takedown attempt.
Keita throws a combination but it was largely blocked by Menzies.
That's three minutes gone in the round.
Menzies shoots in but Keita avoids the takedown attempt easily.
Keita is moving around nicely and scores here with a single head shot.
A low kick lands for Keita.
Menzies closes the distance and clinches up with Keita, looking for a takedown. Menzies pushes Keita against the cage but Keita circles to the side and manages to break the clinch.
Menzies is the aggressor but that punch slipped nicely by Keita.
Keita drops down looking to force a counter takedown but Menzies defends it well.
Keita has taken the fight to the clinch.
Keita works for the underhooks and manages to get a trip takedown into guard.
Menzies has scooted to the edge of the canvas and used the cage to get back to his feet. Keita has stuck on his opponent and is forcing him back against the cage.
Keita gets double underhooks and manages to take the fight to the ground.
Menzies has his feet on Keita's hips. He pushes off and gets to his feet. Nice work.
That's four minutes gone in the round.
The fans in attendance giving it up for the two fighters, who have really let it all hang out in the last minute or so!
A telegraphed takedown attempt from Menzies is defended easily by Keita.
Menzies closes this distance looking for a takedown but Keita circles away.
Keita scores with a nice right hand.
Menzies gets taken down but at least he's managed to land in guard.
Menzies pushes Keita off and scrambles back to his feet.
The crowd applaud the fighters' efforts here as the round comes to an end.
Keita leaves Menzies with his face pressed against the mat as he sprawls beautifully, defending against a solid takedown attempt.
Keita pushes Menzies up against the cage in a clinch.
And that's the end of the fight!
That was a close round. You could make an argument for either fighter but I would give it to Luke Menzies.
I think Menzies has won this one but let's see what the judges have to say. Over to the ring announcer for the scorecards.
Ladies and gentlemen, after 3 rounds of action, we go to the scorecards for a decision.
Judge Albert Achterberg scores the fight for Luke Menzies!
Judge Saam Ante scores the fight for Luke Menzies!
Judge Radbod Blank scores the fight for Losene Keita!
Luke Menzies wins by split decision!
A less than humble Luke Menzies misjudged his post fight interview somewhat and came across a little too arrogant whilst trying to hype up his own abilities.
|
|
|
|
|
|
|
|
|
|
|
|
|
|
|
|
|
|
|
|
|
|
|
| S |
C
A |
G |
S |
C
B |
G |
|
S |
C |
G |
|
energy
A | B |
|
hype
A | B |
|
pop
A | B |
|
mgr
A | B |
|
FIGHT
RATING
67% |
|
|
|
|
|
|
|
Undercard bout
|
Coming up we have a welterweight MMA rules bout between Conlan Gaffney (ranked 5012 p4p, 4441 weight class) and Keith Schwerinn (ranked 548 p4p, 0 weight class). We have two fighters making their debuts here, so let's see who comes out of this one with their first professional victory.
 |
|
 |
| 178 cm
24
175
0 - 0 - 0 |
|
177 cm
24
178
0 - 0 - 0 |
BJJ White Belt
Excellent boxer
Big heart |
|
Good takedowns
Basic striking
Experienced |
|
| |
|
Ladies and gentlemen. This fight is 3 rounds, in the welterweight division.
Introducing the fighter to my left, fighting out of the red corner.
With a record of 0 - 0 - 0, fighting out of Amsterdam, Conlan Gaffney!
And introducing the fighter to my right, fighting out of the blue corner.
With a record of 0 - 0 - 0, fighting out of Amsterdam, Keith Schwerinn!
The judges for this bout are Paulsen Ambrosius, Albert Achterberg and Patrick Alders.
The bell rings for round one and we are underway!
Gaffney shoots in looking for a takedown but Schwerinn manages to keep the fight standing, pushing Gaffney's face into the canvas for good measure before circling away.
Gaffney moves away from the strike by Schwerinn.
No luck with that takedown attempt from Gaffney.
And Schwerinn tries to counter it with a takedown but Gaffney pushes his down on his head and steps out.
Schwerinn manages to get an easy takedown there - catching Gaffney on his heels. He'll look to pass Gaffney's guard now, I'm sure.
Schwerinn wants to control from the top but Gaffney keeps moving.
Schwerinn sneaks a leg through and gets to half guard. That was like a knife through butter how easily he passed Gaffney's guard.
Schwerinn scores with a couple of good hammerfists.
We've had a slow start to the round here - hopefully the action picks up.
Schwerinn is keeping good posture, landing some ground and pound.
Schwerinn seems like he's working for an arm triangle here. He's freed his trapped foot and he's rotating nicely. Gaffney is in big trouble! He's tapping out! This one is aaaaaaaaaaaall over!
Ladies and gentlemen, after 1:56 of round 1, we have a winner by way of Submission (Arm Triangle). Keith Schwerinn!
|
|
|
|
|
|
|
|
|
|
|
|
|
|
|
|
|
|
|
|
|
|
|
| S |
C
A |
G |
S |
C
B |
G |
|
S |
C |
G |
|
energy
A | B |
|
hype
A | B |
|
pop
A | B |
|
mgr
A | B |
|
FIGHT
RATING
71% |
|
|
|
|
|
|
|
Undercard bout
|
Coming up we have a welterweight MMA rules bout between Julian Jamison (ranked 4440 p4p, 4418 weight class) and Jim McCluskey (ranked 0 p4p, 0 weight class). We have two fighters making their debuts here, so let's see who comes out of this one with their first professional victory.
 |
|
 |
| 180 cm
24
178
0 - 0 - 0 |
|
175 cm
18
180
0 - 0 - 0 |
Good takedowns
Brawler
Very quick |
|
BJJ Blue Belt
Brawler
Solid chin |
|
| |
|
Ladies and gentlemen. This fight is 3 rounds, in the welterweight division.
Introducing the fighter to my left, fighting out of the red corner.
With a record of 0 - 0 - 0, fighting out of Amsterdam, Julian Jamison!
And introducing the fighter to my right, fighting out of the blue corner.
With a record of 0 - 0 - 0, fighting out of Amsterdam, Jim McCluskey!
The judges for this bout are Aafke Stam, Paul Aken and Paulsen Ambrosius.
The bell rings for round one and we are underway!
Nice sprawl there from Jamison as McCluskey shoots in.
McCluskey misses with the combination.
Jamison closes the distance and clinches.
Jamison has clasped his hands together around McCluskey's back... aaand, he's got a takedown into side control. Nicely done.

McCluskey throws Jamison to one side and escapes!
McCluskey jabbing away but nothing is landing.
The crowd are loving this. Great action here.
McCluskey swings away but doesn't land with a series of punches.
McCluskey fakes high and swings low for a body shot but Jamison manages to avoid it.
McCluskey falls off balance throwing a combination
and Jamison counters with a takedown into side control! That could mean trouble for McCluskey!
McCluskey throws his opponent off and manages to get back to his feet! Nicely done!
Jamison tries for a takedown but McCluskey sees it coming a mile off and avoids it easily.
McCluskey misses with a series of wild punches.
It looked like Jamison was trying to counter with a body shot coming off that last attack from McCluskey.
McCluskey lunges in with swinging rights and lefts but Jamison circles away quickly and effectively.
That's one minute gone in the round.
McCluskey is trying hard to land a takedown here. Jamison sprawls well and keeps this one on the feet.
McCluskey throws a solid leg kick but Jamison takes the impact on his shin and smiles at McCluskey.
McCluskey looks winded!
Jamison looks for a takedown. He's got it. We're now in half guard.
Ground and pound from Jamison.
The ref warns both fighters not to hold the cage as they work up against the meshing.
Jamison works his way into side control.
Jamison landing strikes.
McCluskey is not content to let Jamison control the position.
McCluskey wants to get back to his feet but Jamison is dominant here and he's now got McCluskey's back!
That's two minutes gone in the round.
Jamison throwing strikes from the back - he gets a warning from the referee for striking the back of the head but all these shots are hurting McCluskey!
The fighters are pressed up against the cage, both looking to find a bit of space to work.
Jamison scores with punches and elbows.
Jamison looking for the choke but no joy.
Jamison has been looking to land a fair amount of strikes on the ground. He might be looking to soften his opponent up in order to work for a submission.
We've seen a great period of action over the last minute or so - credit to both fighters for going all out!
Jamison is working for a rear naked choke. McCluskey is not defending it well and Jamison has tightened it up quickly! This could be all over! McCluskey refuses to tap and goes to sleep, forcing the referee to intervene. A little trickle of blood came out of McCluskey's nose as his head slumped to the floor. That is naaaasty!
Ladies and gentlemen, after 2:45 of round 1, we have a winner by way of Submission (RNC). Julian Jamison!
|
|
|
|
|
|
|
|
|
|
|
|
|
|
|
|
|
|
|
|
|
|
|
| S |
C
A |
G |
S |
C
B |
G |
|
S |
C |
G |
|
energy
A | B |
|
hype
A | B |
|
pop
A | B |
|
mgr
A | B |
|
FIGHT
RATING
71% |
|
|
|
|
|
|
|
Co-main event
|
Coming up we have a welterweight MMA rules bout between Nemon O Hannon (ranked 5010 p4p, 4474 weight class) and Terrance Silver (ranked 547 p4p, 0 weight class). We have two fighters making their debuts here, so let's see who comes out of this one with their first professional victory.
 |
|
 |
| 178 cm
24
182
0 - 0 - 0 |
|
175 cm
24
178
0 - 0 - 0 |
BJJ White Belt
Excellent boxer
Big right hand |
|
Good takedowns
Basic striking
Experienced |
|
| |
|
Ladies and gentlemen. This fight is 3 rounds, in the welterweight division.
Introducing the fighter to my left, fighting out of the red corner.
With a record of 0 - 0 - 0, fighting out of Amsterdam, Nemon O Hannon!
And introducing the fighter to my right, fighting out of the blue corner.
With a record of 0 - 0 - 0, fighting out of Amsterdam, Terrance Silver!
The judges for this bout are Radbod Blank, Daniel Blasius and Wagner Zegers.
The bell rings for round one and we are underway!
O Hannon shoots in looking for a takedown but Silver manages to keep the fight standing, pushing O Hannon's face into the canvas for good measure before circling away.
O Hannon throws a head kick that misses.
O Hannon shoots in for a double leg but Silver sprawls well. That's going to sap some energy.
Silver closes the distance and gets a trip takedown into side control. O Hannon quickly recovers to half guard.
Nice strikes from Silver there.
O Hannon wants to get back to full guard but Silver has mounted him!
O Hannon is in a horrible position here. Silver smacks him with another shot as he tries to escape the position.
The ref warns both fighters not to hold the cage as they work up against the meshing.
Silver quickly switches position and commits to an armbar! It's a big risk for Silver but it's paid off an O Hannon is forced to tap! Nice work by Silver.
Ladies and gentlemen, after 0:50 of round 1, we have a winner by way of Submission (Armbar). Terrance Silver!
|
|
|
|
|
|
|
|
|
|
|
|
|
|
|
|
|
|
|
|
|
|
|
| S |
C
A |
G |
S |
C
B |
G |
|
S |
C |
G |
|
energy
A | B |
|
hype
A | B |
|
pop
A | B |
|
mgr
A | B |
|
FIGHT
RATING
100% |
|
|
|
|
|
|
|
Main event
|
Coming up we have a welterweight MMA rules bout between Steven Marr (ranked 4476 p4p, 4453 weight class) and Sera Fimm (ranked 0 p4p, 0 weight class). We have two fighters making their debuts here, so let's see who comes out of this one with their first professional victory.
 |
|
 |
| 172 cm
24
178
0 - 0 - 0 |
|
178 cm
24
177
0 - 0 - 0 |
Good takedowns
Brawler
KO power |
|
Good takedowns
Brawler
Solid chin |
|
| |
|
Ladies and gentlemen. This fight is 3 rounds, in the welterweight division.
Introducing the fighter to my left, fighting out of the red corner.
With a record of 0 - 0 - 0, fighting out of Amsterdam, Steven Marr!
And introducing the fighter to my right, fighting out of the blue corner.
With a record of 0 - 0 - 0, fighting out of Amsterdam, Sera Fimm!
The judges for this bout are Radbod Blank, Albert Achterberg and Aafke Stam.
The bell rings for round one and we are underway!
Marr wants to slow Fimm down by chopping away at his legs.
Fimm tries to clinch up
and Marr counters with a nice double leg into side control. Fimm won't be happy with that.
Marr gets to mount! Fimm was on the offensive and wasn't defending properly.
Marr with shots to the head and body - Fimm looks very uncomfortable down there.
Marr lands a big shot there that rocks Fimm but he's holding on and managing to survive for now.
Fimm can't escape the position.
Fimm wants to control but Marr is having none of it.
Marr controlling the position easily from mount.
Marr has controlled the position for a good 20 seconds, which will no doubt be starting to frustrate his opponent.
That's one minute gone in the round.
Fimm tries to lock up and control but Marr gives him a forearm to the face and pushes him away.
The ref warns both fighters not to hold the cage as they work up against the meshing.
Fimm is in all sorts of trouble here.
Marr landing shots from mount.
 It looks like Sera Fimm has been cut. It looks like Sera Fimm has been cut.
Marr pausing momentarily but resumes with a couple of decent strikes that do a bit of damage.
Marr prevents Fimm from getting the reversal.
Marr looking to control and managing it successfully.
Fimm can't escape the position.
That's two minutes gone in the round.
Fimm tries to hold on but Marr postures up.
Marr tries to control but Fimm wriggling away.
Fimm is looking to improve his position but Marr isn't that keen on the idea.
Marr takes a little breather and maintains the position. The referee will be looking for him to stay active from such a dominant position though.
Fimm is squirming around, avoiding Marr's attempts to control the action.
Fimm tries to reverse the position but Marr maintains control.
That's three minutes gone in the round.
Fimm tries to hold on but Marr pushes him away.
Marr content just to control the position here.
Marr is looking to stand but Fimm has his arms wrapped tightly around him, looking to prevent the damage.
Fimm is desperately trying to get back to half guard.
Marr raining down shots from the mount!
Marr has been looking to land a fair amount of strikes on the ground. He might be looking to soften his opponent up in order to work for a submission.
That's four minutes gone in the round.
Fimm keeping his composure momentarily, calmly looking to get back to half guard.
Marr lands with some vicious ground and pound - can Fimm hang on?
Marr can't quite control the action as he would like just now, as Fimm is looking to escape.
Fimm bucks up and manages to get a nice reversal! He's in guard on the top - nicely done!
The crowd thankful this round is nearly over.
Marr has a loose triangle. He'll be looking to tighten that up but Fimm can see exactly what he's planning and manages to posture up and free himself.
And that is the end of the round. The fighters go back to their corners.
Steven Marr dominated that round.
The cut man is working on Sera Fimm's cut.
The corners get their ten second warning. Both fighters stand from their stools and stare each other down, ready to get back to the action.
Marr misses with a takedown
and Fimm counters by moving into the clinch.
A head punch blocked on the inside by Marr.
Marr blocks a punch to the side of the head.
Marr jumps guard but Fimm stands there with Marr around his waist. Marr gives up and drops back to his feet. We remain in the clinch.
Fimm pushes off and fires off an elbow that misses, before clinching up again, against the cage.
Marr tries to take the fight to the ground by pulling guard but can't manage it.
That's three failed takedown attempts in the round for Steven Marr. That's going to take a lot out of him.
Fimm misses with a knee strike.
We've had a slow start to the round here - hopefully the action picks up.
Fimm is defending well against a takedown attempt.
Fimm has moved round to his opponent's back and is looking for a suplex! Oh snap! He's tossed Marr clear over his head and slammed him to the mat!
Fimm working for the choke.
That's one minute gone in the round.
Marr is trying to get back to his feet but he's not managed it yet.
Fimm avoiding Marr 's attempts to control his hands.
Marr is in bad spot here.
Marr defends a prolonged rear naked choke attempt and turns nicely into his opponent's guard.
Fimm is working from a closed guard but he's struggling to control his opponent.
Fimm manages to sweep nicely, so he's now on top. Marr manages to get himself to full guard.

That's two minutes gone in the round.
Fimm stays in close to Marr's body and controls the position.
Fimm looking to pass the guard.
Fimm forces his way into half guard.
Fimm trying to control the action but Marr is working from the bottom.
Marr is pressing down on Fimm's left leg trying to get back to full guard. He's managed it.
That's three minutes gone in the round.
Fimm trying to control the position from guard on top but Marr is wriggling around, looking for whatever he can.
Marr looking for a sweep. Not yet Marr, not yet.
The fighters are pressed up against the cage, both looking to find a bit of space to work.
Marr working a defensive guard but Fimm passes into half guard.
Marr is really dominating this fight. Is there anything that Fimm can do to turn this around?
Marr trying to control here.
Marr could do with losing a few pounds - he looks very soft around the mid section, to put it politely.
Neither fighter is being very active at the moment, with Fimm in particular looking to stall.
Marr trying to control but Fimm postures up.
That's four minutes gone in the round.
The crowd are showing their displeasure at the lack of action as loud boos ring out around the arena.
Marr desperately trying to maintain half guard.
Fimm is trying to get back to his feet now but his leg is trapped.
The ref stands the fighters back up due to a lack of activity.
Marr misses with an attempted mid kick.
It seemed like Fimm was going to counter with the hook but didn't fully commit to it.
Marr fails with the takedown.
Boooooooooooooooooooo!!! God, this has been a terrible round. Come on you two, sort yourselves out!
Fimm misses with a half-hearted attempt at a head kick.
Fimm shoots in for a takedown. He's persisting with it as Marr sprawls well. Marr wins this battle and keeps the fight standing. Fimm gets slowly back to his feet.
And that is the end of the round. The fighters go back to their corners.
Sera Fimm showed his class in that round. I'd imagine he'll take it on all the scorecards.
The cut man is working on Sera Fimm's cut.
That's time! Back to the action! This is the final round!
Marr rushes Fimm and pushes him back against the cage in a clinch.
Fimm tried to land a shot to the body but connects with Marr's elbow.
Fimm fails to pull guard.
Marr is pressed up against the cage. Fimm has hold of a leg and is looking to drag Marr down to the mat. Marr avoids the attempt though and has circled away. We're back to striking at a distance.
Fimm has taken the fight to the clinch.
Marr manages to break the clinch.
Marr falls off balance throwing a combination
and Fimm counters with a nice double leg into guard.
We've had a slow start to the round here - hopefully the action picks up.
Marr not looking particularly offensive just at the moment.
Fimm slows down the pace of the fight for a moment. He'll need to remain active if he doesn't want to see the fight stood back up.
That's one minute gone in the round.
Marr has a closed guard, preventing Fimm from standing up.
Fimm pressing down on his opponent's thigh, looking to pass guard. Marr is keeping the position for now.
Marr wants to sweep but no luck.
Marr wants to stand up but Fimm is controlling him.
Fimm stopping the sweep attempt from Marr.
The referee has decided to stand the fighters back up, so we'll restart on the feet.
Fimm leaves Marr with his face pressed against the mat as he sprawls beautifully, defending against a solid takedown attempt.
That's two minutes gone in the round.
The crowd are showing their displeasure at the lack of action as loud boos ring out around the arena.
Marr shoots in for a takedown. "I don't think so" says Fimm as he avoids it easily.
Both fighters are breathing heavily.
Marr throws out a loose jab but Fimm uses good head movement to avoid it.
Fimm moves into the clinch.
Marr has Fimm pressed up against the cage and is working for takedown. Fimm manages to improve position though and keeps the fight standing.
That's three failed takedown attempts in the round for Steven Marr. That's going to take a lot out of him.
Marr escapes the clinch and we're back to striking.
Steven Marr is looking to throw some combinations by the looks of things.
Fimm clinches up with Marr and pushes him back against the cage.
Fimm turns his back and goes for a hip toss. It's a bit messy but it gets the job done and Fimm manages to end up in side control.
Marr wants to control but Fimm postures up.
Marr takes a couple of big shots there - the referee warns him that he has to defend himself better.
Marr is pushing Fimm's head away, looking to escape. Fimm manages to hold on to the position though.
That's three minutes gone in the round.
Fimm working the body and head with strikes.
Marr is looking for a sweep.
Marr being controlled for a moment.
Fimm's corner are shouting for him to control the position and he seems happy to oblige.
Fimm working the head and body with strikes.
Fimm trying to control the position but Marr is working away.
Steven Marr overall seems to be getting the better of the ground position in the fight so far.
That's four minutes gone in the round.
A few boos can be heard. I'm sure they will multiply if the fighters don't pick up the pace.
Fimm wants to stand but Marr has his arm trapped.
Fimm is trying to get an arm triangle but Marr is defending well.
Marr tries to work a leg under to get back to half guard but Fimm wriggles his own leg back out and remains in side control.
Boooooooooooooooooooo!!! God, this has been a terrible round. Come on you two, sort yourselves out!
Fimm has had enough of the ground for now and decides to stand.
Fimm closes the distance and pushes Marr back into the cage.
And that's the end of the fight!
Sera Fimm comfortably won the final round on my scorecard.
I think Fimm has won this one but let's see whether the judges agree with me. Over to the ring announcer for the scorecards.
Ladies and gentlemen, after 3 rounds of action, we go to the scorecards for a decision.
Judge Radbod Blank scores the fight for Sera Fimm!
Judge Albert Achterberg scores the fight for Sera Fimm!
Judge Aafke Stam scores the fight for Sera Fimm!
Sera Fimm wins by unanimous decision!
|
|
|
|
|
|
|
|
|
|
|
|
|
|
|
|
|
|
|
|
|
|
|
| S |
C
A |
G |
S |
C
B |
G |
|
S |
C |
G |
|
energy
A | B |
|
hype
A | B |
|
pop
A | B |
|
mgr
A | B |
|
FIGHT
RATING
33% |
|
|
|
|
|
|
|
|
|
|
