 |
S-1 WGP 2022 in Tokyo PBP Commentary |
Undercard bout
|
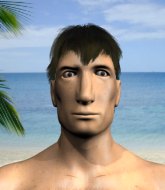
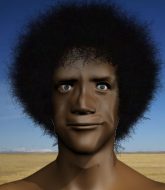
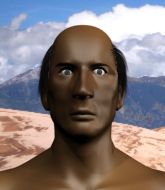
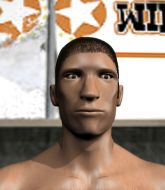
Coming up we have a heavyweight kickboxing rules bout between Young Gunner (ranked 6716 p4p, 18816 weight class) and Alex Minasian (ranked 729 p4p, 740 weight class). Over to our ring announcer for the fighter introductions!
 |
|
 |
| 174 cm
20
205
0 - 2 - 0 |
|
189 cm
38
208
7 - 4 - 1 |
Excellent boxer
Cuts easily
|
|
Excellent MT
Granite chin
|
|
| |
|
Ladies and gentlemen. This fight is 3 rounds, in the heavyweight division.
Introducing the fighter to my left, fighting out of the red corner.
With a record of 0 - 2 - 0, fighting out of Rio de Janeiro, Young Gunner!
And introducing the fighter to my right, fighting out of the blue corner.
With a record of 7 - 4 - 1, fighting out of Amsterdam, Alex Minasian!
The judges for this bout are Yukihiro Shimada, Yasuomi Hirokawa and Kenichi Hosakawa.

The bell rings for round one and we are underway!
Gunner fails to land with the punch combination there - jab, cross, hook, miss, miss, miss.
A lazy left from Minasian finds it's target.
 It looks like Young Gunner has been cut. It looks like Young Gunner has been cut.
Minasian swats away the attempt to clinch by Gunner.
Minasian is looking for the big counter here.
Gunner could do with losing a few pounds - he looks very soft around the mid section, to put it politely.
Minasian connects nicely with a jab. Noted by the judges no doubt.
The fight stays on the outside here - Gunner looks like he's thinking about clinching though.
Gunner throws a head kick but Minasian moves out of range.
Both fighters circling slowly here as the pace drops. Hopefully one of them does someth.. OOOHHHH!!!! Minasian throws an absolute beast of a head kick! Gunner is done! He's out cold, twisted and contorted up against the ropes! Wow!
Ladies and gentlemen, after 0:36 of round 1, we have a winner by way of KO (Head Kick). Alex Minasian!
Alex Minasian thanked the fans post fight for their support.
Young Gunner was interviewed post fight and said 'Calling off fights for cuts and shit now this!'.
|
|
|
|
|
|
|
|
|
|
|
|
|
|
|
|
|
|
|
|
|
|
|
| S |
C
A |
G |
S |
C
B |
G |
|
S |
C |
G |
|
energy
A | B |
|
hype
A | B |
|
pop
A | B |
|
mgr
A | B |
|
FIGHT
RATING
94% |
|
|
|
|
|
|
|
Undercard bout
|
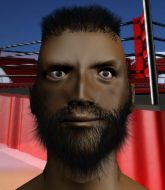
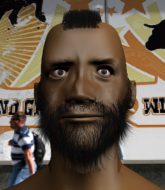
Coming up we have a featherweight kickboxing rules bout between Kenji Nakamoto (ranked 4793 p4p, 25437 weight class) and Sylvester Malone (ranked 421 p4p, 524 weight class). Sylvester Malone will no doubt be trying to keep this one on the feet, where he has a distinct advantage.
 |
|
 |
| 177 cm
26
150
2 - 1 - 0 |
|
168 cm
21
145
0 - 2 - 0 |
Solid Muay Thai
Intelligent
|
|
Excellent boxer
Very confident
|
|
| |
|
Ladies and gentlemen. This fight is 3 rounds, in the featherweight division.
Introducing the fighter to my left, fighting out of the red corner.
With a record of 2 - 1 - 0, fighting out of Tokyo, Kenji Nakamoto!
And introducing the fighter to my right, fighting out of the blue corner.
With a record of 0 - 2 - 0, fighting out of Tokyo, Sylvester Malone!
The judges for this bout are Ren Mimura, Kenichi Hosakawa and Shigeki Sano.
The bell rings for round one and we are underway!
Nakamoto lunges in with swinging rights and lefts but Malone circles away quickly and effectively.
Malone tries to clinch but Nakamoto moves out of range.
Malone looks to land a body kick but Nakamoto moved away.
Nakamoto fails to land with a series of punches.
Malone slips a jab and a cross from Nakamoto.
Nakamoto avoids the body shot from Malone.
Nakamoto avoids the clinch attempt nicely.
As Malone looks to move away, Nakamoto throws a big counter combo but Malone just gets out of the way.
A combination from Nakamoto does no damage.
Malone misses with a two punch combination.
Malone tries to grapple but his opponent circles
and Nakamoto counters with a one-two to the body.
Malone moves in looking to clinch but Nakamoto pushes him off.
Nakamoto moves out of range of the body kick from Malone.
Malone fails in his attempt to clinch.

That's one minute gone in the round.
Malone throws a leg kick

and Nakamoto counters by moving into the clinch. Good anticipation by Nakamoto.
Malone is trying to force a seperation but Nakamoto has the dominant position.
Nakamoto working Malone over with knees to the body.
Malone stalling in the clinch but Nakamoto improves position.
Nakamoto throws a blind hook that connects with the side of Malones head.
Malone takes a knee to the side of the body.
Nakamoto connects with a knee to the head.
Nakamoto scores a nice knee to the body.
Nakamoto keeps control of Malone as he tries to wriggle out of the double underhooks.
Nakamoto lands an elbow inside.
 It looks like Sylvester Malone has been cut. It looks like Sylvester Malone has been cut.
A knee to the head by Nakamoto.
The crowd are loving this. Great action here.
Malone looking to slow down the pace here.
Nakamoto creates a bit of space for himself and sneaks an elbow through Malone's defenses.

That's two minutes gone in the round.
Nakamoto digs a right hand underneath Malone's ribcage. Malone let out a lung full of air as it connected.
Nakamoto softening up his opponent with strikes, against the ropes.
Malone looks winded!
Nakamoto scores with a nice hook to the head.
Nakamoto lands a shoulder strike.
Malone wants to stall.
Malone takes an elbow to the forehead.
Nakamoto connects with a nasty looking knee right to Malone's face.
Nakamoto managing to block the knees to the body from Malone.
Nakamoto crunches a lovely knee into Malone's ribcage.
Nakamoto lands a good knee to the midsection. Malone won't want to take too many of those.
The crowd applaud the fighters' efforts here as the round comes to an end.
Nakamoto landing some nice looking knees to the body.
And that is the end of the round. The fighters go back to their corners.
Kenji Nakamoto dominated that round.
The cut man is working on Sylvester Malone's cut.
The referee calls time. The cornermen exit stage left and we're back to business.

Nakamoto throws a nice looking combination but Malone bobs and weaves to avoid any damage.
Malone takes a swing at Nakamoto's ribcage but misses.
Nakamoto avoids the clinch attempt nicely.
Malone tries to clinch but Nakamoto is having none of it.
Malone walks into a perfectly timed head kick by Nakamoto and drops face first to the floor! Malone's eyes are wide open but he's not all there - he's just flopping around the mat like a drunk on rollerskates! The referee doesn't even start the count - he's called an end to the fight, with Malone in no position to continue!
Ladies and gentlemen, after 0:24 of round 2, we have a winner by way of TKO (Head Kick). Kenji Nakamoto!
|
|
|
|
|
|
|
|
|
|
|
|
|
|
|
|
|
|
|
|
|
|
|
| S |
C
A |
G |
S |
C
B |
G |
|
S |
C |
G |
|
energy
A | B |
|
hype
A | B |
|
pop
A | B |
|
mgr
A | B |
|
FIGHT
RATING
63% |
|
|
|
|
|
|
|
Undercard bout
|
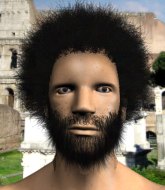
Coming up we have a lightweight kickboxing rules bout between Victor Higgins (ranked 5715 p4p, 5727 weight class) and Harem Bukkake (ranked 545 p4p, 546 weight class). Higgins's ring entrance music is that housewives' favourite, Actin' Crazy by Action Bronson. I can't wait for this one - let's get the fighter introductions out of the way and get this one started!
 |
|
 |
| 170 cm
18
155
1 - 1 - 0 |
|
181 cm
20
164
0 - 1 - 0 |
Brawler
Granite chin
|
|
Brawler
Determined
|
|
| |
|
Ladies and gentlemen. This fight is 3 rounds, in the lightweight division.
Introducing the fighter to my left, fighting out of the red corner.
With a record of 1 - 1 - 0, fighting out of Los Angeles, Victor Higgins!
And introducing the fighter to my right, fighting out of the blue corner.
With a record of 0 - 1 - 0, fighting out of Tokyo, Harem Bukkake!
The judges for this bout are Shigeki Fujiwara, Yasuomi Hirokawa and Shirou Masuda.
The bell rings for round one and we are underway!

Bukkake clinches with his opponent.
Bukkake wants to stall.
Bukkake prevents a body shot from Higgins.

Bukkake pushes off and circles away, back to the middle of the mat.
Bukkake showing good head movement there, avoiding the strikes from Higgins.
Bukkake takes a punch to the jaw and another one to the bread basket.
Bukkake clinches up against the ropes.
Bukkake manages to break the clinch.
Bukkake misses with a two punch combination.
Bukkake gets a clinch.
Bukkake stalling in the clinch but Higgins improves position.
Higgins wants to break the clinch but can't.
Bukkake manages to break the clinch.
Higgins throws a series of punches but Bukkake moves out of range.
Higgins looks to have improved his striking defense since last time we saw him fight.
Bukkake circles away from the clinch attempt.
Bukkake clinches up with Higgins and pushes him back against the ropes.
That's one minute gone in the round.
Higgins blocks an uppercut.
Bukkake's corner calls for him to break the clinch, which he does.
Bukkake forces Higgins back against the ropes and clinches.
The two fighters are working to gain dominance in the clinch.
Bukkake manages to break the clinch.
Higgins swings away but doesn't land with a series of punches.
Bukkake clinches up against the ropes.
Bukkake lands with a good tight uppercut to the head.
Bukkake swings wildly with an uppercut but Higgins uses good head movement to avoid it.
Bukkake is trying to maintain a safe position but Higgins gets an underhook and turns Bukkake into the ropes.
Higgins blocking some punches.
Higgins prevents a body shot from Bukkake.

Higgins breaks from the clinch.
Bukkake gets a clinch.
That's two minutes gone in the round.
Higgins is looking to score with knees to the body. Maybe he'll change it up and go body then head. Bukkake is defending well for now.
Higgins lands with a light punch inside.
Bukkake tries to land a shot to the body but it's blocked.
Higgins wants to break the clinch but can't.
Higgins is trying to break the clinch but Bukkake has him pressed against the ropes.
Bukkake misses with a knee to the head.
Bukkake pushes off and circles away, back to the middle of the mat.
Victor Higgins seems to be the more aggressive standup fighter in this bout.
Wooooo! Give it up for these two warriors! They are putting on a show!
Bukkake gets a clinch.
Come on Bukkake - let's have some action - none of this stalling nonsense.
Bukkake is looking to score with knees to the body. Maybe he'll change it up and go body then head. Higgins is defending well for now.
Nice elbow from Bukkake.
Bukkake breaks from the clinch.
Bukkake moves into the clinch successfully.
Bukkake breaks the clinch and we're back to striking at distance.
And that is the end of the round. The fighters go back to their corners.
Harem Bukkake dominated that round.
The fighters' corners scream their final instructions, as the referee calls time. Here we go, back to the action!
Bukkake slips a jab and a cross from Higgins.
Bukkake is trying to avoid his opponent's strikes and get into the clinch.
Higgins looks to score with a combo but nothing lands.
Bukkake misses with a double jab.
Bukkake moves out of range as Higgins throws a body kick.
Bukkake misses with a head kick.
Higgins gets tackled into the ropes by Bukkake. Bukkake maintains the clinch.
With the two fighters working up against the ropes, Bukkake just misses with a elbow thrown towards Higgins's brow.
Higgins wants to break free but Bukkake has control.
Bukkake has Higgins pushed against the ropes.
Bukkake working Higgins over with knees to the body.
We've had a slow start to the round here - hopefully the action picks up.
Bukkake blocks an elbow strike.
Bukkake keeps control of Higgins as he tries to wriggle out of the double underhooks.
Higgins blocks a couple of punches on the inside.
Bukkake trying to stall but Higgins improves his position.
Higgins wants to push off and get back to the center of the mat but Bukkake has him pressed against the ropes.
That's one minute gone in the round.
Bukkake breaks the clinch.
Bukkake clinches with his opponent.
Bukkake breaks the clinch and we return to the middle of the mat.
Higgins goes for a spinning back kick but it misses.
Higgins swats away the attempt to clinch by Bukkake.
Higgins misses with the combination.
Higgins misses with a jab and misses with a cross straight after too.
Both fighters are absolutely exhausted here.
Bukkake rushes Higgins and presses him up against the ropes.
Higgins breaks from the clinch.
Higgins tries to close the distance and clinch up but Bukkake swats him away and circles back towards the center.
Higgins scores with a nice looking left hook and follows it up with an uppercut!
Bukkake moves into range and clinches up with Higgins.
Bukkake softening up his opponent with strikes, against the ropes.
That's two minutes gone in the round.
The crowd cheering loudly, showing their appreciation for the quality fight we're seeing here.
Bukkake lands with a good tight uppercut to the head.
Higgins throws a vicious knee straight up the middle but Bukkake blocks it with crossed arms.
Bukkake lands with a left to the head.
Bukkake breaks the clinch and we're back to striking at distance.
Bukkake tries to close the distance and clinch but Higgins swats him to one side with an open hand palm strike and circles away.
Bukkake slips a jab and a cross from Higgins.
Bukkake looks to score with a combo but nothing lands.
Higgins swings away but doesn't land with a series of punches.
Bukkake fails to land with the punch combination there - jab, cross, hook, miss, miss, miss.
Higgins doesn't manage to clinch there - Bukkake circles away.
Some wild striking there from Bukkake.
Bukkake misses with a series of wild punches.
A head kick misses from Bukkake.
And that is the end of the round. The fighters go back to their corners.
Harem Bukkake showed his class in that round. I'd imagine he'll take it on all the scorecards.
That's time! Higgins's corner gives him a slap on the ass as he gets ready to fight. And we move into the final round!

Bukkake tries to grapple but his opponent circles
and Higgins counters with a stiff right hand.
Higgins pushes Bukkake up against the ropes in a clinch.
Bukkake softening up his opponent with strikes, against the ropes.
Higgins lands a left hand that snaps the head of Bukkake backwards.
Bukkake tries a shoulder strike but it doesn't do any damage.
Higgins is trying to break the clinch but Bukkake has him pressed against the ropes.
Bukkake escapes the clinch and we're back to striking.
Higgins lands with a nice combination. Bukkake backs away looking to recover.
We've had a slow start to the round here - hopefully the action picks up.
Bukkake moves into range and clinches up with Higgins.
Bukkake lands a hook to the side of the head.
Higgins is trying to break the clinch but Bukkake has him pressed against the ropes.
Bukkake taking a breather.
Bukkake breaks the clinch and we're back to striking at distance.
That's one minute gone in the round.
Sloppy strikes from Higgins. Those never looked like landing.
Victor Higgins is winning the standup battle so far.
Higgins swings away but doesn't land with a series of punches.
Both fighters are breathing heavily.
Bukkake forces Higgins back against the ropes and clinches.
Bukkake has been the more effective fighter overall so far.
Bukkake's corner calls for him to break the clinch, which he does.
Higgins swings wildly with a hook that is half blocked by Bukkake.
Bukkake wants to land a leg kick but Higgins is out of range.
Higgins throws a right and a left that Bukkake avoids nicely.
Higgins scores to the head and body with a nice combination!
A combination from Bukkake does no damage.
Bukkake gets in close and instigates a clinch.
Good body shot from Bukkake.
Harem Bukkake seems to be working more effectively in the clinch in the fight so far.
Bukkake pushes off and fires off an elbow that misses, before clinching up again, against the ropes.
The fans in attendance giving it up for the two fighters, who have really let it all hang out in the last minute or so!
A shot in the inside from Bukkake.
Bukkake manages to break the clinch.
Higgins throws a wild combination but nothing lands.
That's two minutes gone in the round.
Bukkake clinches up against the ropes.
Bukkake missing with knees to the body.
Higgins breaks the clinch and we return to the middle of the mat.
Bukkake takes a step back and watches a body kick go sailing past his mid section.
The fight moves into the clinch position.
Bukkake escapes the clinch and we're back to striking.
Higgins tries to bum rush Bukkake with a series of wild strikes but Bukkake uses good footwork to avoid the assault.
Bukkake forces Higgins back against the ropes and clinches.
A short body shot lands from Bukkake as the two fighters clinch.
Higgins prevents a body shot from Bukkake.
Higgins wants to strike at distance but he can't break free of the clinch.
Victor Higgins has stepped it up - he knows he needs a finish here!
Harem Bukkake is fighting for a decision - hopefully he's judged it right and he's actually winning the fight.
Bukkake makes some space for himself and lands an uppercut.
And that's the end of the fight!
I would just about give that final round to Harem Bukkake.
I've got Bukkake winning every round here. Surely the decision will go his way and he'll pick up a well deserved decision victory. Over to the ring announcer for the scorecards.
Ladies and gentlemen, after 3 rounds of action, we go to the scorecards for a decision.
Judge Shigeki Fujiwara scores the fight 27:30
Judge Yasuomi Hirokawa scores the fight 27:30
Judge Shirou Masuda scores the fight 27:30
In favor of your winner, by unanimous decision... Harem Bukkake!
|
|
|
|
|
|
|
|
|
|
|
|
|
|
|
|
|
|
|
|
|
|
|
| S |
C
A |
G |
S |
C
B |
G |
|
S |
C |
G |
|
energy
A | B |
|
hype
A | B |
|
pop
A | B |
|
mgr
A | B |
|
FIGHT
RATING
63% |
|
|
|
|
|
|
|
Undercard bout
|
Coming up we have a bantamweight kickboxing rules bout between Fanaki Fukawa (ranked 25394 p4p, 24496 weight class) and Clinton Strong (ranked 327 p4p, 338 weight class). Over to our ring announcer for the fighter introductions!
 |
|
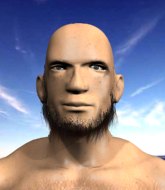 |
| 168 cm
22
135
0 - 4 - 0 |
|
180 cm
21
135
4 - 3 - 0 |
Counter fighter
Good chin
|
|
Brawler
Prefers standup
|
|
| |
|
Ladies and gentlemen. This fight is 3 rounds, in the bantamweight division.
Introducing the fighter to my left, fighting out of the red corner.
With a record of 0 - 4 - 0, fighting out of Tokyo, Fanaki Fukawa!
And introducing the fighter to my right, fighting out of the blue corner.
With a record of 4 - 3 - 0, fighting out of Amsterdam, Clinton Strong !
The judges for this bout are Yukihiro Shimada, Shirou Masuda and Hirohito Nitta.
The bell rings for round one and we are underway!
Fukawa gets tackled into the ropes by Strong . Strong maintains the clinch.
Knees in the clinch landing for Strong .
Fukawa has had enough of the clinch and is looking to separate.
Strong has Fukawa pressed against the ropes, preventing Fukawa from circling away and getting back to striking at range.
Strong prevents Fukawa from breaking the clinch.
Strong softening up his opponent with strikes, against the ropes.
Fukawa is trying to work out of this bad position, with his back against the ropes.
Strong keeps the fight in the clinch, despite Fukawa's efforts to push away.
A frustrated look appears on Fukawa's face as he tries to break the clinch.
Strong lands a hook to the side of the head.
Strong softening up his opponent with strikes, against the ropes.
We've had a slow start to the round here - hopefully the action picks up.
Strong lands a damaging elbow.
It looks like Fanaki Fukawa has been cut.
Strong misses with a shot to the kidneys.
Strong keeps the fight in the clinch, despite Fukawa's efforts to push away.
Strong keeps control of Fukawa as he tries to wriggle out of the double underhooks.
That's one minute gone in the round.
Fukawa wants to break the clinch but can't.
Fukawa wants to break free. God knows he wants to breaaaak freeee.
Strong lands a nice looking hook to the body, against the ropes.
Fukawa tries to circle away but Strong has him pinned against the ropes.
Fukawa takes a knee to the side of the body.
A body shot lands from Strong .
Fukawa can't break the clinch.
Strong unloads a knee to the mid-section. Fukawa lets out a prehistoric sounding urrrrgh.
Fukawa is breathing heavily.
Strong lands with a light punch inside.
Strong lands with a left to the head.
Strong crunches a lovely knee into Fukawa's ribcage.
Strong lands a body punch.
Fukawa takes an elbow to the temple.
Strong with the Thai clinch, lands a knee to the head.
The fans in attendance giving it up for the two fighters, who have really let it all hang out in the last minute or so!
A nice glancing elbow lands by Strong .
That's two minutes gone in the round.
Strong creates a bit of space and fires a knee right up the middle, almost lifting Fukawa off his feet and sending him crashing to the canvas! Fukawa is trying to get back to his feet but his equilibrium is completely gone! The referee has called it off! This fight is over! Strong is jumping up and down like a mad man, celebrating with his cornermen.
Ladies and gentlemen, after 2:10 of round 1, we have a winner by way of TKO (Knee). Clinton Strong !
|
|
|
|
|
|
|
|
|
|
|
|
|
|
|
|
|
|
|
|
|
|
|
| S |
C
A |
G |
S |
C
B |
G |
|
S |
C |
G |
|
energy
A | B |
|
hype
A | B |
|
pop
A | B |
|
mgr
A | B |
|
FIGHT
RATING
59% |
|
|
|
|
|
|
|
Undercard bout
|
Coming up we have a bantamweight kickboxing rules bout between Shigatsu Miyamoto (ranked 23813 p4p, 4144 weight class) and Joao Perez (ranked 367 p4p, 249 weight class). Miyamoto's ring entrance music is that housewives' favourite, 82.99 FM. Both fighters look pumped up here. Let's hope this is a good fight!
 |
|
 |
| 166 cm
29
141
6 - 5 - 0 |
|
180 cm
26
145
2 - 1 - 0 |
Basic striking
Good chin
|
|
Brawler
Determined
|
|
| |
|
Ladies and gentlemen. This fight is 3 rounds, in the bantamweight division.
Introducing the fighter to my left, fighting out of the red corner.
With a record of 6 - 5 - 0, fighting out of Tokyo, Shigatsu Miyamoto!
And introducing the fighter to my right, fighting out of the blue corner.
With a record of 2 - 1 - 0, fighting out of Rio de Janeiro, Joao Perez!
The judges for this bout are Tatsuya Matsuyama, Ren Mimura and Shirou Masuda.
The bell rings for round one and we are underway!
Perez showing good head movement there, avoiding the strikes from Miyamoto.
Perez throws a lazy right hand but Miyamoto sees it coming a mile off and sidesteps it easily.
Perez dodges the punch combination from Miyamoto.
A swing and a miss from Perez.
Miyamoto swings away but doesn't land with a series of punches.
Perez is a painfully thin specimen of a man. You do wonder whether a good body kick would snap him clean in two.
Danga de danga de dang - Miyamoto scores with a four punch combination!
Miyamoto slips under a jab from Perez.
Miyamoto tries to counter by clinching up but Perez breaks away and moves out of range.
Joao Perez seems to be the more aggressive standup fighter in this bout.
Perez misses with a body shot
and Miyamoto counters by clinching up.
Miyamoto stalling the fight.
Miyamoto's corner are urging him to control the action in the clinch for a moment, rather than mount any serious offense. I'm sure the crowd appreciate those instructions... not.
Miyamoto gets a warning from the ref for wasting time.
A real battle for position is taking place between these two warriors.
Miyamoto using the Thai clinch to land knees to the body.
Miyamoto pushes off and circles away, back to the middle of the mat.
Miyamoto lands a jab followed by a nice looking cross.
That's one minute gone in the round.
Miyamoto gets in close and instigates a clinch.
Miyamoto scores a nice knee to the body.
Miyamoto has Perez pressed against the ropes, preventing Perez from circling away and getting back to striking at range.
Miyamoto breaks from the clinch.
Miyamoto cracks Perez with an open hand slap.
A shot to the body from Perez misses
and Miyamoto counters with a three punch combo that has Perez backing up. Perez nods at Miyamoto to acknowledge the strikes.
 Perez is rocked! Perez is rocked!
Perez misses the shot to the body.
Perez is still on wobbly legs! Can Miyamoto finish him?
Miyamoto slips under a jab from Perez.
Perez seems to have recovered his senses.
Miyamoto fakes the leg kick and cracks Perez in the body.
Miyamoto fakes a jab and scores with a low kick.
Perez throws a jab but it's blocked by Miyamoto.
Miyamoto punishes Perez's body with a nice straight punch.
Joao Perez is looking to keep the fight on the feet at all costs.
This has been an exciting period of action!
Perez tries to keep at a distance but Miyamoto has taken the fight into the clinch.
Miyamoto escapes the clinch and we're back to striking.
That's two minutes gone in the round.
Miyamoto dips down and scores with a jab to the body.
Perez closes the distance but Miyamoto moves to the side
and Perez takes a counter punch right on the button for his troubles.
Miyamoto works the jab nicely.
Miyamoto steps to the side to avoid the strikes from Perez.
Miyamoto has managed to clinch.
Miyamoto breaks the clinch.
Perez wants to clinch.
Miyamoto closes the distance and pushes Perez back into the ropes.
The crowd applaud the fighters' efforts here as the round comes to an end.
Miyamoto's corner calls for him to break the clinch, which he does.
Miyamoto lands a two punch combo.
Perez misses with a body punch
and Miyamoto counters with a stiff right hand.
And that is the end of the round. The fighters go back to their corners.
Shigatsu Miyamoto dominated that round.
The referee calls time. The cornermen exit stage left and we're back to business.
The fight stays on the outside here - Perez looks like he's thinking about clinching though.
Miyamoto rushes Perez and presses him up against the ropes.
Perez is trying to push Miyamoto away but Miyamoto has him pressed against the ropes, so he's going nowhere.
Miyamoto using the Thai clinch to land knees to the body.
Perez is trying to slow down the pace in the clinch, to catch his breath.
Miyamoto is working hard here but doesn't seem to be able to control effectively, up against the ropes.
Miyamoto breaks the clinch and we're back to striking at distance.
We've had a slow start to the round here - hopefully the action picks up.
Perez misses with a straight right.
Miyamoto lands three nice shots there - that looked like it hurt!
A shot to the body from Perez misses
and Miyamoto counters with a straight punch to the midsection.
Miyamoto gets in close and instigates a clinch.
Miyamoto breaks from the clinch.
That's one minute gone in the round.
Miyamoto throws a one two combo.
Miyamoto lands a jab-cross combination.
Miyamoto closes the distance and presses his opponent up against the ropes.
Perez looking to slow down the pace here.
Perez is trying to push Miyamoto away but Miyamoto has him pressed against the ropes, so he's going nowhere.
Miyamoto breaks from the clinch.
Perez throws a lazy uppercut
and Miyamoto counters with a two punch combo.
Perez throws an overhand right that lands on Miyamoto's shoulder, as Miyamoto tries to avoid the shot.
Perez throws a hook to the body but it doesn't connect.
Miyamoto avoids a lazy jab quite easily.
Miyamoto fails to land with a series of punches.
The crowd are loving this. Great action here.
Perez is looking to clinch.
Miyamoto throws a combination. Perez tries to block but a couple of punches get through.
Miyamoto is looking to land body kicks.
Perez looks like he wants to counter punch here.
A slow jab from Perez misses its intended target.
That's two minutes gone in the round.
Perez misses with a straight right.
Miyamoto stalks Perez and leaps in with a furious combination of punches. Uppercuts and crosses smash into Perez's face. Perez staggers backwards, shaken.
A big right from Perez misses.
Miyamoto forces Perez back against the ropes and clinches.
Perez wants to break the clinch but can't.
Miyamoto's corner calls for him to break the clinch, which he does.
Perez blocks the body kick.
Miyamoto clinches up with Perez and pushes him back against the ropes.
Miyamoto breaks from the clinch.
Miyamoto lands with a nice low kick. That'll leave a bruise.
Perez misses with an uppercut.
Perez tries to clinch but fails miserably
and Miyamoto connects with a straight left hand counter down the middle.
The crowd applaud the fighters' efforts here as the round comes to an end.
Miyamoto moves into the clinch.
Perez working aggressively here.
Miyamoto's corner calls for him to break the clinch, which he does.
Miyamoto scores with a body shot.
And that is the end of the round. The fighters go back to their corners.
Shigatsu Miyamoto dominated that second round.
The corners get their ten second warning. Both fighters stand from their stools and stare each other down, ready to get back to the action. So, we enter the final round. Let's see if either fighter can bring us a finish, or whether we're going to the judges scorecards.
Miyamoto dips down and scores with a jab to the body.
Miyamoto uses good head movement to avoid the hook from Perez.
Perez darts in trying to clinch
and Miyamoto makes him pay by landing a nice hook to the body before moving out of range.
Perez misses with an uppercut.
Perez misses with a lunging right hand
and Miyamoto counters with a right hand to the body.
Miyamoto clinches.
Miyamoto breaks the clinch and we return to the middle of the mat.
A solid leg kick lands there for Miyamoto.
Miyamoto moves into range and throws a combination. A nice jab followed by a hook to the body.
Miyamoto gets in close and instigates a clinch.
Miyamoto lands a right uppercut that snaps the head of Perez backwards.
We've seen a great period of action over the last minute or so - credit to both fighters for going all out!
Miyamoto is looking to score with knees to the body. Maybe he'll change it up and go body then head. Perez is defending well for now.
Perez tries to break the clinch but Miyamoto is controlling the position.
Miyamoto breaks the clinch.
Shigatsu Miyamoto is fighting for a decision here - he's started to take the cautious approach.
That's one minute gone in the round.
Miyamoto lands three nice shots there - that looked like it hurt!
Perez misses with a shot to the body
and Miyamoto counters with a straight punch to the midsection.
Miyamoto is really dominating this fight. Is there anything that Perez can do to turn this around?
Nice defenses there by Miyamoto.
Miyamoto with a nice calf kick.
Miyamoto slips a jab from Perez.
Perez moves to clinch but Miyamoto breaks away
and Miyamoto counters with a left to the body.
Perez tries to clinch up.
Miyamoto feints and then cracks Perez's leading leg with a nice low kick. He's obviously looking to slow Perez down.
Miyamoto uses good footwork to avoid the strikes from Perez.
Miyamoto closes the distance and lands a one-two.
Miyamoto is working the combinations to good effect here.
A good leg kick by Miyamoto.
The crowd cheering loudly, showing their appreciation for the quality fight we're seeing here.
Perez misses with a left hand
and Miyamoto cracks him with a counter punch right on the button.
Miyamoto ducks under a wild hook from Perez.
Miyamoto is looking to wear down Perez with body shots, infact he's throwing more body shots than head shots at the moment.
Miyamoto misses with a two punch combination.
Perez swings wildly with a right hand that was never going to find it's target.
A decent looking body kick lands there for Miyamoto.
That's two minutes gone in the round.
Miyamoto closes the distance and pushes Perez back into the ropes.
Perez tries to break free but Miyamoto pushes him back against the ropes.
Perez is trying to break the clinch but Miyamoto has him pressed against the ropes.
Perez is looking to break free of the clinch but Miyamoto has double underhooks.
Miyamoto breaks from the clinch.
Miyamoto lets the fists fly and connects with a left straight followed by a right hook.
Miyamoto throws a front kick that sends Perez stumbling back into the ropes.
A telegraphed right hand from Perez misses the target.
Perez rushes in with a sloppy looking punch
letting Miyamoto counter with a right hand.
Perez throws a shot from downtown. Miyamoto moves away and avoids it.
The crowd applaud the fighters' efforts here as the round comes to an end.
Perez misses with an uppercut.
Shigatsu Miyamoto is looking to throw some combinations by the looks of things.
Perez doesn't manage to clinch there - Miyamoto circles away.
Joao Perez has stepped it up - he knows he needs a finish here!
Perez misses with a hook
and Miyamoto counters with a one-two to the body.
Perez takes a swing at Miyamoto's ribcage but misses.
And that's the end of the fight!
Shigatsu Miyamoto showed his dominance in that final round.
Well Miyamoto has outscored his opponent in every aspect of the fight today. Only a scarily incompetent judge or two will keep him from a well deserved win... Over to the ring announcer for the scorecards.
Ladies and gentlemen, after 3 rounds of action, we go to the scorecards for a decision.
Judge Tatsuya Matsuyama scores the fight 30:26
Judge Ren Mimura scores the fight 30:27
Judge Shirou Masuda scores the fight 30:27
In favor of your winner, by unanimous decision... Shigatsu Miyamoto!
Shigatsu Miyamoto decided to thank the fans in attendance for making a great atmosphere. It seemed to go down pretty well.
|
|
|
|
|
|
|
|
|
|
|
|
|
|
|
|
|
|
|
|
|
|
|
| S |
C
A |
G |
S |
C
B |
G |
|
S |
C |
G |
|
energy
A | B |
|
hype
A | B |
|
pop
A | B |
|
mgr
A | B |
|
FIGHT
RATING
82% |
|
|
|
|
|
|
|
Undercard bout
|
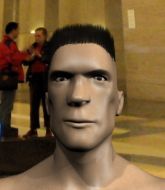
Coming up we have a heavyweight kickboxing rules bout between Luka Doncic (ranked 3265 p4p, 23210 weight class) and Ivarr DeBoneless (ranked 435 p4p, 768 weight class). We have two fighters making their debuts here, so let's see who comes out of this one with their first professional victory.
 |
|
 |
| 200 cm
22
230
0 - 0 - 0 |
|
188 cm
25
215
0 - 0 - 0 |
Solid boxing
Good chin
|
|
Brawler
Granite chin
|
|
| |
|
Ladies and gentlemen. This fight is 3 rounds, in the heavyweight division.
Introducing the fighter to my left, fighting out of the red corner.
With a record of 0 - 0 - 0, fighting out of Tokyo, Luka Doncic!
And introducing the fighter to my right, fighting out of the blue corner.
With a record of 0 - 0 - 0, fighting out of Tokyo, Ivarr DeBoneless!
The judges for this bout are Tatsuya Matsuyama, Yukihiro Shimada and Yukihiro Yamamoto.
The bell rings for round one and we are underway!
Doncic moves into the clinch.
Doncic misses with a shot to the kidneys.
Doncic creates a bit of space for himself and sneaks an elbow through DeBoneless's defenses.
It looks like Ivarr DeBoneless has been cut.
Doncic can't find room to land a body shot as DeBoneless controls the action.
DeBoneless misses the knee to the body. Nice hip positioning from Doncic.
DeBoneless is looking to score with knees to the body. Maybe he'll change it up and go body then head. Doncic is defending well for now.
Doncic pushes off and circles away, back to the middle of the mat.
Wow, both these guys are really going for it!
DeBoneless wants to clinch.
Doncic keeps the fight on the outside.
Sloppy strikes from Doncic. Those never looked like landing.
Ivarr DeBoneless seems to be the more aggressive standup fighter in this bout.
Doncic gets a clinch.
Doncic doesn't land with the attempted body shot.
We've had a slow start to the round here - hopefully the action picks up.
Doncic blocks a knee to the body. He'll have a nicely bruised forearm in the morning.
Doncic breaks from the clinch.
Doncic takes the fight into the clinch.
Doncic escapes the clinch and we're back to striking.
That's one minute gone in the round.
Doncic fakes with an overhand right and moves in to clinch with DeBoneless, pushing him back against the ropes.
Doncic escapes the clinch and we're back to striking.
A combination from Doncic does no damage.
Doncic forces DeBoneless back against the ropes and clinches.
Doncic is trying to maintain a safe position but DeBoneless gets an underhook and turns Doncic into the ropes.
Doncic on the defensive, avoiding the knees to the body.
Doncic manages to break the clinch.
DeBoneless tries to clinch up against the ropes, rushing in to close the distance. Doncic manages to break the clinch and circles back to the middle of the mat.
DeBoneless tries to clinch but Doncic moves out of range.
DeBoneless is looking to take this fight into the clinch.
DeBoneless tries to clinch but Doncic is having none of it.
Doncic keeps the fight on the outside.
Doncic is looking for a counter combo.
DeBoneless has his head snapped back a nice jab. A little nod from DeBoneless there as he acknowledges the shot.
Doncic fails to land with a series of punches.
The fight stays on the outside here - DeBoneless looks like he's thinking about clinching though.
Doncic instigates a clinch.
DeBoneless tries to land a knee to the body but he is off balance and Doncic avoids it.
That's two minutes gone in the round.
Doncic doesn't land with the attempted body shot.
DeBoneless trying to land knees to the body.
Doncic breaks the clinch and we return to the middle of the mat.
We've seen a great period of action over the last minute or so - credit to both fighters for going all out!
DeBoneless tries to clinch up against the ropes, rushing in to close the distance. Doncic manages to break the clinch and circles back to the middle of the mat.
DeBoneless moves in looking to clinch but Doncic pushes him off.
DeBoneless fails in his attempt to clinch.
An attempted straight right counter from Doncic misses the target.
Doncic keeps the fight on the outside.
DeBoneless tries to close the distance and clinch but Doncic swats him to one side with an open hand palm strike and circles away.
DeBoneless tries to close the distance and clinch but Doncic swats him to one side with an open hand palm strike and circles away.
Doncic moves into range and clinches up with DeBoneless.
Doncic breaks from the clinch.
Doncic avoids the clinch attempt nicely.
DeBoneless doesn't manage to clinch there - Doncic circles away.
Doncic has managed to clinch.
Doncic can't find room to land a body shot as DeBoneless controls the action.
DeBoneless misses the knee to the body. Nice hip positioning from Doncic.
Doncic lands an elbow just above DeBoneless 's eye.
Doncic's corner calls for him to break the clinch, which he does.
The fight moves into the clinch position.
And that is the end of the round. The fighters go back to their corners.
Luka Doncic dominated that round.
The cut man is working on Ivarr DeBoneless's cut.
The fighters' corners scream their final instructions, as the referee calls time. Here we go, back to the action!
DeBoneless tries to clinch up but Doncic circles away and keeps his distance.
DeBoneless tries to clinch but Doncic moves out of range.
Doncic closes the distance and presses his opponent up against the ropes.
Doncic misses with a hook to the ribs.
DeBoneless prevents a body shot from Doncic.
Doncic breaks from the clinch.
Doncic gets a clinch.
Doncic pushes off and circles away, back to the middle of the mat.
Doncic moves into the clinch successfully.
Doncic can't find room to land a body shot as DeBoneless controls the action.
Doncic tries to land a shot to the body but it's blocked.
Doncic breaks the clinch and we return to the middle of the mat.
We've had a slow start to the round here - hopefully the action picks up.
Doncic moves into range and clinches up with DeBoneless.
Doncic is really dominating this fight. Is there anything that DeBoneless can do to turn this around?
Doncic breaks from the clinch.
Doncic forces DeBoneless back against the ropes and clinches.
Doncic can't find room to land a body shot as DeBoneless controls the action.
Doncic's corner calls for him to break the clinch, which he does.
Doncic pushes DeBoneless up against the ropes in a clinch.
That's one minute gone in the round.
DeBoneless tries to land a knee to the body but he is off balance and Doncic avoids it.
DeBoneless tries to land knees in the clinch but Doncic avoids the damage to the body.
Doncic pushes off and circles away, back to the middle of the mat.
Doncic swats away the attempt to clinch by DeBoneless.
The fight stays on the outside here - DeBoneless looks like he's thinking about clinching though.
DeBoneless tries to clinch but is not successful on this occasion.
Doncic throws the left hand but DeBoneless avoids the punch easily.
Doncic gets to the clinch - let's see what his plan is here.
Doncic breaks from the clinch.
DeBoneless tries to clinch but is not successful on this occasion.
Doncic misses with a looping right.
DeBoneless is looking to clinch but Doncic is avoiding it.
Doncic circles away from the clinch attempt.
DeBoneless wants to clinch up but Doncic keeps it at a distance.
Doncic clinches up with DeBoneless and pushes him back against the ropes.
Doncic works on DeBoneless's body with a couple of short punches.
Doncic escapes the clinch and we're back to striking.
Doncic has closed the distance and engaged DeBoneless in a clinch.
That's two minutes gone in the round.
A right hook to the body lands for Doncic.
Doncic breaks the clinch.
Doncic misses with a jab, cross combination.
The fans in attendance giving it up for the two fighters, who have really let it all hang out in the last minute or so!
Doncic keeps the fight on the outside.
Doncic instigates a clinch.
Doncic's corner calls for him to break the clinch, which he does.
Luka Doncic is winning the standup battle so far.
Doncic clinches up with DeBoneless and pushes him back against the ropes.
DeBoneless tries to land a knee to the body but he is off balance and Doncic avoids it.
Doncic pushes off and circles away, back to the middle of the mat.
The fight stays on the outside here - DeBoneless looks like he's thinking about clinching though.
DeBoneless tries to clinch there but Doncic circles away.
Doncic closes the distance and presses his opponent up against the ropes.
Doncic blocks a knee to the body. He'll have a nicely bruised forearm in the morning.
Doncic misses the knee to the body. Nice hip positioning from DeBoneless.
Doncic manages to break the clinch.
DeBoneless tries to clinch but Doncic is having none of it.
And that is the end of the round. The fighters go back to their corners.
Luka Doncic dominated that second round.
The cut man is working on Ivarr DeBoneless's cut.
The minute break is over - no more time for sponges and pep talks - back to the action! This is the final round!
Doncic has DeBoneless up against the ropes in a clinch.
Doncic managing to block the knees to the body from DeBoneless.
Doncic's corner calls for him to break the clinch, which he does.
Luka Doncic is looking to throw some combinations by the looks of things.
Doncic moves into the clinch.
Doncic works for underhooks and lands a body shot in the process.
Doncic manages to break the clinch.
DeBoneless tries to clinch up against the ropes, rushing in to close the distance. Doncic manages to break the clinch and circles back to the middle of the mat.
Doncic clinches with his opponent.
The fighters are starting to get sweaty, which will make takedowns a bit more tricky.
Doncic breaks from the clinch.
Doncic closes the distance and pushes DeBoneless back into the ropes.
Doncic missing with knees to the body.
We've had a slow start to the round here - hopefully the action picks up.
Doncic goes for a body shot but it's blocked.
Doncic breaks the clinch and we return to the middle of the mat.
DeBoneless fails with an attempt to clinch.
DeBoneless tries to clinch up against the ropes, rushing in to close the distance. Doncic manages to break the clinch and circles back to the middle of the mat.
Doncic throws a right and a left that DeBoneless avoids nicely.
Doncic scores with a nice one two combo and darts back out of range to avoid anything coming in the opposite direction.
That's one minute gone in the round.
Doncic gets a clinch.
Doncic misses with a shot to the kidneys.
Doncic escapes the clinch and we're back to striking.
Doncic looks to score with a combo but nothing lands.
Doncic swats away the attempt to clinch by DeBoneless.
Doncic pushes DeBoneless up against the ropes in a clinch.
Doncic breaks the clinch and we're back to striking at distance.
DeBoneless gets tackled into the ropes by Doncic. Doncic maintains the clinch.
Doncic manages to break the clinch.
DeBoneless is looking to take this fight into the clinch.
DeBoneless tries to clinch up but Doncic circles away and keeps his distance.
Doncic swats away the attempt to clinch by DeBoneless.
DeBoneless tries to close the distance and clinch up against the ropes but Doncic paws at him with a jab and circles away.
DeBoneless wants to clinch up but Doncic keeps it at a distance.
Doncic moves into the clinch successfully.
That's two minutes gone in the round.
DeBoneless tries to land knees in the clinch but Doncic avoids the damage to the body.
Doncic throws an elbow but it misses.
Doncic lands a nice knee to the body.
Doncic tries to land knees in the clinch but DeBoneless avoids the damage to the body.
Doncic using the Thai clinch to land knees to the body.
This has been an exciting period of action!
Doncic's corner calls for him to break the clinch, which he does.
DeBoneless tries to close the distance and clinch up but Doncic swats him away and circles back towards the center.
Doncic closes the distance and presses his opponent up against the ropes.
Doncic breaks the clinch and we return to the middle of the mat.
Doncic keeps the fight on the outside.
DeBoneless fails with an attempt to clinch.
Doncic fakes with an overhand right and moves in to clinch with DeBoneless, pushing him back against the ropes.
DeBoneless tries to land knees in the clinch but Doncic avoids the damage to the body.
Doncic breaks the clinch and we return to the middle of the mat.
Doncic clinches.
Luka Doncic is fighting for a decision here - he's started to take the cautious approach.
DeBoneless tries to land knees in the clinch but Doncic avoids the damage to the body.
And that's the end of the fight!
Luka Doncic showed his dominance in that final round.
Well Doncic has outscored his opponent in every aspect of the fight today. Only a scarily incompetent judge or two will keep him from a well deserved win... Over to the ring announcer for the scorecards.
Ladies and gentlemen, after 3 rounds of action, we go to the scorecards for a decision.
Judge Tatsuya Matsuyama scores the fight 30:25
Judge Yukihiro Shimada scores the fight 30:25
Judge Yukihiro Yamamoto scores the fight 30:25
In favor of your winner, by unanimous decision... Luka Doncic!
|
|
|
|
|
|
|
|
|
|
|
|
|
|
|
|
|
|
|
|
|
|
|
| S |
C
A |
G |
S |
C
B |
G |
|
S |
C |
G |
|
energy
A | B |
|
hype
A | B |
|
pop
A | B |
|
mgr
A | B |
|
FIGHT
RATING
63% |
|
|
|
|
|
|
|
Undercard bout
|
Coming up we have a featherweight kickboxing rules bout between Paulo Kimura (ranked 3189 p4p, 6196 weight class) and Jop Hop (ranked 324 p4p, 487 weight class). Paulo Kimura has a significant reach advantage - let's see if he can make it count.
 |
|
 |
| 177 cm
20
149
0 - 0 - 0 |
|
161 cm
18
145
0 - 1 - 0 |
Solid boxing
Cuts easily
|
|
Brawler
Solid chin
|
|
| |
|
Ladies and gentlemen. This fight is 3 rounds, in the featherweight division.
Introducing the fighter to my left, fighting out of the red corner.
With a record of 0 - 0 - 0, fighting out of Tokyo, Paulo Kimura!
And introducing the fighter to my right, fighting out of the blue corner.
With a record of 0 - 1 - 0, fighting out of Tokyo, Jop Hop!
The judges for this bout are Taro Takaoka, Yukihiro Yamamoto and Shigeki Fujiwara.
The bell rings for round one and we are underway!
Hop swings away with a body shot that misses
and Kimura cracks him with a counter punch right on the button.
It looks like Jop Hop has been cut.
Hop tries to clinch up
and Kimura counters with a one-two to the body.
Hop keeps the fight on the outside.
Hop tries to clinch
and Kimura counters with a left to the body.
Kimura scores with a punch to the gut of his opponent.
Kimura throws a quick head kick that skims the top of Hop's head.
Kimura tries to clinch but is not successful on this occasion.

Kimura clips Hop with a right and a left that makes him do the chicken dance for a couple of seconds. He touched his left hand down on the canvas so the referee steps between the fighters to give Hop a standing 8 count before we can continue the bout.
Hop is rocked!
Wooooo! Give it up for these two warriors! They are putting on a show!
Hop throws a jab, cross combination which is slipped
and Kimura counters with an inside leg kick.
Hop walks forward, straight into a front kick from Kimura.
Kimura is looking to clinch but Hop is avoiding it.
Hop unleashes a big counter combination but Kimura bobs and weaves and avoids any damage.
Kimura catches Hop napping and connects with a fantastic 3 punch combination that sends Hop crashing to the mat! He's still conscious but he's all over the place - can he beat the count?!? 4,5,6,7,8...9...10! He didn't make it back to his feet! Kimura raises both arms skywards and takes in the roar from the crowd!
Ladies and gentlemen, after 1:59 of round 1, we have a winner by way of TKO (Punches). Paulo Kimura!
|
|
|
|
|
|
|
|
|
|
|
|
|
|
|
|
|
|
|
|
|
|
|
| S |
C
A |
G |
S |
C
B |
G |
|
S |
C |
G |
|
energy
A | B |
|
hype
A | B |
|
pop
A | B |
|
mgr
A | B |
|
FIGHT
RATING
98% |
|
|
|
|
|
|
|
Undercard bout
|
Coming up we have a featherweight kickboxing rules bout between Yushi Sakura (ranked 3289 p4p, 4478 weight class) and Farto Fuerte (ranked 335 p4p, 408 weight class). The atmosphere really building for this one as we go over to our ring announcer for the fighter introductions!
 |
|
 |
| 180 cm
22
152
1 - 0 - 0 |
|
174 cm
26
159
8 - 9 - 1 |
Decent elbows
Good chin
|
|
Excellent boxer
Good gas tank
|
|
| |
|
Ladies and gentlemen. This fight is 3 rounds, in the featherweight division.
Introducing the fighter to my left, fighting out of the red corner.
With a record of 1 - 0 - 0, fighting out of Tokyo, Yushi Sakura!
And introducing the fighter to my right, fighting out of the blue corner.
With a record of 8 - 9 - 1, fighting out of Montreal, Farto Fuerte!
The judges for this bout are Yukihiro Shimada, Ren Mimura and Yuuki Gou.
The bell rings for round one and we are underway!
The fight stays on the outside here - Sakura looks like he's thinking about clinching though.
As Sakura backs off Fuerte throws a huge counter combo but Sakura manages to avoid it all.
Sakura moves to clinch but Fuerte breaks away
and Fuerte counters with a right hand to the body.
Sakura misses with a right hand
and Fuerte counters with a nice uppercut.
Sakura rushes in with a sloppy looking punch
and Fuerte counters with a shot to the ribs. That looked like it hurt.
Fuerte circles away from the clinch attempt
and Fuerte counters with a good right hand that lands right on the jaw.
We've had a slow start to the round here - hopefully the action picks up.
Sakura misses with a hook
and Fuerte counters with a shot to the ribs. That looked like it hurt.
Fuerte circles away from the clinch attempt.
A countering left hand to the body from Fuerte misses.
That's one minute gone in the round.
Sakura tries to clinch up

and Fuerte counters with a big right hook, that lands right on the temple! Sakura goes down! Fuerte rushes to a neutral corner to get the count going quickly. This one's going to be close! 3,4,5,6,7... Sakura is up to one knee.... 8,9.... He's up! The referee says he's good to go, so we're back to the action!
 Sakura is rocked! Sakura is rocked!
Sakura darts in trying to clinch
and Fuerte counters with a straight right, followed by a hook and finally a brutal uppercut! Sakura drops to the canvas, flat on his back and unconcious - no need for the referee to start the count as this one is all over! Fuerte struts around like it's just an every day occurrence to knock someone out in such brutal fashion. A dominant finish for Fuerte!
Ladies and gentlemen, after 1:25 of round 1, we have a winner by way of KO (Punches). Farto Fuerte!
Farto Fuerte really struggled to get his t-shirt on before his hand was raised. Making sure that Knock Out Clothing logo gets some air time is pretty tricky when you're all sweaty.
|
|
|
|
|
|
|
|
|
|
|
|
|
|
|
|
|
|
|
|
|
|
|
| S |
C
A |
G |
S |
C
B |
G |
|
S |
C |
G |
|
energy
A | B |
|
hype
A | B |
|
pop
A | B |
|
mgr
A | B |
|
FIGHT
RATING
58% |
|
|
|
|
|
|
|
Co-main event
|
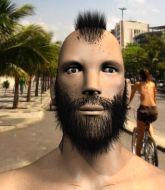
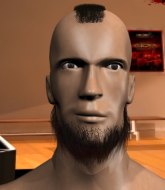
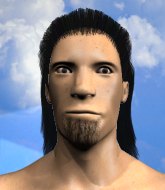
Coming up we have a featherweight kickboxing rules bout between Guy Leblond (ranked 3660 p4p, 4434 weight class) and Junko Toki (ranked 361 p4p, 404 weight class). Junko Toki will no doubt be looking to use his reach advantage to good effect.
 |
|
 |
| 165 cm
24
145
7 - 4 - 1 |
|
180 cm
20
145
1 - 1 - 0 |
Great low kicks
Granite chin
|
|
Excellent MT
Granite chin
|
|
| |
|
Ladies and gentlemen. This fight is 3 rounds, in the featherweight division.
Introducing the fighter to my left, fighting out of the red corner.
With a record of 7 - 4 - 1, fighting out of Montreal, Guy Leblond!
And introducing the fighter to my right, fighting out of the blue corner.
With a record of 1 - 1 - 0, fighting out of Tokyo, Junko Toki!
The judges for this bout are Shirou Masuda, Shigeki Fujiwara and Shigeki Sano.
The bell rings for round one and we are underway!
Toki tries to clinch but Leblond moves out of range.
Toki tries to clinch but Leblond is having none of it.
Leblond jabs Toki to the body, keeping him at a distance.
Junko Toki seems to be the more aggressive standup fighter in this bout.
Toki misses with a body kick.
Toki misses with a jab to the body
and Leblond holds on and brings the fighters into a clinch.
Toki wants to stall.
Leblond breaks the clinch.
Toki pulls out of a head kick attempt.
Toki throws a half hearted mid kick.
Leblond swats away the attempt to clinch by Toki.
We've had a slow start to the round here - hopefully the action picks up.
Toki misses with a kick to the body.
Leblond swung with a counter punch to the body but it didn't connect.
Toki is looking to clinch but Leblond is avoiding it.
Toki just manages to avoid a counter high kick fromLeblond.
Toki takes a kick to the side of the head.
Toki doesn't manage to clinch there - Leblond circles away.
Toki throws a sloppy head kick
and Leblond counters with a nice body kick.
Toki takes a punch right to his stomach. That took the wind out of him momentarily.
Leblond takes a step towards his opponent and connects with a left hand, before circling away.
That's one minute gone in the round.
Toki tries to clinch but is not successful on this occasion.
Leblond was looking to counter that last move with a shot to the body but he didn't commit.
Leblond forces Toki back against the ropes and clinches.
Toki is trying to break the clinch but Leblond is controlling him.
Leblond escapes the clinch and we're back to striking.
Leblond thuds a mid kick into his opponent's body. That will wear on Toki if he has to take too many more of those.
Leblond gets in close and instigates a clinch.
Leblond lands with a good tight uppercut to the head.
Come on Leblond - let's have some action - none of this stalling nonsense.
Leblond breaks the clinch and we're back to striking at distance.
Leblond throws a feint and then finishes with a kick to the body.
Toki tries to clinch up against the ropes, rushing in to close the distance. Leblond manages to break the clinch and circles back to the middle of the mat.
Toki misses with a leg kick.
Leblond appeared to be looking to counter that last move with a leg kick.
Toki looks winded!
Sloppy strikes from Leblond. Those never looked like landing.
Leblond throws a body kick that sends a sickening thudding noise reverberating around the arena.
Nice body kick there by Leblond.
That's two minutes gone in the round.
The crowd are loving this. Great action here.
Leblond has taken the fight to the clinch.
Leblond stalling here - the referee won't stand for too much of that.
Leblond breaks the clinch and we return to the middle of the mat.
Leblond scores with a shot to the body.
Toki gets tackled into the ropes by Leblond. Leblond maintains the clinch.
Leblond breaks the clinch and we're back to striking at distance.
Leblond drives through and clinches with Toki against the ropes.
Leblond breaks the clinch and we return to the middle of the mat.
Toki fails in his attempt to clinch.
Leblond ducks low and lands a nice hook to the body of his opponent.
Leblond shuffles to his left behind two crisp jabs. Toki eats them both and turns towards Leblond to reposition himself and eats a stinging right hand-left hook combo.
The crowd applaud the fighters' efforts here as the round comes to an end.
Leblond lands a head kick that sends Toki down! Toki is flopping around the mat trying to get back up, leaving the referee no choice but to wave off the fight! Leblond is victorious!
Ladies and gentlemen, after 2:53 of round 1, we have a winner by way of TKO (Head Kick). Guy Leblond!
|
|
|
|
|
|
|
|
|
|
|
|
|
|
|
|
|
|
|
|
|
|
|
| S |
C
A |
G |
S |
C
B |
G |
|
S |
C |
G |
|
energy
A | B |
|
hype
A | B |
|
pop
A | B |
|
mgr
A | B |
|
FIGHT
RATING
67% |
|
|
|
|
|
|
|
Main event
|
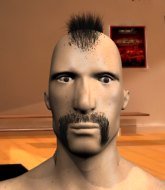
Coming up we have a featherweight kickboxing rules bout between Riku Yamato (ranked 3288 p4p, 3263 weight class) and Masaki Toyota (ranked 334 p4p, 329 weight class). We have two fighters making their debuts here, so let's see who comes out of this one with their first professional victory.
 |
|
 |
| 172 cm
25
148
0 - 0 - 0 |
|
174 cm
18
151
0 - 0 - 0 |
Decent elbows
KO power
|
|
Brawler
Solid chin
|
|
| |
|
Ladies and gentlemen. This fight is 3 rounds, in the featherweight division.
Introducing the fighter to my left, fighting out of the red corner.
With a record of 0 - 0 - 0, fighting out of Tokyo, Riku Yamato!
And introducing the fighter to my right, fighting out of the blue corner.
With a record of 0 - 0 - 0, fighting out of Tokyo, Masaki Toyota!
The judges for this bout are Shigeki Sano, Yuuki Gou and Ren Mimura.
The bell rings for round one and we are underway!
Toyota is on the wrong end of a nice combination from Yamato.
Yamato drives through and clinches with Toyota against the ropes.
Yamato tries to circle away but Toyota has him pinned against the ropes.
Yamato breaks the clinch and we return to the middle of the mat.
Yamato moves out of range as Toyota strikes.
Yamato throws a nice looking combination but Toyota bobs and weaves to avoid any damage.
Toyota misses with a hook. Yamato ducked under it nicely.
Yamato tries to clinch but Toyota is having none of it.
Yamato is looking to clinch but Toyota is avoiding it.
Toyota gets in close and instigates a clinch.
Toyota is looking to control Yamato's arms but Yamato gets an underhook and turns him. Now Toyota has his back to the ropes.
We've had a slow start to the round here - hopefully the action picks up.
Yamato slowing the pace effectively.
Yamato is clearly stalling here... Pick up the pace son.
Yamato seems to have come into the fight with the intention of avoiding any damage in the clinch, rather than actually showing any aggression.
Yamato working Toyota over with knees to the body.
That's one minute gone in the round.
Yamato wants to stall.
Yamato controlling the action here for a moment.
Toyota has had enough of the clinch but Yamato keeps him there for the moment.
Toyota tries to break free but Yamato pushes him back against the ropes.
Both fighters working to control the clinch.
An uppercut to the body lands inside from Yamato.
Toyota tries to break free but Yamato pushes him back against the ropes.
Yamato is working hard here but doesn't seem to be able to control effectively, up against the ropes.
Stalling in the clinch from Toyota.
That's two minutes gone in the round.
The crowd are getting on the fighters' backs, as the pace has dropped off in the last minute or so.
Toyota is looking to break free of the clinch but Yamato has double underhooks.
Toyota keeps control of Yamato as he tries to wriggle out of the double underhooks.
Yamato looks like he'd prefer to be striking at range right now.
Yamato prevents a body shot from Toyota.
Yamato missing with knees to the body.
Yamato stalling in the clinch but Toyota improves position.
Yamato breaks the clinch and we return to the middle of the mat.
Yamato moves into the clinch.
Toyota is trying to slow down the pace of the fight but Yamato is keeping busy.
A knee to the head by Yamato.
The crowd thankful this round is nearly over.
Yamato's corner calls for him to break the clinch, which he does.
Toyota clinches up with Yamato and pushes him back against the ropes.
And that is the end of the round. The fighters go back to their corners.
Riku Yamato dominated that round.
OK. That's time! The bell goes and we're back to the action.
Yamato moves into the clinch.
Toyota tries a knee to the head but he's missed.
Yamato wants to stall.
Toyota lands with a right to the head.
Toyota struggles to land a body shot inside as Yamato controls his hands.
Yamato's corner calls for him to break the clinch, which he does.
Toyota stumbles momentarily as he takes a strong leg kick from Yamato.
Yamato throws a head kick that misses and slips in the process. He scrambles back to his feet and the fighters circle.
Yamato is really dominating this fight. Is there anything that Toyota can do to turn this around?
We've had a slow start to the round here - hopefully the action picks up.
Toyota darts in and clinches Yamato up against the ropes.
Toyota breaks from the clinch.
Yamato has Toyota up against the ropes in a clinch.
Yamato managing to block the knees to the body from Toyota.
That's one minute gone in the round.
Toyota breaks from the clinch.
Yamato drives through and clinches with Toyota against the ropes.
Toyota tries to break free but Yamato pushes him back against the ropes.
Toyota is trying to push Yamato away but Yamato has him pressed against the ropes, so he's going nowhere.
Toyota escapes the clinch and we're back to striking.
Sloppy strikes from Yamato. Those never looked like landing.
Yamato avoids the head kick by Toyota.
Toyota misses the shot to the body.
Yamato misses with a head kick.
Yamato works over Toyota's head and body with a nice combination.
Toyota tries to close the distance and clinch but Yamato swats him to one side with an open hand palm strike and circles away.
Yamato cracks Toyota with a right hand to the side of the head.
Toyota moves into the clinch.
That's two minutes gone in the round.
Yamato is trying to maintain a safe position but Toyota gets an underhook and turns Yamato into the ropes.
Toyota looks like he'd prefer to be striking at range right now.
Yamato has had enough of the clinch and is looking to separate.
Riku Yamato has scored more points in the clinch so far.
Yamato wants to break the clinch but can't.
Yamato breaks the clinch.
Toyota tries to clinch but Yamato moves out of range.
Toyota tries a low kick but Yamato avoids it.
The fans in attendance giving it up for the two fighters, who have really let it all hang out in the last minute or so!
Toyota tries to move into range but Yamato moves to the side and lands with a nice right hand.
Toyota tries to clinch but Yamato moves away
and as Toyota looks to reset his feet, Yamato counters with a string of precision punches, right on the button, sending Toyota crashing to the canvas! Toyota is in big trouble here! The referee has started the count but Toyota is so wobbly that the ref has given up the count at 6 - he's called the bout off! Yamato is your winner!
Ladies and gentlemen, after 2:46 of round 2, we have a winner by way of TKO (Punches). Riku Yamato!
|
|
|
|
|
|
|
|
|
|
|
|
|
|
|
|
|
|
|
|
|
|
|
| S |
C
A |
G |
S |
C
B |
G |
|
S |
C |
G |
|
energy
A | B |
|
hype
A | B |
|
pop
A | B |
|
mgr
A | B |
|
FIGHT
RATING
43% |
|
|
|
|
|
|
|
|
|
|

