|
ENIGMA SUB WRESTLING 4 PBP Commentary |
Undercard bout
|
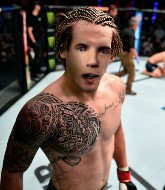
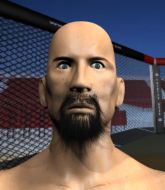
This TWGC bout is 1 fifteen minute round in the heavyweight division. Introducing today's competitors. In the red corner, competing out of Montreal, with a TWGC record of 0 wins and 1 losses; Dade Desjardins! And in the blue corner, fighting out of Las Vegas, with a TWGC record of 1 wins and 0 losses; Kirk Lazarus!
The judges for this bout are Daniel Franklin, Tiny Johnson and Cecil Peabody.
The fighters bow as they face eachother in the middle of the mat and we are under way.#CL2#
Lazarus closes the distance and pushes Desjardins back into the ropes.#TD2#
Lazarus has dropped down and is working for a takedown. Desjardins is trying to keep an underhook but Lazarus manages to get the takedown into half guard. Score +2 for takedown into guard / half guard: Desjardins (0) vs (2) Lazarus
Still in half guard, Lazarus seems content to control.#SUB2#
Lazarus is looking for a kimura but Desjardins is holding onto that half guard position, so it's hard for Lazarus to get the leverage.
Desjardins is trying to get back to full guard.
The fighters are tangled up in the ropes here. We might need a restart if the fighters can't break free themselves.
Lazarus is taking a breather. Desjardins says something to him but it's hard to make out. Perhaps he's telling him to get on with it and actually do something.
Lazarus wants to pass to mount but Desjardins is defending the position. #SUB#
Desjardins looking for submissions from an awkward position here.
We've had a slow start to the round here - hopefully the action picks up.
Desjardins wants to get back to full guard but Lazarus has passed into side control. Score +3 for passing guard: Desjardins (0) vs (5) Lazarus
Desjardins tries to work a leg under to get back to half guard but Lazarus wriggles his own leg back out and remains in side control. #T1#
Lazarus passes to full mount! That's big trouble for Desjardins! Score +2 for reaching mount: Desjardins (0) vs (7) Lazarus
Lazarus moves to the back. Score +3 for taking back: Desjardins (0) vs (10) Lazarus
Desjardins looks to control his opponent's hands but he's not mananging it at the moment. #SUB2#
Lazarus is persistently looking for the submission but Desjardins is defending it well.
#SUB2#
Lazarus looking to break Desjardins's wrist control so he can sink in the choke. Desjardins remaining controlled and patient though - he really has to keep calm otherwise Lazarus will wrap this one up with the rear naked choke!#T2#
The crowd hopeful of a finish here - Lazarus's supporters are on their feet, screaming for him to go for the rear naked choke.
#SUB2#
Lazarus is working really hard to secure the rear naked choke. Desjardins defends successfully for a significant amount of time. Both fighters are looking very determined. #SUB2#
Lazarus working for the choke.
The crowd hopeful of a finish here - Lazarus's supporters are on their feet, screaming for him to go for the rear naked choke.
#SUB2#
Lazarus is working for the rear naked choke. He has one arm under the chin but Desjardins has hold of the other arm. A bit of a stalemate here. #SUB2#
Lazarus patiently working for the choke. Which fighter will keep their nerve here?#T3##SUB2#
Lazarus is looking for the choke from the back position but Desjardins is controlling his hands well. #SUB2#
Lazarus has his opponent's back and is working for the choke.
Desjardins turns into Lazarus and is now in his guard.
Score +2 for sweep to guard / half guard: Desjardins (2) vs (10) Lazarus
Desjardins trying to control but Lazarus is working from the bottom.
Desjardins postures up.
Desjardins trying to pass the guard but can't manage it just yet. #SUB2#
Lazarus looking for a guillotine here but Desjardins defends easily.
Desjardins looking to sit in guard and control but Lazarus gets the butterfly guard and sweeps. He's now in the guard on the top. Score +2 for sweep to guard / half guard: Desjardins (2) vs (12) Lazarus#T4#
Lazarus wants to pass the guard but Desjardins is keeping the position.
Desjardins keeping moving, preventing Lazarus from controlling successfully.
Desjardins lands a beautiful sweep and he's now moved into his opponent's guard. Score +2 for sweep to guard / half guard: Desjardins (4) vs (12) Lazarus
Desjardins stands up and looks to throw the legs aside to pass to side control. Lazarus swivels though and keeps the full guard. #T5#
Desjardins trying to control the position from guard on top but Lazarus is wriggling around, looking for whatever he can.
Desjardins trying to pass the guard but can't manage it just yet. #SUB2#
Lazarus looking to try and escape his hips here, looking for a submission. It looks like he's going for a triangle but Desjardins is defending well. Lazarus quickly switches to an armbar and extends the arm! Desjardins has no choice but to tap, to a very quick submission! Wow, that was lightning fast! Lazarus celebrates on the ropes, with the crowd.
Ladies and gentlemen, after 5:37 of round 1, we have a winner by way of Submission (Armbar). Kirk Lazarus!
After winning the bout, Kirk Lazarus thanked all his fans and promised he'd do even better in his next fight. The crowd seemed to love his humility. |
|
|
|
Undercard bout
|
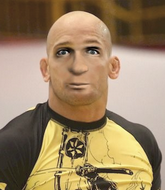
This TWGC bout is 1 fifteen minute round in the welterweight division. Introducing today's competitors. In the red corner, competing out of Montreal, with a TWGC record of 0 wins and 0 losses; Jan Maas! And in the blue corner, fighting out of Rio de Janeiro, with a TWGC record of 5 wins and 1 losses; Adryan Souza!
The judges for this bout are George Francis, Stewart Dunkirk and Robert Twigg.
The fighters bow as they face eachother in the middle of the mat and we are under way.
Maas is looking to clinch.
Adryan Souza seems to be the more aggressive standup fighter in this bout.
Souza fails with a rather predictable takedown attempt.
Souza darts in looking for a takedown but Maas gets double underhooks and turns Souza into the ropes.
Maas is looking to clinch. #CL#
Maas has closed the distance and engaged Souza in a clinch.
#TD2#
Souza pulls guard.
Maas tries to free his leg and advance position but Souza is retaining full guard.
Maas wants to control from the top but Souza keeps moving.
Souza controlling Maas's posture.
The fighters are tangled up in the ropes here. We might need a restart if the fighters can't break free themselves.
We've had a slow start to the round here - hopefully the action picks up.
Souza keeping moving, preventing Maas from controlling successfully.
Maas trying to pass the guard but can't manage it just yet. #T1##SUB2#
Maas looking to improve position, pressing down on Souza's thigh with his hand. Souza seems to be working to lock up a guilotine though... is Maas paying attention? Apparently not! He's locked it up tight! Maas's face has turned purple! Will he tap? Will he! YES! He's tapped! Souza picked his opening and made it count! Great finish!
Ladies and gentlemen, after 1:21 of round 1, we have a winner by way of Submission (Guillotine). Adryan Souza! |
|
|
|
Undercard bout
|
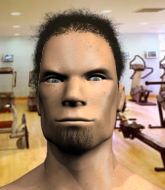
This TWGC bout is 1 fifteen minute round in the middleweight division. Introducing today's competitors. In the red corner, competing out of Los Angeles, with a TWGC record of 2 wins and 2 losses; Hick Diaz! And in the blue corner, fighting out of Las Vegas, with a TWGC record of 1 wins and 0 losses; Kurosaki Hisoka!
The judges for this bout are Daniel Franklin, Frank Dennis and Wesley Smith.
The fighters bow as they face eachother in the middle of the mat and we are under way.#CL2#
Hisoka darts in and clinches Diaz up against the ropes.#TD2#
Hisoka tightens his grip and picks Diaz up, before dumping him to the ground. Diaz manages to land in guard. Score +2 for takedown into guard / half guard: Diaz (0) vs (2) Hisoka
Hisoka wants to control from the top but Diaz keeps moving.
Diaz is trying to control the position from the bottom.
Hisoka trying to control the position from guard on top but Diaz is wriggling around, looking for whatever he can.
Hisoka stands up and looks to throw the legs aside to pass to side control. Diaz swivels though and keeps the full guard. #SUB#
Diaz has a loose triangle. He'll be looking to tighten that up but Hisoka can see exactly what he's planning and manages to posture up and free himself.
Diaz trying to control the position.
We've had a slow start to the round here - hopefully the action picks up.
Diaz keeping moving, preventing Hisoka from controlling successfully.
Diaz controls Hisoka momentarily but Hisoka frees himself. #T1#
Hisoka trying to control the position from guard on top but Diaz is wriggling around, looking for whatever he can.
Hisoka forces his way into half guard.#SUB2#
Hisoka is trying a forearm choke
I don't think that's going to do much at this level of the game.
Hisoka is looking to advance position but Diaz won't allow it.
Hisoka wants to take a breather but Diaz is having none of it.
Diaz tries to get to full guard but Hisoka has control of the leg.
Diaz is looking to control Hisoka's leg but it's slowly edging free. Can Diaz avoid being mounted?
Hisoka trying to pass the guard but Diaz defending well. #T2#
Diaz wants to control but Hisoka is keeping busy.
Diaz is looking to improve his position.
#SUB2#
Hisoka seems to be working for a kimura but Diaz defends the submission attempt.#SUB2#
Hisoka is looking for a kimura. It's going to be difficult to finish that from half guard though and Diaz defends it well.
Hisoka keeping composed on the top, looking to control the action.
Hisoka is pressing down on Diaz's thigh, looking to free his foot. Diaz is holding on for now. #SUB2#
Hisoka is looking for an arm triangle, whilst trying to pass to side control. Diaz doesn't seem that keen to cooperate though. No luck this time Hisoka. #T3##SUB2#
Hisoka is working for a kimura but Diaz is defending it quite comfortably.
Diaz is trying to get back to full guard.
The fighters are trapped in the ropes so we're going to have a reposition here. The ref calls for a break and repositions the fighters in the center of the ring.#SUB2#
Hisoka wants to work for an arm triangle but Diaz is really keeping half guard well and defending the submission attempt.
Diaz is trying to get back to full guard.#SUB#
Diaz looking for submissions from an awkward position here.
The fighters are tangled up in the ropes here. We might need a restart if the fighters can't break free themselves.#SUB2#
Hisoka is trying a forearm choke
I don't think that's going to do much at this level of the game.
#T4#
Diaz is trying to get back to full guard.
Diaz is looking to control Hisoka's leg but it's slowly edging free. Can Diaz avoid being mounted?
Diaz is looking to regain full guard. Not this time though.
Still in half guard, Hisoka seems content to control.#SUB2#
Hisoka in half guard on the top. He's looking for a kimura... He's got it locked and he's managed to free his trapped foot. Diaz tries to escape but it's on too tight and he has to tap! Great BJJ skills there from Hisoka!
Ladies and gentlemen, after 5:18 of round 1, we have a winner by way of Submission (Kimura). Kurosaki Hisoka!
Kurosaki Hisoka decided to thank the fans in attendance for making a great atmosphere. It seemed to go down pretty well. |
|
|
|
Undercard bout
|
This TWGC bout is 1 fifteen minute round in the bantamweight division. Introducing today's competitors. In the red corner, competing out of Los Angeles, with a TWGC record of 6 wins and 2 losses; Jorgen Kruth! And in the blue corner, fighting out of London, with a TWGC record of 12 wins and 24 losses; Jose Pacheco!
The judges for this bout are Stewart Dunkirk, Cecil Peabody and Tiny Johnson.
Let's get this grappling contest under way! Who will be victorious?
Kruth shoots in for a takedown. "I don't think so" says Pacheco as he avoids it easily.
Wow, both these guys are really going for it!#TD#
Kruth shoots in and gets a takedown into Pacheco's guard. Score +2 for takedown into guard / half guard: Kruth (2) vs (0) Pacheco
Kruth advances to half guard.
The fighters are tangled up in the ropes here. We might need a restart if the fighters can't break free themselves.
Kruth is looking to stall here but Pacheco recovers full guard.
Kruth pressing down on his opponent's thigh, looking to pass guard. Pacheco is keeping the position for now.
Kruth is working hard here to advance position.
Kruth wants to control from the top but Pacheco keeps moving.
We've had a slow start to the round here - hopefully the action picks up.
Pacheco keeping full guard, as Kruth tries to pass. #T1#
Kruth sitting in guard, not really doing much.
Pacheco told us pre-fight that he has been working on his escapes in training. Let's see if he can call on some of his new skills to get back to his feet.
Kruth tries to free his leg and advance position but Pacheco is retaining full guard.
Kruth seems content to control from guard here. He's going to have to remain active though if he doesn't want to get stood back up.
Pacheco lands a beautiful sweep and he's now moved into his opponent's guard. Score +2 for sweep to guard / half guard: Kruth (2) vs (2) Pacheco
Kruth is working the butterfly guard. He manages to land a nice scissor sweep and is now in half guard on the top. Nice move. Score +2 for sweep to guard / half guard: Kruth (4) vs (2) Pacheco
Kruth is looking to advance position but Pacheco won't allow it. #T2#
Kruth trying to control from half guard but Pacheco is working away. #SUB#
Kruth is trying to work for a kimura but Pacheco is defending well.
Pacheco is staying active underneath Kruth, who seems content to just control the action from this position.
Kruth looking to pass the half guard. Not this time. #SUB#
Kruth is thinking about going for an arm triangle but he can't free his leg.
#T3#
Kruth stalling away here and it's allowed Pacheco to slip out his trapped foot and regain full guard.
Kruth not doing a lot at the moment. He'll have to show some more aggression or the fight will get stood up.
Kruth won't allow Pacheco to sweep him here.
Kruth content to stall in guard here.
Pacheco is a painfully thin specimen of a man. You do wonder whether a good body kick would snap him clean in two.
Kruth trying to control but Pacheco is working from the bottom.
Kruth stands up and looks to throw the legs aside to pass to side control. Pacheco swivels though and keeps the full guard. #T4#
Pacheco wants to sweep here but Kruth controlling him for the moment.
Kruth trying to control but Pacheco is working from the bottom.
Kruth slips effortlessly into side control - very nice. Score +3 for passing guard: Kruth (7) vs (2) Pacheco
Kruth taking a break here but Pacheco is having none of it and regains half guard.
Kruth prevents Pacheco from improving his position.
Kruth trying to control from half guard but Pacheco is working away. #T5#
Kruth is pressing down on Pacheco's thigh, looking to free his foot. Pacheco is holding on for now. #SUB#
Pacheco makes his way to full guard, as Kruth worked for a kimura.
Kruth pressing down on his opponent's thigh, looking to pass guard. Pacheco is keeping the position for now.
Kruth postures up.
Kruth tries to free his leg and advance position but Pacheco is retaining full guard.
Pacheco looking to hit a scissor sweep but Kruth is one step ahead there.
The fighters are trapped in the ropes so we're going to have a reposition here. The ref calls for a break and repositions the fighters in the center of the ring.#T6#
Kruth is just sitting in guard, looking to avoid any submissions.
Pacheco keeping moving, preventing Kruth from controlling successfully.
Kruth looking to sit in guard and control but Pacheco gets the butterfly guard and sweeps. He's now in the guard on the top. Score +2 for sweep to guard / half guard: Kruth (7) vs (4) Pacheco
Kruth controls Pacheco momentarily but Pacheco frees himself.
Pacheco trying to control the position from guard on top but Kruth is wriggling around, looking for whatever he can. #T7##SUB#
Kruth escapes his hips to the side and looks to be working for an armbar. Pacheco gives him a little smile and shakes his head. No chance.
Kruth lands a beautiful sweep and he's now moved into his opponent's guard. Score +2 for sweep to guard / half guard: Kruth (9) vs (4) Pacheco
Kruth forces his way into half guard.#SUB#
Kruth is trying to work for a kimura. This could be trouble! No, Pacheco has managed to free his arm - good work.
Kruth is trying to control the action in half guard but Pacheco is working away on the bottom, looking perhaps to get back to full guard. #T8##SUB#
Kruth is working for a submission here. He's got hold of the far side arm and he's looking for a kimura. He's cranking on the arm and he's got it! Pacheco is tapping out! Ouch, that looked like it hurt!
Ladies and gentlemen, after 8:20 of round 1, we have a winner by way of Submission (Kimura). Jorgen Kruth!
Jorgen Kruth decided to hype himself up post fight. It was going well but he went on about it a bit too long and the crowd turned on him a little. |
|
|
|
Undercard bout
|
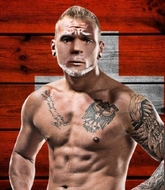
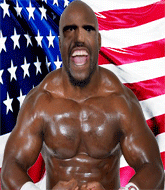
This TWGC bout is 1 fifteen minute round in the heavyweight division. Introducing today's competitors. In the red corner, competing out of St Petersburg, with a TWGC record of 4 wins and 2 losses; Don Johns! And in the blue corner, fighting out of Los Angeles, with a TWGC record of 29 wins and 26 losses; Sven Kristian Nielsen!
The judges for this bout are Daniel Franklin, Stewart Dunkirk and Alan Glass.
The fighters bow as they face eachother in the middle of the mat and we are under way.#CL2#
Nielsen closes the distance and clinches.
Nielsen prevents a takedown attempt there.
#TD#
Johns has managed to pull guard. Let's see whether he can work an aggressive guard. It will also be interesting to see what tactics Nielsen uses from the top position.
My spies in Catch Wrestling L.A. inform me that Nielsen has been getting involved in the gym's BJJ sparring sessions. Let's see whether that pays dividends!#SUB#
Johns has a loose triangle. He'll be looking to tighten that up but Nielsen can see exactly what he's planning and manages to posture up and free himself.
Nielsen slips effortlessly into side control - very nice. Score +3 for passing guard: Johns (0) vs (3) Nielsen
Johns is being controlled here.
Nielsen is looking to take a break and control but Johns is keeping him honest, looking to work from the bottom.
Johns gives up the full mount - oops, sloppy defensive grappling there! Score +2 for reaching mount: Johns (0) vs (5) Nielsen
We've had a slow start to the round here - hopefully the action picks up.
Johns is squirming around, avoiding Nielsen's attempts to control the action. #T1#
The fighters are trapped in the ropes so we're going to have a reposition here. The ref calls for a break and repositions the fighters in the center of the ring.
Nielsen controlling the position easily from mount.
Nielsen wants to take his opponent's back but Johns doesn't allow it.
Nielsen takes a little breather and maintains the position. The referee will be looking for him to stay active from such a dominant position though.
Johns is wriggling around trying to escape.
Nielsen wants to control the pace but Johns is squirming around nicely.
Johns regains half guard.#T2#
Johns wants to improve his position but Nielsen is controlling well.
#SUB2#
Nielsen in half guard on the top. He's looking for a kimura... He's got it locked and he's managed to free his trapped foot. Johns tries to escape but it's on too tight and he has to tap! Great BJJ skills there from Nielsen!
Ladies and gentlemen, after 2:35 of round 1, we have a winner by way of Submission (Kimura). Sven Kristian Nielsen!
A relieved looking Sven Kristian Nielsen thanked the fans for their support and gave the usual line about them being amazing. They seemed to believe that he actually meant it. |
|
|
|
Co-main event
|
This TWGC bout is 1 fifteen minute round in the heavyweight division. Introducing today's competitors. In the red corner, competing out of Los Angeles, with a TWGC record of 9 wins and 8 losses; Xandao Couceiro! And in the blue corner, fighting out of Rio de Janeiro, with a TWGC record of 0 wins and 0 losses; Nick Rodriguez!
The judges for this bout are Stewart Dunkirk, Cecil Peabody and Alan Glass.
Let's get this grappling contest under way! Who will be victorious?
Rodriguez tries to clinch up but Couceiro circles away and keeps his distance.
Couceiro shoots in for a takedown - he's clinched up with Rodriguez but Rodriguez pushes him off and we're back to square one.
Rodriguez changes levels for a counter takedown but doesn't follow through with his attempt.#CL#
Couceiro gets in close and instigates a clinch.
Rodriguez gets underhooks to prevent Couceiro's takedown attempt.
Couceiro tries for a takedown. No joy.
That's three failed takedown attempts in the round for Xandao Couceiro. That's going to take a lot out of him.
Rodriguez drops down looking for an ankle pick but Couceiro pulls his leg out and moves away.
#CL2#
Rodriguez rushes Couceiro and presses him up against the ropes.
Rodriguez is working for takedown but Couceiro is calmly controlling the position for now.
Rodriguez prevents the takedown attempt.
We've had a slow start to the round here - hopefully the action picks up.
Couceiro is pressed up against the ropes. Rodriguez has hold of a leg and is looking to drag Couceiro down to the mat. Couceiro avoids the attempt though and has circled away. We're back to striking at a distance. #CL2#
Rodriguez has taken the fight to the clinch.
#TD2#
Rodriguez gets a trip takedown into half guard. Score +2 for takedown into guard / half guard: Couceiro (0) vs (2) Rodriguez
Couceiro wants to get back to full guard.
Rodriguez trying to control from half guard but Couceiro is working away. #T1#
Couceiro is looking to improve his position.
Rodriguez is pressing down on Couceiro's thigh, looking to free his foot. Couceiro is holding on for now.
Couceiro slips a foot under and gets full guard. Nice work.
Rodriguez trying to control but Couceiro is working from the bottom.
Rodriguez is in a good position here but he's just trying to control... And he's not even managing to do that successfully.
Rodriguez pressing down on his opponent's thigh, looking to pass guard. Couceiro is keeping the position for now. #T2#
Rodriguez passes Couceiro's right leg, so he's now in half guard.
Rodriguez moves into full mount! Couceiro won't be happy about that! Score +3 for passing guard: Couceiro (0) vs (5) Rodriguez
Rodriguez wants to control but Couceiro has made it back to half guard. Nice work.
Rodriguez trying to mount his opponent but Couceiro defends it.
Couceiro works his way to full guard. Good work.#T3#
Rodriguez trying to control but Couceiro is working from the bottom.
Couceiro looking to control.
Couceiro looking to sweep here. No luck so far.
Couceiro is working from a closed guard but he's struggling to control his opponent.
Rodriguez wants to control from the top but Couceiro keeps moving. #SUB#
Rodriguez is sitting in close to Couceiro's body. Couceiro has gone for a guillotine from the bottom. Oh damn, that looks pretty tight! Rodriguez is panicking - it looks like this one could be all over! Yes, Rodriguez is tapping! That was a very nice submission by Couceiro.
Ladies and gentlemen, after 4:55 of round 1, we have a winner by way of Submission (Guillotine). Xandao Couceiro!
In his post fight interview, Xandao Couceiro started talking himself up. Luckily his charisma kept the crowd on side and gave him a good reception. |
|
|
|
Main event
|
This TWGC bout is 1 fifteen minute round in the heavyweight division. Introducing today's competitors. In the red corner, competing out of New York, with a TWGC record of 0 wins and 0 losses; Bjorn Akerfeldt! And in the blue corner, fighting out of Los Angeles, with a TWGC record of 44 wins and 34 losses; Tyrone Sparxx!
The judges for this bout are Frank Dennis, Wesley Smith and Stewart Dunkirk.
Let's get this grappling contest under way! Who will be victorious?#TD2#
Sparxx throws the overhand right but ducks down into a quick takedown attempt. Akerfeldt was covering up waiting for the punch and Sparxx finishes the takedown easily into guard. Score +2 for takedown into guard / half guard: Akerfeldt (0) vs (2) Sparxx
Sparxx wants to control from the top but Akerfeldt keeps moving. #SUB#
Akerfeldt is active off his back here, looking for submissions.
Sparxx wants to pass the guard but Akerfeldt is keeping the position.
Akerfeldt tries to land a sweep but no joy.
The fighters are tangled up in the ropes here. We might need a restart if the fighters can't break free themselves.#SUB#
Akerfeldt is looking for a guillotine. You can't force these things though and Sparxx defends well.#SUB#
Akerfeldt looking for a guillotine here but Sparxx defends easily.
We've had a slow start to the round here - hopefully the action picks up.
Sparxx's corner is telling him to maintain position.#T1#
Akerfeldt wants to sweep but no luck.
Sparxx's corner is telling him to maintain position.#SUB#
Akerfeldt is active off his back here, looking for submissions.
Sparxx stays in close to Akerfeldt's body and controls the position. #SUB#
Akerfeldt had isolated an arm as going for a kimura. Sparxx defends it easily.
Sparxx stays in close to Akerfeldt's body and controls the position. #SUB#
Sparxx avoids a guillotine attempt easily.
Sparxx controlling from the guard. I say controlling but really, he's stalling. #T2#
Sparxx trying to control but Akerfeldt is working from the bottom.
Sparxx advances to half guard.
Sparxx is looking to pass the guard... He's managed it - he's now in full mount! Score +3 for passing guard: Akerfeldt (0) vs (5) Sparxx
Sparxx content just to control the position here.
Akerfeldt tries to improve his position but instead Sparxx has taken his back! Score +3 for taking back: Akerfeldt (0) vs (8) Sparxx#SUB2#
Sparxx looking for the choke but no joy.
Akerfeldt is very frustrated here, being controlled quite effectively by Sparxx.
#SUB2#
Sparxx looking to break Akerfeldt's wrist control so he can sink in the choke. Akerfeldt remaining controlled and patient though - he really has to keep calm otherwise Sparxx will wrap this one up with the rear naked choke!#T3#
Akerfeldt can't escape the position.
Akerfeldt is being controlled on the ground here - he must escape this position otherwise surely the end is near.
#SUB2#
Sparxx has both hooks in and is working for a choke. Akerfeldt is in real trouble here. Sparxx gets an arm under the chin and tightens the submission attempt... is this the end? Yes, Akerfeldt is tapping out! Sparxx wins by rear naked choke!
Ladies and gentlemen, after 3:26 of round 1, we have a winner by way of Submission (RNC). Tyrone Sparxx!
A less than humble Tyrone Sparxx misjudged his post fight interview somewhat and came across a little too arrogant whilst trying to hype up his own abilities. |
|
|
|
|
|
|