 |
KIFC 41 PBP Commentary |
Undercard bout
|
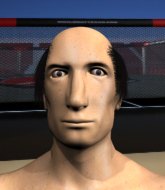
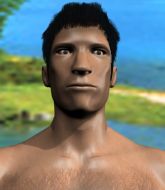
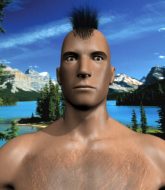
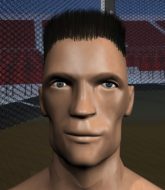
Coming up we have a welterweight MMA rules bout between Glock Tesla (ranked 5280 p4p, 6406 weight class) and Harry Swotter (ranked 531 p4p, 570 weight class). Glock Tesla has the better chin. Will he look to stand and bang today?
 |
|
 |
| 150 cm
25
182
0 - 1 - 0 |
|
180 cm
18
170
0 - 2 - 0 |
BJJ Blue Belt
Excellent MT
Good chin |
|
BJJ White Belt
Good kicks
Very confident |
|
| |
|
Ladies and gentlemen. This fight is 3 rounds, in the welterweight division.
Introducing the fighter to my left, fighting out of the red corner.
With a record of 0 - 1 - 0, fighting out of The Island, Glock Tesla!
And introducing the fighter to my right, fighting out of the blue corner.
With a record of 0 - 2 - 0, fighting out of The Island, Harry Swotter!
The judges for this bout are Dirk Anderson, Daniel Franklin and Michael Johnstone.

The bell rings for round one and we are underway!
Swotter keeping his hands up high there, blocking the jab from Tesla.
Tesla checks the leg kick.
Tesla throws a body kick, spinning off balance
and Swotter cracks him with a counter punch right on the button.
Tesla throws a head kick but Swotter moves out of range.
Swotter has been working on his striking defense in training and it's paying off as Tesla is landing a low percentage of strikes.
Swotter walks forward and throws out a flicking leg kick. Tesla checks it nicely though, as he moves to the side.
Tesla is looking to counter punch.
Tesla throws a lazy head kick
and Swotter counters with a nice low kick that buckles Tesla's knee momentarily.
Tesla throws a lazy head kick
and Swotter counters with a nice uppercut.
Swotter thumps Tesla with a low kick.
Glock Tesla seems to be the more aggressive standup fighter in this bout.
We've had a slow start to the round here - hopefully the action picks up.
Swotter avoids the head kick by Tesla.
Tesla throws a leg kick but Swotter sees it coming and moves out of range.
Tesla moves into range and connects with a jab.
Tesla throws a head kick that misses and slips in the process. He scrambles back to his feet and the fighters circle.

That's one minute gone in the round.
Swotter avoids the head kick by Tesla.
Swotter throws out a counter right but Tesla avoids it with no problem.
Tesla misses with a kick to the body.
Swotter looked like he wanted to counter with a punch but didn't throw it.
Swotter misses the jab.
Tesla lifts his leg as if looking to counter with a high kick.
Swotter takes a punch to the jaw and another one to the bread basket.
A cross from Swotter lands.
Tesla misses with a hook.
Swotter throws out a counter right but Tesla avoids it with no problem.
Tesla really is a fat lump.
Tesla is looking to land body kicks.
Tesla defending well as Swotter loads up on a big left hand.
Tesla throws a jab, cross combination which is slipped
enabling Swotter to counter with a crisp jab.
Swotter keeping at a good range here, avoiding a leg kick.
Swotter counters with a body kick.
Swotter tries to bum rush Tesla with a series of wild strikes but Tesla uses good footwork to avoid the assault.

That's two minutes gone in the round.
Tesla throws a sloppy head kick and Swotter moves out of range easily.
Despite the aggression on Swotter's face he doesn't fully commit to the counter.
Tesla drops his hands and takes a jab to the jaw for his troubles.
Swotter ducks under a wild hook from Tesla.
The fans in attendance giving it up for the two fighters, who have really let it all hang out in the last minute or so!
Tesla tries a switch kick but it misses it's target.
We've been told by Tesla's head coaches at Elite Island Training that he's been working on his takedown defense in preparation for this fight.
Tesla throws a head kick but Swotter moves out of range.
Swotter staying out of range there.
As Tesla backs off Swotter throws a huge counter combo but Tesla manages to avoid it all.
Tesla tries a head kick but it misses.
Tesla misses with a body shot.
Swotter is looking for the big counter here.
Tesla falls off balance throwing a combination
and Swotter makes him pay by landing a thudding low kick.

That's three minutes gone in the round.
Swotter on the wrong end of a nice hook.
Tesla throws a head kick that misses
and Swotter cracks him with a counter punch right on the button.
Tesla looks to throw a body kick
and Swotter counters with a left and a right that stings Tesla.
Swotter misses with an uppercut.
Tesla avoids the body shot from Swotter.
A low kick lands for Tesla.
Swotter listening to his corner there, landing a nice uppercut.
A slapping leg kick lands for Tesla.
Tesla throws the left hand but Swotter avoids the punch easily.
A clash of legs there as Tesla blocks the low kick.
Tesla smiles there as he lands a nice right hand right on the button.

That's four minutes gone in the round.
Tesla goes for a spinning back kick but it misses.
Tesla backing away here, and Swotter unleashes a leg kick that just misses.
Swotter has used his reach advantage pretty well so far tonight.
The crowd are loving this. Great action here.
Tesla misses the shot to the body.
Swotter is looking for the big counter here.
Swotter keeping a good distance there, avoiding the body shot.
Tesla throws a jab, cross combination which is slipped
and Swotter counters with a crisp hook to the side of the head.
Tesla swings widly with a right hand
and Swotter counters with a left to the body.
Swotter moves out of range of the strikes.
And Swotter responds with a good body kick, but Tesla manages to step out the way in time.
Tesla moves into range and lands a nice leg kick.
Tesla misses with a leg kick
and Swotter counters with an inside leg kick.
A head kick by Tesla misses
and Swotter finishes the little exchange by landing a big kick to the body.
Tesla attempts a leg kick but it's missed by a good margin.
And that is the end of the round. The fighters go back to their corners.
That was a close round but I would say that Glock Tesla will probably get the nod.
OK. That's time! The bell goes and we're back to the action.

Tesla throws a body kick that misses.
Swotter lets it all go there with a big combo counter but none of the punches connected.
Tesla throws a head kick that misses
and Swotter counters with a straight right hand.
Tesla throws a nice outside leg kick.
Swotter with a body punch. A glancing blow.
Tesla just misses with a punch to the body.
Tesla throws a jab to the body, straight down the pipe. Boom. That sent Swotter stumbling backwards but he manages to regain his composure quickly.
Swotter with the inside leg kick.
We've had a slow start to the round here - hopefully the action picks up.
Tesla tries a switch kick but it misses it's target.
As Tesla backs off Swotter throws a huge counter combo but Tesla manages to avoid it all.
Crunch! Tesla slams his shin into Swotter's torso.
A low kick from Tesla is predictable there
and Swotter counters with a two punch combo.
Danga de danga de dang - Tesla scores with a four punch combination!
That's one minute gone in the round.
Swotter shapes like he's going to throw a leg kick but settles back down.
Tesla misses with a hook
and Swotter counters with a one-two to the body.
Swotter will need to tighten up his combinations if he doesn't want to gas himself out, swinging at thin air.
Tesla seem to be loading up, looking for a big counter.
Tesla misses with a double jab.
Tesla throws a sloppy head kick
and Swotter counters with a good low kick that Tesla was not able to check.
Tesla's corner calls for a 1-2. Tesla obliges with the 1 part as he scores the single shot and moves back out of range.
Tesla stuns Swotter with a nice body shot, before stepping back out of range.
A looping hook to the body misses from Swotter. Tesla does a little dance to reset his feet.
Swotter is breathing heavily.
Tesla lands a lovely overhand right.
That's two minutes gone in the round.
Tesla checks a leg kick.
Swotter on the wrong end of a nice low kick. He's acting like it's no big deal but he doesn't want to take many more of those.
Tesla throws a nice outside leg kick.
The fans in attendance giving it up for the two fighters, who have really let it all hang out in the last minute or so!
Tesla misses with a head kick.
Glock Tesla is winning the standup battle so far.
Tesla moves forwards but Swotter connects with a nice, crisp jab.
Swotter takes a jab right on the nose. That must have hurt but he shrugs his shoulders and looks to return the favor.
 Swotter is rocked! Swotter is rocked!
Tesla displays some good footwork, moving neatly out of range as Swotter throws out the jab.
Swotter is still on wobbly legs! Can Tesla finish him?
Tesla is the aggressor but that punch slipped nicely by Swotter.
Swotter only half commits to the counter leg kick.
Swotter seems to have recovered his senses.
Swotter ducks under a wild hook from Tesla.
Tesla swings and misses with a hook to the body.
That's three minutes gone in the round.
Swotter moves away from the strike by Tesla.
Tesla digs a good body shot into Swotter's ribs.
Tesla jabbing away but nothing is landing.
Tesla lands a straight punch to the body, keeping Swotter at a distance.
Tesla takes a swing at Swotter's ribcage but misses.
And Swotter responds with a good body kick, but Tesla manages to step out the way in time.
Tesla lands a really nice looking cross but Swotter seems unphased.
Tesla scores with a big left there. The judges will like that one.
Crunch! Tesla slams his shin into Swotter's torso.
A head kick misses from Tesla.
Tesla thumps Swotter with a low kick.
That's four minutes gone in the round.
Swotter walks forward, straight into a front kick from Tesla.
Tesla throws a powerful right kick. Swotter tried to block low but the kick was high! Swotter was taken right off of his feet! Tesla jumps in to finish the job and the ref tackles him! The fight is over!
Ladies and gentlemen, after 4:16 of round 2, we have a winner by way of KO (Head Kick). Glock Tesla!
|
|
|
|
|
|
|
|
|
|
|
|
|
|
|
|
|
|
|
|
|
|
|
| S |
C
A |
G |
S |
C
B |
G |
|
S |
C |
G |
|
energy
A | B |
|
hype
A | B |
|
pop
A | B |
|
mgr
A | B |
|
FIGHT
RATING
57% |
|
|
|
|
|
|
|
Undercard bout
|
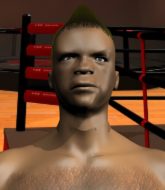
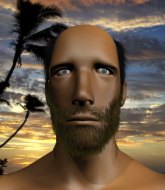
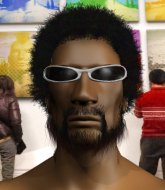
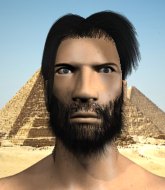
Coming up we have a super heavyweight MMA rules bout between Borscht Balgav (ranked 3257 p4p, 5258 weight class) and Jose Lopez (ranked 155 p4p, 219 weight class). Rumors backstage are that the fighters have been paid to keep it standing but we know that would never happen in MMA!
 |
|
 |
| 200 cm
26
300
2 - 2 - 0 |
|
200 cm
25
285
0 - 1 - 0 |
Good wrestling
Counter fighter
KO power |
|
BJJ White Belt
Excellent boxer
Heavy handed |
|
| |
|
Ladies and gentlemen. This fight is 3 rounds, in the super heavyweight division.
Introducing the fighter to my left, fighting out of the red corner.
With a record of 2 - 2 - 0, fighting out of The Island, Borscht Balgav!
And introducing the fighter to my right, fighting out of the blue corner.
With a record of 0 - 1 - 0, fighting out of The Island, Jose Lopez!
The judges for this bout are David Hoff, Bart Greer and Michael Johnstone.
The bell rings for round one and we are underway!
Lopez fakes high and shoots in for a takedown but Balgav avoids it really well and circles away.
Balgav uses good footwork to avoid the strikes from Lopez.
An attempted straight right counter from Balgav misses the target.
Lopez is looking to take this fight into the clinch.
A low kick from Lopez misses

and Balgav counters with a crisp one two that drops Lopez! Balgav thinks about following him to the mat for a moment but instead steps back and waves Lopez to his feet! Lopez is in big trouble!
We've had a slow start to the round here - hopefully the action picks up.
Lopez misses with a takedown attempt. He shot from a bit too far out.
Balgav was looking to counter that move with a punch but didn't quite pull the trigger.
Lopez is looking to take this fight into the clinch.
That's one minute gone in the round.
Lopez doesn't manage to clinch there - Balgav circles away.
Balgav was looking to counter that move with a punch but didn't quite pull the trigger.
Lopez tries for a takedown but Balgav sees it coming a mile off and avoids it easily.
Borscht Balgav has stuffed three takedown attempts in the round now. That's going to take a lot out of Jose Lopez.
Balgav leaves Lopez with his face pressed against the mat as he sprawls beautifully, defending against a solid takedown attempt.
Balgav looked to counter with a high kick but didn't commit.
Lopez looks for the body kick but Balgav saw that one coming.
Balgav went nuts there looking for a big combo counter but none of the flurry connected.
A head kick misses from Lopez.
And Balgav counters with a quick kick to the body but Lopez blocks it.
Lopez tries to clinch up.
Lopez takes a swing at Balgav's ribcage but misses.
Balgav looks to be in better condition than last time we saw him fight. Obviously he's been working hard on his cardio.
That's two minutes gone in the round.
Lopez tries to clinch up but Balgav circles away and keeps his distance.
It looked like Balgav wanted to counter with a hook but didn't fully commit.
Balgav keeping a good distance there, avoiding the body shot.
Balgav throws a big counter combination but Lopez scrambles out of danger and avoids any damage.
Lopez tries to drive through with a takedown attempt but Balgav defends well and Lopez ends up having to push Balgav into the cage where they will battle it out in the clinch.
The fighters circle momentarily. Lopez darts into range and connects with a nice straight punch.
Lopez is the aggressor but that punch slipped nicely by Balgav.
Balgav appears to be looking for a counter punch to the body.
Lopez lets the fists fly and connects with a left straight followed by a right hook.
 It looks like Borscht Balgav has been cut. It looks like Borscht Balgav has been cut.
A telegraphed takedown attempt from Lopez is defended easily by Balgav.
Balgav appears to be looking for a big counter.
That's three minutes gone in the round.
Lopez is looking to take this fight into the clinch.
Lopez tries to clinch but fails miserably
and Balgav counters with a nice uppercut.
Jose Lopez seems to be the more aggressive standup fighter in this bout.
Lopez looks for a takedown but Balgav sprawls well.
An attempted straight right counter from Balgav misses the target.
Lopez throws a combination that misses
and Balgav counters with a crisp right hand that drops Lopez! Balgav lets Lopez back up to his feet, looking for a finish!
 It looks like Jose Lopez has been cut. It looks like Jose Lopez has been cut.
Lopez with a poor takedown
and Balgav counters with a nice right hand that sends Lopez toppling to the canvas! Lopez scrambles and gets back to his feet - can Balgav finish him?!
Lopez is rocked!
This is a great period of action - very entertaining stuff!
Lopez misses with a takedown attempt
and Balgav counters with a stiff jab, followed by a cross and an uppercut! That's too much punishment for Lopez to take - he tumbles to the canvas, blood pouring from his nose, barely conscious. That's the end of the fight! Great knockout by Balgav!
Ladies and gentlemen, after 3:55 of round 1, we have a winner by way of KO (Strikes). Borscht Balgav!
|
|
|
|
|
|
|
|
|
|
|
|
|
|
|
|
|
|
|
|
|
|
|
| S |
C
A |
G |
S |
C
B |
G |
|
S |
C |
G |
|
energy
A | B |
|
hype
A | B |
|
pop
A | B |
|
mgr
A | B |
|
FIGHT
RATING
39% |
|
|
|
|
|
|
|
Undercard bout
|
Coming up we have a middleweight MMA rules bout between David Thompson (ranked 3039 p4p, 3246 weight class) and Harry Morris (ranked 371 p4p, 395 weight class). David Thompson has the better chin. Will he look to stand and bang today?
 |
|
 |
| 195 cm
25
200
1 - 0 - 0 |
|
182 cm
25
190
1 - 0 - 0 |
Good wrestling
Brawler
Granite chin |
|
BJJ Blue Belt
Counter fighter
Determined |
|
| |
|
Ladies and gentlemen. This fight is 3 rounds, in the middleweight division.
Introducing the fighter to my left, fighting out of the red corner.
With a record of 1 - 0 - 0, fighting out of The Island, David Thompson!
And introducing the fighter to my right, fighting out of the blue corner.
With a record of 1 - 0 - 0, fighting out of The Island, Harry Morris!
The judges for this bout are Daniel Franklin, David Hoff and Santiago Holmes.
The bell rings for round one and we are underway!
Thompson misses with a wild combination.
Morris wants to counter the offense by Thompson and move into the clinch position.
Thompson shoots for a double leg takedown but Morris sprawls well. He's pushed Thompson's face into the mat and manages to get back to his feet relatively easily.
A nice side step and Morris releases a counter shot to the body, but it doesn't find it's home.

Thompson scores a trip takedown into side control. Nice.
Thompson tries to advance to mount but Morris denies him.
Morris can't do much from the bottom here.
We've had a slow start to the round here - hopefully the action picks up.
Morris is trying to escape and get back to his feet.
Thompson wants to stand but Morris has his arm trapped.
That's one minute gone in the round.
Thompson grinds an elbow into Morris's temple.
Morris looks more muscular than last time we saw him. He must have been on the weights.
Thompson working away.
Morris is working hard to escape and get back to his feet. After a battle for position, Thompson asserts his dominance and retains side control.

Thompson tries for a kimura. Not really close to a finish though.
Morris is trying to control Thompson's posture but Thompson avoids it.
That's two minutes gone in the round.
The crowd are getting on the fighters' backs, as the pace has dropped off in the last minute or so.
Thompson wants to work for a kimura but he's foiled early by Morris, who protects the arm well.
Morris can't do much from the bottom here.
Thompson wants to control but Morris is keeping him busy.
A lull in the action here as Thompson stalls from top position.

The referee decides to stand the fighters back up.
Morris misses with a body kick.
That's three minutes gone in the round.
Thompson goes for a double leg but Morris avoids the attempt and the two fighters end up clinched against the cage as Morris continues to drive forward.
Morris steps in looking to counter with the mid kick but it doesn't connect.
A frustrated look appears on Morris's face as he tries to break the clinch.
Thompson working on landing some head shots here - that one got through nicely.
Morris is trying to break the clinch but Thompson has him pressed against the cage.
Thompson has Morris pushed against the cage.
Thompson's corner are urging him to control the action in the clinch for a moment, rather than mount any serious offense. I'm sure the crowd appreciate those instructions... not.
Thompson goes for a takedown attempt but Morris pushes him away and we're back to fighting at a distance.
That's three failed takedown attempts in the round for David Thompson. That's going to take a lot out of him.
That's four minutes gone in the round.
The crowd are hurling abuse towards the fighters... You can hardly blame them though because there isn't a lot going on in the fight.
Thompson shoots for a double leg takedown but Morris sprawls well. He's pushed Thompson's face into the mat and manages to get back to his feet relatively easily.
Morris appears to be waiting to throw a counter punch to the body.
Thompson closes the distance, clinches up and gets a nice trip takedown into side control. Very smooth.

Morris sneaks out the side door and pushes Thompson away - he's back to his feet. The crowd show their appreciation for the escape.
Thompson will need to tighten up his combinations if he doesn't want to gas himself out, swinging at thin air.
Morris misses with a double jab.
Thompson looks frustrated there after his takedown attempt is stuffed easily.
Morris throws a counter combo.
The crowd thankful this round is nearly over.
Thompson closes the distance and clinches up with Morris, looking for a takedown. Thompson pushes Morris against the cage but Morris circles to the side and manages to break the clinch.
And that is the end of the round. The fighters go back to their corners.
A close round but Harry Morris will probably get the nod.
Well, the break between rounds is over. Let's get back to the scrappin!
Morris loads up on a big right hand but Thompson slips the punch.
Morris throws a body kick that misses

and Thompson holds on and brings the fighters into a clinch.
Nice body punch from Thompson - that landed with a thud.
Thompson keeps the fight in the clinch, despite Morris's efforts to push away.
Morris has had enough of the clinch and is looking to separate.
Thompson is trying to pull guard but Morris has him pressed against the cage.
We've had a slow start to the round here - hopefully the action picks up.
Thompson wants a takedown.
Thompson lands a shoulder strike.
Morris is looking to break free of the clinch but Thompson has double underhooks.
That's one minute gone in the round.
Thompson leaning his opponent against the cage.
Morris is trying to break free.
A frustrated look appears on Morris's face as he tries to break the clinch.
Morris is trying to break the clinch but Thompson has him pressed against the cage.
Thompson is trying to break the clinch but Morris is controlling him.
Morris wants to get back to striking at distance but Thompson won't allow it.
Morris is trying to force a seperation but Thompson has the dominant position.
That's two minutes gone in the round.
The crowd are getting on the fighters' backs, as the pace has dropped off in the last minute or so.

Thompson manages to break the clinch.
Morris pivots as if he's going to throw a leg kick but stops half way.
Thompson rushes Morris and presses him up against the cage.
Morris on the defensive, avoiding the knees to the body.
The referee calls for Thompson to work.
Thompson jumps guard but Morris turns him against the cage and keeps the fight standing.
That's three failed takedown attempts in the round for David Thompson. That's going to take a lot out of him.
Thompson tries to land a knee to the head but Morris blocks with his arms.
Thompson breaks the clinch.
Harry Morris is looking to keep the fight on the feet at all costs.
No joy there for Thompson, who threw a few shots but didn't land.
As Thompson backs off Morris throws a huge counter combo but Thompson manages to avoid it all.
David Thompson seems to be the more aggressive standup fighter in this bout.
That's three minutes gone in the round.
Morris swinging wildly here.
Morris swings away but doesn't land with a series of punches.
Thompson checks a low kick. Bone on bone - not my idea of a good time.
David Thompson is looking to throw some combinations by the looks of things.
Morris misses with a hook. Thompson ducked under it nicely.
Thompson blocks a head kick by Morris.
Thompson fails to land with a series of punches.
Thompson fails to land the takedown.
As Thompson backs off Morris throws a huge counter combo but Thompson manages to avoid it all.
Thompson is looking light on his feet compared to last time was saw him fight.
That's four minutes gone in the round.
Thompson goes for a double leg but Morris avoids the attempt and the two fighters end up clinched against the cage as Morris continues to drive forward.
It seemed like Morris was going to counter with the hook but didn't fully commit to it.
Thompson holding his opponent close, against the cage.
Thompson fails to pull the fight into his guard.
Thompson is trying to work for a single leg takedown but Morris pulls him back up using the underhooks.
Thompson pushes off and circles away, back to the middle of the mat.
Thompson goes for a double leg but Morris avoids the attempt and the two fighters end up clinched against the cage as Morris continues to drive forward.
Boooooooooooooooooooo!!! God, this has been a terrible round. Come on you two, sort yourselves out!
Morris tries to break the clinch but Thompson is controlling the position.
Thompson tries to land knees in the clinch but Morris avoids the damage to the body.
A frustrated look appears on Thompson's face as he tries to break the clinch.
And that is the end of the round. The fighters go back to their corners.
David Thompson dominated that second round.
That's time! Back to the action! The crowd applaud as we get ready to start the final round!

Thompson looks for a takedown here. Will he get it? Morris is fending him off so far but Thompson persists. Nope, Morris circles away and we're back to standing.
Thompson shoots in but no luck this time.
Thompson clinches with his opponent.
The fighters are pressed against the cage, as the pace of the fight slows.
Thompson stalling.
We've had a slow start to the round here - hopefully the action picks up.
Thompson tries to pull guard but can't drag his opponent to the mat. Morris just stands there and leans against the cage.
That's three failed takedown attempts in the round for David Thompson. That's going to take a lot out of him.
Thompson tries to score a body lock takedown but Morris shows good agility there to stay on his feet.
Morris blocks a body shot from Thompson.
That's one minute gone in the round.
Thompson goes for a takedown in the clinch but Morris prevents it.
Morris is trying to break free.
Thompson jumps guard but his hands slip and he falls flat on his back. Well, he's made himself look a right mug there, as Morris walks away with a smile on his face. Thompson gets slowly back to his feet and shakes his head.
Morris throws a right and a left that Thompson avoids nicely.
Thompson fails with the takedown.
Morris swings and misses with a hook to the body.
Thompson throws a right and a left that Morris avoids nicely.
Morris uses some good footwork to avoid the body shot by Thompson.
Morris with the counter takedown but Thompson avoids it easily.
That's two minutes gone in the round.
Thompson rushes Morris and presses him up against the cage.
Thompson keeps the fight in the clinch, despite Morris's efforts to push away.
Thompson tries for a takedown. No joy.
Morris is trying to push Thompson away but Thompson has him pressed against the cage, so he's going nowhere.
Thompson keeps the fight in the clinch, despite Morris's efforts to push away.
Thompson just leaning against Morris, taking a breather.
Morris working hard to break the clinch.
That's three minutes gone in the round.
Thompson dictating the pace here, as the fighters clinch against the cage.

Morris breaks the clinch and we return to the middle of the mat.
Morris misses with a half-hearted attempt at a head kick.
Thompson scores a trip takedown into side control. Nice.
Morris sneaks out the side door and pushes Thompson away - he's back to his feet. The crowd show their appreciation for the escape.
Thompson drives through and clinches with Morris against the cage.
Morris has had enough of the clinch and is looking to separate.
Thompson gets double underhooks and manages to take the fight to the ground.
That's four minutes gone in the round.
We've seen a great period of action over the last minute or so - credit to both fighters for going all out!

Morris manages to escape and get back to his feet.
Thompson slips under a jab.
Thompson moves into range and clinches up with Morris.
Thompson's corner are urging him to control the action in the clinch for a moment, rather than mount any serious offense. I'm sure the crowd appreciate those instructions... not.
A frustrated look appears on Morris's face as he tries to break the clinch.
The crowd thankful this round is nearly over.
Thompson jumps guard but Morris turns him against the cage and keeps the fight standing.
Thompson tries to land knees in the clinch but Morris avoids the damage to the body.
And that's the end of the fight!
I would just about give that final round to Harry Morris.
I think Morris has won this one but let's see whether the judges agree with me. Over to the ring announcer for the scorecards.
Ladies and gentlemen, after 3 rounds of action, we go to the scorecards for a decision.
Judge Daniel Franklin scores the fight 29:29
Judge David Hoff scores the fight 29:28
Judge Santiago Holmes scores the fight 29:29
The fight is ruled a majority draw!
|
|
|
|
|
|
|
|
|
|
|
|
|
|
|
|
|
|
|
|
|
|
|
| S |
C
A |
G |
S |
C
B |
G |
|
S |
C |
G |
|
energy
A | B |
|
hype
A | B |
|
pop
A | B |
|
mgr
A | B |
|
FIGHT
RATING
30% |
|
|
|
|
|
|
|
Undercard bout
|
Coming up we have a light heavyweight MMA rules bout between Maricus Moore (ranked 3587 p4p, 3611 weight class) and Joe Pulizzi (ranked 475 p4p, 480 weight class). Both fighters look fresh as a daisy as they make their way towards the cage.
 |
|
 |
| 180 cm
25
215
1 - 0 - 0 |
|
193 cm
25
210
2 - 1 - 0 |
Decent wrestler
Good knees
Very quick |
|
BJJ White Belt
Excellent boxer
Determined |
|
| |
|
Ladies and gentlemen. This fight is 3 rounds, in the light heavyweight division.
Introducing the fighter to my left, fighting out of the red corner.
With a record of 1 - 0 - 0, fighting out of The Island, Maricus Moore!
And introducing the fighter to my right, fighting out of the blue corner.
With a record of 2 - 1 - 0, fighting out of The Island, Joe Pulizzi!
The judges for this bout are Dirk Anderson, Daniel Franklin and Santiago Holmes.
The bell rings for round one and we are underway!
The fighters circling - Pulizzi throws out the jab but it was never going to land.
Pulizzi tries to land with a swinging hook to the body but Moore was well out of range. Poor timing from Pulizzi.
Moore was looking to counter that last move with a shot to the body but he didn't commit.
Moore misses with a wild body shot.
Moore throws a jab but it's blocked by Pulizzi.
Pulizzi takes one on the chin but seems OK.
It looks like Joe Pulizzi has been cut.
Pulizzi swats away the attempt to clinch by Moore.
A swing and a miss from Moore.
Moore tries to clinch up.
Moore has closed the distance and engaged Pulizzi in a clinch.
We've had a slow start to the round here - hopefully the action picks up.
A frustrated look appears on Pulizzi's face as he tries to break the clinch.
A right handed body shot lands from Moore.
Moore tries to work over Pulizzi's body with a swooping hook but it only glances the target.
Pulizzi wants to break free. God knows he wants to breaaaak freeee.
Moore working some nice short punches in the clinch.
Pulizzi leaning against his opponent.
That's one minute gone in the round.
Moore misses with the head strike.
Moore lands a nice knee to the body.
Moore lands a right hand that snaps the head of Pulizzi backwards.
Moore working aggressively here.
Moore lands with a good tight uppercut to the head.
A right hook to the body lands for Moore.
Pulizzi looks winded!
Pulizzi stalling in the clinch but Moore improves position.
A nice left hand lands by Moore.
A head punch on the inside from Moore fails to land.
Moore struggles to land a body shot inside as Pulizzi controls his hands.
Moore tries a shoulder strike but it doesn't do any damage.
Moore lands a shoulder strike that jolts his opponent's head backwards.
Pulizzi works for underhooks and lands a body shot in the process.
Pulizzi's head jolts backwards as he takes an uppercut right on the button!
Moore lands with a short shot to the head.
The crowd are loving this. Great action here.
Moore misses with a hook from the clinch.
Pulizzi is trying to force a seperation but Moore has the dominant position.
Pulizzi is working hard here but doesn't seem to be able to control effectively, up against the cage.
Pulizzi misses with a punch on the inside.
That's two minutes gone in the round.
Moore lands a shoulder strike.
Moore lands a body punch - he's looking to wear down Pulizzi.
Pulizzi is trying to break the clinch but Moore is controlling him.
Pulizzi has a couple of punches blocked by Moore.
Pulizzi fails to land with a short punch on the inside.
Moore lands a hook to the side of the head.
Moore blocks a punch to the side of the head.
Moore lands a shoulder strike.
Pulizzi is rocked!
Moore definitely looks more muscular than last time we saw him fight.
A short right from Moore.
Pulizzi is still on wobbly legs! Can Moore finish him?
Pulizzi prevents a body shot from Moore.
Moore swings away with an uppercut that misses.
Moore lands a shot to the body.
The referee is keeping an eye on Moore - much more stalling and he will separate the fighters.
Pulizzi takes a shot to the head.
Moore landing knees to the body.
Pulizzi seems to have recovered his senses.
Moore makes some space for himself and lands an uppercut.
Moore lands with a light punch inside.
Pulizzi is trying to slow down the pace in the clinch, to catch his breath.
Pulizzi tries to land a shot to the body but it's blocked.
That's three minutes gone in the round.
Moore misses with a punch to the body.
Pulizzi blocks a punch to the side of the head.
Moore misses with a short punch on the inside.
A body shot lands from Moore.
Pulizzi is trying to work out of this bad position, with his back against the cage.
Moore tried to land a shot to the body but connects with Pulizzi's elbow.
Moore blocking some punches.
Moore struggles to land a body shot inside as Pulizzi controls his hands.
Pulizzi blocks a couple of punches on the inside.
We've been informed that Pulizzi has been working hard on his conditioning in the buildup to the fight.
Moore keeps the fight in the clinch, despite Pulizzi's efforts to push away.
Pulizzi wants to strike at distance but he can't break free of the clinch.
Moore misses with a short punch on the inside.
Moore misses with a hook from the clinch.
Moore scores with a nice hook to the head.
Moore lands a short shot on the inside that snaps the head of Pulizzi backwards.
Pulizzi misses with a shot to the kidneys.
That's four minutes gone in the round.
Pulizzi goes for a body shot but it's blocked.
Pulizzi working aggressively here.
Pulizzi tries to circle away but Moore has him pinned against the cage.
Moore digs a right hand into Pulizzi's ribs. Those have got to be taking their toll on Pulizzi's gas tank.
Moore lands with a right to the head.
Moore lands with a short shot to the head.
Pulizzi blocks a couple of punches on the inside.
Moore lands a short shot on the inside that snaps the head of Pulizzi backwards.
This has been an exciting period of action!
Moore landing knees to the body.
Moore lands with a right to the head.
Pulizzi blocks a punch to the side of the head.
Moore lands a big right hand that drops Pulizzi! The killer instinct kicks in and Moore finishes his opponent with a series of strikes from mount. A dominating finish by Moore!
Ladies and gentlemen, after 4:46 of round 1, we have a winner by way of TKO (Strikes). Maricus Moore!
|
|
|
|
|
|
|
|
|
|
|
|
|
|
|
|
|
|
|
|
|
|
|
| S |
C
A |
G |
S |
C
B |
G |
|
S |
C |
G |
|
energy
A | B |
|
hype
A | B |
|
pop
A | B |
|
mgr
A | B |
|
FIGHT
RATING
52% |
|
|
|
|
|
|
|
Undercard bout
|
Coming up we have a middleweight MMA rules bout between Park Yo Ka (ranked 3309 p4p, 4164 weight class) and Kurt Long (ranked 399 p4p, 451 weight class). Kurt Long struggled to make weight for this fight. He only made it down to 187.6lbs at the first attempt and had to take the additional two hours to make the official bout weight. Let's see how much it's taken out of him. I don't know about you partner, but I'm pumped for this one!
 |
|
 |
| 185 cm
25
192
1 - 0 - 0 |
|
210 cm
25
200
1 - 2 - 0 |
Good takedowns
Basic striking
Very quick |
|
Dangerous GnP
Excellent boxer
Enjoys gardening |
|
| |
|
Ladies and gentlemen. This fight is 3 rounds, in the middleweight division.
Introducing the fighter to my left, fighting out of the red corner.
With a record of 1 - 0 - 0, fighting out of The Island, Park Yo Ka!
And introducing the fighter to my right, fighting out of the blue corner.
With a record of 1 - 2 - 0, fighting out of The Island, Kurt Long!
The judges for this bout are David Hoff, Winston Alpacca and Dirk Anderson.
The bell rings for round one and we are underway!
Yo Ka stuffs the takedown attempt from Long. Long gets slowly back to his feet.
Yo Ka darts in and lands a nice takedown into half guard.
Yo Ka tries to pass to full mount but Long defends it.
Yo Ka is looking for a kimura but Long is holding onto that half guard position, so it's hard for Yo Ka to get the leverage.
We've had a slow start to the round here - hopefully the action picks up.
Long tries to kick Yo Ka off but Yo Ka keeps his base steady and stays in half guard.
Yo Ka is looking for a kimura. It's going to be difficult to finish that from half guard though and Long defends it well.
Yo Ka is looking to advance position but Long won't allow it.
That's one minute gone in the round.
Yo Ka passes to side control.
Yo Ka postures up a little and throws a couple of hammerfists but they don't connect properly.
Long is looking to regain half guard here but Yo Ka keeps moving and retains side control.
Yo Ka working away.
Yo Ka working hard here to secure a kimura but he's not really in the right position for it.
Yo Ka definitely looks more muscular than last time we saw him fight.
Long is trying to get back to half guard. He's pushing on Yo Ka's leg. He's managed it. Nice work.
The fighters are pressed up against the cage, both looking to find a bit of space to work.
That's two minutes gone in the round.
Long is looking to regain full guard. Not this time though.
Yo Ka uses his free foot to push down on Long's thigh. Eventually he works his other foot free and he's advanced to mount - this is trouble for Long.
Long tries to hold on but Yo Ka postures up.
Long is a painfully thin specimen of a man. You do wonder whether a good body kick would snap him clean in two.
Yo Ka putting on the heat here with some good ground and pound!
Yo Ka thowing shots but they're missing.
Yo Ka throwing sloppy strikes, which aren't doing any damage.
That's three minutes gone in the round.
Long has given up his back. Will we see Yo Ka going for some submissions?
Long tries to break free.
Yo Ka is working really hard to secure the rear naked choke. Long defends successfully for a significant amount of time. Both fighters are looking very determined.
Long showing good submission defense here.
The ref warns both fighters not to hold the cage as they work up against the meshing.
Even with his hooks in, Yo Ka manages to miss with strikes from the back.
That's four minutes gone in the round.
I really don't envy Long right now.
Long covers up after that shot from Yo Ka.
Yo Ka controls the action.
Yo Ka has the hooks in. Long is starting to panic. He's trying to push off one of the legs but he's left his neck open to attack. Yo Ka passes his arm under Long's neck and tightens up a rear naked choke! This one is surely all over! Yes, Long taps!
Ladies and gentlemen, after 4:41 of round 1, we have a winner by way of Submission (RNC). Park Yo Ka!
Our winner, Park Yo Ka, made sure he spent some time buttering up the crowd during his post fight interview, which will no doubt bring him a few more fans.
|
|
|
|
|
|
|
|
|
|
|
|
|
|
|
|
|
|
|
|
|
|
|
| S |
C
A |
G |
S |
C
B |
G |
|
S |
C |
G |
|
energy
A | B |
|
hype
A | B |
|
pop
A | B |
|
mgr
A | B |
|
FIGHT
RATING
36% |
|
|
|
|
|
|
|
Undercard bout
|
Coming up we have a lightweight MMA rules bout between Siaosi Kuresa (ranked 2363 p4p, 3136 weight class) and Daisuke Toshimichi (ranked 289 p4p, 364 weight class). These two fighters really are very evenly matched on the feet - it will be fascinating to see who can assert themselves in that aspect of the fight.
 |
|
 |
| 187 cm
26
165
2 - 1 - 0 |
|
176 cm
26
165
3 - 2 - 0 |
BJJ Blue Belt
Solid boxing
Very strong |
|
BJJ White Belt
Excellent boxer
Granite chin |
|
| |
|
Ladies and gentlemen. This fight is 3 rounds, in the lightweight division.
Introducing the fighter to my left, fighting out of the red corner.
With a record of 2 - 1 - 0, fighting out of The Island, Siaosi Kuresa!
And introducing the fighter to my right, fighting out of the blue corner.
With a record of 3 - 2 - 0, fighting out of The Island, Daisuke Toshimichi!
The judges for this bout are David Hoff, Sandra Marshall and Daniel Franklin.
The bell rings for round one and we are underway!
Kuresa rushes in with a sloppy looking punch
and Toshimichi counters with a quick right hand to the jaw.
Toshimichi throws a lazy uppercut
and Kuresa counters with a good right hand that lands right on the jaw.
Kuresa cracks a nice hook into Toshimichi's ribs.
Toshimichi swings widly with a right hand
and Kuresa counters with a three punch combo that has Toshimichi backing up. Toshimichi nods at Kuresa to acknowledge the strikes.
Toshimichi throws a lazy uppercut
and Kuresa counters with a two punch combo.
Kuresa definitely looks more muscular than last time we saw him fight.
Daisuke Toshimichi seems to be the more aggressive standup fighter in this bout.
Toshimichi throws a hook but Kuresa avoids it easily.
Kuresa looks to throw the jab but Toshimichi is out of range.
Kuresa closes the distance and takes a jab right on the nose as he does so.
This has been an exciting period of action!
Kuresa walks straight into a jab right on the nose. That one stung - he's blinking and trying to clear his head.
Toshimichi misses with a jab, cross combination.
Toshimichi fakes a head punch and goes low to the body. Nicely done.
Toshimichi misses with a hook
and Kuresa counters with a crisp hook to the side of the head.
That's one minute gone in the round.
Nice uppercut there from Kuresa.
Kuresa blocks a jab.
An attempted straight right counter from Kuresa misses the target.
Toshimichi cracks Kuresa with an open hand slap.
Toshimichi misses with a straight right.
Toshimichi misses with a jab to the body
enabling Kuresa to counter with a crisp jab.
Toshimichi lands a jab to Kuresa's midsection.
Kuresa misses with an uppercut.
Toshimichi slips under a jab from Kuresa.
A little jabbing left from Toshimichi on the counter but it doesn't find it's target.
Kuresa swings wildly with a right hand that was never going to find it's target.
Toshimichi throws a body shot but no joy.
Kuresa is looking to counter punch.
Kuresa avoids a lazy jab quite easily.
That's two minutes gone in the round.
The crowd cheers as Toshimichi lands an impressive looking overhand right. Kuresa doesn't seem phased though.
Toshimichi stuns Kuresa with a nice body shot, before stepping back out of range.
This is a great period of action - very entertaining stuff!
Nice defenses there by Kuresa.
Toshimichi throws a jab to the body, straight down the pipe. Boom. That sent Kuresa stumbling backwards but he manages to regain his composure quickly.
Kuresa looks to land a combination but Toshimichi avoids it well.
Jab from Toshimichi.
Toshimichi steps to the side to avoid the strikes from Kuresa.
Toshimichi looks like he wants to counter punch here.
Toshimichi throws a jab but it's blocked by Kuresa.
Kuresa cracks Toshimichi with a right hand to the side of the head.
Toshimichi thuds his right hand into Kuresa's forehead from close range. That could be painful for both fighters.
Kuresa moves away from the strike by Toshimichi.
That's three minutes gone in the round.
Kuresa loads up on a big right hand but Toshimichi slips the punch.
Toshimichi defending well as Kuresa loads up on a big left hand.
Toshimichi is the aggressor but that punch slipped nicely by Kuresa.
Kuresa with a body punch. A glancing blow.
Toshimichi looks more muscular than last time we saw him. He must have been on the weights.
A jab lands there for Toshimichi.
Toshimichi avoids a lazy jab quite easily.
Toshimichi connects with a looping right hand.
Kuresa scores with a punch to the gut of his opponent.
Toshimichi throws out a token jab with nothing on it.
Kuresa throws a body shot but no joy.
That's four minutes gone in the round.
Kuresa dips to his left and cracks Toshimichi with an uppercut!
Toshimichi throws a nice hook to the body that draws an oooh from the crowd.
Toshimichi looks to land a right hand but Kuresa moved out of range.
Toshimichi misses with a hook. Kuresa ducked under it nicely.
The crowd cheering loudly, showing their appreciation for the quality fight we're seeing here.
Kuresa slips a jab from Toshimichi.
Kuresa is looking for a counter combo.
A nice combination there by Kuresa.
Kuresa is the aggressor but that punch slipped nicely by Toshimichi.
A nice side step and Toshimichi releases a counter shot to the body, but it doesn't find it's home.
Kuresa on the wrong end of a nice jab.
Toshimichi misses with an uppercut.
Toshimichi scores with a body shot.
Toshimichi throws an uppercut from half a mile away. Kuresa sees it coming and avoids it easily.
And that is the end of the round. The fighters go back to their corners.
A close round but Daisuke Toshimichi will probably get the nod.
The minute break is over - no more time for sponges and pep talks - back to the action!
Toshimichi smiles there as he lands a nice right hand right on the button.
Kuresa throws a solid leg kick but Toshimichi takes the impact on his shin and smiles at Kuresa.
Toshimichi walks into a left hand.
Kuresa will need to tighten up his combinations if he doesn't want to gas himself out, swinging at thin air.
Toshimichi blocks a jab.
Toshimichi keeping a good distance there, avoiding the body shot.
Kuresa throws a predictable looking body shot
and Kuresa takes a counter punch right on the button for his troubles.
We've had a slow start to the round here - hopefully the action picks up.
Toshimichi throws out a token jab with nothing on it.
Toshimichi slips under a jab.
Kuresa throws a right and a left that Toshimichi avoids nicely.
That's one minute gone in the round.
A combination from Kuresa does no damage.
Kuresa defending well as Toshimichi loads up on a big left hand.
Toshimichi steps to the side to avoid the strikes from Kuresa.
Toshimichi misses with a left hand
and Kuresa cracks him with a counter punch right on the button.
Kuresa throws a half hearted mid kick.
Toshimichi misses with a left hand
and Kuresa counters with a left to the body.
A punch combination from Toshimichi misses.
An attempted straight right counter from Kuresa misses the target.
Toshimichi misses with a jab to the body
and Kuresa counters with a three punch combination, finished off with a leg kick. Nice work.
Kuresa takes a shot to the eye socket. That's gotta hurt.
Toshimichi scores with a nice right hand.
Siaosi Kuresa is looking to throw some combinations by the looks of things.
Kuresa loads up on a big right hand but Toshimichi slips the punch.
That's two minutes gone in the round.
The crowd cheering loudly, showing their appreciation for the quality fight we're seeing here.
Kuresa misses with a looping left.
Kuresa misses with a looping left.
Toshimichi throws a big shot that misses.
Toshimichi changes levels and scores with a jab to the body.
Toshimichi misses with an uppercut. Kuresa saw that one coming.
Kuresa swinging wildly here.
Toshimichi defending well as Kuresa loads up on a big left hand.
Nice shot by Kuresa.
Toshimichi lands a straight punch to the body, keeping Kuresa at a distance.
That's three minutes gone in the round.
Kuresa misses with a wild body shot.
Kuresa takes a jab on the nose there. A little bit of blood seems to be coming out. Hopefully that won't affect his breathing.
Kuresa swings away with a body shot that misses
and Toshimichi counters with a shot to the ribs. That looked like it hurt.
Nice straight punches there by Toshimichi. You know Roy Jones Jr respects the hands of Toshimichi.
Toshimichi on the wrong end of an overhand right that came out of nowhere.
Toshimichi ducks under a wild hook from Kuresa.
Kuresa gets cracked there but stands up to it.
Kuresa throws a sloppy body shot
and Toshimichi counters with a lovely straight right hand!
A lazy left from Kuresa finds it's target.
Kuresa misses with a looping right.
Kuresa throws a lazy head kick
and Kuresa takes a counter punch right on the button for his troubles.
 Kuresa is rocked! Kuresa is rocked!
That's four minutes gone in the round.
The fans in attendance giving it up for the two fighters, who have really let it all hang out in the last minute or so!
Toshimichi uses good head movement to avoid the hook from Kuresa.
Toshimichi throws a monster overhand right that drops Kuresa! Toshimichi follows up with more strikes from mount and the fight is all over!
Ladies and gentlemen, after 4:15 of round 2, we have a winner by way of TKO (Strikes). Daisuke Toshimichi!
Daisuke Toshimichi seemed lost for words in his post fight interview but he remembered to thank his fans and directed everyone to his website.
|
|
|
|
|
|
|
|
|
|
|
|
|
|
|
|
|
|
|
|
|
|
|
| S |
C
A |
G |
S |
C
B |
G |
|
S |
C |
G |
|
energy
A | B |
|
hype
A | B |
|
pop
A | B |
|
mgr
A | B |
|
FIGHT
RATING
65% |
|
|
|
|
|
|
|
Undercard bout
|
Coming up we have a light heavyweight MMA rules bout between Josh Wilkinson (ranked 2357 p4p, 3656 weight class) and Tom DeBlass (ranked 336 p4p, 486 weight class). Wilkinson comes to the cage accompanied by The Who - Eminence front. Over to our ring announcer for the fighter introductions!
 |
|
 |
| 185 cm
25
210
4 - 1 - 0 |
|
180 cm
26
220
4 - 3 - 0 |
Good takedowns
Counter fighter
Experienced |
|
Good wrestler
Basic striking
Powerful |
|
| |
|
Ladies and gentlemen. This fight is 3 rounds, in the light heavyweight division.
Introducing the fighter to my left, fighting out of the red corner.
With a record of 4 - 1 - 0, fighting out of The Island, Josh Wilkinson!
And introducing the fighter to my right, fighting out of the blue corner.
With a record of 4 - 3 - 0, fighting out of The Island, Tom DeBlass!
The judges for this bout are David Hoff, Peter Branson and Daniel Franklin.
The bell rings for round one and we are underway!
DeBlass shoots for a takedown but Wilkinson saw that one coming a mile off and avoided it easily.
DeBlass tries to shoot in for a takedown. He's got hold of a leg but Wilkinson swivels and escapes.

DeBlass shoots in and scores a nice double leg takedown into half guard.
DeBlass not doing much here.
Wilkinson is trying to get back to full guard.
DeBlass with a momentary lay and pray from half guard.
We've had a slow start to the round here - hopefully the action picks up.

DeBlass is trying for a guillotine from the top but the pressure isn't in the right place so Wilkinson is just riding it out for now. DeBlass eventually gives up the hold.
DeBlass is looking for an arm triangle, whilst trying to pass to side control. Wilkinson doesn't seem that keen to cooperate though. No luck this time DeBlass.
That's one minute gone in the round.
DeBlass wants to free his trapped foot but Wilkinson is holding on for dear life with his legs.
DeBlass wants to take a breather but Wilkinson is having none of it.
Wilkinson definitely looks more muscular than last time we saw him fight.
DeBlass has been taking part in the yoga sessions down at Elite Boxing Club. Presumably he's going to look for a slick submission... Or maybe he's looking to avoid one.
Wilkinson trying to control but DeBlass postures up.
Wilkinson looking for submissions from an awkward position here.
That's two minutes gone in the round.
There's not a lot going on here and the crowd are letting the fighters know they're not willing to tolerate a lack of action.
Wilkinson wants to control but DeBlass is keeping busy and won't allow it.
DeBlass looking to pass the half guard. Not this time.
DeBlass is persisting with the attempt to improve his position.
The ref warns both fighters not to hold the cage as they work up against the meshing.
DeBlass wants to lay and pray for a moment but Wilkinson keeps working.
Wilkinson is looking to regain full guard. Not this time though.
Wilkinson is staying active underneath DeBlass, who seems content to just control the action from this position.
The ref stands the fighters back up due to a lack of activity.
DeBlass tries to drive through with a takedown attempt but Wilkinson defends well and DeBlass ends up having to push Wilkinson into the cage where they will battle it out in the clinch.
Josh Wilkinson has stuffed three takedown attempts in the round now. That's going to take a lot out of Tom DeBlass.
Wilkinson closes the distance and looks for a trip takedown... aaaand he's got it - Wilkinson lands in his opponent's guard.
That's three minutes gone in the round.
Wilkinson is trying to work a guillotine from the top, or something like that? Don't know how he thinks he's going to get a finish from there.
Wilkinson trying to control but DeBlass is working from the bottom.
Wilkinson sneaks a leg through and gets to half guard. That was like a knife through butter how easily he passed DeBlass's guard.
Wilkinson is thwarting DeBlass's attempts to control the position.
Wilkinson looking for a kimura but he'll have to free his other leg if he wants to finish that. Perhaps he's just using it as a distraction technique.
DeBlass wants to improve his position but Wilkinson is controlling well.
That's four minutes gone in the round.
A few boos can be heard. I'm sure they will multiply if the fighters don't pick up the pace.
DeBlass preventing any damage for now, controlling his opponent's head.
Wilkinson sitting in half guard, looking to land shots. DeBlass defending well though.
The fighters are pressed up against the cage, both looking to find a bit of space to work.
DeBlass is trying to get back to full guard.
Wilkinson trying to control from half guard but DeBlass is working away.
Boooooooooooooooooooo!!! God, this has been a terrible round. Come on you two, sort yourselves out!
DeBlass tries to get to full guard but Wilkinson has control of the leg.
DeBlass gets full guard.
And that is the end of the round. The fighters go back to their corners.
That was a close round but I would say that Josh Wilkinson will probably get the nod.
The fighters' corners scream their final instructions, as the referee calls time. Here we go, back to the action!
A big left from Wilkinson misses.
DeBlass fails with a takedown attempt.
Wilkinson looks to land a combination. DeBlass sees it coming but can only parry a couple of the shots.
DeBlass dives in and grabs Wilkinson's left leg, looking for a takedown. Wilkinson pushes down on DeBlass's head and hops out.
Wilkinson tries to counter with a takedown but DeBlass is quick to defend against it.
Wilkinson throws a looping overhand right but DeBlass ducks down to avoid it.
We've had a slow start to the round here - hopefully the action picks up.
DeBlass dives in and grabs Wilkinson's left leg, looking for a takedown. Wilkinson pushes down on DeBlass's head and hops out.
Josh Wilkinson has stuffed three takedown attempts in the round now. That's going to take a lot out of Tom DeBlass.
A really sloppy takedown attempt there from DeBlass.
Wilkinson defends well against a solid takedown attempt from DeBlass.
That's one minute gone in the round.
Wilkinson feints and then dives in with a takedown. That was a long way out but the feint bought him enough time to close the distance and complete the takedown. Now we'll play guard for a bit and see who can get the better of that position.
Wilkinson is intent on slowing down the pace of the fight, simply looking to control.
DeBlass wants to sweep here but Wilkinson controlling him for the moment.
Wilkinson wants to control from the top but DeBlass keeps moving.
Wilkinson postures up in DeBlass's guard and throws a big left but DeBlass blocks it.
DeBlass really doesn't want to stay on the ground with Wilkinson. If he can't get it back to his feet, it's only a matter of time before he'll be tapping out.
Wilkinson passes into half guard.
Wilkinson works his way into full mount!
DeBlass gets back to half guard.
DeBlass keeping his head moving to avoid the ground and pound.
That's two minutes gone in the round.
DeBlass is looking for a sweep. Wilkinson is wise to his cunning plan and keeps the top position.
Wilkinson scores with a couple of good hammerfists.
DeBlass is refusing to be controlled, as Wilkinson sits in half guard.
DeBlass tries to get to full guard but Wilkinson has control of the leg.
Both fighters have adopted an aggressive gameplan on the ground!
DeBlass is looking to control Wilkinson's leg but it's slowly edging free. Can DeBlass avoid being mounted?
Wilkinson winds up and cracks DeBlass with a swinging punch to the side of the head.
DeBlass is looking to control Wilkinson's leg but it's slowly edging free. Can DeBlass avoid being mounted?
Wilkinson is looking to advance position but DeBlass won't allow it.
DeBlass is defending against the submission attempts here by Wilkinson.
That's three minutes gone in the round.
DeBlass wants to control but Wilkinson is keeping busy.
Wilkinson wants to pass the guard but DeBlass is defending well.
Wilkinson thows a huge punch but DeBlass dodges it nicely.
DeBlass is trying to get back to full guard.
DeBlass is still trying to improve position.
That's four minutes gone in the round.
My god... these two guys really need to pick up the pace or everyone will leave to go get a beer.
Wilkinson working DeBlass over with strikes.
Wilkinson wants to lay and pray for a moment but DeBlass keeps working.
DeBlass tries to roll over but Wilkinson keeps him under control.
DeBlass is trying to control but can't.
Wilkinson has hold of the far side arm. He's working for the Kimura, can DeBlass defend it? Wilkinson steps over the head and cranks it - DeBlass is tapping out! That was textbook stuff right there - nice submission victory for Wilkinson!
Ladies and gentlemen, after 4:37 of round 2, we have a winner by way of Submission (Kimura). Josh Wilkinson!
An out of breath Josh Wilkinson thanked his loyal fans in his post fight interview, giving them credit for his success over the course of his career.
|
|
|
|
|
|
|
|
|
|
|
|
|
|
|
|
|
|
|
|
|
|
|
| S |
C
A |
G |
S |
C
B |
G |
|
S |
C |
G |
|
energy
A | B |
|
hype
A | B |
|
pop
A | B |
|
mgr
A | B |
|
FIGHT
RATING
30% |
|
|
|
|
|
|
|
Undercard bout
|
Coming up we have a light heavyweight MMA rules bout between Wing Wang (ranked 1485 p4p, 2570 weight class) and Nishi Guri (ranked 216 p4p, 365 weight class). Wing Wang could well score a knockout today. He has the power to get to Nishi Guri's chin.
 |
|
 |
| 190 cm
26
212
5 - 1 - 0 |
|
190 cm
26
222
2 - 1 - 0 |
Good takedowns
Basic striking
Very quick |
|
Decent wrestler
Good kicks
Very confident |
|
| |
|
Ladies and gentlemen. This fight is 3 rounds, in the light heavyweight division.
Introducing the fighter to my left, fighting out of the red corner.
With a record of 5 - 1 - 0, fighting out of The Island, Wing Wang!
And introducing the fighter to my right, fighting out of the blue corner.
With a record of 2 - 1 - 0, fighting out of The Island, Nishi Guri!
The judges for this bout are Santiago Holmes, Dirk Anderson and David Hoff.
The bell rings for round one and we are underway!
Wang fakes an overhand right and shoots for a takedown. Guri sprawls well initially but Wang persists and gets the takedown into half guard.
Guri is trying to stand back up but Wang is controlling him
Guri is defending against the submission attempts here by Wang.
Wang prevents Guri from improving his position.
Guri is looking to escape.
Guri tries to kick Wang off in order to stand up. Wang Avoids the leg push though and dives into side control.
Wang landing with strikes to the head and body from side control.
Wang definitely looks more muscular than last time we saw him fight.
Guri is looking to work his way out of this bad position but Wang is controlling him well.
Wang happy to just control the position for now.
Wang wants to lay and pray for a moment but Guri keeps working.
We get told so often about how wrestlers don't like to be on their backs. Let's see if Guri can do anything to dispel that myth.
Wang working away.
Wang works a knee to the body and follows up with a nice elbow to the head.
That's one minute gone in the round.
Guri is looking to reverse the position.
Guri looks more muscular than last time we saw him. He must have been on the weights.
Guri is looking to get back to his feet here but Wang is keeping cool and he's managed to take Guri's back.
Wang has the hooks sunk in and you can see the will to fight slowly draining out of Guri's body.
Guri is trying to stand back up.
Guri covers up after that shot from Wang.
Guri looking very determined here, making life difficult for Wang.
Wang is landing with strikes. Guri can't take much more of this.
Guri looking very determined here, making life difficult for Wang.
That's two minutes gone in the round.
Wang keeps control of the position as Guri tries to break free.
Guri trying to control the position but Wang manages to sink in the hooks.
Wang lands with a hammerfist to the side of Guri's head.
Guri is being controlled on the ground here - he must escape this position otherwise surely the end is near.
Wang is working on the RNC. He looks like he's got it but Guri won't tap... Oh, he's out! The ref rips Wang off his unconscious opponent!
Ladies and gentlemen, after 2:42 of round 1, we have a winner by way of Submission (RNC). Wing Wang!
An out of breath Wing Wang thanked his loyal fans in his post fight interview, giving them credit for his success over the course of his career.
|
|
|
|
|
|
|
|
|
|
|
|
|
|
|
|
|
|
|
|
|
|
|
| S |
C
A |
G |
S |
C
B |
G |
|
S |
C |
G |
|
energy
A | B |
|
hype
A | B |
|
pop
A | B |
|
mgr
A | B |
|
FIGHT
RATING
44% |
|
|
|
|
|
|
|
Co-main event
|
Coming up we have a super heavyweight MMA rules bout between Jack Bruce (ranked 950 p4p, 1985 weight class) and Lipe Ribeiro (ranked 53 p4p, 102 weight class). These two fighters really are very evenly matched on the feet - it will be fascinating to see who can assert themselves in that aspect of the fight.
 |
|
 |
| 216 cm
26
286
6 - 0 - 0 |
|
200 cm
26
280
5 - 1 - 0 |
Good wrestling
Solid boxing
Granite chin |
|
BJJ White Belt
Excellent boxer
Powerful |
|
| |
|
Ladies and gentlemen. This fight is 5 rounds, for the super heavyweight championship of the world!
Introducing the champion to my left, fighting out of the red corner.
With a record of 6 - 0 - 0, fighting out of The Island, Jack Bruce!
And introducing the challenger to my right, fighting out of the blue corner.
With a record of 5 - 1 - 0, fighting out of The Island, Lipe Ribeiro!
The judges for this bout are Bart Greer, Daniel Franklin and Peter Branson.
The bell rings for round one and we are underway!
Bruce gets to the clinch - let's see what his plan is here.
Ribeiro can't break the clinch.
Ribeiro escapes the clinch and we're back to striking.
Bruce throws the left hand but Ribeiro avoids the punch easily.
Ribeiro gets tackled into the cage by Bruce. Bruce maintains the clinch.
Bruce tries to land a shot to the body but it's blocked.
Ribeiro is trying to break the clinch but Bruce is controlling him.
Bruce tries to land a shot to the body but it's blocked.
Bruce throws a punch but it's blocked by Ribeiro.
Bruce lands a body shot in the clinch.
Bruce misses with a body punch.
Bruce tries to work over Ribeiro's body with a swooping hook but it only glances the target.
Bruce lands a nice uppercut.
Ribeiro looks more muscular than last time we saw him. He must have been on the weights.
Bruce softening up his opponent with strikes, against the cage.
We've had a slow start to the round here - hopefully the action picks up.
Bruce tried to land a shot to the body but connects with Ribeiro's elbow.
Bruce doesn't land with the attempted body shot.
Bruce swings wildly with an uppercut but Ribeiro uses good head movement to avoid it.
A head punch blocked on the inside by Ribeiro.
Still in the clinch, Bruce scores with a nice short uppercut.
Bruce doesn't land with the attempted body shot.
That's one minute gone in the round.
Bruce lands with a good tight uppercut to the head.
Ribeiro wants to break free. God knows he wants to breaaaak freeee.
Bruce doesn't land with the attempted body shot.
Ribeiro is trying to break the clinch but Bruce is controlling him.
Ribeiro wants to break free but Bruce has control.
A short right from Bruce.
Ribeiro wants to break free but Bruce has control.
Bruce lands a left hand.
A left hand lands to the body for Bruce.
Bruce definitely looks more muscular than last time we saw him fight.
Bruce lands a nice uppercut.
Bruce has Ribeiro pressed against the cage, preventing Ribeiro from circling away and getting back to striking at range.
Bruce works on Ribeiro's body with a couple of short punches.
Ribeiro looks winded!
Bruce misses with a hook to the ribs.
Bruce digs a right hand underneath Ribeiro's ribcage. Ribeiro let out a lung full of air as it connected.
Bruce works on Ribeiro's body with a couple of short punches.
Bruce goes for a body shot but it's blocked.
Bruce lands with a short head shot on the inside.
Bruce lands a body punch in the clinch.
Bruce lands with a light punch inside.
Bruce lands a nice shot to the body.
We've seen a great period of action over the last minute or so - credit to both fighters for going all out!
A nice right hand lands inside from Bruce.
That's two minutes gone in the round.
Bruce stays in close to his opponent and throws a right hand to the body.
Bruce lands a hook to the body. It's hard to tell if that hurt Ribeiro or not.
Bruce scores with an uppercut up the middle.
Bruce lands a right uppercut that snaps the head of Ribeiro backwards.
Ribeiro is rocked!
A frustrated look appears on Ribeiro's face as he tries to break the clinch.
Bruce can't find room to land a body shot as Ribeiro controls the action.
Ribeiro looks like he'd prefer to be striking at range right now.
Ribeiro wants to get back to striking at distance but Bruce won't allow it.
Bruce keeps control of Ribeiro as he tries to wriggle out of the double underhooks.
Bruce lands a hook that snaps the head of Ribeiro backwards.
Bruce misses with a short punch on the inside.
Bruce drops Ribeiro onto one knee with a big uppercut from the clinch! Ribeiro is propped up by the cage and works his way back to his feet!
Ribeiro is still on wobbly legs! Can Bruce finish him?
Bruce presses Ribeiro against the cage and delivers a mid-strength body shot.
Bruce lands a right hand.
Bruce creates some distance for himself and unleashes a massive uppercut that sends Ribeiro's eyes rolling into the back of his head! Ribeiro drops to his knees and Bruce pours it on with more strikes until the referee steps in to end the bout!
Ladies and gentlemen, after 2:50 of round 1, we have a winner by way of TKO (Strikes). Jack Bruce!
Jack Bruce retains his super heavyweight title!
Jack Bruce decided to thank the fans in attendance for making a great atmosphere. It seemed to go down pretty well.
|
|
|
|
|
|
|
|
|
|
|
|
|
|
|
|
|
|
|
|
|
|
|
| S |
C
A |
G |
S |
C
B |
G |
|
S |
C |
G |
|
energy
A | B |
|
hype
A | B |
|
pop
A | B |
|
mgr
A | B |
|
FIGHT
RATING
54% |
|
|
|
|
|
|
|
Main event
|
Coming up we have a heavyweight MMA rules bout between Felix Pappalardi (ranked 795 p4p, 1522 weight class) and The Wilson (ranked 93 p4p, 173 weight class). Wilson comes into a darkened arena with his song building. Painkiller kicks in, the lights come on and the crowd goes wild! What a showman! Both these fighters are unbeaten, so somebody's 0 has got to go!The key to victory for Felix Pappalardi has got to be keeping the fight on the feet.
 |
|
|
| 192 cm
26
272
6 - 0 - 0 |
|
195 cm
25
230
7 - 0 - 0 |
Good wrestling
Counter fighter
Granite chin |
|
Good wrestler
Brawler
Powerful |
|
| |
|
Ladies and gentlemen. This fight is 5 rounds, for the heavyweight championship of the world!
Introducing the champion to my left, fighting out of the red corner.
With a record of 6 - 0 - 0, fighting out of The Island, Felix Pappalardi!
And introducing the challenger to my right, fighting out of the blue corner.
With a record of 7 - 0 - 0, fighting out of The Island, The Wilson!
The judges for this bout are Santiago Holmes, Winston Alpacca and Bart Greer.
The bell rings for round one and we are underway!
Wilson misses with a takedown attempt - Pappalardi sprawls well and throws a nice strike on the way out which just misses.
Pappalardi appears to be looking for a counter punch to the body.
Pappalardi definitely looks more muscular than last time we saw him fight.
Wilson fakes high and shoots in for a takedown but Pappalardi avoids it really well and circles away.
It looked like Pappalardi was trying to counter with a body shot coming off that last attack from Wilson.
Pappalardi ducks down and throws a hook to the body.
Wilson misses with a right hand
and Pappalardi counters with a nice uppercut.
It looks like The Wilson has been cut.
We've had a slow start to the round here - hopefully the action picks up.
Pappalardi connects with a body shot.
Wilson swings widly with a right hand
and Pappalardi counters with a nice jab to the body that keeps Wilson thinking.
Wilson looks winded!
Pappalardi ducks low and lands a nice hook to the body of his opponent.
Pappalardi connects with a slap. Keep your fist closed son.
That's one minute gone in the round.
Pappalardi stuns Wilson with a nice body shot, before stepping back out of range.
Felix Pappalardi is looking to keep the fight on the feet at all costs.
Pappalardi throws a nice hook to the body that draws an oooh from the crowd.
Pappalardi cracks Wilson with a big right hand that sends him to the floor! Wilson looks wobbly but he's sprung back up to his feet straight away� can Pappalardi finish him?
Wilson is rocked!
Wilson walks into a straight right, dropping him to the canvas! Pappalardi swarms him and finishes the fight with a hail of punches! What a brutal finish!
Ladies and gentlemen, after 1:20 of round 1, we have a winner by way of KO (Punches). Felix Pappalardi!
Felix Pappalardi retains his heavyweight title!
After winning the bout, Felix Pappalardi thanked all his fans and promised he'd do even better in his next fight. The crowd seemed to love his humility.
The Wilson spoke after the fight, saying 'Hard to beat a man that's 35lbs heavier than me. '.
|
|
|
|
|
|
|
|
|
|
|
|
|
|
|
|
|
|
|
|
|
|
|
| S |
C
A |
G |
S |
C
B |
G |
|
S |
C |
G |
|
energy
A | B |
|
hype
A | B |
|
pop
A | B |
|
mgr
A | B |
|
FIGHT
RATING
70% |
|
|
|
|
|
|
|
|
|
|
