|
TWGC 40 (185lbs, D4): Los Angeles Qualifier - Round 1 PBP Commentary |
Undercard bout
|
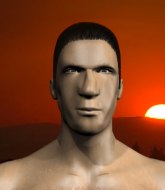
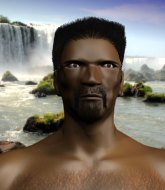
This TWGC bout is 1 fifteen minute round in the middleweight division. Introducing today's competitors. In the red corner, competing out of Las Vegas, with a TWGC record of 0 wins and 0 losses; Montgomery Scott! And in the blue corner, fighting out of Tokyo, with a TWGC record of 0 wins and 1 losses; Harleigh Dungan!
The judges for this bout are Jack Bonds, Timothy Bukovac and Frank Antenori.
Let's get this grappling contest under way! Who will be victorious?#TD#
Scott scores with a nice takedown into half guard. Let's see what he's got on the ground. Score +2 for takedown into guard / half guard: Scott (2) vs (0) Dungan
Scott prevents Dungan from improving his position.
Scott is looking to advance position but Dungan won't allow it. #SUB2#
Dungan looking for submissions off his back.
Scott content to control rather than advance.
We get told so often about how wrestlers don't like to be on their backs. Let's see if Dungan can do anything to dispel that myth.
We've had a slow start to the round here - hopefully the action picks up.#T1#
Dungan is looking to improve his position.
Dungan is persisting with the attempt to improve his position.
Dungan trying to get back to full guard but Scott takes advantage of the position and moves to full mount! Score +3 for passing guard: Scott (5) vs (0) Dungan
Scott avoids the attempt from Dungan to control.#SUB#
Scott working from mount. He moves in close and looks like he might be going for an arm triangle... He's hopped off to the side and he's transitioned into an Anaconda choke. Dungan turning a nasty shade of purple. He's refusing to tap but he's gone! He's out! The ref rips Scott off and cradles Dungan's limp body as Scott celebrates with his corner.
Ladies and gentlemen, after 2:58 of round 1, we have a winner by way of Submission (Anaconda Choke). Montgomery Scott! |
|
|
|
Undercard bout
|
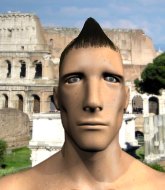
This TWGC bout is 1 fifteen minute round in the middleweight division. Introducing today's competitors. In the red corner, competing out of St Petersburg, with a TWGC record of 1 wins and 1 losses; Blue River ! And in the blue corner, fighting out of Helsinki, with a TWGC record of 0 wins and 0 losses; FrankFurt Livingstone!
The judges for this bout are Jack Bonds, Frank Antenori and Don Winkell.
Let's get this grappling contest under way! Who will be victorious?
Livingstone tries to clinch but River moves out of range.
Livingstone tries to clinch there but River circles away.
Livingstone tries to close the distance and clinch up but River swats him away and circles back towards the center.
River changes levels looking for a counter takedown but doesn't commit.
Livingstone wants to clinch.
The fight stays on the outside here - Livingstone looks like he's thinking about clinching though.
Livingstone moves in looking to clinch but River pushes him off.
River appears to be looking for a counter takedown.
Livingstone wants to clinch up but River keeps it at a distance.#CL#
River closes the distance and pushes Livingstone back into the cage.
We've had a slow start to the round here - hopefully the action picks up.#TD#
River jumps guard.
River pulls Livingstone in close to prevent any damage.
Livingstone must be cautious of submissions here, given that his opponent has the superior Jiu Jitsu.
There's a bit of a scramble here and now River is on top in guard.
Score +2 for sweep to guard / half guard: River (2) vs (0) Livingstone
River is taking a break and basically stalling. The referee will not allow him to do that for long. #T1#
Livingstone keeping moving, preventing River from controlling successfully.
River works a leg free and moves into half guard.
Livingstone is not content to let River control the position.
The ref warns both fighters not to hold the cage as they work up against the meshing.
River works his way into side control. Score +3 for passing guard: River (5) vs (0) Livingstone#SUB#
River tries for a kimura. Not really close to a finish though. #SUB#
River wants to work for a kimura but he's foiled early by Livingstone, who protects the arm well. #SUB#
River wants to work for a kimura but he's foiled early by Livingstone, who protects the arm well. #SUB#
River is trying to get an arm triangle but Livingstone is defending well. #T2##SUB#
River working hard here to secure a kimura but he's not really in the right position for it.
Livingstone gives up the full mount - oops, sloppy defensive grappling there! Score +2 for reaching mount: River (7) vs (0) Livingstone#SUB#
River working for a guillotine from mount but Livingstone is in no mood to give up.
River content just to control the position here.
River can't quite control the action as he would like just now, as Livingstone is looking to escape.
River controlling the position easily from mount.
River trying to control but he's not successful this time. #T3##SUB#
River looking for a guillotine from mount but Livingstone is having none of it.
River looking to control but Livingstone is working nicely, looking to advance position himself. #SUB#
River wants to finish this one by submission but Livingstone is holding onto his waist, trying to prevent any attacks from River . #T4##SUB#
River looking for an armbar but decides to keep the dominant position instead. #SUB#
River looking for an armbar but decides to keep the dominant position instead. #SUB#
River wants to finish this one by submission but Livingstone is holding onto his waist, trying to prevent any attacks from River .
River tries to control but Livingstone wriggling away.
River controlling his opponent.
Livingstone is squirming around, avoiding River 's attempts to control the action. #SUB#
Livingstone defends a decent attempt at a guillotine from River .
Livingstone keeping his composure momentarily, calmly looking to get back to half guard.
#SUB#
River has hold of Livingstone's left arm, perhaps looking for a submission. The two fighters tussle over control of the isolated limb and Livingstone manages to get his arm back to his side and away from danger.
River tries to control but Livingstone wriggling away. #T5##SUB#
River wants to finish this one by submission but Livingstone is holding onto his waist, trying to prevent any attacks from River .
River trying to control but he's not successful this time.
River is really struggling to control Livingstone but he's trying to hold on to the position.
Livingstone really doesn't want to stay on the ground with River . If he can't get it back to his feet, it's only a matter of time before he'll be tapping out.#SUB#
River working for a submission but Livingstone is keeping him at bay. #SUB#
River has control of Livingstone's right arm, working for a kimura. It's a bit of a token attempt though and Livingstone regains control of the situation pretty easily.
#SUB#
River is working for a guillotine from mount but Livingstone frees his head quite easily.
#T6#
River looking to control and managing it successfully. #SUB#
River has hold of Livingstone's left arm, perhaps looking for a submission. The two fighters tussle over control of the isolated limb and Livingstone manages to get his arm back to his side and away from danger.
River will need to keep those long limbs tucked in whilst he's on the ground, to prevent any submissions.#SUB#
River looking to secure an arm triangle but Livingstone defends it well.
River has improved his flexibility recently so we will have to see if he can use that to his advantage.#SUB#
River has hold of Livingstone's left arm, perhaps looking for a submission. The two fighters tussle over control of the isolated limb and Livingstone manages to get his arm back to his side and away from danger.
The fighters are pressed up against the cage, both looking to find a bit of space to work.
Livingstone is squirming around, avoiding River 's attempts to control the action.
Livingstone is wriggling around trying to escape.
River looking to control but Livingstone is working nicely, looking to advance position himself. #T7##SUB#
River looks like he's working for a submission but he's not found anything just yet.
River looking to control but Livingstone is working nicely, looking to advance position himself.
Livingstone is looking to improve his position but River isn't that keen on the idea.
River trying to control but Livingstone is having none of it.
Livingstone is trying desperately to improve position.#SUB#
River jumps to side control looking for an arm triangle but Livingstone manages to avoid the submission attempt. #T8##SUB#
River tries for a kimura. Not really close to a finish though.
Livingstone gives up the full mount - oops, sloppy defensive grappling there! Score +2 for reaching mount: River (9) vs (0) Livingstone#SUB#
River working to secure an arm triangle but it's not happening for him just yet. #SUB#
River working for a submission but Livingstone is keeping him at bay. #SUB#
River working for a guillotine from mount but Livingstone is in no mood to give up. #SUB#
River is working for a guillotine from mount but Livingstone frees his head quite easily.
#SUB#
River wants to finish this one by submission but Livingstone is holding onto his waist, trying to prevent any attacks from River . #T9##SUB#
River is in full mount, looking to secure a guillotine but Livingstone is surviving well by controlling River 's body position as best he can. #SUB#
River working to secure an arm triangle but it's not happening for him just yet.
River wants to control the pace but Livingstone is squirming around nicely. #SUB#
River is working for a guillotine from mount but Livingstone frees his head quite easily.
#SUB#
Livingstone defends a decent attempt at a guillotine from River .
River trying to control but Livingstone is having none of it. #T10##SUB#
River working to secure an arm triangle but it's not happening for him just yet.
Livingstone is desperately trying to improve his position but River has a good base and remains in mount.
River trying to control but Livingstone is having none of it.
Livingstone working to try and regain half guard.
River controlling the position easily from mount.
River wants to control the pace but Livingstone is squirming around nicely. #SUB#
River with some aggressive grappling here. He's looking for submissions here, rather than waiting for the opportunity to counter.
Livingstone is squirming around, avoiding River 's attempts to control the action. #T11#
River is going to have to think about doing something other than just controlling because Livingstone is managing to avoid having the position dictated to him.
Livingstone is trying to escape the mount.
River looking to control but Livingstone is working nicely, looking to advance position himself. #SUB#
River wants to finish this one by submission but Livingstone is holding onto his waist, trying to prevent any attacks from River . #SUB#
River working to secure an arm triangle but it's not happening for him just yet.
Livingstone is trying to escape the mount.
#T12##SUB#
River with some aggressive grappling here. He's looking for submissions here, rather than waiting for the opportunity to counter.
Livingstone working to try and regain half guard.
River wants to control the pace but Livingstone is squirming around nicely. #SUB#
River working to secure an arm triangle but it's not happening for him just yet. #SUB#
River has control of Livingstone's right arm, working for a kimura. It's a bit of a token attempt though and Livingstone regains control of the situation pretty easily.
River trying to control but Livingstone is having none of it. #T13##SUB#
River looking for an armbar but decides to keep the dominant position instead. #SUB#
River jumps to side control looking for an arm triangle but Livingstone manages to avoid the submission attempt.
Livingstone is not content to let River control the position.
River taking a breather here. #SUB#
River wants to work for a kimura but he's foiled early by Livingstone, who protects the arm well. #SUB#
River is trying to land an Americana. He has the arm isolated but Livingstone is keeping cool and he's avoided the danger for now. #T14##SUB#
River working hard here to secure a kimura but he's not really in the right position for it.
Livingstone is looking to reverse the position.
River is looking to take a break and control but Livingstone is keeping him honest, looking to work from the bottom.
Livingstone is looking to reverse the position.
River controlling the position from side mount.
River moves into full mount! Score +2 for reaching mount: River (11) vs (0) Livingstone
Boooooooooooooooooooo!!! God, this has been a terrible round. Come on you two, sort yourselves out!#SUB#
River is working for a guillotine from mount but Livingstone frees his head quite easily.
#SUB#
River looking to secure an arm triangle but Livingstone defends it well.
And that's the end of the fight!
River takes the fight on points by 11 to 0. |
|
|
|
Co-main event
|
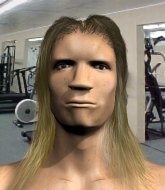
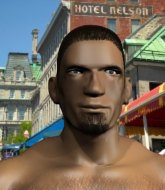
This TWGC bout is 1 fifteen minute round in the middleweight division. Introducing today's competitors. In the red corner, competing out of Los Angeles, with a TWGC record of 0 wins and 0 losses; Usada Johnson! And in the blue corner, fighting out of Las Vegas, with a TWGC record of 0 wins and 0 losses; Clayton Ladine!
The judges for this bout are Timothy Bukovac, Don Winkell and Jack Bonds.
The official calls the fighters to the middle and the contest is under way.
Johnson defends well against a solid takedown attempt from Ladine.
Johnson leaves Ladine with his face pressed against the mat as he sprawls beautifully, defending against a solid takedown attempt.#CL#
Johnson clinches.
Johnson wants to take the fight to the mat but Ladine manages to get underhooks and keep the fight in the clinch.#TD#
Johnson gets a trip takedown into half guard. Score +2 for takedown into guard / half guard: Johnson (2) vs (0) Ladine
Ladine gets back to full guard.
Ladine looking to control.
We've had a slow start to the round here - hopefully the action picks up.
Ladine has his hands on Johnson's head, controlling the position. #SUB2#
Ladine has his feet on Johnson's thighs here. He's pushed Johnson off and worked for a very quick armbar from the bottom! He's flipped onto his stomach and he's cranking hard on the arm! Johnson screams in pain and taps out! This one is all over!
Ladies and gentlemen, after 1:56 of round 1, we have a winner by way of Submission (Armbar). Clayton Ladine! |
|
|
|
Main event
|
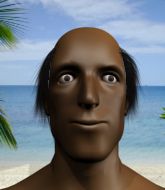
This TWGC bout is 1 fifteen minute round in the middleweight division. Introducing today's competitors. In the red corner, competing out of Las Vegas, with a TWGC record of 0 wins and 0 losses; Azz Babal! And in the blue corner, fighting out of Las Vegas, with a TWGC record of 0 wins and 0 losses; Ron Jacobs!
The judges for this bout are Frank Antenori, Jack Bonds and Don Winkell.
Let's get this grappling contest under way! Who will be victorious?
Jacobs slaps away a takedown attempt from Babal, before circling back to the center of the mat.
Babal is looking to clinch but Jacobs is avoiding it.
Babal is looking to clinch but Jacobs is avoiding it.
Jacobs shoots in and drives through. Babal sprawls well.
Jacobs circles away from the clinch attempt.
Babal goes for a double leg but Jacobs avoids the attempt and the two fighters end up clinched against the cage as Jacobs continues to drive forward.#TD2#
Jacobs has dropped down and is working for a takedown. Babal is trying to keep an underhook but Jacobs manages to get the takedown into half guard. Score +2 for takedown into guard / half guard: Babal (0) vs (2) Jacobs
Babal tries to roll over but Jacobs keeps him under control.
Jacobs wants to pass to mount but Babal is defending the position.
We've had a slow start to the round here - hopefully the action picks up.#SUB2#
Jacobs is trying for a guillotine from the top but the pressure isn't in the right place so Babal is just riding it out for now. Jacobs eventually gives up the hold. #SUB2#
Jacobs is looking for an arm triangle, whilst trying to pass to side control. Babal doesn't seem that keen to cooperate though. No luck this time Jacobs. #T1#
Babal gets full guard.#SUB2#
Jacobs drops back, looking for a kneebar! Babal looks panicked! The fighters roll across the mat, one looking to finish, one looking to escape. Babal looks to have wriggled free... Yes, he's got his leg free and he's dived into side control! Good work there from Babal! Score +4 for clean sweep to past guard: Babal (4) vs (2) Jacobs
Jacobs really doesn't want to stay on the ground with Babal. If he can't get it back to his feet, it's only a matter of time before he'll be tapping out.#SUB#
Babal working hard here to secure a kimura but he's not really in the right position for it.
Babal moving around in side mount but really he's just happy to control for now. #T2#
Babal is looking to take a break and control but Jacobs is keeping him honest, looking to work from the bottom. #T3#
Babal tries to cartwheel into mount but he doesn't manage it.
You can see the frustration on Jacobs's face, being in this tough position on the bottom.#SUB#
Babal wants to work for a kimura but he's foiled early by Jacobs, who protects the arm well.
Babal tries to advance to mount but Jacobs denies him. #T4#
Jacobs is looking to regain half guard here but Babal keeps moving and retains side control.
Babal trying to control the position but Jacobs is working away.
We get told so often about how wrestlers don't like to be on their backs. Let's see if Jacobs can do anything to dispel that myth.
You can see the frustration on Jacobs's face, being in this tough position on the bottom.#SUB#
Babal tries for a kimura but Jacobs is defending well. #SUB#
Babal is trying to get an arm triangle but Jacobs is defending well. #T5#
Babal trying to control the action but Jacobs is working from the bottom.
Jacobs is looking to reverse the position.#SUB#
Babal working hard here to secure a kimura but he's not really in the right position for it.
Babal is looking to take a break and control but Jacobs is keeping him honest, looking to work from the bottom. #T6#
Jacobs tries to improve position but can't.
Jacobs is persisting with the attempt to improve his position.
Babal has knee on belly and moves into mount. Score +2 for reaching mount: Babal (6) vs (2) Jacobs#T7#
Babal controlling from mount.
The ref warns both fighters not to hold the cage as they work up against the meshing.#SUB#
Babal jumps to side control looking for an arm triangle but Jacobs manages to avoid the submission attempt.
Babal advances nicely into full mount. Score +2 for reaching mount: Babal (8) vs (2) Jacobs
Babal prevents Jacobs from getting the reversal.#T8##SUB#
Babal looking to secure an arm triangle but Jacobs defends it well.
Babal is breathing heavily.
Jacobs working to try and regain half guard.
#SUB#
Babal looking to secure an arm triangle but Jacobs defends it well. #SUB#
Babal looks like he's working for a submission but he's not found anything just yet.#T9##SUB#
Babal jumps to side control looking for an arm triangle but Jacobs manages to avoid the submission attempt.
We've been informed that Jacobs has been working hard on his conditioning in the buildup to the fight.
Jacobs tries to buck Babal off but Babal is having none of it.
Jacobs is not content to let Babal control the position.
Jacobs is positioning himself to get back to half guard. #T10#
Babal trying to control the action but Jacobs is working from the bottom.
Babal controls the position.
Jacobs is trying to control Babal's posture but Babal avoids it.
Jacobs tries to improve position but can't. #T11##SUB#
Babal tries for a kimura. Not really close to a finish though.
Jacobs stops Babal from passing to mount. #SUB#
Babal tries for a kimura but Jacobs is defending well.
Jacobs tries to improve position but can't. #T12#
Jacobs is not content to let Babal control the position.
Jacobs is looking to regain half guard here but Babal keeps moving and retains side control.
Jacobs looks to move to half guard but instead Babal has passed into mount! Damn! Score +2 for reaching mount: Babal (10) vs (2) Jacobs#SUB#
Babal working for a submission but Jacobs is keeping him at bay.
Jacobs is looking to get to half guard.#T13#
Babal sitting in mount, just looking to control for the moment.
Jacobs tries to lock up and control but Babal gives him a forearm to the face and pushes him away.
Jacobs is desperately trying to get back to half guard.
Jacobs stops Babal from taking his back. Still, being mounted isn't any better. #T14#
Babal sitting in mount, just looking to control for the moment.
Jacobs can't escape the position.
#SUB#
Babal looking for an armbar but decides to keep the dominant position instead.
Babal controlling from mount.
Boooooooooooooooooooo!!! God, this has been a terrible round. Come on you two, sort yourselves out!
Jacobs tries to hold on but Babal postures up.
And that's the end of the fight!
Babal takes the fight on points by 10 to 2. |
|
|
|
|
|
|