|
TWGC 40 (185lbs, D1): Tokyo Qualifier - Round 1 PBP Commentary |
Undercard bout
|
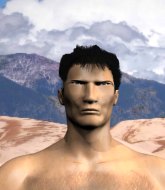
This TWGC bout is 1 fifteen minute round in the middleweight division. Introducing today's competitors. In the red corner, competing out of New York, with a TWGC record of 31 wins and 25 losses; Chan Siam! And in the blue corner, fighting out of New York, with a TWGC record of 0 wins and 0 losses; Tommy Reed!
The judges for this bout are Yukihiro Shimada, Ren Mimura and Shigeki Sano.
The fighters connect hands in the middle of the mat and we are under way.#CL2#
Reed moves into the clinch.
Siam is working for takedown but Reed is calmly controlling the position for now.#TD#
Siam is working on a single leg takedown against the cage. Reed can't fight it off and eventually Siam manages to take the fight to the floor. Reed looks annoyed but at least he's managed to land in guard. Score +2 for takedown into guard / half guard: Siam (2) vs (0) Reed#SUB2#
Reed has an omoplata and is looking to use it perhaps as a submission or perhaps to transition. Siam is in a bit of discomfort here, but he's managed to free himself and has dived into side control! That didn't work out too well for Reed. Score +3 for passing guard: Siam (5) vs (0) Reed
Reed tries to buck Siam off but Siam is having none of it.
Reed gets one leg under and gets the fight to half guard.
We've had a slow start to the round here - hopefully the action picks up.
Reed wants to get back to full guard.#T1#
Siam is pressing down on Reed's thigh, looking to free his foot. Reed is holding on for now.
Siam takes a deep breath and rests his weight momentarily on top of his opponent, to control the position.
Reed wants to improve his position but Siam is controlling well.
Reed trying to control here.
The fighters are battling for position here. Reed manages to regain full guard. Nice work.
Siam controlling from the guard. I say controlling but really, he's stalling. #T2#
Reed is working an open guard here, looking to improve his position. No doubt that will leave him open to counters but at least he's being more offensive.
Reed trying to control the position.
Siam showing good wrestling skills to control the position.
Siam stopping the sweep attempt from Reed.
The ref warns both fighters not to hold the cage as they work up against the meshing.#T3#
Reed has a butterfly guard looking to sweep but Siam has passed into side control.
Score +3 for passing guard: Siam (8) vs (0) Reed
Reed is trying to improve his position.
Reed is trying to control Siam's posture but Siam avoids it.
Siam taking a breather here.
Siam tries to move to mount but Reed blocks the move with his legs. #T4#
Siam taking a breather here.
Reed is positioning himself to get back to half guard.
The fighters are starting to get a bit slippery now, which will make submissions a bit more difficult.
Reed is trying to escape the position but Siam is controlling the position.
Reed is looking to reverse the position.
Reed tries to slip a leg under to move to half guard but Siam presses down on the leg and jumps into full mount! Score +2 for reaching mount: Siam (10) vs (0) Reed#T5#
Reed is writhing around trying to get back to his feet.
Reed tries to reverse the position but Siam maintains control.
The fighters are pressed up against the cage, both looking to find a bit of space to work.
Reed is trying to escape the mount but Siam keeps good control and instead manages to take Reed's back.
Score +3 for taking back: Siam (13) vs (0) Reed
Siam has good solid back control here.
Reed tries to escape the position.
Siam really has the hooks in deep now - there seems like no escape for Reed.
Reed wants to escape the position.
#T6#
Reed looks to control his opponent's hands but he's not mananging it at the moment.
Reed is really stuck here.
Reed is very frustrated here, being controlled quite effectively by Siam.
Reed rolls and manages to get back to half guard. Nicely done.
Reed wants to get back to full guard.#T7#
Reed wants to get back to full guard but Siam has passed into side control. Score +3 for passing guard: Siam (16) vs (0) Reed
Reed is trying to get back to half guard.
Siam passes to full mount! That's big trouble for Reed! Score +2 for reaching mount: Siam (18) vs (0) Reed
Siam sitting in mount, just looking to control for the moment.
Reed tries to get back to half guard but can't. #T8#
We've been hearing good reports from Siam's training camp. Apparently he has been rolling around with some good quality BJJ practitioners and has been sharpening his skills. Let's see if that has an impact on the fight today.
Siam pushing the pace here, looking to move to his opponents back and work for a finish.
Reed wants to improve position but instead he's given up his back. Score +3 for taking back: Siam (21) vs (0) Reed
Siam really has the hooks in deep now - there seems like no escape for Reed.#T9#
Reed manages to reverse the position and now he's in Siam's guard. Nice work there by Reed.
Score +2 for sweep to guard / half guard: Siam (21) vs (2) Reed
Siam pulls Reed in close to prevent any damage.
My spies in Ground Zero Workout Gym inform me that Reed has been getting involved in the gym's BJJ sparring sessions. Let's see whether that pays dividends!
Reed trying to control but Siam is working from the bottom. #T10#
Siam pulls Reed in to control the position.
Reed trying to control the position from guard on top but Siam is wriggling around, looking for whatever he can.
Siam is working an open guard here, looking to improve his position. No doubt that will leave him open to counters but at least he's being more offensive.
Reed wants to pass the guard but Siam is keeping the position.
Siam keeping moving, preventing Reed from controlling successfully. #T11#
Reed might have to switch it up a bit here because his efforts to control Siam haven't been going to plan, at least at the current moment in time.
Reed is looking to pass into half guard but Siam pushes him away with his feet and jumps on top - now Siam is in guard. Score +2 for sweep to guard / half guard: Siam (23) vs (2) Reed#SUB2#
Reed isolates an arm and boxes in a triangle. Siam stacks Reed on his neck as he steps over and passes to the side. He's now in a much more dominant position where he can look to do some serious damage. Nice move by Siam! Score +3 for passing guard: Siam (26) vs (2) Reed
Reed tries to control but Siam manages to take his back. Score +3 for taking back: Siam (29) vs (2) Reed
Reed is defending well here and trying to improve his position.
#T12#
What can Reed do to escape this position? He's going to have to figure it out pretty quick if he wants to stay in the fight!
You can see the frustration on Reed's face� He knows he is in trouble unless he improves his position sooner rather than later.
What can Reed do to escape this position? He's going to have to figure it out pretty quick if he wants to stay in the fight!
Reed is really stuck here.
So, who will make the next big move? In this position it could be crucial.
#T13#
Reed is in bad spot here.
Reed trying to control the action but Siam just sinks the hooks in.
Reed can't escape the position.
#T14#
Siam not allowing Reed to control his hands.
Siam is looking cool and calm here, just waiting for a good opportunity to attack and finish the fight from this dominant position.
Siam is not going to allow Reed to sit and survive in this position.
Boooooooooooooooooooo!!! God, this has been a terrible round. Come on you two, sort yourselves out!
Siam is looking cool and calm here, just waiting for a good opportunity to attack and finish the fight from this dominant position.
And that's the end of the fight!
Siam takes the fight on points by 29 to 2.
Chan Siam decided to thank the fans in attendance for making a great atmosphere. It seemed to go down pretty well. |
|
|
|
Undercard bout
|
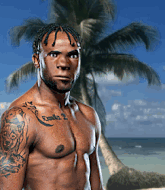
This TWGC bout is 1 fifteen minute round in the middleweight division. Introducing today's competitors. In the red corner, competing out of Amsterdam, with a TWGC record of 7 wins and 4 losses; Sao Alela! And in the blue corner, fighting out of London, with a TWGC record of 4 wins and 7 losses; Owen Alvarez!
The judges for this bout are Hirohito Nitta, Yuuki Gou and Taro Takaoka.
Let's get this grappling contest under way! Who will be victorious?
Alela tries to close the distance and clinch up but Alvarez swats him away and circles back towards the center. #CL2#
Alvarez gets in close and instigates a clinch. #TD2#
Alvarez successfully pulls guard.
Alvarez is pulling down on Alela's head. It's preventing any offense from Alela, at least for the moment.
Alvarez is continuing to stall.
The fighters are pressed up against the cage, both looking to find a bit of space to work.#SUB2#
Alvarez is working actively off his back, looking to secure an arm or perhaps work for a triangle.
Alvarez has his hands on Alela's head, controlling the position.
We've had a slow start to the round here - hopefully the action picks up.
Alela is pushing down on Alvarez's leg trying to pass to half guard. Alvarez is fighting to maintain full guard but Alela has managed to sneak the leg through.#T1#
Alela controlling the action here.
Alvarez is trying to get back to full guard.
Alela has been talking about how he's improved his wrestling in the run up to the fight so let's see if that's enough to sway the balance.
Alvarez wants to get back to full guard but Alela has mounted him! Score +3 for passing guard: Alela (3) vs (0) Alvarez
Alvarez wants to control but Alela is having none of it.#SUB#
Alela jumps to side control looking for an arm triangle but Alvarez manages to avoid the submission attempt.
Alvarez is looking to reverse the position.
Alela wants to lay and pray for a moment but Alvarez keeps working.
Alvarez tries to bench press Alela off him but Alela keeps the position. #T2#
Alvarez holds on to Alela's head and controls the position momentarily.
Alela is looking to take a break and control but Alvarez is keeping him honest, looking to work from the bottom.
Alvarez stops Alela from passing to mount.
Alela wants to control but Alvarez is keeping him busy.
Alela in the domination position with Alvarez hanging on.
Alvarez prevents Alela from moving into mount.
Alela taking a breather here.
Alvarez gets back to half guard.#T3#
Alvarez is trying to get back to full guard.
Alela keeping composed on the top, looking to control the action.#SUB#
Alela seems to be trying to get a kimura but instead Alvarez has recovered full guard.
Alvarez tries to land a sweep but no joy.
Alvarez bucks up whilst keeping hold of a body lock, managing to reverse the position. Now he's in top in Alela's guard. Score +2 for sweep to guard / half guard: Alela (3) vs (2) Alvarez
Alela keeping moving, preventing Alvarez from controlling successfully. #SUB#
Alvarez avoids a guillotine attempt easily.
#T4#
Alela looking to hit a scissor sweep but Alvarez is one step ahead there.
Alvarez is looking to advance position but Alela has hit a scissor sweep - now he's on top in mount! Score +4 for clean sweep to past guard: Alela (7) vs (2) Alvarez
Alvarez regains half guard.
Alvarez tries to get to full guard but Alela has control of the leg.
Alela passes the half guard and he's now in mount! Big trouble for Alvarez! Score +3 for passing guard: Alela (10) vs (2) Alvarez#T5#
Alvarez is looking to get to half guard.
Alvarez tries to hold on but Alela postures up.
Alvarez manages to regain half guard. Good work.
Alela passes into side control, despite Alvarez's attempt to control the position.
Score +3 for passing guard: Alela (13) vs (2) Alvarez
Alvarez is not content to let Alela control the position. #T6#
Alvarez is trying to control Alela's posture but Alela avoids it.
Alvarez tries to get back to half guard but can't.
Alela takes a little break here. Alvarez wants to take advantage but he is being controlled well.#T7#
Alela trying to control the action but Alvarez is working from the bottom.
Alela working away.
Alvarez is trying to improve his position.
Alela passes to full mount! That's big trouble for Alvarez! Score +2 for reaching mount: Alela (15) vs (2) Alvarez
Alvarez can't escape the position.
Alela avoids the attempt from Alvarez to control.#T8#
Alela takes a little breather and maintains the position. The referee will be looking for him to stay active from such a dominant position though.
Alvarez wants to control but Alela is having none of it.#SUB#
Alela is working on an americana here. Ooh, that looks pretty nasty! Nope, Alvarez has managed to escape the submission attempt.
Alvarez is squirming around, avoiding Alela's attempts to control the action.
Alvarez wants to control but Alela is having none of it.
Alvarez is in all sorts of trouble here.
#T9#
Alvarez is squirming around, avoiding Alela's attempts to control the action.
Alvarez sneaks a leg under to get to half guard.#SUB#
Alela is working for submissions here but there's nothing on.
Alvarez keeping hold of Alela's head, controlling as best he can.
Alela prevents Alvarez from improving his position.#SUB#
Alela is sneakily working for an arm triangle but Alvarez sees it coming and defends easily.#T10##SUB#
Alela is sneakily working for an arm triangle but Alvarez sees it coming and defends easily.#SUB#
Alela is trying for a guillotine from the top but the pressure isn't in the right place so Alvarez is just riding it out for now. Alela eventually gives up the hold.
Alvarez wants to improve his position but Alela is controlling well.
Alela tries to pass the half guard into mount. Alvarez knows what he's doing though and prevents the attempt.
Alvarez trying to control from the bottom.
#T11##SUB#
Alela is thinking about going for an arm triangle but he can't free his leg.
Alvarez trying to control here.
Alvarez tries to get to full guard but Alela has control of the leg.
Alvarez keeps control of the position for the meantime. #SUB#
Alela is thinking about going for an arm triangle but he can't free his leg.
Alela is trying to control. Alvarez wants to improve his position but can't escape this time. #T12#
Alvarez wants to control but Alela is keeping busy and won't allow it.
Alvarez is looking to regain full guard. Not this time though. #SUB#
Alela is looking for an arm triangle, whilst trying to pass to side control. Alvarez doesn't seem that keen to cooperate though. No luck this time Alela.
The ref warns both fighters not to hold the cage as they work up against the meshing.
Alvarez gets full guard.#T13#
Alela stopping the sweep attempt from Alvarez.
A real slowdown in the pace of the fight for a moment, as Alvarez holds on and takes a little breather.
Alela preventing the sweep.
Alvarez pulls Alela in close to prevent any damage.
Alela looking to sit in guard and control but Alvarez gets the butterfly guard and sweeps. He's now in the guard on the top. Score +2 for sweep to guard / half guard: Alela (15) vs (4) Alvarez
Alvarez passes Alela's left leg - he's now in half guard. #T14##SUB2#
Alvarez is working for a kimura but Alela is defending it quite comfortably.
Alela is looking to regain full guard. Not this time though.
Alvarez is looking to take a break and control but Alela is keeping him honest, looking to work from the bottom.
Boooooooooooooooooooo!!! God, this has been a terrible round. Come on you two, sort yourselves out!
Alvarez tries to pass the half guard into mount. Alela knows what he's doing though and prevents the attempt.
And that's the end of the fight!
Alela takes the fight on points by 15 to 4.
An out of breath and clearly excited Sao Alela thanked Ma Balls Is Hot Clothing for their help and support (and free stuff they sent him). |
|
|
|
Co-main event
|
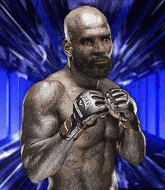
This TWGC bout is 1 fifteen minute round in the middleweight division. Introducing today's competitors. In the red corner, competing out of Sydney, with a TWGC record of 10 wins and 3 losses; Cesare Borgia! And in the blue corner, fighting out of Montreal, with a TWGC record of 12 wins and 1 losses; Giovanni De Rossi!
The judges for this bout are Shirou Masuda, Yukihiro Yamamoto and Tatsuya Matsuyama.
Let's get this grappling contest under way! Who will be victorious?#CL#
Borgia closes the distance and presses his opponent up against the cage.
Borgia drops to a knee looking for a takedown but De Rossi gets the underhooks and prevents it.
Borgia has been talking about how he's improved his wrestling in the run up to the fight so let's see if that's enough to sway the balance.
De Rossi tries to jump guard but he falls flat on his backside. Borgia smiles and moves away.
#CL#
Borgia pushes De Rossi up against the cage in a clinch.#TD#
Borgia has hold of one of De Rossi's legs. De Rossi is fighting the takedown attempt but Borgia gets the trip and lands the takedown into guard. Score +2 for takedown into guard / half guard: Borgia (2) vs (0) De Rossi
Borgia is stalling in the full guard.
Borgia pressing down on his opponent's thigh, looking to pass guard. De Rossi is keeping the position for now.
We've had a slow start to the round here - hopefully the action picks up.
Borgia's corner is telling him to maintain position.
Borgia passes into half guard. #SUB2#
De Rossi looking for submissions from an awkward position here.#T1#
De Rossi trying to control from the bottom.
De Rossi looks more muscular than last time we saw him. He must have been on the weights.
Borgia is looking to advance position but De Rossi won't allow it. #SUB#
Borgia is trying a forearm choke� I don't think that's going to do much at this level of the game.
Borgia is looking to take a break and control but De Rossi is keeping him honest, looking to work from the bottom.
Borgia performing his best blanket impression for a moment. #T2#
Borgia's ground tactics aren't going to win him many fans. Let's hope he's got fireworks for us if he gets back to his feet because he's not doing much on the ground.#SUB2#
De Rossi is looking to sinch up a guillotine here but Borgia pulls his head out easily.
De Rossi is doing well to avoid being mounted. He's controlling the position at the moment.
Borgia trying to control the pace.
De Rossi is trying to maintain the position but Borgia is very close to passing his half guard.#T3#
Borgia controlling the action here. #SUB2#
The fighters are starting to perspire pretty heavily.
De Rossi actively working from the bottom here.
Borgia stalling.
De Rossi is trying to get back to full guard.#SUB2#
De Rossi is working on a guillotine. He's managed to get to full guard and he's really squeezing tight! Borgia is tapping! Great win for De Rossi!
Ladies and gentlemen, after 3:58 of round 1, we have a winner by way of Submission (Guillotine). Giovanni De Rossi!
Giovanni De Rossi thanked the fans post fight for their support. |
|
|
|
Main event
|
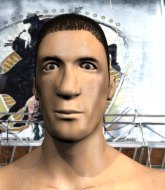
This TWGC bout is 1 fifteen minute round in the middleweight division. Introducing today's competitors. In the red corner, competing out of St Petersburg, with a TWGC record of 0 wins and 3 losses; Phol Boxaaja! And in the blue corner, fighting out of Sydney, with a TWGC record of 0 wins and 0 losses; Percival Nerdspoof The 3rd!
The judges for this bout are Shigeki Fujiwara, Ren Mimura and Taro Takaoka.
The official calls the fighters to the middle and the contest is under way.#TD2#
Nerdspoof The 3rd scores with a nice takedown into half guard. Let's see what he's got on the ground. Score +2 for takedown into guard / half guard: Boxaaja (0) vs (2) Nerdspoof The 3rd
Nerdspoof The 3rd is trying to control the action in half guard but Boxaaja is working away on the bottom, looking perhaps to get back to full guard.
Nerdspoof The 3rd looks over to his corner - he wants some instructions but his corner are not responding.
Boxaaja is trying to get back to full guard.#SUB2#
Nerdspoof The 3rd is looking for an arm triangle, whilst trying to pass to side control. Boxaaja doesn't seem that keen to cooperate though. No luck this time Nerdspoof The 3rd.
The ref warns both fighters not to hold the cage as they work up against the meshing.
Boxaaja manages to get to full guard.
We've had a slow start to the round here - hopefully the action picks up.
Boxaaja is working an open guard here, looking to improve his position. No doubt that will leave him open to counters but at least he's being more offensive.#T1#
Nerdspoof The 3rd pressing down on his opponent's thigh, looking to pass guard. Boxaaja is keeping the position for now.
Nerdspoof The 3rd stays in close to Boxaaja's body and controls the position.
Nerdspoof The 3rd trying to move into half guard but instead Boxaaja has managed to sweep! Score +2 for sweep to guard / half guard: Boxaaja (2) vs (2) Nerdspoof The 3rd
Nerdspoof The 3rd being controlled here, momentarily.
Boxaaja trying to control the position from guard on top but Nerdspoof The 3rd is wriggling around, looking for whatever he can. #T2##SUB2#
Boxaaja sitting in guard doing not very much at all here. Nerdspoof The 3rd doesn't need a second invitation though! He's locked up a guillotine and he's squeezing tight! That is tiiiiiiiiight! Boxaaja paying the price for stalling here - he's pushing hard on the arm trying to free himself but it's no use! He's tapped! WOW, quick submission from Nerdspoof The 3rd - great work!
Ladies and gentlemen, after 2:27 of round 1, we have a winner by way of Submission (Guillotine). Percival Nerdspoof The 3rd!
A relieved looking Percival Nerdspoof The 3rd thanked the fans for their support and gave the usual line about them being amazing. They seemed to believe that he actually meant it. |
|
|
|
|
|
|