|
GFY 3 - Taco Night PBP Commentary |
Undercard bout
|
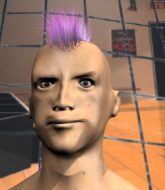
This TWGC bout is 1 fifteen minute round in the super heavyweight division. Introducing today's competitors. In the red corner, competing out of Las Vegas, with a TWGC record of 0 wins and 1 losses; Domingo The Flamingo! And in the blue corner, fighting out of St Petersburg, with a TWGC record of 11 wins and 33 losses; Sirus Hughes!
The judges for this bout are Chris Downing, Frank Dennis and Tiny Johnson.
The fighters connect hands in the middle of the mat and we are under way.#TD2#
Hughes looking to score a takedown here. The Flamingo is defending well but Hughes drives through and ends up in The Flamingo's guard. Score +2 for takedown into guard / half guard: The Flamingo (0) vs (2) Hughes
Hughes controls from within his opponent's guard.
Hughes slips effortlessly into side control - very nice. Score +3 for passing guard: The Flamingo (0) vs (5) Hughes
The Flamingo is looking to regain half guard here but Hughes keeps moving and retains side control.
The Flamingo being controlled for a moment. #SUB2#
Hughes is working to tighten his grip on The Flamingo's neck. He's isolated an arm and is working for an arm triangle. The Flamingo has recognised the danger and is trying to turn with the submission but Hughes is really squeezing tight and eventually The Flamingo passes out! Hughes breaks the hold and jumps onto the ropes to celebrate! Submission of the night, I'd say!
Ladies and gentlemen, after 0:57 of round 1, we have a winner by way of Submission (Arm Triangle). Sirus Hughes! |
|
|
|
Co-main event
|
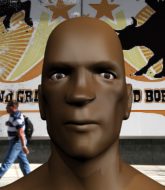
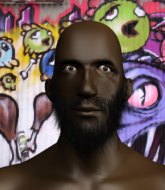
This TWGC bout is 1 fifteen minute round in the super heavyweight division. Introducing today's competitors. In the red corner, competing out of Las Vegas, with a TWGC record of 1 wins and 2 losses; Chad Strdoza! And in the blue corner, fighting out of Las Vegas, with a TWGC record of 59 wins and 65 losses; Tobias Pancake!
The judges for this bout are George Francis, Stewart Dunkirk and Chris Downing.
The fighters connect hands in the middle of the mat and we are under way.
Pancake doesn't succeed with the takedown#CL#
and Strdoza counters into the clinch. Nicely done. #TD#
Strdoza manages to pull guard. Let's see whether he can land a sub off his back.
Strdoza trying to keep a closed guard but Pancake is proving a slippery customer.
Pancake must be cautious of submissions here, given that his opponent has the superior Jiu Jitsu.#SUB#
Strdoza is working actively off his back, looking to secure an arm or perhaps work for a triangle. #SUB#
Strdoza escapes his hips to the side and looks to be working for an armbar. Pancake gives him a little smile and shakes his head. No chance.
Pancake sitting in guard, not really doing much.
We've had a slow start to the round here - hopefully the action picks up.
Pancake trying to control but Strdoza is working from the bottom. #T1##SUB#
Strdoza looking for submissions from the bottom but instead Pancake passes into side control.
Score +3 for passing guard: Strdoza (0) vs (3) Pancake
Strdoza tries to get back to half guard but can't.
The fighters are tangled up in the ropes here. We might need a restart if the fighters can't break free themselves.
Strdoza regains half guard.
Pancake seems very keen to just sit and control from half guard but Strdoza does not like that idea so much and is remaining active off his back.
Strdoza trying to control but Pancake postures up.
Strdoza is looking to improve his position.
The fighters are trapped in the ropes so we're going to have a reposition here. The ref calls for a break and repositions the fighters in the center of the ring.
Strdoza is refusing to be controlled, as Pancake sits in half guard. #T2#
Pancake wants to pass to mount but Strdoza is defending the position.
Strdoza is trying to get back to full guard.
Pancake wants to control but Strdoza is keeping him busy.
Pancake is in a good position here but he's just trying to control... And he's not even managing to do that successfully.
Pancake works his way into side control. Score +3 for passing guard: Strdoza (0) vs (6) Pancake
Pancake trying to control the action but Strdoza is working from the bottom.
Strdoza is trying to improve his position.#SUB2#
Pancake tries for a kimura but Strdoza is defending well. #T3#
Strdoza sneaks a leg under to get back to half guard.
Strdoza is trying to get back to full guard.
Strdoza gets full guard.
Pancake trying to pass the guard but can't manage it just yet.
Strdoza keeping moving, preventing Pancake from controlling successfully. #SUB#
Strdoza is looking for a triangle but Pancake pushes his legs off easily.
#SUB#
Strdoza working for a triangle but Pancake defends it easily.
#T4##SUB#
Strdoza looking for submissions from the bottom but instead Pancake passes into side control.
Score +3 for passing guard: Strdoza (0) vs (9) Pancake
Strdoza is looking to reverse the position.
Strdoza regains half guard.
Strdoza wants to get back to full guard.
Pancake passes to side control. Score +3 for passing guard: Strdoza (0) vs (12) Pancake
Strdoza gets back to half guard.
Strdoza trying to control but Pancake postures up.
#T5#
Pancake controlling the action here.
Strdoza wants to improve his position but Pancake is controlling well.
Pancake trying to control from Strdoza's half guard. Strdoza has other ideas though and has regained full guard.
Strdoza keeping moving, preventing Pancake from controlling successfully. #T6#
Strdoza keeping full guard, as Pancake tries to pass. #SUB#
Strdoza had isolated an arm as going for a kimura. Pancake defends it easily.#SUB#
Strdoza is active off his back here, looking for submissions.
#SUB2#
Pancake drops back looking for a leg! Strdoza is in trouble here! The fighters roll with the hold and Strdoza manages to kick Pancake off! Pancake jumps back into Strdoza's guard. #SUB#
Strdoza looks to be working for a triangle here. Oh, it looks like he might have it! Pancake has picked Strdoza up and slammed him! Strdoza can't keep hold of the triangle and Pancake manages to pass to side control! Score +3 for passing guard: Strdoza (0) vs (15) Pancake#T7#
Strdoza regains half guard.#SUB2#
Pancake is looking for an arm triangle, whilst trying to pass to side control. Strdoza doesn't seem that keen to cooperate though. No luck this time Pancake. #SUB#
Strdoza looking to work for a kimura from the bottom.
Strdoza trying to control here.
Pancake trying to pass the guard but Strdoza defending well. #SUB2#
Pancake is working for an americana but Strdoza has been sneaky and has managed to get back to half guard, whilst Pancake was thinking about the submission.#T8##SUB#
Strdoza is looking for a guillotine. You can't force these things though and Pancake defends well.
Pancake looking to control the position here, rather than advance. #SUB#
Strdoza looking for submissions from the bottom here. Moving his hips around, possibly looking for an armbar.
#SUB#
Strdoza is throwing his legs up, looking for submissions. Pancake is aware though and is defending well.#T9#
Strdoza lands a beautiful sweep and he's now moved into his opponent's guard. Score +2 for sweep to guard / half guard: Strdoza (2) vs (15) Pancake#SUB2#
Pancake is looking for a guillotine. You can't force these things though and Strdoza defends well.#SUB#
Strdoza thinks about going for a leg but decides against it, in order to maintain the position. #SUB2#
Pancake working for submissions but it's allowed Strdoza to get to half guard.
Strdoza is trying to control the action in half guard but Pancake is working away on the bottom, looking perhaps to get back to full guard. #SUB#
Strdoza wants to work for an arm triangle but Pancake is really keeping half guard well and defending the submission attempt.
#SUB#
Strdoza is looking for a kimura here.
#T10#
Pancake is looking to improve his position.
Pancake trying to control but Strdoza postures up.
Pancake is not content to let Strdoza control the position.
Strdoza tries to pass the half guard into mount. Pancake knows what he's doing though and prevents the attempt.
Pancake is staying active underneath Strdoza, who seems content to just control the action from this position.
Pancake gets full guard.#T11#
Strdoza slows down the pace of the fight, as he sits in guard.
Pancake is trying to control the position from the bottom.
Pancake is controlling Strdoza's posture.
Strdoza wants to control from the top but Pancake keeps moving. #SUB2#
Pancake had isolated an arm as going for a kimura. Strdoza defends it easily.
Pancake is looking to sweep but instead, Strdoza has passed into half guard.
#T12#
Strdoza trying to control the action but Pancake is working from the bottom. #SUB#
Pancake is defending against the submission attempts here by Strdoza.
Strdoza is looking to take a break and control but Pancake is keeping him honest, looking to work from the bottom. #SUB#
Strdoza is working for a kimura but Pancake is defending it quite comfortably.
#SUB2#
Pancake looking to work for a kimura from the bottom.#T13##SUB#
Strdoza is working for submissions here but there's nothing on.
#SUB#
Strdoza is sneakily working for an arm triangle but Pancake sees it coming and defends easily.
Pancake is looking to improve his position.
Strdoza wants to lay and pray for a moment but Pancake keeps working. #SUB#
Strdoza is looking for a kimura. It's going to be difficult to finish that from half guard though and Pancake defends it well. #T14##SUB#
Strdoza is looking for a kimura here.
#SUB2#
Pancake looking for submissions from an awkward position here.
Pancake wants to get back to full guard.#SUB#
Strdoza seems to be working for a kimura but Pancake defends the submission attempt.
Boooooooooooooooooooo!!! God, this has been a terrible round. Come on you two, sort yourselves out!#SUB#
Strdoza is looking for a kimura here.
And that's the end of the fight!
Pancake wins on points by 15 to 2.
Tobias Pancake decided to go for the less than humble approach in his post fight interview, telling everyone how he is going to conquer the world. The crowd seemed to like it when really that sort of approach could have gone either way. |
|
|
|
Main event
|
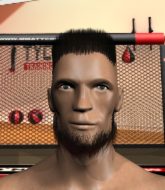
This TWGC bout is 1 fifteen minute round in the super heavyweight division. Introducing today's competitors. In the red corner, competing out of Las Vegas, with a TWGC record of 43 wins and 40 losses; Pacer Dalton! And in the blue corner, fighting out of Las Vegas, with a TWGC record of 3 wins and 1 losses; Humphrey Wellington!
The judges for this bout are Alan Glass, Tiny Johnson and Gwen Towbar.
The fighters connect hands in the middle of the mat and we are under way.
Wellington tries to clinch up against the ropes, rushing in to close the distance. Dalton manages to break the clinch and circles back to the middle of the mat.
Dalton fails with a rather predictable takedown attempt.#CL2#
Wellington moves into the clinch.
Wellington is trying to pull guard but Dalton has him pressed against the ropes.#TD#
Dalton lands a nice trip takedown into half guard.
Score +2 for takedown into guard / half guard: Dalton (2) vs (0) Wellington
Wellington wants to improve his position but Dalton is controlling well.
Wellington trying to control but Dalton postures up.
Dalton is pressing down on Wellington's thigh, looking to free his foot. Wellington is holding on for now.
We've had a slow start to the round here - hopefully the action picks up.
Dalton passes the guard and advances to mount! Score +3 for passing guard: Dalton (5) vs (0) Wellington
Dalton controlling the position easily from mount.
Wellington is looking to improve his position but Dalton isn't that keen on the idea.#T1#
Wellington is persisting with the attempt to improve his position.
Dalton controlling the position easily from mount.
Dalton has controlled the position for a good 20 seconds, which will no doubt be starting to frustrate his opponent.
Wellington is looking to get to half guard.
Dalton controlling from the full mount.
Dalton seems to have a rather negative gameplan on the ground. He seems keen to just score the takedown and hold down Wellington for as long as he can get away with.#T2#
This is a sustained period of stalling by Dalton.
Dalton continues to hold on tight.
Dalton's ground tactics aren't going to win him many fans. Let's hope he's got fireworks for us if he gets back to his feet because he's not doing much on the ground.
Dalton fails to take his opponent's back.
Wellington really trying hard to get back to half guard here.
Dalton tucks in and makes sure he doesn't lose the dominant position. #T3#
Wellington prevents Dalton from taking his back.
Dalton sitting in mount, just looking to control for the moment.
Dalton takes Wellington's back. Score +3 for taking back: Dalton (8) vs (0) Wellington
Wellington tries to break free.
Dalton is not going to allow Wellington to sit and survive in this position.
A bit of a pause in the action here. Dalton controlling the positon.#T4#
Wellington rolls, trying to escape but Dalton keeps control of the position.
Dalton controls the position.
Dalton is hanging on to Wellington's back as he tries to escape.
Dalton has good solid back control here.
You can see the frustration on Wellington's face� He knows he is in trouble unless he improves his position sooner rather than later.
Dalton is riding his opponent, not letting Wellington buck him off.
Wellington tries to escape the position.
Dalton just keeping the dominant position. He can't wait too long though, otherwise the referee will stand them back up.
We've been informed that Wellington has been working hard on his conditioning in the buildup to the fight.#SUB#
Wellington fending off the submission attempt from Dalton. #T5#
You know, I was talking to some of our celebrities at ringside tonight and they were split right down the middle on who was going to win this fight.
Wellington is a painfully thin specimen of a man. You do wonder whether a good body kick would snap him clean in two.#T6#
Wellington rolls, trying to escape but Dalton keeps control of the position.
Good control from Dalton.
Wellington is in a world of trouble here. He's outmatched on the ground here and he'd better get Dalton off his back sharpish unless he wants to be submitted.
Wellington wants to control his opponent's hands but Dalton gets his hands free.
Wellington is defending well here and trying to improve his position.
Dalton controlling the position well here. Wellington rolled but Dalton kept the hooks locked in and stayed in the dominant position.
Dalton continues to stall.
Further stalling from Dalton.
Wellington is really stuck here.
#T7#
Dalton trying to secure his dominant position for a moment - making sure Wellington doesn't escape.
The fighters are trapped in the ropes so we're going to have a reposition here. The ref calls for a break and repositions the fighters in the center of the ring.
Wellington tries to roll but Dalton sticks to his back.
#T8#
Dalton has good solid back control here.
Wellington tries to escape but Dalton has the hooks in and won't let him break free.
A bit of a pause in the action here. Dalton controlling the positon.
Wellington is defending well here and trying to improve his position.
Dalton biding his time, controlling Wellington.
Wellington is defending well here and trying to improve his position.
Dalton has good solid back control here.
Wellington is defending well here and trying to improve his position.
#T9#
You know, I was talking to some of our celebrities at ringside tonight and they were split right down the middle on who was going to win this fight.
More hug and hope from Dalton.
Dalton doesn't have the hooks in and Wellington manages to turn into his guard.
Score +2 for sweep to guard / half guard: Dalton (8) vs (2) Wellington
Dalton is pulling down on Wellington's head to control his posture.
Dalton bucks up whilst keeping hold of a body lock, managing to reverse the position. Now he's in top in Wellington's guard. Score +2 for sweep to guard / half guard: Dalton (10) vs (2) Wellington#T10#
Dalton seems content to control from guard here. He's going to have to remain active though if he doesn't want to get stood back up.
Dalton is pushing down on Wellington's leg trying to pass to half guard. Wellington is fighting to maintain full guard but Dalton has managed to sneak the leg through.
Wellington is looking to control Dalton's leg but it's slowly edging free. Can Wellington avoid being mounted?
Dalton perhaps working for something from half guard, or maybe not. It looks like he's just sitting there.
Wellington is trying to get back to full guard.
Dalton sitting and controlling from the half guard.
Wellington tries to roll over but Dalton keeps him under control.
Dalton is just sitting in half guard, waiting for something to happen.#T11#
Wellington is looking for a sweep. Dalton is wise to his cunning plan and keeps the top position.
Dalton content to sit in half guard and control for a moment.
Wellington is looking to improve his position.
Wellington is holding on to half guard well.
Dalton prevents Wellington from improving his position.
Dalton not doing much here.
The fighters are tangled up in the ropes here. We might need a restart if the fighters can't break free themselves.#T12#
Dalton is thwarting Wellington's attempts to control the position.
Dalton performing his best blanket impression for a moment.
Wellington is in trouble now - Dalton has advanced to mount! Score +3 for passing guard: Dalton (13) vs (2) Wellington
Wellington is working to get back to half guard.
Dalton looking to control and managing it successfully. #T13#
Wellington regains half guard.
Dalton wants to free his trapped foot but Wellington is holding on for dear life with his legs.
Still in half guard, Dalton seems content to control.
Dalton moves into full mount! Wellington won't be happy about that! Score +3 for passing guard: Dalton (16) vs (2) Wellington
Dalton content just to control the position here. #T14#
Wellington tries to reverse the position but Dalton maintains control.
Dalton controlling from the full mount.
Boooooooooooooooooooo!!! God, this has been a terrible round. Come on you two, sort yourselves out!
Wellington is working to get back to half guard.
And that's the end of the fight!
Dalton takes the fight on points by 16 to 2.
Pacer Dalton retains his super heavyweight title!
A relieved looking Pacer Dalton thanked the fans for their support and gave the usual line about them being amazing. They seemed to believe that he actually meant it. |
|
|
|
|
|
|