 |
BANZAI COMBAT 17 PBP Commentary |
Undercard bout
|
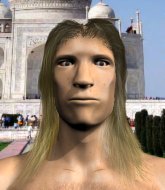
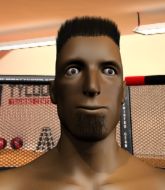
Coming up we have a middleweight MMA rules bout between Manning Moore (ranked 4622 p4p, 4550 weight class) and Dustin Knight (ranked 447 p4p, 442 weight class). We have two fighters making their debuts here, so let's see who comes out of this one with their first professional victory.
 |
|
 |
| 180 cm
25
185
0 - 0 - 0 |
|
187 cm
24
195
0 - 0 - 0 |
BJJ Blue Belt
Solid Muay Thai
Good in bed |
|
BJJ White Belt
Decent boxing
Intelligent |
|
| |
|
Ladies and gentlemen. This fight is 3 rounds, in the middleweight division.
Introducing the fighter to my left, fighting out of the red corner.
With a record of 0 - 0 - 0, fighting out of Hilo, Manning Moore!
And introducing the fighter to my right, fighting out of the blue corner.
With a record of 0 - 0 - 0, fighting out of Sydney, Dustin Knight!
The judges for this bout are Kenichi Hosakawa, Ren Mimura and Sosuke Kotani.

The bell rings for round one and we are underway!
Moore wants to clinch.
Moore fails in his attempt to clinch.
Moore is looking to clinch but Knight is avoiding it.
Knight tries to bum rush Moore with a series of wild strikes but Moore uses good footwork to avoid the assault.
Moore tries to close the distance and clinch but Knight swats him to one side with an open hand palm strike and circles away.
You can follow us on Twitter at...Ooooooh Moore got wobbled bad by a big combination! Knight presses forward with punches and knees until Moore stumbles to the ground! The ref watches Moore closely before deciding to step in and end the fight!
Ladies and gentlemen, after 0:25 of round 1, we have a winner by way of TKO (Strikes). Dustin Knight!
|
|
|
|
|
|
|
|
|
|
|
|
|
|
|
|
|
|
|
|
|
|
|
| S |
C
A |
G |
S |
C
B |
G |
|
S |
C |
G |
|
energy
A | B |
|
hype
A | B |
|
pop
A | B |
|
mgr
A | B |
|
FIGHT
RATING
100% |
|
|
|
|
|
|
|
Undercard bout
|
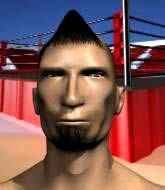
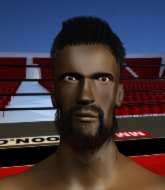
Coming up we have a heavyweight MMA rules bout between Braylon Mason (ranked 4529 p4p, 4553 weight class) and Gavin Windsor (ranked 477 p4p, 479 weight class). On his way into the cage it seems that Braylon Mason has been attacked by a crazed fan! It looks like it might have been the just bleed guy! Luckily Braylon Mason seems to be OK! I thought that lunatic was in prison!?
 |
|
 |
| 196 cm
25
265
1 - 1 - 0 |
|
150 cm
25
265
0 - 0 - 0 |
BJJ Blue Belt
Brawler
Good chin |
|
BJJ White Belt
Decent boxing
Solid chin |
|
| |
|
Ladies and gentlemen. This fight is 3 rounds, in the heavyweight division.
Introducing the fighter to my left, fighting out of the red corner.
With a record of 1 - 1 - 0, fighting out of Sydney, Braylon Mason!
And introducing the fighter to my right, fighting out of the blue corner.
With a record of 0 - 0 - 0, fighting out of Las Vegas, Gavin Windsor!
The judges for this bout are Kenichi Hosakawa, Sosuke Kotani and Yukihiro Shimada.
The bell rings for round one and we are underway!
Mason gets his takedown attempt stuffed easily
and Windsor counters with a straight right hand.
 It looks like Braylon Mason has been cut. It looks like Braylon Mason has been cut.
Windsor lands a jab-cross combination.

Windsor closes the distance and pushes Mason back into the cage.
Mason stalling in the clinch but Windsor improves position.

Mason works for the underhooks and manages to get a trip takedown into guard.

Windsor pushes Mason off for just long enough to get back to his feet. Very athletic spring there.
We've seen a great period of action over the last minute or so - credit to both fighters for going all out!
Windsor digs a good hook to Mason's body.
Windsor connects with a body shot that sends Mason's belly button to the back.

Windsor scores with a takedown into Mason's guard.
Mason keeping moving, preventing Windsor from controlling successfully.
Mason tries to land a sweep but no joy.

That's one minute gone in the round.
Mason has a closed guard, preventing anything of note from happening. Perhaps he's looking to stall.
Windsor would like to get this fight back to the feet but can't get free from the closed guard.

Mason throwing his legs up looking for a triangle.
Windsor trying to control but Mason is working from the bottom.
Windsor connects with a couple of short punches.
Windsor has a momentary lapse of concentration, allowing Mason to throw up a leg and lock on what appears to be a pretty tight triangle! Windsor is fighting it off but it's all too little too late - Mason pulls down on the head and he's put Windsor to sleep! This one is all over!
Ladies and gentlemen, after 2:59 of round 1, we have a winner by way of Submission (Triangle). Braylon Mason!
|
|
|
|
|
|
|
|
|
|
|
|
|
|
|
|
|
|
|
|
|
|
|
| S |
C
A |
G |
S |
C
B |
G |
|
S |
C |
G |
|
energy
A | B |
|
hype
A | B |
|
pop
A | B |
|
mgr
A | B |
|
FIGHT
RATING
57% |
|
|
|
|
|
|
|
Undercard bout
|
Coming up we have a welterweight MMA rules bout between Bobby Frank (ranked 4274 p4p, 4261 weight class) and Silas Mason (ranked 418 p4p, 413 weight class). We have two fighters making their debuts here, so let's see who comes out of this one with their first professional victory.
 |
|
 |
| 178 cm
25
175
0 - 0 - 0 |
|
175 cm
25
176
0 - 0 - 0 |
BJJ Blue Belt
Solid Muay Thai
Cuts easily |
|
BJJ Blue Belt
Counter fighter
Solid chin |
|
| |
|
Ladies and gentlemen. This fight is 3 rounds, in the welterweight division.
Introducing the fighter to my left, fighting out of the red corner.
With a record of 0 - 0 - 0, fighting out of Hilo, Bobby Frank!
And introducing the fighter to my right, fighting out of the blue corner.
With a record of 0 - 0 - 0, fighting out of St Petersburg, Silas Mason!
The judges for this bout are Shirou Masuda, Yukihiro Shimada and Taro Takaoka.
The bell rings for round one and we are underway!
Mason throws a series of punches but Frank avoids them all with ease.
Frank tries to shoot in for a takedown. He's got hold of a leg but Mason swivels and escapes.
Mason lets it all go there with a big combo counter but none of the punches connected.
Frank tries to drive through with a takedown attempt but Mason defends well and Frank ends up having to push Mason into the cage where they will battle it out in the clinch.
Mason prevents a body shot from Frank.
Frank tries to pull guard but Mason forces him back to his feet, against the cage.
That's three failed takedown attempts in the round for Bobby Frank. That's going to take a lot out of him.

Mason pushes off and circles away, back to the middle of the mat.
Mason keeps the fight on the outside.
Despite the aggression on Mason's face he doesn't fully commit to the counter.
Frank tries to clinch but is not successful on this occasion.
We've had a slow start to the round here - hopefully the action picks up.
Frank fails in his attempt to clinch.
Mason is looking for the big counter here.
Frank tries to score a power double leg takedown but Mason sees that one coming and sprawls well. That will dishearten Frank somewhat.
Despite the aggression on Mason's face he doesn't fully commit to the counter.
That's one minute gone in the round.
Mason forces Frank back against the cage and clinches.
Mason tries a body shot but Frank blocks it.
Frank can't find room to land a body shot as Mason controls the action.
With the two fighters working up against the cage, Frank just misses with a elbow thrown towards Mason's brow.
Frank taking a break, stalling in the clinch.
Frank lands a left hand that snaps the head of Mason backwards.
Frank tries to land knees in the clinch but Mason avoids the damage to the body.
Frank misses with a knee strike.

That's two minutes gone in the round.

Frank breaks from the clinch.

Frank moves into range and clinches up with Mason.
Frank is leaning against Mason and scores with a nice uppercut to the body.
Frank scores with a shot to the side of Mason's head.
Nice body punch from Mason - that landed with a thud.
Frank tries to work over Mason's body with a swooping hook but it only glances the target.
Frank tries to break the clinch but Mason is controlling the position.
Frank tries to land a knee to the head but Mason blocks with his arms.
Frank tries to take the fight to the ground by pulling guard but can't manage it.
Frank is breathing heavily.
Nice body punch from Frank.
Mason managing to block the knees to the body from Frank.

That's three minutes gone in the round.
Mason tries to work over Frank's body with a swooping hook but it only glances the target.
Mason with a knee to the head.
It looks like Bobby Frank has been cut.
Frank lands a glancing elbow in the clinch.
Frank tries to pull guard but Mason holds him up against the cage and eventually Frank drops back down to his feet.
Frank working aggressively here.
Frank with an attempt at a knee that misses.
Mason is looking to break free of the clinch but Frank has double underhooks.
Mason on the defensive, avoiding the knees to the body.
With the two fighters working up against the cage, Frank just misses with a elbow thrown towards Mason's brow.
Nice elbow from Frank.

That's four minutes gone in the round.
Mason tries a body shot but Frank blocks it.
A head punch on the inside from Frank fails to land.
Frank misses the knee to the body. Nice hip positioning from Mason.
Frank tries to land knees in the clinch but Mason avoids the damage to the body.
Frank creates a bit of distance and throws an elbow that only just misses.
Frank trying to control the position but instead, Mason has worked for underhooks and has pushed Frank into the cage.
Frank misses with a shot to the kidneys.
The crowd thankful this round is nearly over.
Mason breaks from the clinch.
Frank doesn't manage to clinch there - Mason circles away.
And that is the end of the round. The fighters go back to their corners.
Bobby Frank dominated that round.
The cut man is working on Bobby Frank's cut.
OK. That's time! The bell goes and we're back to the action.

Mason keeps the fight on the outside.
As Frank backs off Mason throws a huge counter combo but Frank manages to avoid it all.
Frank lunges in with swinging rights and lefts but Mason circles away quickly and effectively.
Mason unleashes a big counter combination but Frank bobs and weaves and avoids any damage.
Frank with a lazy takedown attempt
and Mason counters with a three punch combination, finished off with a leg kick. Nice work.
Frank fakes high and shoots in for a takedown but Mason avoids it really well and circles away.
Frank is looking to clinch.
Mason throws a counter combo.
Mason throws a combination but it was largely blocked by Frank.
As Mason looks to move away, Frank throws a big counter combo but Mason just gets out of the way.
We've had a slow start to the round here - hopefully the action picks up.
Frank tries to clinch there but Mason circles away.
Mason throws a nice looking combination but Frank bobs and weaves to avoid any damage.
Mason defends well against a solid takedown attempt from Frank.
That's three failed takedown attempts in the round for Bobby Frank. That's going to take a lot out of him.
Both fighters are absolutely exhausted here.
That's one minute gone in the round.
Mason has taken the fight to the clinch.
Frank tries to land knees in the clinch but Mason avoids the damage to the body.
Frank throws a knee to the head but misses.
Mason breaks the clinch.
Bobby Frank is looking to throw some combinations by the looks of things.
Mason darts in and clinches Frank up against the cage.
Mason lands a body punch - he's looking to wear down Frank.
Mason being controlled against the cage.
Frank is working hard here but doesn't seem to be able to control effectively, up against the cage.
That's two minutes gone in the round.
Frank lands a right hand.
Frank missing with knees to the body.
Frank with the Thai clinch. He's looking to land a big knee but he's not managed it this time.
Frank wants to get back to striking at distance but Mason won't allow it.
Frank tries a knee to the head but he's missed.
Frank can't find room to land a body shot as Mason controls the action.
Bobby Frank has scored more points in the clinch so far.
Frank misses with a punch to the body.
Frank is trying to push Mason away but Mason has him pressed against the cage, so he's going nowhere.
Mason's corner calls for him to break the clinch, which he does.
Frank is looking to clinch.
A nice side step and Mason releases a counter shot to the body, but it doesn't find it's home.
That's three minutes gone in the round.
Frank tries to close the distance and clinch up against the cage but Mason paws at him with a jab and circles away.
Mason rushes Frank and presses him up against the cage.
Mason keeps the fight in the clinch, despite Frank's efforts to push away.
Frank misses with a short punch on the inside.
Mason looks like he'd prefer to be striking at range right now.
Frank misses with a knee to the head.
Frank wants to push off and get back to the center of the mat but Mason has him pressed against the cage.
Frank's corner calls for him to break the clinch, which he does.
Mason rushes Frank and presses him up against the cage.
That's four minutes gone in the round.
Frank misses with a short punch on the inside.
Frank using the Thai clinch to land knees to the body.
Mason digs a right hand underneath Frank's ribcage. Frank let out a lung full of air as it connected.
Frank tries to throw a body punch but Mason avoids it by throwing Frank back against the cage.
Mason blocks a knee to the body. He'll have a nicely bruised forearm in the morning.
Mason can't find room to land a body shot as Frank controls the action.
Mason doesn't land with the attempted body shot.
Frank tries to pull guard but Mason forces him back to his feet, against the cage.
The crowd thankful this round is nearly over.
Frank tries to land a knee to the body but he is off balance and Mason avoids it.
Frank tries a body shot but Mason blocks it.
And that is the end of the round. The fighters go back to their corners.
Silas Mason showed his class in that round. I'd imagine he'll take it on all the scorecards.
The cut man is working on Bobby Frank's cut.
The minute break is over - no more time for sponges and pep talks - back to the action! This is the final round!

Frank tries to clinch but fails miserably
and Mason counters with a shot to the ribs. That looked like it hurt.
Mason defends well against a solid takedown attempt from Frank.
Despite the aggression on Mason's face he doesn't fully commit to the counter.
Mason closes the distance and pushes Frank back into the cage.
Frank lands a knee to the head there! That was nasty!
Frank throws an elbow but it's blocked.
Mason misses with a hook to the ribs.
Frank tries to break the clinch but Mason is controlling the position.
We've had a slow start to the round here - hopefully the action picks up.
Frank ties up his opponent against the cage and manages to drag the fight down to the ground. Frank no doubt will be looking to work submissions from his guard.
Both fighters are breathing heavily.
Mason trying to control the position from guard on top but Frank is wriggling around, looking for whatever he can.

Frank uses the cage to get back to his feet.
That's one minute gone in the round.
Frank shoots in and drives through. Mason sprawls well.
Mason throws a nice looking combination but Frank bobs and weaves to avoid any damage.
The fight moves into the clinch position.
Mason breaks the clinch and we're back to striking at distance.
Frank with a poor takedown
and Mason counters with a two punch combo.
That's three failed takedown attempts in the round for Bobby Frank. That's going to take a lot out of him.
Frank tries to clinch up.
Despite the aggression on Mason's face he doesn't fully commit to the counter.
A right-left combo lands from Mason.
Frank pulls out of a head kick attempt.
That's two minutes gone in the round.
Frank tries to keep at a distance but Mason has taken the fight into the clinch.
Frank pulls guard.
Fantastic stuff here - a very entertaining period of action, which has drawn cheers from the crowd.
Frank is trying to control the position but Mason postures up.

Mason decides he's had enough of playing guard and decides to stand. Come on Frank, up you get!
Frank darts in trying to clinch
and Mason counters with a one-two to the body.
Mason throws a one two combo.
Frank wants to clinch.
That's three minutes gone in the round.
Mason clinches up against the cage.
Frank tries a body shot but Mason blocks it.
Frank misses with a shot to the kidneys.
Frank prevents Mason from breaking the clinch.
Frank can't find room to land a body shot as Mason controls the action.
That's four minutes gone in the round.
Neither fighter has done anything of merit for a good minute or two here and the crowd are not happy about it.
Frank tries a knee to the head but he's missed.
Mason has been the more effective fighter overall so far.
Frank has Mason pressed against the cage, preventing Mason from circling away and getting back to striking at range.
Frank connects with a nasty looking knee right to Mason's face.
Frank is trying to pull guard but Mason has him pressed against the cage.
Frank prevents a body shot from Mason.
A head punch blocked on the inside by Mason.
Mason misses with a hook to the ribs.
Frank throws a vicious knee straight up the middle but Mason blocks it with crossed arms.
Frank tried to land a shot to the body but connects with Mason's elbow.
Frank tries to land a knee to the body but he is off balance and Mason avoids it.
And that's the end of the fight!
Silas Mason comfortably won the final round on my scorecard.
I think Mason has won this one but let's see whether the judges agree with me. Over to the ring announcer for the scorecards.
Ladies and gentlemen, after 3 rounds of action, we go to the scorecards for a decision.
Judge Shirou Masuda scores the fight 28:29
Judge Yukihiro Shimada scores the fight 28:29
Judge Taro Takaoka scores the fight 28:29
In favor of your winner, by unanimous decision... Silas Mason!
|
|
|
|
|
|
|
|
|
|
|
|
|
|
|
|
|
|
|
|
|
|
|
| S |
C
A |
G |
S |
C
B |
G |
|
S |
C |
G |
|
energy
A | B |
|
hype
A | B |
|
pop
A | B |
|
mgr
A | B |
|
FIGHT
RATING
34% |
|
|
|
|
|
|
|
Undercard bout
|
Coming up we have a middleweight MMA rules bout between Matthew Dean (ranked 4435 p4p, 3625 weight class) and Louis Sutherland (ranked 437 p4p, 389 weight class). Man, I cannot wait for this one!
 |
|
 |
| 186 cm
25
185
0 - 0 - 0 |
|
183 cm
25
185
1 - 0 - 0 |
Good wrestling
Basic striking
KO power |
|
Decent wrestler
Basic striking
Determined |
|
| |
|
Ladies and gentlemen. This fight is 3 rounds, in the middleweight division.
Introducing the fighter to my left, fighting out of the red corner.
With a record of 0 - 0 - 0, fighting out of Las Vegas, Matthew Dean!
And introducing the fighter to my right, fighting out of the blue corner.
With a record of 1 - 0 - 0, fighting out of Hilo, Louis Sutherland!
The judges for this bout are Yuuki Gou, Yukihiro Shimada and Yukihiro Yamamoto.
The bell rings for round one and we are underway!
Dean tries for a takedown but Sutherland circles away easily
and Sutherland counters with a shoot takedown. Dean fights it but they end up in guard.
Sutherland working some ground and pound from guard but it's not doing any damage.
Sutherland working some strikes from top position.
Sutherland lands a nice shot whilst sitting in his opponent's guard.
Sutherland trying to land body shots but he keeps hitting the mat.
Sutherland working some ground and pound from guard but it's not doing any damage.
Dean on his back here. We all know that wrestlers don't like being on their back so let's see if Dean tries to get out of the position.
Dean is looking to get back to his feet but can't, whilst Sutherland is controlling him.
Sutherland working some ground and pound from guard but it's not doing any damage.
We've had a slow start to the round here - hopefully the action picks up.
Sutherland scoring with some ground and pound.
Sutherland postures up and lands a big shot to Dean's brow.
Sutherland postures up to throw the ground and pound strikes but they don't connect.
That's one minute gone in the round.
Sutherland landing some decent shots from guard.
Sutherland is sitting in guard, working some ground and pound.
Sutherland throws a big right hand that misses.
Sutherland trying to control the position from guard on top but Dean is wriggling around, looking for whatever he can.
The ref warns both fighters not to hold the cage as they work up against the meshing.
Dean preventing the ground and pound from doing any damage.
Sutherland landing with the ground and pound.
Sutherland missing there with some ground and pound from the guard.
Sutherland throws a big elbow that misses.
The fighters are pressed up against the cage, both looking to find a bit of space to work.
That's two minutes gone in the round.
Sutherland content to strike from guard, landing some decent shots.
Sutherland trying to control but Dean is working from the bottom.
Dean is looking to get back to his feet but can't, whilst Sutherland is controlling him.
Sutherland scoring with punches to the head and body.
Sutherland with a flurry of punches that miss.
Sutherland throws a big right hand that misses.
Sutherland looks more muscular than last time we saw him. He must have been on the weights.
Dean knows he needs to get back to his feet asap. He's simply no match for Sutherland on the ground.
Sutherland scoring with some ground and pound.
Dean is looking to stand back up... there's a bit of a scramble and Sutherland dives into side control.
Dean tries to wriggle free to get back to his feet but he's given up his back! Oops.
That's three minutes gone in the round.
Dean manages to stand up with Sutherland still on his back. Eventually Sutherland drops to his feet and we're back in the standing position.
Sutherland misses with a takedown attempt - Dean sprawls well and throws a nice strike on the way out which just misses.
Sutherland fakes a strike and closes the distance, dragging Dean to the ground. Sutherland is now in Dean's guard.
Sutherland working from the guard for now, landing some ground and pound.
Sutherland working some strikes from top position.
Sutherland in full guard, throwing the ground and pound. No damage this time.
Sutherland with a flurry of punches that miss.
That's four minutes gone in the round.
Sutherland with a flurry of punches that miss.
Sutherland throwing strikes from guard but Dean blocks nicely.
Sutherland working some strikes from top position.
Sutherland working some strikes from top position.
Dean wants to stand but Sutherland is controlling the position.
Dean utilising some decent striking defenses from the guard, preventing the ground and pound.
The crowd thankful this round is nearly over.
Dean wants to stand and escape but Sutherland is having none of it.
Dean has scooted to the edge of the canvas and used the cage to get back to his feet. Sutherland has stuck on his opponent and is forcing him back against the cage.
This has been an exciting period of action!
Sutherland is working for a takedown up against the cage. He can't get it on this occasion though.
And that is the end of the round. The fighters go back to their corners.
Louis Sutherland dominated that round.
That's the end of the interval. I'm sure that seemed a lot quicker than a minute for our two fighters! Back to the action.
Dean misses with a takedown attempt - Sutherland sprawls well and throws a nice strike on the way out which just misses.
Sutherland is clearly trying to counter these attacks from Dean with a body shot.
Dean clinches up with Sutherland and pushes him back against the cage.
Dean working aggressively here.
Sutherland wants a takedown but no success here.
Sutherland is trying to drag Dean to the mat but Dean just about manages to keep his footing. He used the cage to his advantage there.
We've had a slow start to the round here - hopefully the action picks up.
Dean misses with a short punch on the inside.
That's one minute gone in the round.
Dean prevents the takedown attempt.
Matthew Dean has stuffed three takedown attempts in the round now. That's going to take a lot out of Louis Sutherland.
Sutherland tries to jump guard but he falls flat on his backside. Dean smiles and moves away.
Dean shoots in for a takedown but doesn't get it.
Dean gets a double leg takedown into Sutherland's guard.
Dean chips away with some ground and pound.
Dean lands a couple of elbows.
Sutherland is looking to stand up but Dean isn't so interested in that idea.
Sutherland has the superior BJJ but he's also working some ground strikes into his gameplan.
That's two minutes gone in the round.
Dean trying to control but Sutherland is working from the bottom.
Dean prevents Sutherland from getting back to his feet.
Sutherland is using up a lot of energy trying to get back to his feet. Perhaps he should improve his position first.

The referee has stepped in and called for a break in the action. We'll restart on the feet.
Dean closes the distance, clinches up and gets a nice trip takedown into side control. Very smooth.
Dean prevents Sutherland from escaping the position.
That's three minutes gone in the round.
Sutherland takes a big shot right to the temple there but he's taken it well.
Sutherland is pushing Dean's head away, looking to escape. Dean manages to hold on to the position though.
Dean postures up a little and throws a couple of hammerfists but they don't connect properly.
Dean tries to land with some ground and pound but misses.
That's four minutes gone in the round.
The crowd are starting to boo a lack of action.
Dean in side control, throwing shots but Sutherland defends.
Sutherland is trying to stand back up. He's worked his way up against the cage but Dean has just dragged him back down to the mat.
It looks like the ref is thinking about a standup.
Louis Sutherland has got the better of the ground game so far.
The ref stands the fighters back up due to a lack of activity.
Dean shoots in for a takedown - he's clinched up with Sutherland but Sutherland pushes him off and we're back to square one.
Sutherland feints the counter takedown.
Dean stuffs a takedown. It's all about dictating where the fight takes place and Dean wants it to stay on the feet.
Sutherland is breathing heavily.
Dean tries to close the distance and clinch up but Sutherland swats him away and circles back towards the center.
Dean closes the distance, clinches up and gets a nice trip takedown into side control. Very smooth.
Sutherland is trying to stand back up. He's worked his way up against the cage but Dean has just dragged him back down to the mat.
The crowd thankful this round is nearly over.

Dean decides to stand back up.
And that is the end of the round. The fighters go back to their corners.
Matthew Dean dominated that second round.
The minute break is over - no more time for sponges and pep talks - back to the action! And we move into the final round!
Dean shoots in from a long way out. He's driving through with the takedown attempt and he eventually gets it, landing in Sutherland's guard.
Dean stops Sutherland from standing up.

Dean stands up over his opponent, looking to dive in with a big punch. Here he comes, superman style! Oh, the punch misses and Sutherland has got him in a triangle choke for good measure! Oh no! Dean manages to get his head free but now Sutherland has transitioned to an armbar! Dean grimaces and is forced to tap! Beautiful Jiu Jitsu from Sutherland! I'd be surprised if that didn't end up as submission of the night!
Ladies and gentlemen, after 0:34 of round 3, we have a winner by way of Submission (Armbar). Louis Sutherland!
|
|
|
|
|
|
|
|
|
|
|
|
|
|
|
|
|
|
|
|
|
|
|
| S |
C
A |
G |
S |
C
B |
G |
|
S |
C |
G |
|
energy
A | B |
|
hype
A | B |
|
pop
A | B |
|
mgr
A | B |
|
FIGHT
RATING
41% |
|
|
|
|
|
|
|
Undercard bout
|
Coming up we have a light heavyweight MMA rules bout between Dolph Rush (ranked 4431 p4p, 3676 weight class) and Brain Game (ranked 437 p4p, 391 weight class). I'm sure you'll be fascinated to know that I was talking to some pointless Z list celebrity before the fight and he thought that Brain Game was going to win. Let's see if he was right.
 |
|
 |
| 196 cm
25
216
0 - 0 - 0 |
|
190 cm
25
208
1 - 0 - 0 |
BJJ White Belt
Excellent boxer
KO power |
|
BJJ White Belt
Excellent boxer
Granite chin |
|
| |
|
Ladies and gentlemen. This fight is 3 rounds, in the light heavyweight division.
Introducing the fighter to my left, fighting out of the red corner.
With a record of 0 - 0 - 0, fighting out of Las Vegas, Dolph Rush!
And introducing the fighter to my right, fighting out of the blue corner.
With a record of 1 - 0 - 0, fighting out of Tokyo, Brain Game!
The judges for this bout are Yasuomi Hirokawa, Shirou Masuda and Shigeki Sano.
The bell rings for round one and we are underway!
Game misses with a double jab.
Game stuffs a takedown. It's all about dictating where the fight takes place and Game wants it to stay on the feet.
Game throws a jab when Rush was well out of range.
Rush shoots for a double leg takedown but Game sprawls well. He's pushed Rush's face into the mat and manages to get back to his feet relatively easily.
Game scores with a reasonable looking shot to the body. Rush doesn't seem bothered though.
Rush on the wrong end of a vicious looking body shot.
Rush rushes Game and presses him up against the cage.
A frustrated look appears on Game's face as he tries to break the clinch.
Game working aggressively here.
Rush tries to pull guard but Game won't allow it.
That's three failed takedown attempts in the round for Dolph Rush. That's going to take a lot out of him.
We've had a slow start to the round here - hopefully the action picks up.
Rush decides to pull guard.
Rush is working an open guard here, looking to improve his position. No doubt that will leave him open to counters but at least he's being more offensive.
Game controls the pace of the fight for a moment.
That's one minute gone in the round.
The fighters are pressed up against the cage, both looking to find a bit of space to work.
Rush is working the butterfly guard. He manages to land a nice scissor sweep and is now in half guard on the top. Nice move.

Rush throws a big elbow that misses, also allowing Game to regain full guard.
Rush missing there with some ground and pound from the guard.
Game wants to get back to his feet but he's too absorbed in his own little project and Rush manages to pass to side control.
Rush uses his free foot to push down on Game's thigh. Eventually he works his other foot free and he's advanced to mount - this is trouble for Game.
Game reaches up to try and control the position but Rush seems to have an arm triangle now! Uh oh! Game rolls and tries to escape and now Rush has his back!
That's two minutes gone in the round.
Game avoids the strikes from Rush.
Rush biding his time, controlling Game.
Rush missing with strikes.

Game manages to stand up with Rush still on his back. Eventually Rush drops to his feet and we're back in the standing position.
Game throws a jab, cross combination which is slipped
and Rush counters with a one-two to the body.
We've seen a great period of action over the last minute or so - credit to both fighters for going all out!
Rush closes the distance and clinches.
Game tries to land a shot to the body but it's blocked.
A real battle for position is taking place between these two warriors.
Game wants to strike at distance but he can't break free of the clinch.
That's three minutes gone in the round.
Rush pushes off and circles away, back to the middle of the mat.
Brain Game seems to be the more aggressive standup fighter in this bout.
Some wild striking there from Rush.
Rush looks for a takedown here. Will he get it? Game is fending him off so far but Rush persists. Nope, Game circles away and we're back to standing.
Rush shoots in looking for a takedown. Game tries to sprawl out of it but Rush keeps driving through. The fighters are pinned against the cage. Game manages to get underhooks and after a bit of a struggle, circles away and we're back to standing.
Rush bobs and weaves well there to avoid the strikes.
Rush tries to clinch there but Game circles away.
Game throws an ugly left hook that misses
and Rush counters by moving into the clinch.
Good anti-grappling being displayed by Rush as Game tries to tie him up.
The referee calls for Game to work.
That's four minutes gone in the round.
Rush trying to land knees to the body.
Rush escapes the clinch and we're back to striking.
Rush keeping his hands up high there, blocking the jab from Game.
Rush clinches.
Game prevents a takedown attempt there.
Rush slowing the pace effectively.
Rush breaks from the clinch.
Danga de danga de dang - Rush scores with a four punch combination!
Rush misses with a takedown attempt. He shot from a bit too far out.
And that is the end of the round. The fighters go back to their corners.
Dolph Rush dominated that round.
Well, the break between rounds is over. Let's get back to the scrappin!
Game swings widly with a right hand
and Rush counters with a one-two to the body.
Rush scores with a nice body kick.
Game just misses with a punch to the body.
Game throws the left hand but Rush avoids the punch easily.
Rush is looking for a counter combo.
Game lands a slapping body shot.
Rush throws a leg kick but Game moved away.
Rush ducks under a wild hook from Game.
Rush throws a head kick that misses
The fighters are starting to perspire pretty heavily.
and Game counters with a lovely straight right hand!
Rush slips a straight right by Game.
Rush shoots in for a takedown. "Ole!" shouts Game as he jumps to the side.
Game scores with a shot to the body.
Game wings a very wild body shot but it does the job and lands to the midsection.
This is a great period of action - very entertaining stuff!
Game stuffs the takedown.
We've been informed that Game has been working hard on his conditioning in the buildup to the fight.
Brain Game seems to be getting the better of the standup.
Both fighters are absolutely exhausted here.
That's one minute gone in the round.
Rush takes a shot to the body in his stride.
Rush steps to the side to avoid the strikes from Game.
Game connects with the punch.
A low kick from Rush misses
and Rush takes a counter punch right on the button for his troubles.
 Rush is rocked! Rush is rocked!
Rush misses with a few strikes there.

Game cracks Rush with a big right hand that sends him to the floor! Rush looks wobbly but he's sprung back up to his feet straight away� can Game finish him?
Oh Rush is still all over the place! His legs are completely gone! Will he be able to recover?!!
This is a great period of action - very entertaining stuff!
A telegraphed right hand from Game misses the target.
A jab from Game misses.
Game throws a monster uppercut resembling something out of street fighter but it doesn't land.
Rush leaves his chin hanging out and Game seizes the opportunity with an uppercut! Rush crumbles to the floor in a heap! The referee steps in and tends to the downed fighter! What a knockout!
Ladies and gentlemen, after 1:40 of round 2, we have a winner by way of KO (Punch). Brain Game!
Brain Game looked relieved post fight as he said the following; 'I want to call out a quivering bitch. Gonzo Dragosavac I wanna see you in the cage after Billy breaks your jaw next.'.
|
|
|
|
|
|
|
|
|
|
|
|
|
|
|
|
|
|
|
|
|
|
|
| S |
C
A |
G |
S |
C
B |
G |
|
S |
C |
G |
|
energy
A | B |
|
hype
A | B |
|
pop
A | B |
|
mgr
A | B |
|
FIGHT
RATING
52% |
|
|
|
|
|
|
|
Undercard bout
|
Coming up we have a heavyweight MMA rules bout between Santiago Jefferson (ranked 3648 p4p, 3895 weight class) and Sylvester Jolt (ranked 423 p4p, 442 weight class). Buckle up people - heeeeeeeeeere we go!
 |
|
 |
| 195 cm
25
270
1 - 0 - 0 |
|
200 cm
25
265
1 - 0 - 0 |
BJJ White Belt
Excellent MT
Big right hand |
|
BJJ Blue Belt
Decent boxing
Tends to cut |
|
| |
|
Ladies and gentlemen. This fight is 3 rounds, in the heavyweight division.
Introducing the fighter to my left, fighting out of the red corner.
With a record of 1 - 0 - 0, fighting out of Hilo, Santiago Jefferson!
And introducing the fighter to my right, fighting out of the blue corner.
With a record of 1 - 0 - 0, fighting out of Hilo, Sylvester Jolt!
The judges for this bout are Yukihiro Yamamoto, Yukihiro Shimada and Taro Takaoka.
The bell rings for round one and we are underway!
Jolt throws a leg kick
enabling Jefferson to counter with a crisp jab.
Jefferson throws an overhand right that lands on Jolt's shoulder, as Jolt tries to avoid the shot.
Santiago Jefferson seems to be the more aggressive standup fighter in this bout.
Jefferson lands with a right hand.
Jefferson scores with a nice right hand.
Jolt connects with a good right hand that stumbles Jefferson. Jefferson circles away out of range and recomposes himself.
Jefferson lands with a good body shot.
A jab from Jefferson finds it's way through Jolt's defenses.
Jefferson misses with a body shot.
Jolt ducks under a wild hook from Jefferson.
Jefferson slips a jab from Jolt.
Nice uppercut there from Jefferson.
 It looks like Sylvester Jolt has been cut. It looks like Sylvester Jolt has been cut.
This is a great period of action - very entertaining stuff!
A looping hook to the body misses from Jefferson. Jolt does a little dance to reset his feet.
Jolt tries a counter takedown but it's more of a dummy move, and he uses it to push himself away.
Jefferson misses with an uppercut.
That's one minute gone in the round.
Jefferson misses with a hook. Jolt ducked under it nicely.
Jolt staying out of range there.
Jefferson slips a jab from Jolt.
A little feinted left hand from Jefferson on the counter but he doesn't commit to it.
Jefferson tests Jolt's chin there with a solid looking shot.
 Jolt is rocked! Jolt is rocked!
Jolt takes a body punch but keeps moving.
Jolt is still on wobbly legs! Can Jefferson finish him?
Jolt looks winded!
Jefferson lands a jab to Jolt's midsection.
Jefferson cracks a nice hook into Jolt's ribs.
Jefferson lands hard precision jab right on the jaw that stiffens Jolt up and sends him tumbling to the mat! The ref grabs Jefferson from behind before he can pounce. Some folks in the crowd didn't like that stoppage, but I saw Jolt's eyes roll way back in his head, he was done.
Ladies and gentlemen, after 1:30 of round 1, we have a winner by way of KO (Punch). Santiago Jefferson!
|
|
|
|
|
|
|
|
|
|
|
|
|
|
|
|
|
|
|
|
|
|
|
| S |
C
A |
G |
S |
C
B |
G |
|
S |
C |
G |
|
energy
A | B |
|
hype
A | B |
|
pop
A | B |
|
mgr
A | B |
|
FIGHT
RATING
63% |
|
|
|
|
|
|
|
Undercard bout
|
Coming up we have a welterweight MMA rules bout between Paul Maddoc (ranked 4304 p4p, 3198 weight class) and Sinan Vrases (ranked 419 p4p, 338 weight class). Rumors backstage are that the fighters have been paid to keep it standing but we know that would never happen in MMA!
 |
|
 |
| 184 cm
25
175
0 - 0 - 0 |
|
172 cm
24
162
3 - 1 - 0 |
Good takedowns
Counter fighter
Intelligent |
|
Good wrestler
Decent knees
Determined |
|
| |
|
Ladies and gentlemen. This fight is 3 rounds, in the welterweight division.
Introducing the fighter to my left, fighting out of the red corner.
With a record of 0 - 0 - 0, fighting out of Hilo, Paul Maddoc!
And introducing the fighter to my right, fighting out of the blue corner.
With a record of 3 - 1 - 0, fighting out of Montreal, Sinan Vrases!
The judges for this bout are Shigeki Sano, Yuuki Gou and Yukihiro Yamamoto.
The bell rings for round one and we are underway!
Maddoc drives through with a takedown into guard.
Vrases keeping moving, preventing Maddoc from controlling successfully.
The fighters are pressed up against the cage, both looking to find a bit of space to work.
Maddoc is really struggling to control Vrases but he's trying to hold on to the position.
We get told so often about how wrestlers don't like to be on their backs. Let's see if Vrases can do anything to dispel that myth.
Maddoc is fighting to break Vrases's control of his arms but Vrases is doing a good job of controlling the position at the moment.
We've had a slow start to the round here - hopefully the action picks up.
Vrases looking to sweep here. No luck so far.
That's one minute gone in the round.
Vrases has his hands on Maddoc's head, controlling the position.
The referee has decided to stand the fighters back up, so we'll restart on the feet.
Vrases closes the distance and clinches.
Vrases landing knees to the body. They look like they could hurt.
Vrases leaning against his opponent.
Vrases using the Thai clinch to land knees to the body.
Maddoc is breathing heavily.
Vrases connects with a knee to the head.
It looks like Paul Maddoc has been cut.
Maddoc takes a knee to the side of the body.
Maddoc takes a knee right on the jaw!
Vrases has the Thai plumb, controlling the head nicely. He loads up with a big knee to the head and Maddoc goes down! Vrases pounces into side control - this one could be over soon!
Maddoc is rocked!
We've seen a great period of action over the last minute or so - credit to both fighters for going all out!
Vrases in side control here. He's dropped a big elbow there and Maddoc looks hurt! Oh, he is hurt! Vrases turns on the heat and pounds him out for a TKO victory! Good killer instinct there!
Ladies and gentlemen, after 2:55 of round 1, we have a winner by way of TKO (Strikes). Sinan Vrases!
Jumping up and down and very excited, Sinan Vrases waved his t-shirt featuring BANZAI COMBAT NUTRITION's logo in front of the cameras.
|
|
|
|
|
|
|
|
|
|
|
|
|
|
|
|
|
|
|
|
|
|
|
| S |
C
A |
G |
S |
C
B |
G |
|
S |
C |
G |
|
energy
A | B |
|
hype
A | B |
|
pop
A | B |
|
mgr
A | B |
|
FIGHT
RATING
56% |
|
|
|
|
|
|
|
Undercard bout
|
Coming up we have a lightweight MMA rules bout between Mbuti Bayaka (ranked 3206 p4p, 4697 weight class) and Enzo Cooke (ranked 298 p4p, 387 weight class). Both fighters look fresh as a daisy as they make their way towards the cage.
 |
|
 |
| 163 cm
24
163
4 - 1 - 0 |
|
175 cm
24
157
0 - 0 - 0 |
Good wrestling
Counter fighter
Very strong |
|
Good wrestler
Counter fighter
Granite chin |
|
| |
|
Ladies and gentlemen. This fight is 3 rounds, in the lightweight division.
Introducing the fighter to my left, fighting out of the red corner.
With a record of 4 - 1 - 0, fighting out of Montreal, Mbuti Bayaka!
And introducing the fighter to my right, fighting out of the blue corner.
With a record of 0 - 0 - 0, fighting out of Las Vegas, Enzo Cooke!
The judges for this bout are Kenichi Hosakawa, Yukihiro Yamamoto and Yukihiro Shimada.
The bell rings for round one and we are underway!
Cooke takes a shot to the eye socket. That's gotta hurt.
Cooke on the wrong end of a vicious looking body shot.
Bayaka slips in close and lands a nice hook before moving back out of range.
Bayaka slips in close and lands a nice hook before moving back out of range.
Nice body punch from Bayaka.
Bayaka scores with a jab to the jaw.
Bayaka connects with a right hand. Cooke shakes it off.
Cooke shoots and misses
and Bayaka counters by moving into the clinch. Good anticipation by Bayaka.
Cooke wants to take the fight to the mat but Bayaka manages to get underhooks and keep the fight in the clinch.
This has been an exciting period of action!
Bayaka pressing his opponent against the cage.
Cooke is working on a leg, looking for a takedown but Bayaka is defending well.
Mbuti Bayaka has stuffed three takedown attempts in the round now. That's going to take a lot out of Enzo Cooke.
That's one minute gone in the round.
Bayaka lands a body shot.
Bayaka escapes the clinch and we're back to striking.
Bayaka connects with a good right hand that stumbles Cooke. Cooke circles away out of range and recomposes himself.
Mbuti Bayaka seems to be the more aggressive standup fighter in this bout.
Cooke takes a shot to the nose. Hopefully that hasn't broken it.
Bayaka throws a wild combination but nothing lands.
Cooke now looks to counter with a shot at the body.
Cooke closes the distance and clinches up with Bayaka, looking for a takedown. Cooke pushes Bayaka against the cage but Bayaka circles to the side and manages to break the clinch.
Bayaka seemed to be looking to counter by closing the distance.
Cooke avoids the body shot from Bayaka.
Bayaka jabs. That one connects to the head of his opponent.
That's two minutes gone in the round.
Bayaka scores with a sloppy punch to the body. Not much technique there but it did the business.
Cooke dives in and grabs Bayaka's left leg, looking for a takedown. Bayaka pushes down on Cooke's head and hops out.
Bayaka half commits to a counter takedown before pushing away, out of range.
Cooke needs to keep his hands up - Bayaka had a free shot at his head there.
Good standup being displayed there by Bayaka as he connects with a hook.
The crowd cheering loudly, showing their appreciation for the quality fight we're seeing here.
Left hook, right uppercut from Bayaka.
Bayaka lands a nice looking body shot.
Cooke looks winded!
Cooke closes the distance looking to clinch
and Bayaka cracks him with a counter punch right on the button.
That's three minutes gone in the round.
Cooke takes an uppercut right on the button but keeps his composure.
Bayaka lands an overhand left. A wild punch that just about connected.
Bayaka swinging wildly here.
Cooke drops down looking to force a counter takedown but Bayaka defends it well.
Bayaka's corner calls for a 1-2. Bayaka obliges with the 1 part as he scores the single shot and moves back out of range.
Cooke takes a body punch but keeps moving.
Bayaka works his jab well there, keeping his opponent at a distance.
That's four minutes gone in the round.
Cooke ducks right into an uppercut from Bayaka.
Bayaka lands with a shot to the body.
Bayaka moving in and out of range nicely, whilst landing the scoring shot.
This has been an exciting period of action!
Bayaka lands a nice hook to Cooke's body. Cooke takes it in his stride and looks to land his own strikes.
A punch combination from Bayaka misses.
Bayaka lands a jab to the nose.
A jab from Bayaka does it's job there.
Donk. Bayaka catches Cooke right on the button with a cross.
And that is the end of the round. The fighters go back to their corners.
Mbuti Bayaka dominated that round.
The referee calls time. The cornermen exit stage left and we're back to business.
Cooke on the wrong end of a nice jab.
Bayaka connects with a single shot there.
Danga de danga de dang - Bayaka scores with a four punch combination!
Bayaka throws a combination that misses
and Cooke counters with a nice double leg into side control. Bayaka won't be happy with that.
Bayaka on his back here. We all know that wrestlers don't like being on their back so let's see if Bayaka tries to get out of the position.
Bayaka tries to bench press Cooke off him but Cooke keeps the position.
Cooke wants to work for a kimura but he's foiled early by Bayaka, who protects the arm well.
The crowd are loving this. Great action here.
Cooke working the ground and pound but he's contacting the mat, not the fighter.
Cooke tries for a kimura but Bayaka is defending well.
The ref warns both fighters not to hold the cage as they work up against the meshing.
Bayaka tries to improve position but can't.
That's one minute gone in the round.
Bayaka gets back to half guard.
Cooke is scoring with some nice ground and pound from the dominant position.
Cooke is sneakily working for an arm triangle but Bayaka sees it coming and defends easily.
Cooke is breathing heavily.
Bayaka has no desire to be mounted, so is trying to control. Cooke is working away from the top position though.
Cooke looking for a kimura but he'll have to free his other leg if he wants to finish that. Perhaps he's just using it as a distraction technique.
Bayaka looks to be in better condition than last time we saw him fight. Obviously he's been working hard on his cardio.
Bayaka is holding on to half guard well.
That's two minutes gone in the round.
A few boos can be heard. I'm sure they will multiply if the fighters don't pick up the pace.
Bayaka wants to get back to full guard.
Bayaka is trying to control but can't.
Cooke prevents Bayaka from improving his position.
Cooke is looking for a kimura. It's going to be difficult to finish that from half guard though and Bayaka defends it well.
Bayaka is looking to regain full guard. Not this time though.
Bayaka is doing well to avoid being mounted. He's controlling the position at the moment.
Cooke prevents Bayaka from improving his position.
That's three minutes gone in the round.
Cooke is working for a submission of some sort.
Bayaka tries to get to full guard but Cooke has control of the leg.
Cooke is looking for a kimura but he's never going to get it from there.
Cooke is trying to control. Bayaka wants to improve his position but can't escape this time.
Cooke is looking for a kimura but Bayaka is holding onto that half guard position, so it's hard for Cooke to get the leverage.
Bayaka wants to get back to full guard.
Bayaka is doing well to avoid being mounted. He's controlling the position at the moment.
That's four minutes gone in the round.
My god... these two guys really need to pick up the pace or everyone will leave to go get a beer.
Bayaka is looking for a sweep. Cooke is wise to his cunning plan and keeps the top position.
Cooke is trying for a guillotine from the top but the pressure isn't in the right place so Bayaka is just riding it out for now. Cooke eventually gives up the hold.
Bayaka keeps control of the position for the meantime.
Boooooooooooooooooooo!!! God, this has been a terrible round. Come on you two, sort yourselves out!
The fighters are battling for position here. Bayaka manages to regain full guard. Nice work.
Bayaka bucks up whilst keeping hold of a body lock, managing to reverse the position. Now he's in top in Cooke's guard.
And that is the end of the round. The fighters go back to their corners.
A close second round but Enzo Cooke will probably get the nod - 10:9.
That's the end of the interval. I'm sure that seemed a lot quicker than a minute for our two fighters! Back to the action. This is the final round!
Cooke walks into a stiff left hand from Bayaka.
Bayaka scores to the head and body with a nice combination!
Bayaka is really dominating this fight. Is there anything that Cooke can do to turn this around?
Bayaka with a hook.
Bayaka lands a nice looking body shot.
Bayaka jabs at Cooke's body.
Bayaka will need to tighten up his combinations if he doesn't want to gas himself out, swinging at thin air.
Cooke tries a counter takedown but it's more of a dummy move, and he uses it to push himself away.
We've had a slow start to the round here - hopefully the action picks up.
Bayaka connects with a looping left hand that seems like it dazed Cooke momentarily.
That's one minute gone in the round.
Cooke takes a hook to the side of the head. I wonder if that's got his ears ringing.
Cooke drops his hands and takes a jab to the jaw for his troubles.
Cooke tries to clinch up but Bayaka circles away and keeps his distance.
Bayaka drops down looking for a counter takedown but Cooke sprawls and moves away.
Bayaka darts in and lands a nice takedown into half guard.
Bayaka is scoring with some nice ground and pound from the dominant position.
Bayaka not doing much here.
Bayaka is thwarting Cooke's attempts to control the position.
That's two minutes gone in the round.
Bayaka tries to pass to full mount but Cooke defends it.
Bayaka works his way into full mount!
Bayaka jumps to side control looking for an arm triangle but Cooke manages to avoid the submission attempt.
Cooke manages to work his way to half guard, despite Bayaka's best efforts.
Cooke wants to improve his position but Bayaka is controlling well.
Cooke takes a big intake of breath there - he's definitely tired.
Bayaka sitting and controlling from the half guard.
That's three minutes gone in the round.
Bayaka working over Cooke with some ground and pound. Cooke looks like he wants out of this position, which is understandable.
Cooke is refusing to be controlled, as Bayaka sits in half guard.
Nice strikes from Bayaka there.
The two fighters exchange a few words. I couldn't hear what they were saying but maybe it's more fun if you make it up yourself. Bayaka connects with a nice short shot to Cooke's temple.
The fighters are battling for position here. Cooke manages to regain full guard. Nice work.
Cooke is looking for a guillotine. You can't force these things though and Bayaka defends well.
Mbuti Bayaka overall seems to be getting the better of the ground position in the fight so far.
Bayaka is working the ground and pound from guard. He might want to try advancing position though to get more of an impact.
Bayaka postures up and lands a big shot to Cooke's brow.
Bayaka landing some decent shots from guard.
Bayaka postures up and lands a big shot to Cooke's brow.
That's four minutes gone in the round.
Bayaka with a nice head shot there.
Bayaka connects with a couple of short punches.
Bayaka works over Cooke with some ground and pound from guard.
Cooke is rocked!
The fighters are pressed up against the cage, both looking to find a bit of space to work.
Bayaka distracts Cooke with his right hand and drops a big elbow with his other arm.
Cooke is still in real trouble! Can Bayaka finish him?
Bayaka controlling from the top position.
Bayaka chips away with some ground and pound.
Bayaka with a couple of shots to the head there. Not particularly brutal.
Bayaka working some strikes from top position.
This has been an exciting period of action!
Bayaka looking to pass the guard.
Bayaka with a couple of shots to the head there. Not particularly brutal.
Bayaka with a couple of shots to the head there. Not particularly brutal.
Bayaka scoring with some ground and pound.
Bayaka postures up and scores with a shot to the body and a follow up elbow to the head.
And that's the end of the fight!
Mbuti Bayaka showed his dominance in that final round.
Well Bayaka has outscored his opponent in every aspect of the fight today. Only a scarily incompetent judge or two will keep him from a well deserved win... Over to the ring announcer for the scorecards.
Ladies and gentlemen, after 3 rounds of action, we go to the scorecards for a decision.
Judge Kenichi Hosakawa scores the fight 29:26
Judge Yukihiro Yamamoto scores the fight 29:26
Judge Yukihiro Shimada scores the fight 29:26
In favor of your winner, by unanimous decision... Mbuti Bayaka!
During a confident post fight interview, Mbuti Bayaka thanked all his fans. He seemed very genuine when describing how motivated his fans keep him.
|
|
|
|
|
|
|
|
|
|
|
|
|
|
|
|
|
|
|
|
|
|
|
| S |
C
A |
G |
S |
C
B |
G |
|
S |
C |
G |
|
energy
A | B |
|
hype
A | B |
|
pop
A | B |
|
mgr
A | B |
|
FIGHT
RATING
46% |
|
|
|
|
|
|
|
Co-main event
|
Coming up we have a light heavyweight MMA rules bout between Mark Atherton (ranked 2796 p4p, 3461 weight class) and Cody Nightmare (ranked 312 p4p, 375 weight class). Mark Atherton could well score a knockout today. He has the power to get to Cody Nightmare's chin.
 |
|
 |
| 183 cm
25
204
2 - 0 - 0 |
|
188 cm
25
205
1 - 0 - 0 |
Good takedowns
Counter fighter
Prefers standup |
|
Good takedowns
Brawler
Tends to cut |
|
| |
|
Ladies and gentlemen. This fight is 3 rounds, in the light heavyweight division.
Introducing the fighter to my left, fighting out of the red corner.
With a record of 2 - 0 - 0, fighting out of Tokyo, Mark Atherton!
And introducing the fighter to my right, fighting out of the blue corner.
With a record of 1 - 0 - 0, fighting out of Los Angeles, Cody Nightmare!
The judges for this bout are Hirohito Nitta, Shigeki Sano and Yuuki Gou.
The bell rings for round one and we are underway!
Atherton throws a body shot but no joy.
A momentary lapse in concentration from Atherton enables Nightmare to shoot in and score with a neat double leg. Atherton manages to secure a closed guard as the fighters hit the mat.
Nightmare trying to control but Atherton is working from the bottom.
The fighters are pressed up against the cage, both looking to find a bit of space to work.
Nightmare stands up and looks to throw the legs aside to pass to side control. Atherton swivels though and keeps the full guard.
Nightmare gets to his feet - Atherton follows without any prompting.
Nightmare avoids a lazy jab quite easily.
We've had a slow start to the round here - hopefully the action picks up.
Nightmare darts in and clinches Atherton up against the cage.
Atherton is trying to break the clinch but Nightmare is controlling him.
Nightmare manages to break the clinch.
Atherton misses with a wild body shot.
Mark Atherton is looking to keep the fight on the feet at all costs.
That's one minute gone in the round.
Nightmare shoots in and bounces Atherton off the cage to secure the takedown into guard.
Nightmare trying to control the position from guard on top but Atherton is wriggling around, looking for whatever he can.
Nightmare prevents Atherton from getting back to his feet.
Nightmare wants to control from the top but Atherton keeps moving.
Nightmare won't allow Atherton to get back to his feet.
That's two minutes gone in the round.
Nightmare decides to stand up and beckons his opponent to follow.
Atherton fakes high and swings low for a body shot but Nightmare manages to avoid it.
Nightmare tries to counter by closing the distance.
Excellent takedown into side control there by Nightmare.
Nightmare has been taking part in the yoga sessions down at MMAH League and Warrior Nation. Presumably he's going to look for a slick submission... Or maybe he's looking to avoid one.
Nightmare wants to lay and pray for a moment but Atherton keeps working.
Nightmare sitting in side control, looking to soften his opponent up with elbows and hammerfists but Atherton is avoiding damage well and looking to escape the position.
That's three minutes gone in the round.
Nightmare wants to control for a moment but Atherton uses the opportunity to move back to half guard.
Nightmare slips a nice elbow through Atherton's hands, connecting with Atherton's forehead.
Atherton looks to be in better condition than last time we saw him fight. Obviously he's been working hard on his cardio.
Atherton wants to get back to his feet.
Nightmare stalling away here and it's allowed Atherton to slip out his trapped foot and regain full guard.
Nightmare wants to control from the top but Atherton keeps moving.
That's four minutes gone in the round.
Well. There's a bit of a lull in the action here and the crowd are starting to get restless.
Nightmare might have to switch it up a bit here because his efforts to control Atherton haven't been going to plan, at least at the current moment in time.
Nightmare prevents Atherton from getting back to his feet.
We may be looking at a referee standup if the pace doesn't pick up soon.
Atherton keeping moving, preventing Nightmare from controlling successfully.
The referee has motioned to the fighters to stand back up.
Nightmare shoots in for a takedown - he's clinched up with Atherton but Atherton pushes him off and we're back to square one.
Boooooooooooooooooooo!!! God, this has been a terrible round. Come on you two, sort yourselves out!
Nightmare shoots in with a takedown attempt and he has Atherton pinned against the cage. Atherton gets the underhooks and manages to circle away.
And that is the end of the round. The fighters go back to their corners.
Cody Nightmare dominated that round.
The minute break is over - no more time for sponges and pep talks - back to the action!
Atherton swings and misses with a hook to the body.
Nightmare closes this distance looking for a takedown but Atherton circles away.
Atherton keeps the fight on the outside.
Atherton misses with a hook. Nightmare ducked under it nicely.
Atherton misses with a looping left.
A jab from Nightmare misses.
It looked like Atherton was trying to counter with a body shot coming off that last attack from Nightmare.
Nightmare slips a jab from Atherton.
Atherton avoids the head kick by Nightmare.
Atherton throws a body shot but no joy.
We've had a slow start to the round here - hopefully the action picks up.
Atherton throws a hook to the body but it doesn't connect.
Atherton throws a body punch but Nightmare moves out of range.
Nightmare clinches up against the cage.
Nightmare's corner are urging him to control the action in the clinch for a moment, rather than mount any serious offense. I'm sure the crowd appreciate those instructions... not.
That's one minute gone in the round.
Atherton working hard to break the clinch.
Nightmare pulls Atherton into guard.
Nightmare trying to control the position.
Nightmare throws his legs up looking to secure a triangle. Oh, that looks pretty tight, I gotta say! Atherton escapes and throws Nightmare's legs to the side, diving into side control!
Nightmare tries to get back to half guard but can't.
That's two minutes gone in the round.
Atherton wants to stand but Nightmare is controlling his arm.
Atherton tries to stand but Nightmare controls the position and pulls Atherton into his guard.
Nightmare trying to control the position.
Nightmare wants to control but instead he gets his guard passed and Atherton is now in half guard.
It looks like Atherton is going to stand back up.
Nightmare has no desire to be mounted, so is trying to control. Atherton is working away from the top position though.
That's three minutes gone in the round.
The fighters are battling for position here. Nightmare manages to regain full guard. Nice work.
Nightmare wants to get back to his feet but Atherton is in a dominant position and won't allow it.
Nightmare looking for submissions from the bottom here. Moving his hips around, possibly looking for an armbar.
Nightmare is trying to control the position from the bottom.
Atherton wanted to stand there but Nightmare had control of the position.
The referee decides to stand the fighters back up.
Cody Nightmare seems to be the more aggressive standup fighter in this bout.
That's four minutes gone in the round.
A lull in the action here being met with boos from the crowd.
Nightmare tries to clinch but is not successful on this occasion.
An attempted straight right counter from Atherton misses the target.
Nightmare shoots in looking for a takedown. Atherton tries to sprawl out of it but Nightmare keeps driving through. The fighters are pinned against the cage. Atherton manages to get underhooks and after a bit of a struggle, circles away and we're back to standing.
Atherton was looking to counter that move with a punch but didn't quite pull the trigger.
Atherton throws a monster uppercut resembling something out of street fighter but it doesn't land.
Nightmare unleashes a big counter combination but Atherton bobs and weaves and avoids any damage.
A big right from Atherton misses.
Nightmare tries for a takedown but Atherton sees it coming a mile off and avoids it easily.
Atherton is looking for a counter combo.
Mark Atherton has stuffed three takedown attempts in the round now. That's going to take a lot out of Cody Nightmare.
Nightmare lunges in with swinging rights and lefts but Atherton circles away quickly and effectively.
Boooooooooooooooooooo!!! God, this has been a terrible round. Come on you two, sort yourselves out!
Nightmare misses with a series of wild punches.
Nightmare tries for a takedown but Atherton sees it coming a mile off and avoids it easily.
And that is the end of the round. The fighters go back to their corners.
That was a close second round but I would say that Mark Atherton will probably get the nod.
The fighters' corners scream their final instructions, as the referee calls time. Here we go, back to the action! This is the final round!
Nightmare tries to shoot in for a takedown. He's got hold of a leg but Atherton swivels and escapes.
Nightmare closes the distance and clinches.
Nightmare tries to pull guard but can't drag his opponent to the mat. Atherton just stands there and leans against the cage.
Atherton working hard to break the clinch.
Atherton tries to break the clinch but Nightmare is controlling the position.
Atherton has had enough of the clinch but Nightmare keeps him there for the moment.
Nightmare escapes the clinch and we're back to striking.
We've had a slow start to the round here - hopefully the action picks up.
Nightmare shoots in and drives through. Atherton sprawls well.
Atherton is looking to counter punch.
Mark Atherton has stuffed three takedown attempts in the round now. That's going to take a lot out of Cody Nightmare.
Nightmare tries to score a power double leg takedown but Atherton sees that one coming and sprawls well. That will dishearten Nightmare somewhat.
That's one minute gone in the round.
Nightmare will need to close the distance a bit before he attacks - that leg kick was thrown from too far away.
Nightmare looks frustrated there after his takedown attempt is stuffed easily.
A little feinted left hand from Atherton on the counter but he doesn't commit to it.
Atherton throws a monster uppercut resembling something out of street fighter but it doesn't land.
Nightmare darts in and lands a nice takedown into half guard.
Atherton pushes Nightmare off looking to stand but Nightmare dives back in and keeps control.
Nightmare wants to control but Atherton is keeping him busy.
Nightmare is just content to waste time from the top position. Atherton takes advantage of the situation and regains full guard.
That's two minutes gone in the round.
Nightmare wants to pass the guard but Atherton is keeping the position.
Nightmare trying to control but Atherton is working from the bottom.
If this pace continues, the referee will definitely step in and force a standup.
Nightmare throws an elbow that misses. Atherton uses the momentum to reverse the position. He's now in Nightmare's guard. Nice move by Atherton!
Cody Nightmare has got the better of the ground game so far.
Nightmare is working actively off his back, looking to secure an arm or perhaps work for a triangle.
Nightmare is looking for a triangle here but Atherton uses the submission attempt to pass into side control.
That's three minutes gone in the round.
Nightmare can't do much from the bottom here.
Nightmare is positioning himself to get back to half guard.
Atherton tries to stand but Nightmare is controlling his head.
The ref warns both fighters not to hold the cage as they work up against the meshing.
That's four minutes gone in the round.
The crowd are hurling abuse towards the fighters... You can hardly blame them though because there isn't a lot going on in the fight.
Nightmare is trying to get back to his feet.
Nightmare trying his best to control but Atherton has mounted him.
Nightmare tries to lock up and control but Atherton gives him a forearm to the face and pushes him away.
Atherton controlling the pace for now.
Boooooooooooooooooooo!!! God, this has been a terrible round. Come on you two, sort yourselves out!
Nightmare tries to hold on but Atherton postures up.
And that's the end of the fight!
Mark Atherton showed his dominance in that final round.
I think Atherton has won this one but let's see what the judges have to say. Over to the ring announcer for the scorecards.
Ladies and gentlemen, after 3 rounds of action, we go to the scorecards for a decision.
Judge Hirohito Nitta scores the fight 29:28
Judge Shigeki Sano scores the fight 29:28
Judge Yuuki Gou scores the fight 29:28
In favor of your winner, by unanimous decision... Mark Atherton!
A relieved looking Mark Atherton thanked the fans for their support and gave the usual line about them being amazing. They seemed to believe that he actually meant it.
|
|
|
|
|
|
|
|
|
|
|
|
|
|
|
|
|
|
|
|
|
|
|
| S |
C
A |
G |
S |
C
B |
G |
|
S |
C |
G |
|
energy
A | B |
|
hype
A | B |
|
pop
A | B |
|
mgr
A | B |
|
FIGHT
RATING
23% |
|
|
|
|
|
|
|
Main event
|
Coming up we have a light heavyweight MMA rules bout between Marko Novakovic (ranked 2278 p4p, 4321 weight class) and Bennie Howard (ranked 261 p4p, 434 weight class). Bennie Howard looks lathargic as he enters the arena. Wake up son, you're about to have a fight!
 |
|
 |
| 195 cm
25
216
2 - 0 - 0 |
|
192 cm
25
213
0 - 0 - 0 |
BJJ White Belt
Excellent MT
Big right hand |
|
BJJ Blue Belt
Solid Muay Thai
Solid chin |
|
| |
|
Ladies and gentlemen. This fight is 3 rounds, in the light heavyweight division.
Introducing the fighter to my left, fighting out of the red corner.
With a record of 2 - 0 - 0, fighting out of St Petersburg, Marko Novakovic!
And introducing the fighter to my right, fighting out of the blue corner.
With a record of 0 - 0 - 0, fighting out of New York, Bennie Howard!
The judges for this bout are Yukihiro Yamamoto, Hirohito Nitta and Yasuomi Hirokawa.
The bell rings for round one and we are underway!
Novakovic takes the fight into the clinch.
Novakovic misses with a shot to the kidneys.
Howard prevents a body shot from Novakovic.
Howard tries to land a knee to the head but misses.
Novakovic scores with a shot to the side of Howard's head.
It looks like Bennie Howard has been cut.
With the fighters clinched against the cage, Novakovic creates a bit of distance for himself and scores with a nice uppercut.
Novakovic working on landing some head shots here - that one got through nicely.
Howard looks like he'd prefer to be striking at range right now.
A right handed body shot lands from Novakovic.
A hook to the body from Novakovic.
Howard looks winded!
A quick uppercut on the inside from Novakovic.
Novakovic lands a right uppercut that snaps the head of Howard backwards.
Novakovic drops to a knee looking for a takedown but Howard gets the underhooks and prevents it.
Good anti-grappling being displayed by Novakovic as Howard tries to tie him up.
Novakovic lands a shoulder strike that jolts his opponent's head backwards.
The crowd are loving this. Great action here.
Novakovic lands a right hand.
A short right hand to the side of the head by Novakovic.
Novakovic lands with a short punch from the clinch.
Novakovic scores with a shot to the side of Howard's head.
A short right from Novakovic on the inside.
That's one minute gone in the round.
A left hand lands to the body for Novakovic.
Novakovic scores with a nice hook to the head.
Howard is rocked!
Novakovic lands a big right hand that drops Howard! The killer instinct kicks in and Novakovic finishes his opponent with a series of strikes from mount. A dominating finish by Novakovic!
Ladies and gentlemen, after 1:16 of round 1, we have a winner by way of TKO (Strikes). Marko Novakovic!
An out of breath Marko Novakovic thanked his loyal fans in his post fight interview, giving them credit for his success over the course of his career.
|
|
|
|
|
|
|
|
|
|
|
|
|
|
|
|
|
|
|
|
|
|
|
| S |
C
A |
G |
S |
C
B |
G |
|
S |
C |
G |
|
energy
A | B |
|
hype
A | B |
|
pop
A | B |
|
mgr
A | B |
|
FIGHT
RATING
77% |
|
|
|
|
|
|
|
|
|
|
