|
TWGC 41 (170lbs, D2): Rio de Janeiro Qu - Round 1 PBP Commentary |
Undercard bout
|
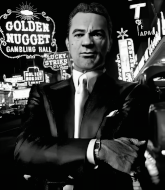
This TWGC bout is 1 fifteen minute round in the welterweight division. Introducing today's competitors. In the red corner, competing out of Los Angeles, with a TWGC record of 37 wins and 9 losses; Gino Gambini! And in the blue corner, fighting out of Hilo, with a TWGC record of 2 wins and 0 losses; Manta Ray!
The judges for this bout are Emerson Jorge, Leandro Rodrigues and Luis Engracia.
The fighters connect hands in the middle of the mat and we are under way.#CL#
Gambini moves into the clinch.
Ray fails to pull the fight into his guard.
#TD#
Gambini lands a nice trip takedown into half guard.
Score +2 for takedown into guard / half guard: Gambini (2) vs (0) Ray
Gambini wants to free his trapped foot but Ray is holding on for dear life with his legs.
The referee calls for the fighters to work.
Ray trying to control here.
Gambini is working hard to pass the guard. He's done it - he's now in full mount! Trouble for Ray! Score +3 for passing guard: Gambini (5) vs (0) Ray
Gambini tucks in and makes sure he doesn't lose the dominant position.
Gambini has controlled the position for a good 20 seconds, which will no doubt be starting to frustrate his opponent.
We've had a slow start to the round here - hopefully the action picks up.
Gambini's ground tactics aren't going to win him many fans. Let's hope he's got fireworks for us if he gets back to his feet because he's not doing much on the ground.#T1#
Ray holds on for dear life, controlling Gambini's posture momentarily.
Ray is wriggling around trying to escape.
Ray tries to lock up and control but Gambini gives him a forearm to the face and pushes him away.
Ray can't escape the position.
Gambini controlling from mount.
Gambini wants to take Ray's back here but Ray is holding on to an arm, himself looking to escape.
Gambini controlling the pace for now.
Gambini continues to stall.#T2#
More hug and hope from Gambini.
Ray is trying to escape the mount but Gambini keeps good control and instead manages to take Ray's back.
Score +3 for taking back: Gambini (8) vs (0) Ray
Ray is defending well here and trying to improve his position.
Gambini keeps control of the position easily here as Ray tries to buck him off.
Further stalling from Gambini.#T3#
Ray wants to escape the position.
Gambini keeps control of the position easily here as Ray tries to buck him off.
Ray tries to break free.
You know, I was talking to some of our celebrities at ringside tonight and they were split right down the middle on who was going to win this fight.
This is a sustained period of stalling by Gambini.#T4#
If it seems like I'm not saying a lot, it's just because Gambini is stinking the place up with his stalling.
Gambini continues to hold on tight.
The fighters are pressed up against the cage, both looking to find a bit of space to work.
Gambini has the hooks in. Ray is trying to push off one leg but he has to do so cautiously to avoid being submitted.
Gambini will need to keep those long limbs tucked in whilst he's on the ground, to prevent any submissions.#T5#
Gambini really has the hooks in deep now - there seems like no escape for Ray.
Ray tries to roll but Gambini sticks to his back.
#T6#
Gambini controls the action.
Ray tries to roll but Gambini sticks to his back.
A bit of a pause in the action here. Gambini controlling the positon.
Gambini is trying to stick to Ray's back but Ray is turning into Gambini. He's managed to reverse the position - now he's in Gambini's guard. Polite applause from the crowd in appreciation of some nice Jiu Jitsu by Ray. Score +2 for sweep to guard / half guard: Gambini (8) vs (2) Ray#T7#
Gambini keeping full guard, as Ray tries to pass.
Gambini has Ray pulled in close to control his posture.
Gambini keeping moving, preventing Ray from controlling successfully.
Gambini has a closed guard, preventing anything of note from happening. Perhaps he's looking to stall.
Gambini looking to hit a scissor sweep but Ray is one step ahead there. #T8#
Gambini is controlling Ray's posture.
Ray wants to control from the top but Gambini keeps moving.
Gambini controlling Ray's posture.
Ray passes into half guard.
Gambini is controlling Ray's position as best he can from this difficult position.#T9#
Ray prevents Gambini from improving his position.
Ray wants to control but Gambini is keeping him busy.
Ray wants to pass to mount but Gambini is defending the position. #SUB2#
Ray seems to be looking for submissions.
Gambini controlling the position for now.
Gambini is not content to let Ray control the position.
Gambini controlling the position well. #T10##SUB2#
Ray is trying to work for a kimura. This could be trouble! No, Gambini has managed to free his arm - good work.
Ray is stalling here. Gambini is in no mood to hang around though. He's locked up a kimura from the bottom! Ray seems to be keeping calm but he's forced to roll out of the hold and Gambini has ended up in side control on the top. Nice work. Score +4 for clean sweep to past guard: Gambini (12) vs (2) Ray
Gambini taking a breather here.
Ray is trying to improve his position.#T11#
Gambini staying calm.
Ray tries to improve position but can't. #T12#
Gambini is staying tight to Ray's torso, preventing him from escaping.
Ray is looking for a sweep.
Gambini in side control, just content to control the action for now.
Ray is looking for a sweep.
Gambini is pausing for a moment. What's he doing? It looks like he's clearing his nose. Oh dude! He's shot a load of snot all down Ray's shoulder. That is not cool. #T13#
Ray is trying to get back to half guard.
A lull in the action here as Gambini stalls from top position.#T14#
Ray manages to work his way to half guard, despite Gambini's best efforts.
Gambini is controlling the pace.
Gambini moves into full mount! Ray won't be happy about that! Score +3 for passing guard: Gambini (15) vs (2) Ray
Gambini moves to take his opponent's back. Score +3 for taking back: Gambini (18) vs (2) Ray
Boooooooooooooooooooo!!! God, this has been a terrible round. Come on you two, sort yourselves out!
Ray is being controlled on the ground here - he must escape this position otherwise surely the end is near.
And that's the end of the fight!
Gambini takes the fight on points by 18 to 2.
A victorious Gino Gambini thanked his army of followers in his post fight interview, telling people to make sure they follow him on Twitter. |
|
|
|
Undercard bout
|
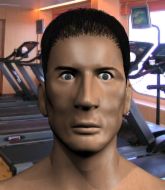
This TWGC bout is 1 fifteen minute round in the welterweight division. Introducing today's competitors. In the red corner, competing out of Las Vegas, with a TWGC record of 0 wins and 1 losses; Larry Salad Dressing! And in the blue corner, fighting out of Rio de Janeiro, with a TWGC record of 0 wins and 0 losses; Mr Bean!
The judges for this bout are Mauricio Rocha, Matheus Silva and Daniel Cesar.
The official calls the fighters to the middle and the contest is under way.#CL#
Salad Dressing gets a clinch. #TD#
Salad Dressing gets control of Bean's arms and successfully pulls guard. Salad Dressing will no doubt be looking for submissions off his back.
Bean is frustrating his opponent with some stalling tactics from top position.
Salad Dressing is trying to keep Bean in close.
We've had a slow start to the round here - hopefully the action picks up.
Bean is frustrating his opponent with some stalling tactics from top position.
Salad Dressing has his hands on Bean's head, controlling the position. #T1#
Salad Dressing tries to land a sweep but no joy.
Salad Dressing looking to control the pace of the fight rather than finish it.
Bean trying to control but Salad Dressing is working from the bottom.
Bean won't allow Salad Dressing to sweep him here.
The ref warns both fighters not to hold the cage as they work up against the meshing.#T2#
Bean trying to control the position from guard on top but Salad Dressing is wriggling around, looking for whatever he can.
Bean wants to pass the guard but Salad Dressing is keeping the position.#SUB#
Salad Dressing is working actively off his back, looking to secure an arm or perhaps work for a triangle.
Bean trying to control but Salad Dressing is working from the bottom.
Bean told us pre-fight that he has been working on his escapes in training. Let's see if he can call on some of his new skills to get back to his feet.#T3#
Salad Dressing looking to control.
Bean controlling from the top position.
Salad Dressing is pulling down on Bean's head to control his posture.
Bean is stalling in the full guard. #T4##SUB2#
Bean drops back looking for a submission - "I'm sorry sir, but I'm gunna break your leg" says Bean as he cranks on the unfortunate limb! Salad Dressing screams and taps out before any major damage is done! Don't mess with Bean! Nice submission victory there!
Ladies and gentlemen, after 4:46 of round 1, we have a winner by way of Submission (Kneebar). Mr Bean! |
|
|
|
Co-main event
|
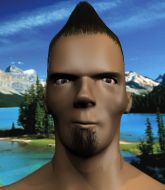
This TWGC bout is 1 fifteen minute round in the welterweight division. Introducing today's competitors. In the red corner, competing out of Tokyo, with a TWGC record of 0 wins and 0 losses; DeShawn West! And in the blue corner, fighting out of New York, with a TWGC record of 2 wins and 1 losses; Jack Nice!
The judges for this bout are Matheus Silva, Felipe Paraventi and Luis Engracia.
The official calls the fighters to the middle and the contest is under way.#CL#
West drives through and clinches with Nice against the cage.
#TD2#
Nice has moved round to his opponent's back and is looking for a suplex! Oh snap! He's tossed West clear over his head and slammed him to the mat! Score +4 for clean takedown past guard: West (0) vs (4) Nice
We could do with one of the fighters taking the initiative a bit more on the ground - they're both waiting to capitalize on a mistake.
West is keeping busy.
Nice wants to control the position but West frees himself and scrambles - Nice manages to regain control in side control.
#SUB2#
Nice tries for a kimura but West is defending well.
Nice happy to just control the position for now.
We've had a slow start to the round here - hopefully the action picks up.
West tries to buck Nice off but Nice is having none of it.#T1##SUB2#
Nice tries for a kimura. Not really close to a finish though.
West is being controlled here.
Nice wants to control but West is keeping him busy.
Nice tries to cartwheel into mount but he doesn't manage it.
Nice is looking to take a break and control but West is keeping him honest, looking to work from the bottom. #T2#
West stops Nice from passing to mount.
West tries to bench press Nice off him but Nice keeps the position.
West is trying to escape the position but Nice is controlling the position.
Nice works to advance to full mount. West defends for a few seconds but eventually he succumbs. Score +2 for reaching mount: West (0) vs (6) Nice
Nice controlling from mount.
Nice can't control as he wanted to and West manages to get the fight back to his half guard. #T3#
Nice trying to control the pace.
Nice trying to pass the guard but West defending well.
West is looking to improve his position.
The fighters are pressed up against the cage, both looking to find a bit of space to work.
Nice controlling the pace. #T4#
Nice moves into full mount! West won't be happy about that! Score +3 for passing guard: West (0) vs (9) Nice
The fighters are starting to perspire pretty heavily.
Nice tries to control but West wriggling away.
West might be looking to lock onto one of his opponent's long limbs for a submission, whilst we're on the ground.
Nice controlling from mount.
West is trying to escape the mount.
#T5#
Nice sitting in mount, just looking to control for the moment. #SUB2#
Nice goes for an armbar but he's fallen flat on his backside there and now West is on top in guard.
Score +2 for sweep to guard / half guard: West (2) vs (9) Nice
West sitting in guard, not really doing much. #SUB2#
Nice is looking for a guillotine. You can't force these things though and West defends well.#T6##SUB2#
Nice working from the bottom, still in full guard. He's managed to get a loose triangle. West doesn't seem to be doing much to defend here, obviously he feels comfortable in the position. West manages to throw the legs off his shoulder and he's back into guard - no problem.
West pressing down on his opponent's thigh, looking to pass guard. Nice is keeping the position for now. #SUB2#
Nice has a loose triangle. He'll be looking to tighten that up but West can see exactly what he's planning and manages to posture up and free himself.
There's a bit of a scramble here and now Nice is on top in guard.
Score +2 for sweep to guard / half guard: West (2) vs (11) Nice#T7#
Nice stands up and looks to throw the legs aside to pass to side control. West swivels though and keeps the full guard.
Nice engaging in some classic timewasting tactics.
West wants to sweep here but Nice controlling him for the moment.
West keeping full guard, as Nice tries to pass. #T8#
Nice trying to control the position from guard on top but West is wriggling around, looking for whatever he can.
Nice controls the pace of the fight for a moment.
Nice stands and throws West's legs to the side, diving into side control. Score +3 for passing guard: West (2) vs (14) Nice
Nice slows the pace down.
Nice tries to advance to mount but can't. #T9#
Nice controlling the position.
Nice tries to move to mount but West blocks the move with his legs.
Nice trying to control the position but West is working away. #SUB2#
Nice looking for an arm triangle but it's way too loose to do anything.
West trying to remain calm as Nice controls from the top position.#T10#
Nice advances to mount. Score +2 for reaching mount: West (2) vs (16) Nice
Nice wants to control the pace but West is squirming around nicely.
Nice tries to take his opponent's back but West turns with him and manages to move into guard on the top. Nice work. Score +2 for sweep to guard / half guard: West (4) vs (16) Nice
West preventing the sweep. #T11#
Nice is trying to keep West in close.
Our spies down at at Ironbound MMA inform us that Nice has really been working on his submissions in the buildup to this fight. Will it pay off?
Nice working a defensive guard but West manages to pass into side control anyway.
Score +3 for passing guard: West (7) vs (16) Nice
Nice tries to improve position but can't.
West controlling the position.
Nice is looking for a sweep.#T12#
Nice is persisting with the attempt to improve his position.
Well,West is on his way to losing a decision here. Can he use his experience to pull something off in the closing minutes?
Nice is not content to let West control the position.
Nice tries to buck West off but West is having none of it.#T13#
West taking a breather here.
Nice is positioning himself to get back to half guard.
West trying to control the action but Nice is working from the bottom.
Nice is trying to control West's posture but West avoids it. #T14#
Nice is moving his hips around well on the bottom and has managed to get back to half guard.
West moves into full mount! Nice won't be happy about that! Score +3 for passing guard: West (10) vs (16) Nice
West wants to control but instead Nice manages to regain half guard.
Nice is looking to improve his position.
Boooooooooooooooooooo!!! God, this has been a terrible round. Come on you two, sort yourselves out!
Nice slips a foot under and gets full guard. Nice work.
Nice looking to sweep here. No luck so far.
And that's the end of the fight!
Nice wins on points by 16 to 10.
A very excited looking Jack Nice made sure he remembered to thank all the fans both in the arena and on the internet. He said all the coolest people spend all day on MMA websites, which got a big reaction. |
|
|
|
Main event
|
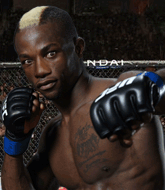
This TWGC bout is 1 fifteen minute round in the welterweight division. Introducing today's competitors. In the red corner, competing out of St Petersburg, with a TWGC record of 0 wins and 0 losses; Remi Johnson! And in the blue corner, fighting out of Hilo, with a TWGC record of 1 wins and 1 losses; Sea Slug!
The judges for this bout are Matheus Silva, Paulo Santos and Daniel Cesar.
The official calls the fighters to the middle and the contest is under way.#CL#
Johnson forces Slug back against the cage and clinches.#TD#
Johnson gets double underhooks and manages to take the fight to the ground. Score +2 for takedown into guard / half guard: Johnson (2) vs (0) Slug
Slug is trying to control the position from the bottom.
Johnson controls the pace of the fight for a moment.
Slug wants to sweep here but Johnson controlling him for the moment.
Johnson is just sitting in guard, looking to avoid any submissions.
We've had a slow start to the round here - hopefully the action picks up.#SUB2#
Slug looking for submissions from the bottom here. Moving his hips around, possibly looking for an armbar.
Johnson controlling from the top position. #T1#
Slug is working an open guard here, looking to improve his position. No doubt that will leave him open to counters but at least he's being more offensive.
Johnson works a leg free and moves into half guard.
Johnson passes the guard and advances to mount! Score +3 for passing guard: Johnson (5) vs (0) Slug
Johnson fails to advance to Slug's back.
Slug regains half guard.#SUB#
Johnson is working for a kimura but Slug is defending it quite comfortably.
#SUB2#
Slug looking to work for a kimura from the bottom.#T2##SUB#
The fighters are going at a pretty good pace and they're both starting to sweat now.
Johnson is trying for a guillotine from the top but the pressure isn't in the right place so Slug is just riding it out for now. Johnson eventually gives up the hold.
Johnson is looking to advance position but Slug won't allow it.
Johnson sitting and controlling from the half guard. #T3##SUB#
Johnson is looking for a kimura but he's never going to get it from there.
Slug manages to get to full guard.
Slug keeping moving, preventing Johnson from controlling successfully. #SUB2#
Slug has an omoplata and is looking to use it perhaps as a submission or perhaps to transition. Johnson is in a bit of discomfort here, but he's managed to free himself and has dived into side control! That didn't work out too well for Slug. Score +3 for passing guard: Johnson (8) vs (0) Slug
Slug struggling a bit here.#T4#
Johnson trying to control the action but Slug is working from the bottom.
The referee asks Johnson politely if he wouldn't mind getting on with it and actually doing something. Johnson prefers to stall for the moment though.
Slug can't do much from the bottom here.
Slug is trying to get back to half guard.
Johnson controls the position.
Slug manages to land a sweep and he's now on top! Lovely Jiu Jitsu! Score +2 for sweep to guard / half guard: Johnson (8) vs (2) Slug
The fighters are pressed up against the cage, both looking to find a bit of space to work.
Slug wants to control but Johnson is keeping him busy.
Slug is looking to advance position but Johnson won't allow it. #T5#
Slug with a momentary lay and pray from half guard.
Slug is stalling here. Johnson is in no mood to hang around though. He's locked up a kimura from the bottom! Slug seems to be keeping calm but he's forced to roll out of the hold and Johnson has ended up in side control on the top. Nice work. Score +4 for clean sweep to past guard: Johnson (12) vs (2) Slug
Slug manages to land a sweep and he's now on top! Lovely Jiu Jitsu! Score +2 for sweep to guard / half guard: Johnson (12) vs (4) Slug
Slug seems very keen to just sit and control from half guard but Johnson does not like that idea so much and is remaining active off his back.
Johnson won't allow Slug to pass to mount.
Johnson has no desire to be mounted, so is trying to control. Slug is working away from the top position though.
Slug trying to control the pace.
Johnson keeping hold of Slug's head, controlling as best he can. #T6##SUB2#
Slug is working for submissions here but there's nothing on.
Johnson is staying active underneath Slug, who seems content to just control the action from this position. #SUB2#
Slug is trying to work for a kimura but Johnson is defending well.
#SUB2#
Slug is working for a kimura here but Johnson manages to reverse the position and he's now in Slug's guard.
Score +2 for sweep to guard / half guard: Johnson (14) vs (4) Slug
Johnson showing good wrestling skills to control the position.
Johnson passes easily into side control. Nice work. Score +3 for passing guard: Johnson (17) vs (4) Slug#T7##SUB#
Johnson looking for an arm triangle but it's way too loose to do anything.
Johnson content to control the pace. The referee will try and keep them active though. #SUB#
Johnson tries for a kimura but Slug is defending well.
Slug manages to get one leg in to regain half guard. #T8#
Slug tries to roll over but Johnson keeps him under control.
Slug slips a foot under and gets full guard. Nice work.#SUB2#
Slug is active off his back here, looking for submissions.
Johnson pushes down on Slug's leg and manages to get into half guard.
Johnson wants to take a breather but Slug is having none of it.
Slug wants to improve his position but Johnson is controlling well.
Johnson sitting and controlling from the half guard. #T9#
Slug trying to hold on to Johnson's head to control him but Johnson postures up.
Johnson works his way into side control. Score +3 for passing guard: Johnson (20) vs (4) Slug#SUB#
Johnson has worked his way into a potential kimura here. Slug is trying to get out of the position but his squirming has just got him deeper into trouble. Johnson yanks on the arm and Slug is forced to tap due to a very painful looking submission! Nice work by Johnson.
Ladies and gentlemen, after 9:52 of round 1, we have a winner by way of Submission (Kimura). Remi Johnson!
Remi Johnson seemed lost for words in his post fight interview but he remembered to thank his fans and directed everyone to his website. |
|
|
|
|
|
|