|
TWGC 41 (170lbs, D2): Sydney Qualifier - Round 2 PBP Commentary |
Co-main event
|
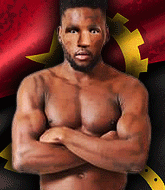
This TWGC bout is 1 fifteen minute round in the welterweight division. Introducing today's competitors. In the red corner, competing out of Los Angeles, with a TWGC record of 2 wins and 1 losses; Paulo Roberto! And in the blue corner, fighting out of Sydney, with a TWGC record of 6 wins and 0 losses; Broady Hallows!
The judges for this bout are Skip Squint, Winston Howard and Steve Erwin.
Let's get this grappling contest under way! Who will be victorious?
Hallows shoots for a takedown but Roberto saw that one coming a mile off and avoided it easily.#CL#
Roberto gets in close and instigates a clinch.
Roberto tries for a takedown. No joy.
Roberto wants a takedown but no success here.
Hallows looking for a takedown.
Roberto is looking to take this one to the mat.
That's three failed takedown attempts in the round for Paulo Roberto. That's going to take a lot out of him.
Hallows prevents the takedown attempt.
Hallows has hold of a leg and is looking for a trip takedown. Roberto avoids it nicely though and we remain in the clinch.
Hallows prevents a takedown attempt there.
Roberto has Hallows pressed up against the cage and is working for takedown. Hallows manages to improve position though and keeps the fight standing. #TD2#
Hallows is trying to trip Roberto. He has hold of a leg but Roberto is hopping around, keeping his balance for the moment. Hallows persists though and gets the takedown into guard. Score +2 for takedown into guard / half guard: Roberto (0) vs (2) Hallows
Roberto is working an open guard here, looking to improve his position. No doubt that will leave him open to counters but at least he's being more offensive.
Hallows looking to pass the guard.
We've had a slow start to the round here - hopefully the action picks up.
Hallows is persisting with the attempt to improve his position.
Hallows stands and throws Roberto's legs to the side, diving into side control. Score +3 for passing guard: Roberto (0) vs (5) Hallows#T1##SUB2#
Hallows goes for an armbar here - this could be all over! But no, Roberto has escaped beautifully and is now on top in side control! Oh, that's unlucky for Hallows but great work by Roberto. Score +4 for clean sweep to past guard: Roberto (4) vs (5) Hallows
Hallows is looking to regain half guard here but Roberto keeps moving and retains side control.
Roberto controls the position.
Hallows tries to slip a leg under to move to half guard but Roberto presses down on the leg and jumps into full mount! Score +2 for reaching mount: Roberto (6) vs (5) Hallows
Hallows is looking to improve his position but Roberto isn't that keen on the idea.
Hallows tries to hold on but Roberto postures up.#T2#
Hallows working to try and regain half guard.
Roberto content just to control the position here.
Hallows keeping his composure momentarily, calmly looking to get back to half guard.
The ref warns both fighters not to hold the cage as they work up against the meshing.
Hallows regains half guard.
Hallows is trying to get back to full guard.#T3#
Roberto passes to side control. Score +3 for passing guard: Roberto (9) vs (5) Hallows
Roberto is maintaining the dominant position - no doubt Hallows will start to get frustrated soon if he's not already.
Hallows is looking for a sweep.
Hallows is still trying to improve position.#T4#
Hallows keeps trying to improve his position.
Hallows is letting Roberto control him for a moment.
Hallows manages to get back to half guard.#T5#
Hallows trying to control from the bottom.
Roberto is just sitting in half guard, waiting for something to happen.
Roberto has controlled the position for a good 20 seconds, which will no doubt be starting to frustrate his opponent.
Roberto prevents Hallows from improving his position.
Hallows trying to control here.
Hallows tries to roll over but Roberto keeps him under control.#T6#
Hallows keeping control of the leg, stopping his opponent passing to mount.
Hallows wants to get back to full guard.
Roberto not doing much here.
Hallows is looking to improve his position.
Roberto content to sit in half guard and control for a moment. #T7#
Hallows works his way to full guard. Good work.
Roberto tries to free his leg and advance position but Hallows is retaining full guard.
Roberto is working hard here to advance position.
Hallows working a defensive guard but Roberto manages to pass into side control anyway.
Score +3 for passing guard: Roberto (12) vs (5) Hallows
Hallows is looking to reverse the position.
The fighters are pressed up against the cage, both looking to find a bit of space to work.
Roberto staying calm.#T8#
Hallows gets back to half guard.
Roberto is just sitting in half guard, waiting for something to happen.
Hallows trying to hold on to Roberto's head to control him but Roberto postures up.
Hallows wants to improve his position but Roberto is controlling well.
#T9#
Hallows is trying to control but can't.
Roberto sitting and controlling from the half guard.
Hallows tries to get to full guard but Roberto has control of the leg. #T10#
Hallows is trying to control but Roberto passes into side control!
Score +3 for passing guard: Roberto (15) vs (5) Hallows
Hallows tries to bench press Roberto off him but Roberto keeps the position.
Hallows looks to move to half guard but instead Roberto has passed into mount! Damn! Score +2 for reaching mount: Roberto (17) vs (5) Hallows
Roberto controlling his opponent.
Hallows can't escape the position.
Hallows sneaks a leg under to get to half guard.
Hallows is trying to get back to full guard.#T11#
Roberto is thwarting Hallows's attempts to control the position.#SUB2#
Hallows with the active half guard here but Roberto passes nicely into side control. Score +3 for passing guard: Roberto (20) vs (5) Hallows
Hallows is looking to reverse the position.
Roberto working away.#T12#
Hallows is looking for a sweep.
A lull in the action here.
Hallows is looking to reverse the position.
Hallows gets one leg under and gets the fight to half guard. #SUB2#
Hallows looking to force a kimura from the bottom here. He's concentrating on that move too much though and Roberto pushes past his half guard into mount! Score +3 for passing guard: Roberto (23) vs (5) Hallows
Roberto content just to control the position here.
Hallows is desperately trying to improve his position but Roberto has a good base and remains in mount.#T13#
Roberto controlling his opponent.
Hallows is looking to improve his position but Roberto isn't that keen on the idea.
Roberto takes a little breather and maintains the position. The referee will be looking for him to stay active from such a dominant position though.
Hallows is wriggling around trying to escape.
#T14#
Roberto controlling his opponent.
Hallows working to try and regain half guard.
Roberto content just to control the position here.
Hallows keeping his composure momentarily, calmly looking to get back to half guard.
Boooooooooooooooooooo!!! God, this has been a terrible round. Come on you two, sort yourselves out!
Roberto controlling his opponent.
And that's the end of the fight!
Roberto takes the fight on points by 23 to 5.
Paulo Roberto decided to hype himself up post fight. It was going well but he went on about it a bit too long and the crowd turned on him a little. |
|
|
|
Main event
|
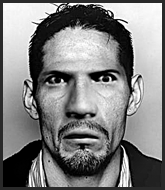
This TWGC bout is 1 fifteen minute round in the welterweight division. Introducing today's competitors. In the red corner, competing out of Hilo, with a TWGC record of 2 wins and 0 losses; Striped Marlin! And in the blue corner, fighting out of Tokyo, with a TWGC record of 1 wins and 0 losses; Hideki Nakamura!
The judges for this bout are Donatello Bradman, Francis DeMontford and Damien Edna.
The official calls the fighters to the middle and the contest is under way.
Marlin wants to clinch.#CL2#
Nakamura instigates a clinch.
Marlin has a body lock and is looking for a takedown. Nakamura is bouncing around trying to prevent the takedown and somehow he has indeed managed to stay on his feet.#TD2#
Nakamura wants the takedown. Marlin is fighting it off but Nakamura persists and manages to bring the fight to the ground, ending up in Marlin's guard against the cage. Score +2 for takedown into guard / half guard: Marlin (0) vs (2) Nakamura
Marlin is trying to keep Nakamura in close.
The ref warns both fighters not to hold the cage as they work up against the meshing.
Nakamura preventing the sweep.
Nakamura is fighting to break Marlin's control of his arms but Marlin is doing a good job of controlling the position at the moment.
We've had a slow start to the round here - hopefully the action picks up.
Marlin controls Nakamura momentarily but Nakamura frees himself.
Nakamura showing good wrestling skills to control the position. #T1#
Marlin controls Nakamura momentarily but Nakamura frees himself.
The fighters are pressed up against the cage, both looking to find a bit of space to work.
Marlin has a closed guard, preventing anything of note from happening. Perhaps he's looking to stall.
Marlin manages to sweep nicely, so he's now on top. Nakamura manages to get himself to full guard.
Score +2 for sweep to guard / half guard: Marlin (2) vs (2) Nakamura
Marlin sitting in guard, not really doing much.
Marlin seems to have a rather negative gameplan on the ground. He seems keen to just score the takedown and hold down Nakamura for as long as he can get away with.#T2#
Marlin looking to pass the guard.
Marlin wants to control from the top but Nakamura keeps moving.
Nakamura controlling Marlin's posture.
Marlin stands up and looks to throw the legs aside to pass to side control. Nakamura swivels though and keeps the full guard. #T3#
Marlin passes Nakamura's right leg, so he's now in half guard.
Nakamura keeping control of the position. #SUB#
Marlin is working for a submission of some sort.
Marlin wants to lay and pray for a moment but Nakamura keeps working. #T4#
Marlin is thwarting Nakamura's attempts to control the position.
Nakamura might have to switch it up a bit here because his efforts to control Marlin haven't been going to plan, at least at the current moment in time.
Marlin keeping composed on the top, looking to control the action.
Nakamura trying to control from the bottom.
Nakamura wants to get back to full guard.
Nakamura trying to control here.
Marlin trying to control from Nakamura's half guard. Nakamura has other ideas though and has regained full guard.
Marlin sitting in guard, not really doing much. #T5#
Marlin wants to control from the top but Nakamura keeps moving.
Marlin controls the pace of the fight for a moment.
Marlin has to be careful here, sitting in the guard of a superior BJJ player.
Marlin continues to stall.
Marlin is looking to advance position but Nakamura has hit a scissor sweep - now he's on top in mount! Score +4 for clean sweep to past guard: Marlin (2) vs (6) Nakamura
Nakamura prevents Marlin from getting the reversal.#T6#
Nakamura avoids the attempt from Marlin to control.
Marlin is desperately trying to improve his position but Nakamura has a good base and remains in mount.
Marlin tries to hold on but Nakamura postures up.
Marlin tries to control the position but Nakamura now has his back.
Score +3 for taking back: Marlin (2) vs (9) Nakamura
Marlin is trying to break free.
#T7#
Nakamura controlling from the back.
Marlin tries to roll but Nakamura sticks to his back.
Nakamura slows the pace down here. Having a little breather whilst he's in a dominant position, looking to rest and regain some energy, ready to go for the finish.
Marlin wants to escape the position.
Marlin is very frustrated here, being controlled quite effectively by Nakamura.
Nakamura keeps control of the position as Marlin tries to break free.
Nakamura really has the hooks in deep now - there seems like no escape for Marlin.#T8##T9#
Marlin controlling Nakamura 's hands.
Nakamura keeps control of the position easily here as Marlin tries to buck him off.
I really don't envy Marlin right now.
A bit of a pause in the action here. Nakamura controlling the positon.
Nakamura gets his hands free as Marlin looks to control. #T10#
Nakamura has the hooks in. Marlin is trying to push off one leg but he has to do so cautiously to avoid being submitted.
Marlin is working hard here to advance position.
Marlin just trying to survive but Nakamura is wriggling into a better position, looking to finish.
Marlin breaks Nakamura's hooks off and manages to turn into his guard.
Score +2 for sweep to guard / half guard: Marlin (4) vs (9) Nakamura
Nakamura pulls Marlin in to control the position.
Marlin sitting in guard here, content to control.
Nakamura bucks up whilst keeping hold of a body lock, managing to reverse the position. Now he's in top in Marlin's guard. Score +2 for sweep to guard / half guard: Marlin (4) vs (11) Nakamura
Marlin being controlled here, momentarily.
Nakamura stopping the sweep attempt from Marlin.#T11#
Nakamura trying to pass the guard but can't manage it just yet.
Marlin trying to control the position.
Nakamura showing good wrestling skills to control the position.
Marlin has a closed guard, preventing anything of note from happening. Perhaps he's looking to stall.
Nakamura's corner is telling him to maintain position.#T12#
Nakamura wants to pass the guard but Marlin is keeping the position.
Marlin is working an open guard here, looking to improve his position. No doubt that will leave him open to counters but at least he's being more offensive.
Nakamura stands up and looks to throw the legs aside to pass to side control. Marlin swivels though and keeps the full guard.
Marlin wants to control the position but Nakamura says "no thanks buddy" and passes to half guard.
Marlin wants to control but Nakamura is keeping busy and won't allow it.
Marlin is looking for a sweep. Nakamura is wise to his cunning plan and keeps the top position.#T13#
Marlin trying to hold on to Nakamura's head to control him but Nakamura postures up.
Nakamura passes into side control, despite Marlin's attempt to control the position.
Score +3 for passing guard: Marlin (4) vs (14) Nakamura
Nakamura working away.
Marlin is positioning himself to get back to half guard.
A bit of a lull in the action. I'm sure it will pick up again soon... even if the ref has to physically pick them up and put them back on their feet. #T14#
Marlin is looking to regain half guard here but Nakamura keeps moving and retains side control.
Nakamura controls the position.
Marlin wants to control but Nakamura postures up.
Marlin is looking to reverse the position.
Marlin is trying to control Nakamura's posture but Nakamura avoids it.
Marlin manages to get one leg in to regain half guard.
Boooooooooooooooooooo!!! God, this has been a terrible round. Come on you two, sort yourselves out!
Nakamura prevents Marlin from improving his position.
Nakamura is taking a breather. Marlin says something to him but it's hard to make out. Perhaps he's telling him to get on with it and actually do something.
And that's the end of the fight!
Nakamura wins on points by 14 to 4.
Hideki Nakamura really struggled to get his t-shirt on before his hand was raised. Making sure that Shadow Realm Apparel logo gets some air time is pretty tricky when you're all sweaty. |
|
|
|
|
|
|