|
TWGC 41 (265lbs, D4): Finals - Round 2 PBP Commentary |
Co-main event
|
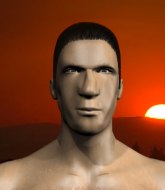
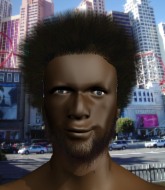
This TWGC bout is 1 fifteen minute round in the heavyweight division. Introducing today's competitors. In the red corner, competing out of Las Vegas, with a TWGC record of 2 wins and 0 losses; Tryon Tao! And in the blue corner, fighting out of St Petersburg, with a TWGC record of 3 wins and 1 losses; Terrance Glover!
The judges for this bout are James Atkins, Phil Schofield and Donald Grub.
Let's get this grappling contest under way! Who will be victorious?
Tao shoots in for a takedown. "Ole!" shouts Glover as he jumps to the side.
Tao tries to shoot in for a takedown. He's got hold of a leg but Glover swivels and escapes.
Glover wants to counter the offense by Tao and move into the clinch position.#CL2#
Glover pushes Tao up against the cage in a clinch.
Glover has dropped down and is looking to force the takedown but it's defended by Tao after a bit of a struggle.
Tao is looking for a takedown up against the cage. Glover gets underhooks though and prevents the takedown attempt.
That's three failed takedown attempts in the round for Tryon Tao. That's going to take a lot out of him.
Glover gets underhooks to prevent Tao's takedown attempt.
We've had a slow start to the round here - hopefully the action picks up.
Tao gets underhooks to prevent Glover's takedown attempt.
Glover stops a takedown attempt from Tao.
Glover wants to take the fight to the mat but Tao manages to get underhooks and keep the fight in the clinch.#T1#
Tao has hold of a leg and is looking for a trip takedown. Glover avoids it nicely though and we remain in the clinch.
Glover is defending well against a takedown attempt.
Glover wants a takedown.
Tao changes levels and goes for a takedown here. Glover fights it off and pushes away nicely.
#CL2#
Glover closes the distance and clinches.
Tao drops down looking for an ankle pick but Glover pulls his leg out and moves away.
#T2#
Tao looks for a takedown here. Will he get it? Glover is fending him off so far but Tao persists. Nope, Glover circles away and we're back to standing.#CL2#
Glover darts in and clinches Tao up against the cage.
Tao is working on a leg, looking for a takedown but Glover is defending well.
Glover looking for a takedown.
Glover has dropped down and is looking to force the takedown but it's defended by Tao after a bit of a struggle.
Glover has dropped down and is looking to force the takedown but it's defended by Tao after a bit of a struggle.
Tao wants a takedown but no success here.
Tao is trying to work for a single leg takedown but Glover pulls him back up using the underhooks. #T3#
Glover looking for a takedown.
Glover is working on a leg, looking for a takedown but Tao is defending well.
Tao wants a takedown but no success here.
Glover is looking to take this one to the mat.
Glover wants to take the fight to the mat but Tao manages to get underhooks and keep the fight in the clinch.
Tao looking for a takedown. #T4#
Glover wants to take the fight to the mat but Tao manages to get underhooks and keep the fight in the clinch.
Tao changes levels and goes for a takedown here. Glover fights it off and pushes away nicely.
Tao is trying hard to land a takedown here. Glover sprawls well and keeps this one on the feet.
Glover wants to counter with a clinch but Tao pushes him away.
Tao is breathing heavily.
Tao goes for a double leg but Glover avoids the attempt and the two fighters end up clinched against the cage as Glover continues to drive forward.
Glover tries to counter by closing the distance.
Glover is looking for a takedown up against the cage. Tao gets underhooks though and prevents the takedown attempt.#TD2#
Glover jumps guard.
We get told so often about how wrestlers don't like to be on their backs. Let's see if Glover can do anything to dispel that myth.
Glover is working an open guard here, looking to improve his position. No doubt that will leave him open to counters but at least he's being more offensive.#T5#
Glover has control of Tao's left arm, preventing Tao from doing any damage.
Tao passes Glover's left leg - he's now in half guard. #SUB2#
Glover looking for submissions from an awkward position here.
Glover keeping hold of Tao's head, controlling as best he can.
Tao perhaps working for something from half guard, or maybe not. It looks like he's just sitting there. #T6#
Glover is positioning himself well to prevent Tao advancing to mount.
Glover is trying to get back to full guard.
Glover wants to control but Tao is keeping busy.
The ref warns both fighters not to hold the cage as they work up against the meshing.#SUB#
Tao is trying a forearm choke� I don't think that's going to do much at this level of the game.
#T7#
Tao takes a deep breath and rests his weight momentarily on top of his opponent, to control the position.
Tao stalling away here and it's allowed Glover to slip out his trapped foot and regain full guard.
Glover is trying to keep Tao in close.
Glover is pulling down on Tao's head to control his posture.
Tao pressing down on his opponent's thigh, looking to pass guard. Glover is keeping the position for now. #T8#
Glover wants to sweep but no luck.
Glover controls Tao momentarily but Tao frees himself.
Glover is working an open guard here, looking to improve his position. No doubt that will leave him open to counters but at least he's being more offensive.
Glover is persisting with the attempt to improve his position.#SUB2#
Glover looking for submissions from the bottom here. Moving his hips around, possibly looking for an armbar.
Glover looking to control the pace of the fight rather than finish it. #T9#
Tao sitting in guard here, content to control.
Glover is avoiding any damage by keeping wrist control.
Glover is working the butterfly guard. He manages to land a nice scissor sweep and is now in half guard on the top. Nice move. Score +2 for sweep to guard / half guard: Tao (0) vs (2) Glover#SUB2#
Glover is thinking about going for an arm triangle but he can't free his leg.
Glover is looking to stall here but Tao recovers full guard. #T10#
Tao looking to control the pace of the fight rather than finish it.
Tao lands a beautiful sweep and he's now moved into his opponent's guard. Score +2 for sweep to guard / half guard: Tao (2) vs (2) Glover
Glover pulls Tao in close to his closed guard and prevents Tao from doing any damage or advancing position.#T11#
Tao stands up and looks to throw the legs aside to pass to side control. Glover swivels though and keeps the full guard.
Tao controlling from the guard. I say controlling but really, he's stalling.
Glover controlling Tao's posture. #SUB2#
Tao avoids a guillotine attempt easily.
#T12#
Tao wants to control from the top but Glover keeps moving.
Tao looking to pass the guard.
Tao is working hard here to advance position.
Glover not looking particularly offensive just at the moment.
#T13#
Tao won't allow Glover to sweep him here.
Tao being controlled here momentarily.
Glover keeping moving, preventing Tao from controlling successfully. #SUB2#
Glover has a loose triangle. He'll be looking to tighten that up but Tao can see exactly what he's planning and manages to posture up and free himself. #SUB2#
Glover has a loose triangle. He'll be looking to tighten that up but Tao can see exactly what he's planning and manages to posture up and free himself.
The fighters are pressed up against the cage, both looking to find a bit of space to work.#T14#
Tao pressing down on his opponent's thigh, looking to pass guard. Glover is keeping the position for now. #SUB2#
Glover escapes his hips to the side and looks to be working for an armbar. Tao gives him a little smile and shakes his head. No chance.
Tao trying to move into half guard but instead Glover has managed to sweep! Score +2 for sweep to guard / half guard: Tao (2) vs (4) Glover
Boooooooooooooooooooo!!! God, this has been a terrible round. Come on you two, sort yourselves out!
Tao is trying to keep Glover in close.
And that's the end of the fight!
Glover wins on points by 4 to 2. |
|
|
|
Main event
|
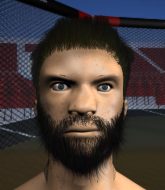
This TWGC bout is 1 fifteen minute round in the heavyweight division. Introducing today's competitors. In the red corner, competing out of New York, with a TWGC record of 2 wins and 4 losses; Douglas Muir! And in the blue corner, fighting out of Los Angeles, with a TWGC record of 3 wins and 0 losses; Harry Nile!
The judges for this bout are James Ackerman, James Glass and Steven Brown.
The fighters bow as they face eachother in the middle of the mat and we are under way.#CL2#
Nile closes the distance and clinches.
Nile looks more muscular than last time we saw him. He must have been on the weights.
Nile tries to take the fight to the ground by pulling guard but can't manage it.
#TD#
Muir decides to pull guard. #SUB#
Muir had isolated an arm as going for a kimura. Nile defends it easily.#SUB#
Muir is looking for a guillotine. You can't force these things though and Nile defends well.
Nile stays in close to Muir's body and controls the position.
We've had a slow start to the round here - hopefully the action picks up.#T1##SUB#
Muir throwing his legs up looking for a triangle.
The fighters are pressed up against the cage, both looking to find a bit of space to work.
Nile is taking a break and basically stalling. The referee will not allow him to do that for long.
Nile is continuing to stall.#SUB#
Muir had isolated an arm as going for a kimura. Nile defends it easily.#SUB#
Muir working for a triangle but Nile defends it easily.
#T2##SUB#
Muir escapes his hips to the side and looks to be working for an armbar. Nile gives him a little smile and shakes his head. No chance.
Muir might be looking to lock onto one of his opponent's long limbs for a submission, whilst we're on the ground.
Nile engaging in some classic timewasting tactics.
Muir keeping full guard, as Nile tries to pass. #SUB#
Muir looking for submissions off his back, moving his hips, looking for an opening.
#T3#
Nile engaging in some classic timewasting tactics.
Let's hope that Nile has the urge to step up the pace any second now because for the last 15 or 20 seconds he's just been holding on tight.
Nile wants to pass the guard but Muir is keeping the position.
The ref warns both fighters not to hold the cage as they work up against the meshing.
Muir is trying to control the position but Nile postures up.
Nile showing good wrestling skills to control the position. #T4#
Nile pressing down on his opponent's thigh, looking to pass guard. Muir is keeping the position for now. #SUB#
Muir working for a triangle but Nile defends it easily.
Muir looking for a sweep. Not yet Muir, not yet.
Nile's corner is telling him to maintain position.
Nile looking to pass the guard.
Nile is persisting with the attempt to improve his position.
Nile is stalling in the full guard. #T5#
Nile stands up and looks to throw the legs aside to pass to side control. Muir swivels though and keeps the full guard.
Muir can't do much from the bottom at the moment, as Nile controls the pace.
Nile trying to pass the guard but can't manage it just yet.
Nile sneaks a leg through and gets to half guard. That was like a knife through butter how easily he passed Muir's guard.
Muir moves his hips nicely and gets into full guard.
Nile slows down the pace of the fight for a moment. He'll need to remain active if he doesn't want to see the fight stood back up. #T6##SUB#
Muir looking for submissions from the bottom here. Moving his hips around, possibly looking for an armbar.
Nile is frustrating his opponent with some stalling tactics from top position.
Muir can't keep his opponent in guard - Nile advances to half guard, no doubt looking to mount.
Muir won't allow Nile to pass to mount.
Muir is trying to control but can't.
Nile wants to pass to mount but Muir is defending the position.
Muir tries to get to full guard but Nile has control of the leg.
Nile looking to pass the half guard. Not this time. #T7##SUB#
Muir is looking to sinch up a guillotine here but Nile pulls his head out easily. #SUB#
Muir actively working from the bottom here.
Muir trying to control here but he's found himself mounted! Oh no!
Score +3 for passing guard: Muir (0) vs (3) Nile
Nile sitting in mount, just looking to control for the moment.
Muir stops Nile from taking his back. Still, being mounted isn't any better.
Nile takes a little breather and maintains the position. The referee will be looking for him to stay active from such a dominant position though.#T8#
Muir really trying hard to get back to half guard here.
Nile controlling his opponent. #T9#
Muir really trying hard to get back to half guard here.
Nile controlling from the full mount.
Muir stops Nile from taking his back. Still, being mounted isn't any better.
Muir tries to control the position but Nile now has his back.
Score +3 for taking back: Muir (0) vs (6) Nile
Muir is very frustrated here, being controlled quite effectively by Nile.
Nile has the hooks in. Muir is trying to push off one leg but he has to do so cautiously to avoid being submitted. #T10#
Nile biding his time, controlling Muir.
Nile not allowing Muir to control his hands.
What can Muir do to escape this position? He's going to have to figure it out pretty quick if he wants to stay in the fight!
Nile is not going to allow Muir to sit and survive in this position.
Nile keeps control of the position easily here as Muir tries to buck him off.
Muir can't escape the position.
Nile keeps control of the position easily here as Muir tries to buck him off.
Muir tries to roll but Nile sticks to his back.
#T11#
What can Muir do to escape this position? He's going to have to figure it out pretty quick if he wants to stay in the fight!
Muir trying to control the hands but Nile won't let him.
Muir is being controlled on the ground here - he must escape this position otherwise surely the end is near.
Nile keeps control of the position as Muir tries to break free.
Nile controlling from the back.#T12#
We're seeing a lot of stalling here from Nile.
Nile is not going to allow Muir to sit and survive in this position.
Nile biding his time, looking for the opening.
#T13#
The adventures of Nile the control monster continue. Boring.
Muir wants to escape the position.
Muir wants to control his opponent's hands but Nile gets his hands free.
Nile is looking cool and calm here, just waiting for a good opportunity to attack and finish the fight from this dominant position.
#T14#
Muir wants to control his opponent's hands but Nile gets his hands free.
Muir breaks Nile's hooks off and manages to turn into his guard.
Score +2 for sweep to guard / half guard: Muir (2) vs (6) Nile
Nile looking to hit a scissor sweep but Muir is one step ahead there.
Muir stands up and looks to throw the legs aside to pass to side control. Nile swivels though and keeps the full guard.
Muir controlling from the guard. I say controlling but really, he's stalling.
Nile looking for a sweep. Not yet Nile, not yet.
Boooooooooooooooooooo!!! God, this has been a terrible round. Come on you two, sort yourselves out!
Nile is avoiding any damage by keeping wrist control.
And that's the end of the fight!
Nile wins on points by 6 to 2.
A victorious Harry Nile thanked his army of followers in his post fight interview, telling people to make sure they follow him on Twitter. |
|
|
|
|
|
|