 |
HFA 8 PBP Commentary |
Undercard bout
|
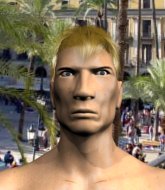
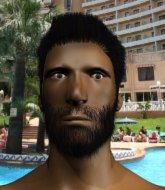
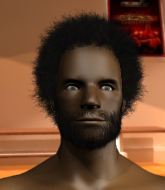
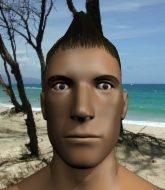
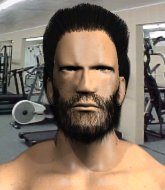
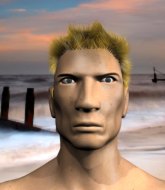
Coming up we have a lightweight MMA rules bout between Nick Chapman (ranked 4395 p4p, 4335 weight class) and Rey Ross (ranked 423 p4p, 416 weight class). We have two fighters making their debuts here, so let's see who comes out of this one with their first professional victory.
 |
|
 |
| 172 cm
18
155
0 - 0 - 0 |
|
178 cm
18
155
0 - 0 - 0 |
BJJ Blue Belt
Counter fighter
Cuts easily |
|
BJJ Blue Belt
Brawler
Solid chin |
|
| |
|
Ladies and gentlemen. This fight is 3 rounds, in the lightweight division.
Introducing the fighter to my left, fighting out of the red corner.
With a record of 0 - 0 - 0, fighting out of Los Angeles, Nick Chapman!
And introducing the fighter to my right, fighting out of the blue corner.
With a record of 0 - 0 - 0, fighting out of London, Rey Ross!
The judges for this bout are Micheangelo Fripello, Ryoma Takatsuka and Chris Saunders.

The bell rings for round one and we are underway!

Ross moves into the clinch.
Ross blocks an uppercut.
Ross prevents a takedown attempt there.

Ross tightens his grip and picks Chapman up, before dumping him to the ground. Chapman manages to land in guard.
Ross trying to control the position from guard on top but Chapman is wriggling around, looking for whatever he can.

Chapman is looking for a guillotine. You can't force these things though and Ross defends well.
Ross is looking to work some ground and pound but Chapman has wrist control.
Chapman is working actively off his back, looking to secure an arm or perhaps work for a triangle.
Chapman working from the bottom, still in full guard. He's managed to get a loose triangle. Ross doesn't seem to be doing much to defend here, obviously he feels comfortable in the position. Ross manages to throw the legs off his shoulder and he's back into guard - no problem.
We've had a slow start to the round here - hopefully the action picks up.
Chapman looking to sweep here. No luck so far.
Ross missing there with some ground and pound from the guard.
Ross loading up with the ground and pound but he's missing more than he's landing in this flurry.
Chapman avoiding any damage from the ground and pound.
Chapman working away from the bottom but not quite defensive enough there because Ross has passed into half guard!

That's one minute gone in the round.
Chapman is looking to sinch up a guillotine here but Ross pulls his head out easily.
Ross working over Chapman with some ground and pound. Chapman looks like he wants out of this position, which is understandable.

Chapman is defending against the submission attempts here by Ross.
Chapman gets full guard.
Ross postures up in Chapman's guard and throws a big left but Chapman blocks it.
The ref warns both fighters not to hold the cage as they work up against the meshing.
Ross throwing strikes from guard but Chapman blocks nicely.
Chapman looking to sweep using the butterfly guard but Ross puts pay to that idea as he passes nicely into half guard.
Chapman tries to roll over but Ross keeps him under control.
Ross is looking for a kimura but he's never going to get it from there.
The fighters are going at a pretty good pace and they're both starting to sweat now.
Ross is looking to take a break and control but Chapman is keeping him honest, looking to work from the bottom.

That's two minutes gone in the round.
Ross throwing punches and elbows but they're not doing any damage.
Chapman tries to get to full guard but Ross has control of the leg.
The fighters are pressed up against the cage, both looking to find a bit of space to work.
Chapman works his way to full guard. Good work.
Chapman is working actively off his back, looking to secure an arm or perhaps work for a triangle.
Ross preventing the sweep.

That's three minutes gone in the round.
Ross advances position into side control!
Chapman parries the strikes from Ross easily there. Ross is wary of posturing up too much because it might enable Chapman to escape.
Ross looking for an arm triangle but it's way too loose to do anything.
Ross working hard here to secure a kimura but he's not really in the right position for it.
Ross wants to lay and pray for a moment but Chapman keeps working.
Chapman is looking for a sweep.
Chapman is sneaking out the side here. He's bucked Ross off and has taken his back!
Chapman lands a couple of good shots to his opponent's body and a final shot to the head. Good little attack there by Chapman.
Ross covers up after that shot from Chapman.
Ross wants to get back to his feet.

That's four minutes gone in the round.
Chapman has his opponent's back and is working for the choke.
Ross trying to get back to his feet but Chapman is in full control for now.
Chapman is working the ground and pound here and the referee is taking a close look at Ross. He must escape soon or this one will be stopped.
The fans in attendance giving it up for the two fighters, who have really let it all hang out in the last minute or so!
Ross grimaces as he takes a shot to the body.
Chapman lands shots from the back.
Ross is trying to get back to his feet but Chapman has full control of the position and if anything, Ross has just worked his way into a worse spot.
Chapman has got his arm under Ross's chin working for the choke� has he got it? It looks pretty tight! Oh! Ross has spun round into Chapman's guard beautifully! Well done that man!
Chapman is active off his back here, looking for submissions.
And that is the end of the round. The fighters go back to their corners.
A close round but Rey Ross will probably get the nod.
Well, the break between rounds is over. Let's get back to the scrappin!

Ross moves away from the strike by Chapman.
Ross throws a right and a left that Chapman avoids nicely.
Chapman swung with a counter right hand that didn't connect.
Ross has Chapman up against the cage in a clinch.
Ross gets double underhooks and manages to take the fight to the ground.
Rey Ross has got the better of the ground game so far.
Chapman is working the butterfly guard. He manages to land a nice scissor sweep and is now in half guard on the top. Nice move.

Ross looks like he's trying to stand up.
We've had a slow start to the round here - hopefully the action picks up.
Chapman is looking for a kimura but Ross is holding onto that half guard position, so it's hard for Chapman to get the leverage.
The referee walks around the fighters to get a better view of the action. Chapman lands a nice short elbow.
Chapman wants to pass the guard but Ross is defending well.
That's one minute gone in the round.

Ross kicks off Chapman and gets to his feet.
Ross's corner calls for a 1, 2 combination and Ross duly obliges.
Ross misses with a head kick.
Chapman is looking to counter the offense by Ross and move into the clinch.
Ross throws a two punch combo that lands nicely.
Chapman slips a jab and a cross from Ross.
Ross is breathing heavily.
Chapman cracks Ross with an open hand slap.
Ross misses with a wild combination.
The fans in attendance giving it up for the two fighters, who have really let it all hang out in the last minute or so!
Ross looks to land a combination but Chapman avoids it well.
An attempted straight right counter from Chapman misses the target.
Ross uses good head movement to avoid the hook from Chapman.
Chapman looks to land a left hand but Ross moved out of range nicely.
Ross displaying good standup as he scores with a three punch combination.
That's two minutes gone in the round.
Chapman showing good head movement there, avoiding the strikes from Ross.
Rey Ross seems to be getting the better of the standup.
Ross tries to bum rush Chapman with a series of wild strikes but Chapman uses good footwork to avoid the assault.
Chapman avoids a punch combination nicely.
Chapman seemed to be looking to counter by closing the distance.
Chapman lunges in with swinging rights and lefts but Ross circles away quickly and effectively.
Ross is looking for the big counter here.
Sloppy strikes from Ross. Those never looked like landing.
Chapman tries to counter by moving into the clinch but Ross manages to circle out of the way.

Chapman scores with a takedown into Ross's guard.
Chapman works a leg free and moves into half guard.
Chapman is looking to pass the guard... He's managed it - he's now in full mount!
The crowd growing excited in anticipation of a finish here! Right on cue, Chapman cracks his opponent with a massive right hand that draws loud cheers!
That's three minutes gone in the round.
Chapman has hold of Ross's left arm, perhaps looking for a submission. The two fighters tussle over control of the isolated limb and Ross manages to get his arm back to his side and away from danger.
Chapman is working on an americana here. Ooh, that looks pretty nasty! Nope, Ross has managed to escape the submission attempt.
Chapman with a couple of short strikes.
Chapman swings around for an armbar but it's a sloppy attempt and Ross is now in Chapman's guard. A big mistake from Chapman there, giving up the dominant position!
Chapman manages to sweep nicely, so he's now on top. Ross manages to get himself to full guard.
Chapman works a leg free and moves into half guard.
Chapman looking to pass the half guard. Not this time.
Chapman uses his free foot to push down on Ross's thigh. Eventually he works his other foot free and he's advanced to mount - this is trouble for Ross.
That's four minutes gone in the round.
Chapman is landing with some decent strikes but Ross is trying to advance his position so the referee is letting the fight continue.
Chapman punishing his opponent with strikes.
This has been an exciting period of action!
Chapman landing strikes, looking to finish!
Chapman is in the full mount, landing strikes.
Chapman scores with a couple of good head shots there.
Chapman landing punches.
Chapman has control of Ross's right arm, working for a kimura. It's a bit of a token attempt though and Ross regains control of the situation pretty easily.
Chapman wants to finish this one by submission but Ross is holding onto his waist, trying to prevent any attacks from Chapman.
The crowd applaud the fighters' efforts here as the round comes to an end.
Chapman raining down hammerfists from mount.
Chapman won't let Ross get back to his feet... He wants to keep the fight where it is for now.
And that is the end of the round. The fighters go back to their corners.
That was a close second round but I would say that Nick Chapman will probably get the nod.
The minute break is over - no more time for sponges and pep talks - back to the action! This is the final round!

Ross closes the distance and pushes Chapman back into the cage.
Chapman working aggressively here.
Ross has clasped his hands together around Chapman's back... aaand, he's got a takedown into side control. Nicely done.
Chapman is looking to reverse the position.
Ross tries for a kimura but Chapman is defending well.
Chapman is looking for a sweep.
Chapman is moving his hips around well on the bottom and has managed to get back to half guard.
Chapman tries to roll over but Ross keeps him under control.
We've had a slow start to the round here - hopefully the action picks up.
Chapman is pressing down on Ross's left leg trying to get back to full guard. He's managed it.
Chapman wants to sweep here but Ross controlling him for the moment.
Ross trying to control the position from guard on top but Chapman is wriggling around, looking for whatever he can.
Chapman throwing his legs up looking for a triangle.
That's one minute gone in the round.
Chapman wants to sweep here but Ross controlling him for the moment.
Chapman working from the bottom, still in full guard. He's managed to get a loose triangle. Ross doesn't seem to be doing much to defend here, obviously he feels comfortable in the position. Ross manages to throw the legs off his shoulder and he's back into guard - no problem.
Both fighters are breathing heavily.
Chapman avoiding any damage from the ground and pound.
Chapman looking to sweep here. No luck so far.
Ross is just sitting in guard, looking to avoid any submissions.
Chapman has his foot on Ross's thigh. He's trying to push off and get in position for a triangle, I think. Ross works his way back into a safe position though.
Ross postures up to throw the ground and pound strikes but they don't connect.
Chapman is working an open guard here, looking to improve his position. No doubt that will leave him open to counters but at least he's being more offensive.
That's two minutes gone in the round.
The crowd are starting to boo a lack of action.
Ross working some strikes from top position.
Chapman looking to sweep here. No luck so far.
Chapman is working the butterfly guard. He manages to land a nice scissor sweep and is now in half guard on the top. Nice move.
Chapman wants to pass the guard but Ross is defending well.
Chapman is nestled in close to Ross, controlling him well. He's worked in a nice elbow to the side of the head as well, for good measure.
Chapman is looking to advance position but Ross won't allow it.
Ross wants to get back to his feet.
Chapman is pressing down on Ross's thigh, looking to free his foot. Ross is holding on for now.
Ross pushes Chapman off and gets back to his feet.
That's three minutes gone in the round.
Ross swings wildly with a couple of big hooks

and Chapman counters into the clinch. Nicely done.
Ross has dropped down and is working for a takedown. Chapman is trying to keep an underhook but Ross manages to get the takedown into half guard.
Chapman tries to get to full guard but Ross has control of the leg.
Chapman gets back to full guard.
Chapman has been looking to land a fair amount of strikes on the ground. He might be looking to soften his opponent up in order to work for a submission.
Chapman looking to hit a scissor sweep but Ross is one step ahead there.
Ross wants to control from the top but Chapman keeps moving.
That's four minutes gone in the round.
Chapman keeping full guard, as Ross tries to pass.
There's a bit of a scramble here and now Chapman is on top in guard.
Chapman is pushing down on Ross's leg trying to pass to half guard. Ross is fighting to maintain full guard but Chapman has managed to sneak the leg through.
Chapman uses his free foot to push down on Ross's thigh. Eventually he works his other foot free and he's advanced to mount - this is trouble for Ross.
Chapman raining down hammerfists from mount.
This has been an exciting period of action!
Chapman jumps to side control looking for an arm triangle but Ross manages to avoid the submission attempt.
Chapman lands a few punches from side control.
Chapman scores with punches from side control.
And that's the end of the fight!
That was a close round. You could make an argument for either fighter but I would give it to Nick Chapman.
I think Chapman has won this one but let's see what the judges have to say. Over to the ring announcer for the scorecards.
Ladies and gentlemen, after 3 rounds of action, we go to the scorecards for a decision.
Judge Micheangelo Fripello scores the fight 29:28
Judge Ryoma Takatsuka scores the fight 30:27
Judge Chris Saunders scores the fight 30:27
In favor of your winner, by unanimous decision... Nick Chapman!
Rey Ross spoke after the fight, saying 'He got lucky , i wanna rematch'.
|
|
|
|
|
|
|
|
|
|
|
|
|
|
|
|
|
|
|
|
|
|
|
| S |
C
A |
G |
S |
C
B |
G |
|
S |
C |
G |
|
energy
A | B |
|
hype
A | B |
|
pop
A | B |
|
mgr
A | B |
|
FIGHT
RATING
55% |
|
|
|
|
|
|
|
Undercard bout
|
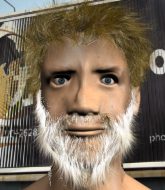
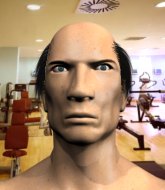
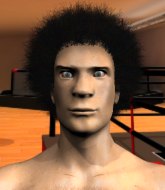
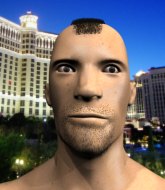
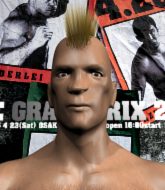
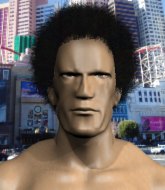
Coming up we have a light heavyweight MMA rules bout between You Gay (ranked 5655 p4p, 5279 weight class) and Chumba Brudda (ranked 510 p4p, 486 weight class). Chumba Brudda has the better chin. Will he look to stand and bang today?
 |
|
 |
| 180 cm
18
204
2 - 2 - 0 |
|
195 cm
18
215
0 - 1 - 0 |
BJJ White Belt
Excellent boxer
Very strong |
|
BJJ White Belt
Excellent boxer
Good gas tank |
|
| |
|
Ladies and gentlemen. This fight is 3 rounds, in the light heavyweight division.
Introducing the fighter to my left, fighting out of the red corner.
With a record of 2 - 2 - 0, fighting out of London, You Gay!
And introducing the fighter to my right, fighting out of the blue corner.
With a record of 0 - 1 - 0, fighting out of St Petersburg, Chumba Brudda!
The judges for this bout are Jeff Smith, Micheangelo Fripello and Paul Gruel.
The bell rings for round one and we are underway!
The fight stays on the outside here - Brudda looks like he's thinking about clinching though.
Gay throws a right hand that Brudda ducks under and follows up with a left that Brudda also avoids with ease.
Brudda fails with a takedown attempt.
Gay appears to be looking for a big counter.
Gay throws a wild combination but nothing lands.
Brudda uses decent footwork to sidestep a right hand from Gay.
Brudda tries to score a power double leg takedown but Gay sees that one coming and sprawls well. That will dishearten Brudda somewhat.
Brudda is trying hard to land a takedown here. Gay sprawls well and keeps this one on the feet.
You Gay has stuffed three takedown attempts in the round now. That's going to take a lot out of Chumba Brudda.
Gay throws a right and a left that Brudda avoids nicely.
We've had a slow start to the round here - hopefully the action picks up.
Brudda doesn't manage to clinch there - Gay circles away.
Sloppy strikes from Gay. Those never looked like landing.
Gay has a nice red mark on his side after a thudding body kick by Brudda.
Brudda shoots in for a takedown but Gay shows good takedown defense.
Brudda slips a jab and a cross from Gay.
That's one minute gone in the round.
Gay misses with a two punch combination.
Brudda is definitely looking for the counter takedowns here.
Brudda tries to clinch up
and Gay counters with a nice jab to the body that keeps Brudda thinking.
Gay scores with a nice one two combo and darts back out of range to avoid anything coming in the opposite direction.
Gay throws a right and a left that both miss.
Gay misses with a jab, cross combination.
Brudda wants to clinch up but Gay keeps it at a distance.
Gay will need to tighten up his combinations if he doesn't want to gas himself out, swinging at thin air.
Brudda looks more muscular than last time we saw him. He must have been on the weights.
Brudda keeping a good distance there, avoiding the body shot.
Gay misses with a double jab
and Brudda counters with a quick right hand to the jaw.
Brudda shoots in but Gay avoids the takedown attempt easily.
Gay is looking light on his feet compared to last time was saw him fight.
Gay throws a combination but it was largely blocked by Brudda.
Gay throws a jab, cross combination which is slipped

and Brudda counters with a crisp one two that drops Gay! Brudda thinks about following him to the mat for a moment but instead steps back and waves Gay to his feet! Gay is in big trouble!
 Gay is rocked! Gay is rocked!
That's two minutes gone in the round.
We've seen a great period of action over the last minute or so - credit to both fighters for going all out!
Brudda connects with a left and a right that sees a clearly hurt Gay covering up! Brudda comes in with a big uppercut and Gay goes doooown! He's slumped up against the cage, eyes staring blankly into space.
Ladies and gentlemen, after 2:06 of round 1, we have a winner by way of KO (Strikes). Chumba Brudda!
You Gay was interviewed post fight and said 'Your not gay'.
|
|
|
|
|
|
|
|
|
|
|
|
|
|
|
|
|
|
|
|
|
|
|
| S |
C
A |
G |
S |
C
B |
G |
|
S |
C |
G |
|
energy
A | B |
|
hype
A | B |
|
pop
A | B |
|
mgr
A | B |
|
FIGHT
RATING
55% |
|
|
|
|
|
|
|
Undercard bout
|
Coming up we have a bantamweight MMA rules bout between Amber Jack (ranked 4691 p4p, 5159 weight class) and William Freeman (ranked 264 p4p, 274 weight class). Jack's ring entrance music is that housewives' favourite, PSA - Jay-Z. Amber Jack has the edge in experience - let's see if he can make that count tonight.
 |
|
 |
| 174 cm
18
142
1 - 1 - 0 |
|
170 cm
18
140
0 - 1 - 0 |
BJJ White Belt
Excellent boxer
Granite chin |
|
BJJ White Belt
Great elbows
Solid chin |
|
| |
|
Ladies and gentlemen. This fight is 3 rounds, in the bantamweight division.
Introducing the fighter to my left, fighting out of the red corner.
With a record of 1 - 1 - 0, fighting out of Hilo, Amber Jack!
And introducing the fighter to my right, fighting out of the blue corner.
With a record of 0 - 1 - 0, fighting out of London, William Freeman!
The judges for this bout are Chris Saunders, Colin Fray and Jeff Smith.
The bell rings for round one and we are underway!
Jack misses with an uppercut.
Freeman tries to clinch but Jack moves out of range.
Jack throws a hook to the side of Freeman's head but Freeman sees it coming and ducks under it beautifully.
Freeman tries to clinch but Jack is having none of it.
Freeman tries to clinch but Jack moves out of range.
Freeman wants to clinch up but Jack keeps it at a distance.
Jack swung with a counter right hand that didn't connect.
Jack digs a good hook to Freeman's body.
Jack misses with a straight right.
Jack has been working on his boxing with his coaches at The Aquarium in the buildup to the fight.
Freeman wants to clinch.
We've had a slow start to the round here - hopefully the action picks up.
Jack scores with the left hand. Freeman knows he should have avoided that one.
 It looks like William Freeman has been cut. It looks like William Freeman has been cut.
Freeman tries to clinch but is not successful on this occasion.
It looked like Jack was looking amped, ready to throw a big counter but didn't commit.
That's one minute gone in the round.
Freeman tries to clinch but Jack moves out of range.
Freeman closes the distance but Jack moves to the side
and Jack counters with a right hand to the body.
Freeman fails with an attempt to clinch.
Freeman tries to clinch up but Jack circles away and keeps his distance.
Freeman moves in looking to clinch but Jack pushes him off.
Freeman tries to clinch
and Jack connects with a straight left hand counter down the middle.
Freeman wants to clinch.
Jack sizes up Freeman with a pawing jab and scores with a straight right down the middle.
Freeman tries to clinch there but Jack circles away.
Jack lands an uppercut out of nowhere! Freeman falls backwards - clearly groggy! Jack dives in and finishes the fight with more strikes for a TKO finish!
Ladies and gentlemen, after 2:05 of round 1, we have a winner by way of TKO (Strikes). Amber Jack!
Amber Jack seemed lost for words in his post fight interview but he remembered to thank his fans and directed everyone to his website.
|
|
|
|
|
|
|
|
|
|
|
|
|
|
|
|
|
|
|
|
|
|
|
| S |
C
A |
G |
S |
C
B |
G |
|
S |
C |
G |
|
energy
A | B |
|
hype
A | B |
|
pop
A | B |
|
mgr
A | B |
|
FIGHT
RATING
39% |
|
|
|
|
|
|
|
Undercard bout
|
Coming up we have a middleweight MMA rules bout between Mikhail Borta (ranked 25638 p4p, 5461 weight class) and Solly North (ranked 522 p4p, 496 weight class). Borta comes to the cage accompanied by HARMASAR "DAOI". Rumors backstage are that the fighters have been paid to keep it standing but we know that would never happen in MMA!
 |
|
 |
| 185 cm
24
190
1 - 2 - 0 |
|
188 cm
18
185
1 - 1 - 0 |
BJJ Blue Belt
Excellent boxer
Big right hand |
|
BJJ Blue Belt
Counter fighter
Solid chin |
|
| |
|
Ladies and gentlemen. This fight is 3 rounds, in the middleweight division.
Introducing the fighter to my left, fighting out of the red corner.
With a record of 1 - 2 - 0, fighting out of St Petersburg, Mikhail Borta!
And introducing the fighter to my right, fighting out of the blue corner.
With a record of 1 - 1 - 0, fighting out of Sydney, Solly North!
The judges for this bout are Colin Fray, Jeff Smith and Ryoma Takatsuka.
The bell rings for round one and we are underway!
Borta sizes up North with a pawing jab and scores with a straight right down the middle.
Borta swings wildly with a couple of big hooks
and North counters with a one-two to the body.
North scores with a decent looking hook.
North throws an ugly left hook that misses
and Borta counters with a good right hand that lands right on the jaw.
It looks like Solly North has been cut.
North throws a shot from downtown. Borta moves away and avoids it.
North sizes up Borta with a pawing jab and scores with a straight right down the middle.
Borta is rocked!
North throws a predictable looking body shot
and Borta cracks him with a counter punch right on the button.
North looks more muscular than last time we saw him. He must have been on the weights.
Borta looks shocked there as he takes a right hand to the temple.
Oh Borta is still all over the place! His legs are completely gone! Will he be able to recover?!!
We've seen a great period of action over the last minute or so - credit to both fighters for going all out!
North misses with a telegraphed body shot
and Borta connects with a straight left hand counter down the middle.
Borta seems to have got his legs back now.
Borta throws a right and a left that both miss.
North looks to score with a jab to the body but Borta is just out of range.
Borta seem to be loading up, looking for a big counter.
That's one minute gone in the round.
North swings widly with a right hand
and Borta counters with a stiff right hand.
North throws a hard body shot but it just misses.
Borta is looking to counter punch.
North throws the left hand but Borta avoids the punch easily.
Borta blocks a jab.
North looks to score with a jab to the body but Borta is just out of range.
The fight moves into the clinch position.
Borta lands punches inside but they're not really causing much damage.
Borta working some nice short punches in the clinch.
With the fighters clinched against the cage, Borta creates a bit of distance for himself and scores with a nice uppercut.
North manages to pull guard. Let's see whether he can land a sub off his back.
That's two minutes gone in the round.
Borta is trying to work a guillotine from the top, or something like that? Don't know how he thinks he's going to get a finish from there.
Borta pressing down on his opponent's thigh, looking to pass guard. North is keeping the position for now.
North keeping moving, preventing Borta from controlling successfully.
Borta has to be careful here, sitting in the guard of a superior BJJ player.
North had isolated an arm as going for a kimura. Borta defends it easily.
Borta looking to pass the guard.
Borta avoids a guillotine attempt easily.
This has been an exciting period of action!
Borta tries to free his leg and advance position but North is retaining full guard.
Borta is trying to work a guillotine from the top, or something like that? Don't know how he thinks he's going to get a finish from there.
That's three minutes gone in the round.
North is throwing his legs up, looking for submissions. Borta is aware though and is defending well.
Borta is trying to work a guillotine from the top, or something like that? Don't know how he thinks he's going to get a finish from there.
North is throwing his legs up, looking for submissions. Borta is aware though and is defending well.
Borta avoids a guillotine attempt easily.
Borta thinks about going for a leg but decides against it, in order to maintain the position.
Borta's corner is telling him to maintain position.
North keeping moving, preventing Borta from controlling successfully.
North is working from a closed guard but he's struggling to control his opponent.
That's four minutes gone in the round.
Borta got a little sloppy there for a moment and North has worked his way into a loose triangle - can he finish it?! No, Borta has managed to get both his arms back between North's legs - danger averted.
North is working actively off his back, looking to secure an arm or perhaps work for a triangle.
North can't do much from the bottom at the moment, as Borta controls the pace.
North is throwing his legs up, looking for submissions. Borta is aware though and is defending well.
Borta pressing down on his opponent's thigh, looking to pass guard. North is keeping the position for now.
Borta is holding a leg here, probably looking for an ankle lock - he drops back and goes for it! North is in trouble! Is it all over??? No! North has escaped and now he's on top!

Borta looking to sweep here. No luck so far.
And that is the end of the round. The fighters go back to their corners.
A close round but Solly North will probably get the nod.
The cut man is working on Solly North's cut.
The fighters' corners scream their final instructions, as the referee calls time. Here we go, back to the action!
North lands a glancing blow to the side of Borta's head.
Solly North seems to be the more aggressive standup fighter in this bout.
Borta connects with a jab.
North throws a big shot that misses.
North lands a pitter patter jab to the forehead of his opponent.
Borta walks into a stiff left hand from North.
Borta gets in close and instigates a clinch.
Borta working on landing some head shots here - that one got through nicely.
We've had a slow start to the round here - hopefully the action picks up.
North is trying to break free.
North successfully pulls guard.
North has a loose triangle. He'll be looking to tighten that up but Borta can see exactly what he's planning and manages to posture up and free himself.
Borta stands up and looks to throw the legs aside to pass to side control. North swivels though and keeps the full guard.
That's one minute gone in the round.
Borta pushes down on North's leg and manages to get into half guard.
Borta is trying to work for a kimura. This could be trouble! No, North has managed to free his arm - good work.
Borta trying to work for an americana but North has managed to regain full guard.
Borta slows down the pace of the fight for a moment. He'll need to remain active if he doesn't want to see the fight stood back up.
North working from the bottom, still in full guard. He's managed to get a loose triangle. Borta doesn't seem to be doing much to defend here, obviously he feels comfortable in the position. Borta manages to throw the legs off his shoulder and he's back into guard - no problem.
North looking for submissions off his back, moving his hips, looking for an opening.
North keeping moving, preventing Borta from controlling successfully.
That's two minutes gone in the round.
Borta controlling from the top position.
Borta trying to control but North is working from the bottom.
North is looking for a guillotine. You can't force these things though and Borta defends well.
Borta has gone for a leg lock! North slips out almost immediately though and dives into Borta's guard.
Borta wants to control but North passes easily into half guard.
North is looking for a kimura here.
That's three minutes gone in the round.
North is keen to just control but Borta is a slippery customer.
Borta slips a foot under and gets full guard. Nice work.
Borta pulls North in close to prevent any damage.
North tries to stand but Borta is controlling from the bottom.
Borta looks to be working for a triangle here. Oh, it looks like he might have it! North has picked Borta up and slammed him! Borta can't keep hold of the triangle and North manages to pass to side control!
North has been the more effective fighter overall so far.
Borta wants to improve his position, back to half guard but North has ideas of his own. He's got hold of Borta's far side arm and it looks like he's got an Americana. Ohh! Ohhhh! OOOOOOOOOH! A human being's arm is not meant to bend like that! Borta is tapping like a morse code operator on the Titanic! SOS SOS! He's out of here! Great win for North!
Ladies and gentlemen, after 4:57 of round 2, we have a winner by way of Submission (Americana). Solly North!
|
|
|
|
|
|
|
|
|
|
|
|
|
|
|
|
|
|
|
|
|
|
|
| S |
C
A |
G |
S |
C
B |
G |
|
S |
C |
G |
|
energy
A | B |
|
hype
A | B |
|
pop
A | B |
|
mgr
A | B |
|
FIGHT
RATING
42% |
|
|
|
|
|
|
|
Undercard bout
|
Coming up we have a featherweight MMA rules bout between Salem Kanno (ranked 3905 p4p, 25652 weight class) and Avery Watson (ranked 287 p4p, 355 weight class). Salem Kanno had real problems making weight for this fight. After initially coming in at 146.0lbs, he had two hours to make the official fight weight. He made it but it will have taken a lot out of him to cut those extra few pounds. Avery Watson has the better chin. Will he look to stand and bang today?
 |
|
 |
| 173 cm
22
150
1 - 0 - 0 |
|
176 cm
24
150
1 - 2 - 0 |
BJJ White Belt
Excellent boxer
Cuts easily |
|
BJJ White Belt
Excellent boxer
Heavy handed |
|
| |
|
Ladies and gentlemen. This fight is 3 rounds, in the featherweight division.
Introducing the fighter to my left, fighting out of the red corner.
With a record of 1 - 0 - 0, fighting out of Los Angeles, Salem Kanno!
And introducing the fighter to my right, fighting out of the blue corner.
With a record of 1 - 2 - 0, fighting out of Los Angeles, Avery Watson!
The judges for this bout are Micheangelo Fripello, Chris Saunders and Josh West.
The bell rings for round one and we are underway!
Watson circles away from the clinch attempt.
Watson gets tackled into the cage by Kanno. Kanno maintains the clinch.
Kanno swings wildly with an uppercut but Watson uses good head movement to avoid it.
Kanno working some nice short punches in the clinch.
Still in the clinch, Kanno scores with a nice short uppercut.
Watson blocks a punch to the side of the head.
Kanno misses with some punches.
Kanno keeps control of Watson as he tries to wriggle out of the double underhooks.
Kanno misses with a punch on the inside.
Watson misses with a hook from the clinch.
Kanno working some nice short punches in the clinch.
A head punch blocked on the inside by Kanno.
Kanno tries a shoulder strike but it doesn't do any damage.
I was talking to Kanno's coach per-fight and he was telling me that they'd been working on the clinch in the runup to this fight.
We've had a slow start to the round here - hopefully the action picks up.
Watson wants to push off and get back to the center of the mat but Kanno has him pressed against the cage.
Watson is trying to work out of this bad position, with his back against the cage.
Watson swings wildly with an uppercut but Kanno uses good head movement to avoid it.
Kanno misses with some punches.
Watson blocks a punch to the side of the head.
Watson wants to stall.
That's one minute gone in the round.
Watson is looking to control Kanno's arms but Kanno gets an underhook and turns him. Now Watson has his back to the cage.
Watson misses with a punch to the body.

Watson breaks the clinch and we return to the middle of the mat.
Kanno has taken the fight to the clinch.
Kanno misses with the head strike.
A head punch on the inside from Kanno fails to land.
Watson throws a punch but it's blocked by Kanno.
Kanno digs a right hand underneath Watson's ribcage. Watson let out a lung full of air as it connected.
A quick uppercut on the inside from Kanno.
Kanno misses with a hook from the clinch.
Watson has had enough of the clinch and is looking to separate.
Watson is trying to work out of this bad position, with his back against the cage.
Kanno tries a shoulder strike but it doesn't do any damage.
Watson wants to break free. God knows he wants to breaaaak freeee.
Kanno throws a punch but it's blocked by Watson.
Kanno tries to land a shot to the body but it's blocked.
Kanno misses with a short punch on the inside.
Watson swings away with an uppercut that misses.
That's two minutes gone in the round.
Watson tries to work over Kanno's body with a swooping hook but it only glances the target.
A real battle for position is taking place between these two warriors.
Kanno misses with the head strike.
Kanno swings wildly with an uppercut but Watson uses good head movement to avoid it.
Watson gets through Kanno's defenses to land a nice punch to the side of the head.
Kanno blocks a punch to the side of the head.
Watson lands a right uppercut that snaps the head of Kanno backwards.
Watson pushes off and circles away, back to the middle of the mat.
Kanno shoots and misses
and Watson counters with a crisp hook to the side of the head.
Kanno is breathing heavily.
The crowd cheering loudly, showing their appreciation for the quality fight we're seeing here.
Kanno tries to clinch up against the cage, rushing in to close the distance. Watson manages to break the clinch and circles back to the middle of the mat.
Kanno gets to the clinch - let's see what his plan is here.
Kanno blocks a body shot from Watson.
Watson is trying to maintain a safe position but Kanno gets an underhook and turns Watson into the cage.
Watson misses with a short punch on the inside.
Kanno can't find room to land a body shot as Watson controls the action.
Watson misses with a punch to the body.
Watson blocks a punch to the side of the head.
That's three minutes gone in the round.
Kanno pushes Watson back against the cage and lands a hook to the side of the head.
Kanno misses with a hook from the clinch.
Kanno blocking some punches.
Watson's corner calls for him to break the clinch, which he does.
Kanno tries to clinch up
and Watson counters nicely by changing levels and landing a hook to the body.
Kanno is pinned up against the cage taking some big shots here. The referee is looking closely deciding whether he should stop the fight.
Watson misses with a takedown attempt - Kanno sprawls well and throws a nice strike on the way out which just misses.
Watson connects with a looping left hand that seems like it dazed Kanno momentarily.
Watson shoots in for a takedown but doesn't get it.
That's four minutes gone in the round.
Kanno on the wrong end of a decent looking cross there.
Watson looks for a takedown but Kanno sprawls well.
Salem Kanno has stuffed three takedown attempts in the round now. That's going to take a lot out of Avery Watson.
Watson has a takedown stuffed.
Kanno tries to grapple but his opponent circles
and Watson counters with a crisp hook to the side of the head.
Horrible takedown attempt by Watson or perhaps it was just good defense by Kanno, which made it look bad.
Fantastic stuff here - a very entertaining period of action, which has drawn cheers from the crowd.
Kanno tries to clinch but Watson is having none of it.
And that is the end of the round. The fighters go back to their corners.
That was a close round but I would say that Salem Kanno will probably get the nod.
The minute break is over - no more time for sponges and pep talks - back to the action!
Kanno closes the distance but Watson moves to the side
letting Watson counter with a right hand.
Kanno tries to clinch
and Watson connects with a straight left hand counter down the middle.
Watson circles away from the clinch attempt.
Kanno moves into the clinch.
Watson swings wildly with an uppercut but Kanno uses good head movement to avoid it.
Watson is trying to maintain a safe position but Kanno gets an underhook and turns Watson into the cage.
Kanno misses with a shot to the kidneys.
Kanno pushes Watson back against the cage and unloads with a body punch.
We've had a slow start to the round here - hopefully the action picks up.
Watson is trying to break the clinch but Kanno has him pressed against the cage.
Watson tries to stall but Kanno uses the opportunity to gain a better position.
Watson tries to throw a body punch but Kanno avoids it by throwing Watson back against the cage.
Watson goes for a body shot but it's blocked.
Watson is trying to work out of this bad position, with his back against the cage.
Both fighters are absolutely exhausted here.
Kanno lands with a short shot to the head.
That's one minute gone in the round.
Watson is trying to break the clinch but Kanno has him pressed against the cage.
Watson is working hard here but doesn't seem to be able to control effectively, up against the cage.
Kanno blocks a punch to the side of the head.
Kanno blocking some punches.
Watson misses with a short punch on the inside.
Kanno throws a punch but it's blocked by Watson.
Kanno throws a head punch that misses.
Watson blocks a couple of punches on the inside.
An uppercut on the inside fails to land for Watson.
The fighters are starting to perspire pretty heavily.
Kanno swings wildly with an uppercut but Watson uses good head movement to avoid it.
Kanno misses with some punches.
Kanno throws a head punch that misses.
Watson has a couple of punches blocked by Kanno.
Watson tries to work over Kanno's body with a swooping hook but it only glances the target.
Watson is trying to slow down the pace of the fight but Kanno is keeping busy.
A head punch on the inside from Watson fails to land.
That's two minutes gone in the round.
Kanno fails to land with a short punch on the inside.
Watson prevents a body shot from Kanno.
Kanno misses with some punches.
Watson working aggressively here.
Watson has had enough of the clinch and is looking to separate.
Kanno can't find room to land a body shot as Watson controls the action.
Watson looks like he'd prefer to be striking at range right now.
Watson tried to land a shot to the body but connects with Kanno's elbow.
Watson throws a head punch that misses.
Watson tries to circle away but Kanno has him pinned against the cage.
Watson working aggressively here.
Kanno prevents Watson from breaking the clinch.
Kanno swings away with an uppercut that misses.
Watson misses with some punches.
Watson misses with some punches.
Watson looks like he'd prefer to be striking at range right now.
With the fighters clinched against the cage, Watson creates a bit of distance for himself and scores with a nice uppercut.
Watson misses with a hook from the clinch.
Kanno swings wildly with an uppercut but Watson uses good head movement to avoid it.
That's three minutes gone in the round.
Kanno throws a punch but it's blocked by Watson.
A real battle for position is taking place between these two warriors.
Salem Kanno has scored more points in the clinch so far.
Watson blocking some punches.
Watson taking a breather.
Watson has a couple of punches blocked by Kanno.
Kanno misses with a hook from the clinch.
A head punch blocked on the inside by Kanno.
Kanno blocking some punches.
Kanno blocks a couple of punches on the inside.
Kanno misses with a punch on the inside.
Kanno has a couple of punches blocked by Watson.
Kanno lands a left hand that snaps the head of Watson backwards.
Kanno misses with some punches.
A frustrated look appears on Watson's face as he tries to break the clinch.
A head punch blocked on the inside by Watson.
Kanno blocks a punch to the side of the head.
Kanno misses with the head strike.
A head punch on the inside from Watson fails to land.
That's four minutes gone in the round.
Watson swings wildly with an uppercut but Kanno uses good head movement to avoid it.
Kanno fails to land with a short punch on the inside.
Kanno tries to land a shot to the body but it's blocked.
Watson misses with some punches.
Watson wants to break free but Kanno has control.
Kanno keeps control of Watson as he tries to wriggle out of the double underhooks.
Kanno fails to land with a short punch on the inside.
Watson wants to get back to striking at distance but Kanno won't allow it.
Watson swings away with an uppercut that misses.
Kanno misses with a shot to the kidneys.
Watson throws a head punch that misses.
Kanno has Watson pressed against the cage, preventing Watson from circling away and getting back to striking at range.
An uppercut on the inside fails to land for Watson.
The crowd thankful this round is nearly over.
Kanno working aggressively here.
An uppercut on the inside fails to land for Watson.
Watson has had enough of the clinch but Kanno keeps him there for the moment.
Watson fails to land with a short punch on the inside.
Watson lands an uppercut.
And that is the end of the round. The fighters go back to their corners.
Avery Watson showed his class in that round. I'd imagine he'll take it on all the scorecards.
The corners get their ten second warning. Both fighters stand from their stools and stare each other down, ready to get back to the action. This is the final round!
Watson misses with a double jab.
Kanno gets a clinch.
Watson tries a shoulder strike but it doesn't do any damage.
Watson is looking to control Kanno's arms but Kanno gets an underhook and turns him. Now Watson has his back to the cage.
Kanno struggles to land a body shot inside as Watson controls his hands.
A frustrated look appears on Watson's face as he tries to break the clinch.
Kanno lands with a right to the head.
Kanno lands with a short punch from the clinch.
Kanno misses with a hook from the clinch.
Watson lands a shot to the body.
Kanno blocks a punch to the side of the head.
Kanno working aggressively here.
We've had a slow start to the round here - hopefully the action picks up.
Watson wants to stall.
Watson misses with a punch on the inside.
Both fighters are breathing heavily.
Watson breaks the clinch.
Kanno tries to clinch up against the cage, rushing in to close the distance. Watson manages to break the clinch and circles back to the middle of the mat.
That's one minute gone in the round.
Kanno is looking to clinch.
Watson looks frustrated there after his takedown attempt is stuffed easily.
Watson circles away from the clinch attempt.
Watson swings away with a counter right hand but no contact made.
Watson tries to score a power double leg takedown but Kanno sees that one coming and sprawls well. That will dishearten Watson somewhat.
Kanno throwing a counter right hand but Watson manages to avoid it.
Kanno tries to clinch but Watson is having none of it.
A nice side step and Watson releases a counter shot to the body, but it doesn't find it's home.
Kanno tries to clinch but is not successful on this occasion.
Watson looks like he wants to counter punch here.
Danga de danga de dang - Watson scores with a four punch combination!
Watson cracks Kanno with a good shot that sees him stumbling back into the cage.
That's two minutes gone in the round.
Kanno on the wrong end of a nice hook.
Watson ducks low and lands a nice hook to the body of his opponent.
Kanno walks into a jab.
Nice body punch from Watson.
Horrible takedown attempt by Watson or perhaps it was just good defense by Kanno, which made it look bad.
Salem Kanno has stuffed three takedown attempts in the round now. That's going to take a lot out of Avery Watson.
Watson fakes high and shoots in for a takedown but Kanno avoids it really well and circles away.
Salem Kanno seems to be the more aggressive standup fighter in this bout.
We've seen a great period of action over the last minute or so - credit to both fighters for going all out!
Kanno avoids the body shot from Watson.
That's three minutes gone in the round.
The fighters circle momentarily. Watson darts into range and connects with a nice straight punch.
Watson with a nice cross.
Watson lands a pitter patter jab to the forehead of his opponent.
Kanno walks into a left hand.
Kanno fails with an attempt to clinch.
Watson has been the more effective fighter overall so far.
Kanno wants to clinch
and Watson connects with a straight left hand counter down the middle.
Watson shoots in for a takedown but Kanno shows good takedown defense.
Watson shoots in and drives through. Kanno sprawls well.
Good shot there by Watson.
That's four minutes gone in the round.
Kanno takes a jab right on the kisser.
Watson lands with a good body shot.
Watson shoots in for a takedown but Kanno shows good takedown defense.
This has been an exciting period of action!
Watson circles away from the clinch attempt
enabling Watson to counter with a crisp jab.
Nice takedown defense from Kanno. No joy for Watson on that attempt.
Kanno looks to clinch
and Watson counters with a nice uppercut.
A really sloppy takedown attempt there from Watson.
And that's the end of the fight!
Avery Watson comfortably won the final round on my scorecard.
I think Watson has won this one but let's see whether the judges agree with me. Over to the ring announcer for the scorecards.
Ladies and gentlemen, after 3 rounds of action, we go to the scorecards for a decision.
Judge Micheangelo Fripello scores the fight 28:29
Judge Chris Saunders scores the fight 28:30
Judge Josh West scores the fight 28:29
In favor of your winner, by unanimous decision... Avery Watson!
|
|
|
|
|
|
|
|
|
|
|
|
|
|
|
|
|
|
|
|
|
|
|
| S |
C
A |
G |
S |
C
B |
G |
|
S |
C |
G |
|
energy
A | B |
|
hype
A | B |
|
pop
A | B |
|
mgr
A | B |
|
FIGHT
RATING
43% |
|
|
|
|
|
|
|
Undercard bout
|
Coming up we have a light heavyweight MMA rules bout between Dobroi Sobaka (ranked 3673 p4p, 4399 weight class) and Monte Leonard (ranked 395 p4p, 436 weight class). Sobaka comes into the arena with White trash X Plenka blaring out of the sound system. On his way into the cage it seems that Dobroi Sobaka has been attacked by a crazed fan! It looks like it might have been the just bleed guy! Luckily Dobroi Sobaka seems to be OK! I thought that lunatic was in prison!?
 |
|
 |
| 190 cm
22
200
3 - 1 - 0 |
|
191 cm
25
210
1 - 1 - 0 |
BJJ Blue Belt
Counter fighter
Big heart |
|
BJJ White Belt
Basic striking
Determined |
|
| |
|
Ladies and gentlemen. This fight is 3 rounds, in the light heavyweight division.
Introducing the fighter to my left, fighting out of the red corner.
With a record of 3 - 1 - 0, fighting out of St Petersburg, Dobroi Sobaka!
And introducing the fighter to my right, fighting out of the blue corner.
With a record of 1 - 1 - 0, fighting out of Hilo, Monte Leonard!
The judges for this bout are Jeff Smith, Chris Saunders and Josh West.
The bell rings for round one and we are underway!
Sobaka looks for a takedown but Leonard sprawls well.
Leonard closes the distance and gets a double leg, slamming Sobaka to the mat! Sobaka manages to get full guard.
Leonard engaging in some classic timewasting tactics.
Sobaka has thrown up a leg looking for a triangle. Leonard doesn't defend quickly enough and Sobaka has managed to lock this one up! Can Leonard escape?! NO! He's tapping out! Damn, that was a quick submission - congrats to Sobaka on a fantastic submission victory.
Ladies and gentlemen, after 0:40 of round 1, we have a winner by way of Submission (Triangle). Dobroi Sobaka!
|
|
|
|
|
|
|
|
|
|
|
|
|
|
|
|
|
|
|
|
|
|
|
| S |
C
A |
G |
S |
C
B |
G |
|
S |
C |
G |
|
energy
A | B |
|
hype
A | B |
|
pop
A | B |
|
mgr
A | B |
|
FIGHT
RATING
100% |
|
|
|
|
|
|
|
Undercard bout
|
Coming up we have a lightweight MMA rules bout between Toe Licker (ranked 3393 p4p, 4811 weight class) and Elijah Highlander (ranked 327 p4p, 445 weight class). There are an array of beautiful celebrities at ringside tonight! I wonder if any of them paid for their tickets.
 |
|
 |
| 175 cm
25
164
2 - 2 - 0 |
|
178 cm
22
162
2 - 1 - 0 |
BJJ White Belt
Excellent boxer
KO power |
|
BJJ Purple Belt
Counter fighter
Powerful |
|
| |
|
Ladies and gentlemen. This fight is 3 rounds, in the lightweight division.
Introducing the fighter to my left, fighting out of the red corner.
With a record of 2 - 2 - 0, fighting out of Montreal, Toe Licker!
And introducing the fighter to my right, fighting out of the blue corner.
With a record of 2 - 1 - 0, fighting out of Sydney, Elijah Highlander!
The judges for this bout are Colin Fray, Ryoma Takatsuka and Chris Saunders.
The bell rings for round one and we are underway!
Licker misses with a jab, cross combination.
Licker swings for the body but Highlander moves out of range.
Licker misses with a double jab.
Licker scores with a shot to the body.
Licker throws a combination but it was largely blocked by Highlander.
Highlander is looking for the big counter here.
Highlander looks more muscular than last time we saw him. He must have been on the weights.
Licker throws a left and a right that both miss
and Highlander counters with a shot to the ribs. That looked like it hurt.
Licker moves out of range of the strikes.
Licker throws a big shot that misses.
It seemed like Highlander was going to counter with the hook but didn't fully commit to it.
Licker will need to tighten up his combinations if he doesn't want to gas himself out, swinging at thin air.
Licker moves out of range of the strikes.
Licker went nuts there looking for a big combo counter but none of the flurry connected.
We've had a slow start to the round here - hopefully the action picks up.
Licker throws a half hearted mid kick.
Licker lunges in with swinging rights and lefts but Highlander circles away quickly and effectively.
Licker misses with a jab and misses with a cross straight after too.
Licker slips a jab from Highlander.
Licker uses good footwork to avoid the strikes from Highlander.
That's one minute gone in the round.
Licker falls off balance throwing a combination
and Licker takes a counter punch right on the button for his troubles.
Highlander shakes his hands off, looking to compose himself, but takes a jab to the jaw whilst he does it.
Licker throws a series of punches but Highlander moves out of range.
Highlander throws a looping overhand right but Licker ducks down to avoid it.
Licker tries to land with a swinging hook to the body but Highlander was well out of range. Poor timing from Licker.
Licker throws a sloppy body shot
and Highlander counters with a stiff right hand.
Licker throws a right and a left that both miss.
Highlander throws a combination but it was largely blocked by Licker.
Licker swung with a counter punch to the body but it didn't connect.
Licker swings away but doesn't land with a series of punches.
Licker bobbing and weaving, closes the distance and lands a hook to the side of Highlander's head.
Licker ducks under an overhand right and circles away with a smile on his face.
Licker looks to be in better condition than last time we saw him fight. Obviously he's been working hard on his cardio.
Highlander keeping a good distance there, avoiding the body shot.
Licker looks to land a combination but Highlander avoids it well.
That's two minutes gone in the round.
Fantastic stuff here - a very entertaining period of action, which has drawn cheers from the crowd.
Highlander takes an uppercut right on the button but keeps his composure.
Licker tries to land with a swinging hook to the body but Highlander was well out of range. Poor timing from Licker.
Highlander misses with a body shot.
Licker rushes forward with a series of wild hooks but Highlander moves out of range and avoids them all easily.
Licker lands an overhand left. A wild punch that just about connected.
Licker keeping his hands up high there, blocking the jab from Highlander.
Licker throws a combination but it was largely blocked by Highlander.
Highlander looks to throw the jab but Licker is out of range.
Licker throws a big counter combination but Highlander scrambles out of danger and avoids any damage.
Highlander tries to close the distance and clinch up but Licker swats him away and circles back towards the center.
Licker closes the distance and lands a one-two.
Licker has his head snapped back a nice jab. A little nod from Licker there as he acknowledges the shot.
Sloppy strikes from Licker. Those never looked like landing.
A little jabbing left from Highlander on the counter but it doesn't find it's target.
A looping hook to the body misses from Licker. Highlander does a little dance to reset his feet.
Highlander moves out of range of the body kick.
It seemed like Highlander was going to counter with the hook but didn't fully commit to it.
That's three minutes gone in the round.
Highlander works Licker's body with a nice hook.
Licker is breathing heavily.
Licker throws a body punch but Highlander moves out of range.
Highlander connects with a slap. Keep your fist closed son.
Licker throws a body kick but he wasn't in range.
Highlander moves out of range as Licker throws a body kick.
A swing and a miss from Licker.
Jab, jab by Highlander - just one landing.
Licker misses with a two punch combination.
Licker throws a hook to the body but it doesn't connect.
Highlander looked like he wanted to counter with a punch but didn't throw it.
A big right from Highlander misses.
Licker slips a jab from Highlander.
The crowd cheers as Highlander lands an impressive looking overhand right. Licker doesn't seem phased though.
Highlander might want to mix his strikes up a bit more. He's just going for head shots at the moment and that can become a bit predictable.
Highlander doesn't manage to clinch there - Licker circles away.
Licker misses with a two punch combination.
That's four minutes gone in the round.
Highlander thuds his right hand into Licker's forehead from close range. That could be painful for both fighters.
Licker is rocked!
This has been an exciting period of action!
Highlander weaves into range and cracks Licker right on the temple with a beautiful overhand right! Licker goes down! He's out cold! Wow, what a beautiful knockout! Highlander is strutting round the canvas like a movie star as the camera bulbs flash frantically.
Ladies and gentlemen, after 4:10 of round 1, we have a winner by way of KO (Punch). Elijah Highlander!
|
|
|
|
|
|
|
|
|
|
|
|
|
|
|
|
|
|
|
|
|
|
|
| S |
C
A |
G |
S |
C
B |
G |
|
S |
C |
G |
|
energy
A | B |
|
hype
A | B |
|
pop
A | B |
|
mgr
A | B |
|
FIGHT
RATING
55% |
|
|
|
|
|
|
|
Co-main event
|
Coming up we have a middleweight MMA rules bout between Danny Hall (ranked 2738 p4p, 2900 weight class) and Jurgen Van Damme (ranked 317 p4p, 332 weight class). Over to our ring announcer for the fighter introductions!
 |
|
 |
| 193 cm
25
198
3 - 1 - 0 |
|
191 cm
25
195
3 - 1 - 0 |
Good wrestling
Counter fighter
KO power |
|
BJJ Blue Belt
Counter fighter
Granite chin |
|
| |
|
Ladies and gentlemen. This fight is 3 rounds, in the middleweight division.
Introducing the fighter to my left, fighting out of the red corner.
With a record of 3 - 1 - 0, fighting out of London, Danny Hall!
And introducing the fighter to my right, fighting out of the blue corner.
With a record of 3 - 1 - 0, fighting out of Los Angeles, Jurgen Van Damme!
The judges for this bout are Micheangelo Fripello, Roger Salmon and Josh West.
The bell rings for round one and we are underway!
Hall takes a nice looking leg kick right on the meat of his thigh there.
Hall definitely looks more muscular than last time we saw him fight.
Van Damme tries to clinch but Hall moves away
and Hall connects with a straight left hand counter down the middle.
A jab from Van Damme finds it's way through Hall's defenses.
Van Damme throws a wild combination but nothing lands.
Hall swung with a counter right hand that didn't connect.
Van Damme uses decent footwork to sidestep a right hand from Hall.
Van Damme raises up his leg as if looking to counter with a high kick.
Van Damme tries to close the distance and clinch up against the cage but Hall paws at him with a jab and circles away.
A jab from Van Damme misses.
We've had a slow start to the round here - hopefully the action picks up.
An inside leg kick lands from Van Damme.
Van Damme moves to clinch but Hall breaks away

and Hall counters with a crisp right hand that drops Van Damme! Hall lets Van Damme back up to his feet, looking for a finish!
It looks like Jurgen Van Damme has been cut.
That's one minute gone in the round.
Van Damme fails to land with the punch combination there - jab, cross, hook, miss, miss, miss.
A little feinted left hand from Hall on the counter but he doesn't commit to it.
Van Damme looks to score with a combo but nothing lands.
Hall seem to be loading up, looking for a big counter.
Jurgen Van Damme seems to be the more aggressive standup fighter in this bout.
Van Damme moves out of range as Hall strikes.
Van Damme tries to clinch but Hall moves out of range.
An attempted straight right counter from Hall misses the target.
Hall ducks under a wild hook from Van Damme.
Van Damme darts in trying to clinch
and Hall scores with a counter punch that sends Van Damme to the canvas! Hall smells blood - he's punishing Van Damme with more strikes and the ref has stopped it! Van Damme has no idea where he is - he's tackled the ref... oh dear, poor guy, the crowd is in hysterics!
Ladies and gentlemen, after 1:48 of round 1, we have a winner by way of TKO (Strikes). Danny Hall!
|
|
|
|
|
|
|
|
|
|
|
|
|
|
|
|
|
|
|
|
|
|
|
| S |
C
A |
G |
S |
C
B |
G |
|
S |
C |
G |
|
energy
A | B |
|
hype
A | B |
|
pop
A | B |
|
mgr
A | B |
|
FIGHT
RATING
56% |
|
|
|
|
|
|
|
Main event
|
Coming up we have a lightweight MMA rules bout between Cody Shelton (ranked 2353 p4p, 3156 weight class) and Miles Janetty (ranked 242 p4p, 309 weight class). Cody Shelton could well score a knockout today. He has the power to get to Miles Janetty's chin.
 |
|
 |
| 178 cm
25
159
2 - 0 - 0 |
|
185 cm
25
161
2 - 0 - 0 |
BJJ White Belt
Excellent MT
Cardio machine |
|
BJJ White Belt
Decent boxing
Heavy handed |
|
| |
|
Ladies and gentlemen. This fight is 3 rounds, in the lightweight division.
Introducing the fighter to my left, fighting out of the red corner.
With a record of 2 - 0 - 0, fighting out of London, Cody Shelton!
And introducing the fighter to my right, fighting out of the blue corner.
With a record of 2 - 0 - 0, fighting out of Los Angeles, Miles Janetty!
The judges for this bout are Jeff Smith, Josh West and Paul Gruel.
The bell rings for round one and we are underway!
Janetty stuns Shelton with a nice body shot, before stepping back out of range.
Shelton looks to score with a jab to the body but Janetty is just out of range.
Janetty defending well as Shelton loads up on a big left hand.
Shelton gets his head snapped back by a nice shot there.
Shelton has closed the distance and engaged Janetty in a clinch.
Shelton lands a nice uppercut.
Shelton lands a right hand.

Shelton's corner calls for him to break the clinch, which he does.
Shelton misses with a wild combination.
Shelton ducks down and throws a hook to the body.
Janetty takes a body punch but keeps moving.
That's one minute gone in the round.
Janetty throws a wild combination but nothing lands.
Shelton is trying to close the distance and clinch up, after that failed offence from Janetty.
The fight stays on the outside here - Shelton looks like he's thinking about clinching though.
Shelton misses with a body shot. Nice footwork from Janetty.
Shelton connects with a body shot that sends Janetty's belly button to the back.
Shelton swings and misses with a hook to the body.
Janetty will need to tighten up his combinations if he doesn't want to gas himself out, swinging at thin air.
Janetty tried to score with a low kick but Shelton checks it.
Shelton throws an ugly left hook that misses
and Janetty counters with a lovely shot to the body.
Shelton misses with a wild combination.
Janetty swings away with a counter right hand but no contact made.
That's two minutes gone in the round.
Sloppy strikes from Janetty. Those never looked like landing.
Janetty throws a hook but Shelton avoids it easily.
Shelton is looking to wear down Janetty with body shots, infact he's throwing more body shots than head shots at the moment.
Janetty scoring well with a low kick there.
Shelton connects with a body shot that sends Janetty's belly button to the back.
Janetty throws a combination that misses
and Shelton cracks him with a counter punch right on the button.
It looks like Miles Janetty has been cut.
Janetty looks winded!
The crowd cheering loudly, showing their appreciation for the quality fight we're seeing here.
Janetty throws a right and a left that Shelton avoids nicely.
Shelton misses the shot to the body.
Shelton loads up on a big right hand but Janetty slips the punch.
Shelton sizes up Janetty with a pawing jab and scores with a straight right down the middle.
Shelton feints and then winds up with a huge right hand that connects perfectly and sends Janetty sprawling to the canvas! Janetty rolls over backwards and springs off the cage and manages to regain his footing - how acrobatic! Oh, he's still wobbly - can Shelton finish him?!
 Janetty is rocked! Janetty is rocked!
That's three minutes gone in the round.
Shelton cracks Janetty with a left hook right on the temple and Janetty goes down! He's out! Referee! Stop the fight! Shelton lands a few more punches before the dopey ref steps in - hopefully Janetty is OK!
Ladies and gentlemen, after 3:09 of round 1, we have a winner by way of KO (Punch). Cody Shelton!
In his post fight interview, Cody Shelton started talking himself up. Luckily his charisma kept the crowd on side and gave him a good reception.
|
|
|
|
|
|
|
|
|
|
|
|
|
|
|
|
|
|
|
|
|
|
|
| S |
C
A |
G |
S |
C
B |
G |
|
S |
C |
G |
|
energy
A | B |
|
hype
A | B |
|
pop
A | B |
|
mgr
A | B |
|
FIGHT
RATING
51% |
|
|
|
|
|
|
|
|
|
|
