 |
BT2 PBP Commentary |
Undercard bout
|
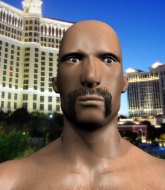
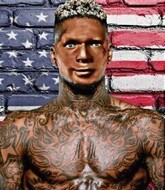
Coming up we have a bantamweight MMA rules bout between Ben Hamilton (ranked 4022 p4p, 25625 weight class) and Ronin Davis (ranked 245 p4p, 296 weight class). Hamilton kept the crowd waiting but all that was forgotten when his ring entrance music started. The incomparable musical genius that is Synthesizer. Ronin Davis is the more experienced fighter, so let's see if that makes a difference tonight.
 |
|
 |
| 155 cm
16
132
0 - 0 - 0 |
|
175 cm
18
145
0 - 2 - 0 |
BJJ White Belt
Counter fighter
KO power |
|
BJJ White Belt
Excellent MT
Powerful |
|
| |
|
Ladies and gentlemen. This fight is 3 rounds, in the bantamweight division.
Introducing the fighter to my left, fighting out of the red corner.
With a record of 0 - 0 - 0, fighting out of Tokyo, Ben Hamilton!
And introducing the fighter to my right, fighting out of the blue corner.
With a record of 0 - 2 - 0, fighting out of Amsterdam, Ronin Davis!
The judges for this bout are Wagner Zegers, Albert Achterberg and Paulsen Ambrosius.

The bell rings for round one and we are underway!
Hamilton shuffles to his left behind two crisp jabs. Davis eats them both and turns towards Hamilton to reposition himself and eats a stinging right hand-left hook combo.
Hamilton feints a straight left to the body, then turns around with a flashy move and hits Daviss jaw with a dramatic spinning back fist!
Hamilton throws the left hand but Davis avoids the punch easily.
Hamilton ducks down and throws a hook to the body but Davis moves away.
Davis blocks a jab.
Davis feints the counter takedown.
Hamilton misses with a hook. Davis ducked under it nicely.
Hamilton looks to score with a jab to the body but Davis is just out of range.
Davis changes levels for a counter takedown but doesn't follow through with his attempt.
We've had a slow start to the round here - hopefully the action picks up.
Hamilton looks to land a right hand but Davis moved out of range.
Davis defending well as Hamilton loads up on a big left hand.
Davis changes levels for a counter takedown but doesn't follow through with his attempt.
Ben Hamilton seems to be the more aggressive standup fighter in this bout.

That's one minute gone in the round.
Hamilton throws a hook but Davis avoids it easily.
Davis feints the counter takedown.
Hamilton looks to score with a jab to the body but Davis is just out of range.
Hamilton digs a good hook to Davis's body.
A jab from Hamilton misses.
Davis tries a counter takedown but it's more of a dummy move, and he uses it to push himself away.
Hamilton is really struggling to find his range with his punches. Davis's reach advantage is clearly causing him problems.
Davis ducks under a wild hook from Hamilton.
Hamilton misses the jab.
Davis feints the counter takedown.
Hamilton missing with a left hand there. Davis was out of range so wasted energy throwing that one.
Hamilton misses with a body shot.

That's two minutes gone in the round.
Hamilton stuns Davis with a nice body shot, before stepping back out of range.
Davis slips a straight right by Hamilton.
Hamilton could do with losing a few pounds - he looks very soft around the mid section, to put it politely.
Hamilton just misses with a punch to the body.
Davis looks more muscular than last time we saw him. He must have been on the weights.
Hamilton loads up on a big right hand but Davis slips the punch.
Davis is definitely looking for the counter takedowns here.
Hamilton takes a swing at Davis's ribcage but misses.
Hamilton takes a swing at Davis's ribcage but misses.
Davis drops down looking to force a counter takedown but Hamilton defends it well.
The crowd thankful this round is nearly over.
Hamilton jabbing away but nothing is landing.
Davis steps to the side to avoid the strikes from Hamilton.
And that is the end of the round. The fighters go back to their corners.
Ben Hamilton dominated that round.
The fighters get back to their feet, the hooter sounds and we're back to the action!

Davis slips a straight right by Hamilton.
Davis slips a straight right by Hamilton.
Davis with the counter takedown but Hamilton avoids it easily.
Davis slips a jab from Hamilton.
Davis changes levels for a counter takedown but doesn't follow through with his attempt.
Hamilton throws a hook to the body but it doesn't connect.
Hamilton misses the shot to the body.
Hamilton is really dominating this fight. Is there anything that Davis can do to turn this around?
Davis moves out of range as Hamilton strikes.
Davis is definitely looking for the counter takedowns here.
We've had a slow start to the round here - hopefully the action picks up.
Hamilton throws a hard body shot but it just misses.
Hamilton misses with a hook.
That's one minute gone in the round.
Hamilton misses with a looping left.
Hamilton misses with a straight left.
Davis drops down looking to force a counter takedown but Hamilton defends it well.
Ben Hamilton is looking to keep the fight on the feet at all costs.
Hamilton swings and misses with a hook to the body.
Davis feints the counter takedown.
Hamilton misses with a straight right.
And Davis tries to counter it with a takedown but Hamilton pushes his down on his head and steps out.
Hamilton scores with a shot to the body.
Hamilton looks to land a left hand but Davis moved out of range nicely.
And Davis tries to counter it with a takedown but Hamilton pushes his down on his head and steps out.
Hamilton ducks down and throws a hook to the body but Davis moves away.
Davis moves his head to the side to avoid a jab but walks straight into a cross.
That's two minutes gone in the round.
Davis keeping a good distance there, avoiding the body shot.
Ben Hamilton is winning the standup battle so far.
Hamilton throws a hard body shot but it just misses.
Davis tries a counter takedown but it's more of a dummy move, and he uses it to push himself away.
Hamilton thows a left - swing and a miss!
Hamilton misses the shot to the body.
Hamilton throws a body shot but no joy.
Davis with the counter takedown but Hamilton avoids it easily.
Hamilton misses the jab.
Boooooooooooooooooooo!!! God, this has been a terrible round. Come on you two, sort yourselves out!
Hamilton misses with an uppercut.
Davis is definitely looking for the counter takedowns here.
Hamilton throws the left hand but Davis avoids the punch easily.
And that is the end of the round. The fighters go back to their corners.
Ben Hamilton dominated that second round.
That's the end of the interval. I'm sure that seemed a lot quicker than a minute for our two fighters! Back to the action. This is the final round!

Hamilton throws an overhand right that lands on Davis's shoulder, as Davis tries to avoid the shot.
Davis keeping his hands up high there, blocking the jab from Hamilton.
And Davis tries to counter it with a takedown but Hamilton pushes his down on his head and steps out.
The fighters circling - Hamilton throws out the jab but it was never going to land.
And Davis tries to counter it with a takedown but Hamilton pushes his down on his head and steps out.
Hamilton misses with a wild body shot.
Hamilton throws a body punch but Davis moves out of range.
Hamilton throws a hook to the side of Davis's head but Davis sees it coming and ducks under it beautifully.
We've had a slow start to the round here - hopefully the action picks up.
Davis uses good footwork to avoid the strikes from Hamilton.
Davis with the counter takedown but Hamilton avoids it easily.
Hamilton misses with a body shot. Nice footwork from Davis.
That's one minute gone in the round.
Davis ducks under a wild hook from Hamilton.
Davis ducks under a wild hook from Hamilton.
Davis is definitely looking for the counter takedowns here.
Hamilton waving his hands out in front of him, looking to distract Davis.
Davis tries a counter takedown but it's more of a dummy move, and he uses it to push himself away.
Ronin Davis has stepped it up - he knows he needs a finish here!
Hamilton throws a right hand that Davis ducks under and follows up with a left that Davis also avoids with ease.
Davis is definitely looking for the counter takedowns here.
Hamilton throws a body punch but Davis moves out of range.
Hamilton misses with a head kick.
Hamilton looks to score with a jab to the body but Davis is just out of range.
And Davis tries to counter it with a takedown but Hamilton pushes his down on his head and steps out.
Hamilton ducks down and throws a hook to the body but Davis moves away.
That's two minutes gone in the round.
Davis bobs and weaves well there to avoid the strikes.
Davis feints the counter takedown.
Hamilton has not gone for a single takedown so far in this fight, which seems like a very strange tactic when you consider that he has the superior wrestling and BJJ.
Hamilton looks to score with a jab to the body but Davis is just out of range.
Davis tries a counter takedown but it's more of a dummy move, and he uses it to push himself away.
Hamilton throws a hook but Davis avoids it easily.
Davis tries a counter takedown but it's more of a dummy move, and he uses it to push himself away.
Hamilton misses with a jab and misses with a cross straight after too.
Davis moves away from the strike by Hamilton.
Hamilton throws a lazy right hand but Davis sees it coming a mile off and sidesteps it easily.
Boooooooooooooooooooo!!! God, this has been a terrible round. Come on you two, sort yourselves out!
Hamilton looks to throw the jab but Davis is out of range.
Ben Hamilton is fighting for a decision here - he's started to take the cautious approach.
Hamilton throws a hook to the side of Davis's head but Davis sees it coming and ducks under it beautifully.
And that's the end of the fight!
Ben Hamilton showed his dominance in that final round.
Well Hamilton has outscored his opponent in every aspect of the fight today. Only a scarily incompetent judge or two will keep him from a well deserved win... Over to the ring announcer for the scorecards.
Ladies and gentlemen, after 3 rounds of action, we go to the scorecards for a decision.
Judge Wagner Zegers scores the fight 30:24
Judge Albert Achterberg scores the fight 30:24
Judge Paulsen Ambrosius scores the fight 30:24
In favor of your winner, by unanimous decision... Ben Hamilton!
|
|
|
|
|
|
|
|
|
|
|
|
|
|
|
|
|
|
|
|
|
|
|
| S |
C
A |
G |
S |
C
B |
G |
|
S |
C |
G |
|
energy
A | B |
|
hype
A | B |
|
pop
A | B |
|
mgr
A | B |
|
FIGHT
RATING
27% |
|
|
|
|
|
|
|
Undercard bout
|
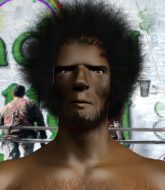
Coming up we have a welterweight MMA rules bout between Jamison Hardin (ranked 4024 p4p, 25341 weight class) and Uriel Short (ranked 421 p4p, 525 weight class). Hardin comes to the cage accompanied by Memories (feat. Kid Cudi). I don't know about you partner, but I'm pumped for this one!
 |
|
 |
| 179 cm
16
170
0 - 0 - 0 |
|
178 cm
18
172
0 - 2 - 0 |
BJJ White Belt
Counter fighter
Big heart |
|
Good wrestler
Counter fighter
Good gas tank |
|
| |
|
Ladies and gentlemen. This fight is 3 rounds, in the welterweight division.
Introducing the fighter to my left, fighting out of the red corner.
With a record of 0 - 0 - 0, fighting out of Tokyo, Jamison Hardin!
And introducing the fighter to my right, fighting out of the blue corner.
With a record of 0 - 2 - 0, fighting out of Amsterdam, Uriel Short!
The judges for this bout are Saam Ante, Paul Aken and Paulsen Ambrosius.
The bell rings for round one and we are underway!
Hardin misses with a wild combination.
Hardin misses with a body shot.
Hardin throws a jab when Short was well out of range.
Short is definitely looking for the counter takedowns here.
Hardin throws a series of punches but Short moves out of range.
And Short tries to counter it with a takedown but Hardin pushes his down on his head and steps out.
Short shoots in with a takedown attempt and he has Hardin pinned against the cage. Hardin gets the underhooks and manages to circle away.
Jamison Hardin seems to be the more aggressive standup fighter in this bout.
We've had a slow start to the round here - hopefully the action picks up.
Hardin lands a slapping body shot.
That's one minute gone in the round.
Hardin thows a left - swing and a miss!
And Short tries to counter it with a takedown but Hardin pushes his down on his head and steps out.
Hardin throws a series of punches but Short moves out of range.
Short is definitely looking for the counter takedowns here.
A looping hook to the body misses from Hardin. Short does a little dance to reset his feet.
Hardin tries to land with a swinging hook to the body but Short was well out of range. Poor timing from Hardin.
Hardin misses with a hook.
Short avoids the body shot from Hardin.
Short uses some good footwork to avoid the body shot by Hardin.
Short changes levels for a counter takedown but doesn't follow through with his attempt.
That's two minutes gone in the round.
Short slips under a jab.
Short feints the counter takedown.
Short uses some good footwork to avoid the body shot by Hardin.
And Short tries to counter it with a takedown but Hardin pushes his down on his head and steps out.
Hardin bobbing and weaving, closes the distance and lands a hook to the side of Short's head.
Short keeping his hands up high there, blocking the jab from Hardin.
Short changes levels for a counter takedown but doesn't follow through with his attempt.
Hardin fails to land with the punch combination there - jab, cross, hook, miss, miss, miss.
Short with the counter takedown but Hardin avoids it easily.
Hardin pushing out the jab but it's not landing.
The crowd thankful this round is nearly over.
A jab from Hardin misses.
Short uses good footwork to avoid the strikes from Hardin.
Short with the counter takedown but Hardin avoids it easily.
And that is the end of the round. The fighters go back to their corners.
Jamison Hardin dominated that round.
That's the end of the round. The referee orders the cornermen out of the cage so we can get back down to business.
Short fails to land the takedown.
Hardin swings and misses with a hook to the body.
Short needs to keep his hands up - Hardin had a free shot at his head there.
Hardin tries to land with a swinging hook to the body but Short was well out of range. Poor timing from Hardin.
Hardin is really dominating this fight. Is there anything that Short can do to turn this around?
Hardin misses with a straight left.
We've had a slow start to the round here - hopefully the action picks up.
Hardin works Short's body with a nice hook.
Short avoids a lazy jab quite easily.
Short is definitely looking for the counter takedowns here.
Hardin connects with a good right hand that stumbles Short. Short circles away out of range and recomposes himself.
 Short is rocked! Short is rocked!
That's one minute gone in the round.
Hardin circles and sees the opportunity to plant his feet and throw a really nice straight left hand that drops Short to the canvas! Short doesn't know where he is but he's trying to survive - Hardin keeps piling on the pressure and forces the referee to step in! This one is aaaaaall over!
Ladies and gentlemen, after 1:10 of round 2, we have a winner by way of TKO (Strikes). Jamison Hardin!
|
|
|
|
|
|
|
|
|
|
|
|
|
|
|
|
|
|
|
|
|
|
|
| S |
C
A |
G |
S |
C
B |
G |
|
S |
C |
G |
|
energy
A | B |
|
hype
A | B |
|
pop
A | B |
|
mgr
A | B |
|
FIGHT
RATING
36% |
|
|
|
|
|
|
|
Undercard bout
|
Coming up we have a bantamweight MMA rules bout between Trenth Ball (ranked 5697 p4p, 3288 weight class) and Todd Savage (ranked 288 p4p, 217 weight class). Over to our ring announcer for the fighter introductions!
 |
|
 |
| 175 cm
18
145
1 - 1 - 0 |
|
175 cm
18
145
2 - 0 - 0 |
BJJ White Belt
Excellent MT
Good in bed |
|
BJJ White Belt
Excellent MT
Very confident |
|
| |
|
Ladies and gentlemen. This fight is 3 rounds, in the bantamweight division.
Introducing the fighter to my left, fighting out of the red corner.
With a record of 1 - 1 - 0, fighting out of Amsterdam, Trenth Ball!
And introducing the fighter to my right, fighting out of the blue corner.
With a record of 2 - 0 - 0, fighting out of London, Todd Savage!
The judges for this bout are Paul Aken, Nard Betker and Radbod Blank.
The bell rings for round one and we are underway!
Savage misses with a jab and misses with a cross straight after too.
Ball half commits to a counter takedown before pushing away, out of range.
Savage throws an uppercut from half a mile away. Ball sees it coming and avoids it easily.
Savage swings and misses with a hook to the body.
Ball attempts a counter takedown but Savage avoids it well and moves away.
Ball moves out of range as Savage strikes.
Ball feinted with a counter takedown.
Ball takes a solid shot to the body. That one hurt him but he's trying not to show it.
Ball showing good head movement there, avoiding the strikes from Savage.
Ball half commits to a counter takedown before pushing away, out of range.

Savage takes the fight into the clinch.
We've had a slow start to the round here - hopefully the action picks up.
Savage has a body lock and is looking for a takedown. Ball is bouncing around trying to prevent the takedown and somehow he has indeed managed to stay on his feet.
Savage changes levels and goes for a takedown here. Ball fights it off and pushes away nicely.
That's one minute gone in the round.
Ball slips under a jab from Savage.
Savage misses with a wild body shot.
Ball feinted with a counter takedown.
Savage misses with a body shot. Nice footwork from Ball.
A looping hook to the body misses from Savage. Ball does a little dance to reset his feet.
Savage dips down and scores with a jab to the body.
Todd Savage seems to be the more aggressive standup fighter in this bout.
Savage looks to land a left hand but Ball moved out of range nicely.
Savage connects with a lovely right hand, straight down the pipe.
Ball bobs and weaves well there to avoid the strikes.
Ball tries to counter with a takedown but Savage is quick to defend against it.
Savage closes the distance and clinches.
Ball looks like he'd prefer to be striking at range right now.
Ball stops a takedown attempt from Savage.
Trenth Ball has stuffed three takedown attempts in the round now. That's going to take a lot out of Todd Savage.
A left hand lands to the body for Savage.
That's two minutes gone in the round.
Savage tries a body shot but Ball blocks it.
Savage goes for a body shot but it's blocked.
Savage goes for a takedown in the clinch but Ball prevents it.

Savage jumps guard.
Savage is doing well to control the posture of his opponent and prevent any damage.
Ball wants to control from the top but Savage keeps moving.

That's three minutes gone in the round.
Savage has his hands on Ball's head, controlling the position.
Savage's corner are shouting for him to control the position and he seems happy to oblige.
The ref warns both fighters not to hold the cage as they work up against the meshing.
Ball wants to control from the top but Savage keeps moving.
Savage looking to sweep here. No luck so far.

The ref stands the fighters back up due to a lack of activity.
Savage connects with a body shot that sends Ball's belly button to the back.

That's four minutes gone in the round.
The crowd are starting to boo a lack of action.
Savage works Ball's body with a nice hook.
The fighters circle momentarily. Savage darts into range and connects with a nice straight punch.
Savage lands with a nice body punch.
Savage throws out a token jab with nothing on it.
Ball half commits to a counter takedown before pushing away, out of range.
Ball moves out of range of the strikes.
Savage moves into range and clinches up with Ball.
Savage wants a takedown but no success here.
A short right from Savage on the inside.
The crowd thankful this round is nearly over.
Savage gets double underhooks and manages to take the fight to the ground.
Savage content to stall in guard here.
Savage looking to pass the guard.
And that is the end of the round. The fighters go back to their corners.
Todd Savage dominated that round.
That's time! Ball's corner gives him a slap on the ass as he gets ready to fight.
Savage pushing out the jab but it's not landing.
Ball tries to counter with a takedown but Savage is quick to defend against it.
Savage throws a body punch but Ball moves out of range.
Savage stooping low to avoid any incoming strikes and then lunges in with an uppercut come cross that lands flush.
A big left from Savage misses.
Savage has been the more effective fighter overall so far.
Ball blocks a jab.
Ball attempts a counter takedown but Savage avoids it well and moves away.
Savage pushing out the jab but it's not landing.
Savage tries to clinch up but Ball circles away and keeps his distance.
Ball drops down looking for a counter takedown but Savage sprawls and moves away.
Savage throws a body shot but no joy.
We've had a slow start to the round here - hopefully the action picks up.
Savage waving his hands out in front of him, looking to distract Ball.
Ball attempts a counter takedown but Savage avoids it well and moves away.
Savage misses with an uppercut. Ball saw that one coming.
Ball feinted with a counter takedown.
Ball takes a body punch but keeps moving.
That's one minute gone in the round.
Ball ducks under an overhand right and circles away with a smile on his face.
Ball tries to counter with a takedown but Savage is quick to defend against it.
Savage misses with a body shot. Nice footwork from Ball.
Savage throws a couple of head shots and lands with the final one - a decent hook, which struck Ball on the side of the head.
A swing and a miss from Savage.
Ball feinted with a counter takedown.
Savage has worked on his takedown defense in the runup to this fight and it is paying off so far.
Todd Savage is looking to keep the fight on the feet at all costs.
Savage misses with an uppercut.
The fighters circling - Savage throws out the jab but it was never going to land.
Savage wings a very wild body shot but it does the job and lands to the midsection.
Trenth Ball is looking to throw some combinations by the looks of things.
Savage jabs at Ball's body.
Savage closes the distance and pushes Ball back into the cage.
Ball tries to land a shot to the body but it's blocked.
Savage goes for a takedown attempt but Ball pushes him away and we're back to fighting at a distance.
That's two minutes gone in the round.
Savage throws a jab to the body, straight down the pipe. Boom. That sent Ball stumbling backwards but he manages to regain his composure quickly.
Savage throws out a token jab with nothing on it.
Savage scores with a reasonable looking shot to the body. Ball doesn't seem bothered though.
The crowd are loving this. Great action here.
A slow jab from Savage misses its intended target.
Todd Savage seems to be getting the better of the standup.
Savage closes the distance and clinches.
Savage pulls guard effortlessly.
Ball wants to control from the top but Savage keeps moving.
Ball looking to pass the guard.
That's three minutes gone in the round.
Savage pulls Ball in close to prevent any damage.
Ball trying to control but Savage is working from the bottom.
Savage lands a beautiful sweep and he's now moved into his opponent's guard.

That's four minutes gone in the round.
Neither fighter has done anything of merit for a good minute or two here and the crowd are not happy about it.
Savage looking to control the position here, rather than advance.
The crowd thankful this round is nearly over.
And that is the end of the round. The fighters go back to their corners.
Todd Savage showed his class in that round. I'd imagine he'll take it on all the scorecards.
That's the end of the interval. I'm sure that seemed a lot quicker than a minute for our two fighters! Back to the action. This is the final round!
Savage has taken the fight to the clinch.
A nice right hand lands inside from Savage.
Savage prevents a body shot from Ball.
Savage lands punches inside but they're not really causing much damage.
Savage tries to pull guard but Ball holds him up against the cage and eventually Savage drops back down to his feet.
Savage tries to jump guard but he falls flat on his backside. Ball smiles and moves away.
We've had a slow start to the round here - hopefully the action picks up.
Savage throws an overhand right that lands on Ball's shoulder, as Ball tries to avoid the shot.
Savage misses with an uppercut.
Ball appears to be looking for a counter takedown.
Savage misses with a hook. Ball ducked under it nicely.
Ball feinted with a counter takedown.
That's one minute gone in the round.
Savage misses the shot to the body.
Ball changes levels looking for a counter takedown but doesn't commit.
Savage loads up on a big right hand but Ball slips the punch.
Ball appears to be looking for a counter takedown.
Savage looks to throw the jab but Ball is out of range.
Ball feinted with a counter takedown.
Savage throws a shot to the body.
Ball gets tackled into the cage by Savage. Savage maintains the clinch.
Ball struggles to land a body shot inside as Savage controls his hands.
Ball prevents the takedown attempt.
Trenth Ball has stuffed three takedown attempts in the round now. That's going to take a lot out of Todd Savage.
Savage has a couple of punches blocked by Ball.
Savage tries to jump guard but he falls flat on his backside. Ball smiles and moves away.
Savage works Ball's body with a nice hook.
That's two minutes gone in the round.
Ball uses good footwork to avoid the strikes from Savage.
Ball attempts a counter takedown but Savage avoids it well and moves away.
Savage stooping low to avoid any incoming strikes and then lunges in with an uppercut come cross that lands flush.
Savage misses with a body shot.
Ball half commits to a counter takedown before pushing away, out of range.
Savage thows a left - swing and a miss!
Savage misses with an uppercut. Ball saw that one coming.
Ball appears to be looking for a counter takedown.
Ball doesn't react quick enough there as he takes a shot to the body.
Savage bobs and weaves and throws out a fast jab that snaps Ball's head backwards.
The crowd cheering loudly, showing their appreciation for the quality fight we're seeing here.
Savage throws a right hand that misses

and Ball counters with a shoot takedown. Savage fights it but they end up in guard.
Savage is pulling down on Ball's head. It's preventing any offense from Ball, at least for the moment.
That's three minutes gone in the round.
Savage bucks up whilst keeping hold of a body lock, managing to reverse the position. Now he's in top in Ball's guard.
Todd Savage is fighting for a decision - hopefully he's judged it right and he's actually winning the fight.
Savage content to stall in guard here.
Ball is trying to control the position from the bottom.
Trenth Ball has stepped it up - he knows he needs a finish here!
Savage controls from within his opponent's guard.
That's four minutes gone in the round.
My god... these two guys really need to pick up the pace or everyone will leave to go get a beer.
Ball is working from a closed guard but he's struggling to control his opponent.
Savage controls the pace of the fight for a moment.
Savage passes into half guard.
Savage is controlling the pace.
The crowd thankful this round is nearly over.
And that's the end of the fight!
Todd Savage comfortably won the final round on my scorecard.
Well Savage has outworked and out performed his opponent in all aspects of the game today. He was simply too good and the decision should be no more than a formality. Over to the ring announcer for the scorecards.
Ladies and gentlemen, after 3 rounds of action, we go to the scorecards for a decision.
Judge Paul Aken scores the fight 26:30
Judge Nard Betker scores the fight 26:30
Judge Radbod Blank scores the fight 26:30
In favor of your winner, by unanimous decision... Todd Savage!
|
|
|
|
|
|
|
|
|
|
|
|
|
|
|
|
|
|
|
|
|
|
|
| S |
C
A |
G |
S |
C
B |
G |
|
S |
C |
G |
|
energy
A | B |
|
hype
A | B |
|
pop
A | B |
|
mgr
A | B |
|
FIGHT
RATING
35% |
|
|
|
|
|
|
|
Co-main event
|
Coming up we have a welterweight MMA rules bout between Nok Su Kao (ranked 4073 p4p, 4155 weight class) and Uriah Finley (ranked 422 p4p, 429 weight class). We have two fighters making their debuts here, so let's see who comes out of this one with their first professional victory.
 |
|
 |
| 175 cm
18
170
0 - 0 - 0 |
|
175 cm
18
175
0 - 0 - 0 |
Good takedowns
Brawler
Self confident |
|
BJJ White Belt
Excellent MT
Determined |
|
| |
|
Ladies and gentlemen. This fight is 3 rounds, in the welterweight division.
Introducing the fighter to my left, fighting out of the red corner.
With a record of 0 - 0 - 0, fighting out of London, Nok Su Kao!
And introducing the fighter to my right, fighting out of the blue corner.
With a record of 0 - 0 - 0, fighting out of London, Uriah Finley!
The judges for this bout are Albert Achterberg, Paulsen Ambrosius and Saam Ante.
The bell rings for round one and we are underway!
Finley shoots in from a long way out. He's driving through with the takedown attempt and he eventually gets it, landing in Su Kao's guard.

Su Kao is scooting his butt against the cage and has managed to get back to his feet. Finley presses him back against the cage, presumably looking to take the fight back to the mat.
Finley is trying to break free.

Finley's corner calls for him to break the clinch, which he does.
Finley feints and then dives in with a takedown. That was a long way out but the feint bought him enough time to close the distance and complete the takedown. Now we'll play guard for a bit and see who can get the better of that position.
Su Kao kicks Finley off and gets to his feet.
Wooooo! Give it up for these two warriors! They are putting on a show!
Su Kao throws an off balance right hand
and Finley counters with a left to the body.
Finley shoots in and bounces Su Kao off the cage to secure the takedown into guard.
Su Kao wriggles free and stands up.
Nok Su Kao seems to be the more aggressive standup fighter in this bout.
Su Kao fakes an overhand right and shoots for a takedown. Finley sprawls well initially but Su Kao persists and gets the takedown into half guard.
Finley is looking to get back to is feet but Su Kao passes into side control.

Su Kao is working to tighten his grip on Finley's neck. He's isolated an arm and is working for an arm triangle. Finley has recognised the danger and is trying to turn with the submission but Su Kao is really squeezing tight and eventually Finley passes out! Su Kao breaks the hold and jumps onto the cage to celebrate! Submission of the night, I'd say!
Ladies and gentlemen, after 1:56 of round 1, we have a winner by way of Submission (Arm Triangle). Nok Su Kao!
After winning the bout, Nok Su Kao thanked all his fans and promised he'd do even better in his next fight. The crowd seemed to love his humility.
|
|
|
|
|
|
|
|
|
|
|
|
|
|
|
|
|
|
|
|
|
|
|
| S |
C
A |
G |
S |
C
B |
G |
|
S |
C |
G |
|
energy
A | B |
|
hype
A | B |
|
pop
A | B |
|
mgr
A | B |
|
FIGHT
RATING
100% |
|
|
|
|
|
|
|
Main event
|
Coming up we have a welterweight MMA rules bout between Jacky Chen (ranked 4100 p4p, 4270 weight class) and Spencer Boone (ranked 423 p4p, 444 weight class). We have two fighters making their debuts here, so let's see who comes out of this one with their first professional victory.
 |
|
 |
| 175 cm
18
170
0 - 0 - 0 |
|
178 cm
18
175
0 - 0 - 0 |
Good takedowns
Brawler
Inexperienced |
|
BJJ White Belt
Excellent MT
Solid chin |
|
| |
|
Ladies and gentlemen. This fight is 3 rounds, in the welterweight division.
Introducing the fighter to my left, fighting out of the red corner.
With a record of 0 - 0 - 0, fighting out of London, Jacky Chen!
And introducing the fighter to my right, fighting out of the blue corner.
With a record of 0 - 0 - 0, fighting out of London, Spencer Boone!
The judges for this bout are Daniel Blasius, Saam Ante and Nard Betker.
The bell rings for round one and we are underway!
Chen is looking for a takedown here. He's shot in and has managed to get it, finishing up in Boone's half guard.
Chen controlling the action here.
Chen passes the half guard and he's now in mount! Big trouble for Boone!
A nice elbow there by Chen.
Boone has left one of his arms exposed and Chen doesn't need a second invitation. He's isolated it and locked on a tight armbar. Boone screams and taps out, obviously in a lot of pain. Hopefully there isn't permanent damage to that arm.
Ladies and gentlemen, after 0:53 of round 1, we have a winner by way of Submission (Armbar). Jacky Chen!
Jacky Chen seemed lost for words in his post fight interview but he remembered to thank his fans and directed everyone to his website.
|
|
|
|
|
|
|
|
|
|
|
|
|
|
|
|
|
|
|
|
|
|
|
| S |
C
A |
G |
S |
C
B |
G |
|
S |
C |
G |
|
energy
A | B |
|
hype
A | B |
|
pop
A | B |
|
mgr
A | B |
|
FIGHT
RATING
96% |
|
|
|
|
|
|
|
|
|
|
