|
TWGC 42 (145lbs, D4): Las Vegas Qualifier - Round 1 PBP Commentary |
Co-main event
|
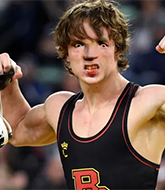
This TWGC bout is 1 fifteen minute round in the featherweight division. Introducing today's competitors. In the red corner, competing out of Los Angeles, with a TWGC record of 0 wins and 0 losses; Jack Williams! And in the blue corner, fighting out of Tokyo, with a TWGC record of 0 wins and 0 losses; Naoya Li!
The judges for this bout are Wesley Smith, Frank Dennis and Alan Glass.
The fighters bow as they face eachother in the middle of the mat and we are under way.
Williams with a poor takedown #TD2#
so Li counters with a double leg into guard. Good agility. Score +2 for takedown into guard / half guard: Williams (0) vs (2) Li
The fighters are pressed up against the cage, both looking to find a bit of space to work.
Li is stalling in the full guard.
Williams is trying to keep Li in close.
Li must be cautious of submissions here, given that his opponent has the superior Jiu Jitsu.
There's a bit of a scramble here and now Williams is on top in guard.
Score +2 for sweep to guard / half guard: Williams (2) vs (2) Li
Williams stopping the sweep attempt from Li.
We've had a slow start to the round here - hopefully the action picks up.
Li keeping moving, preventing Williams from controlling successfully.
Li has his hands on Williams's head, controlling the position. #T1#
Li tries to land a sweep but no joy.
The ref warns both fighters not to hold the cage as they work up against the meshing.
Li is pulling down on Williams's head to control his posture.
Li is working an open guard here, looking to improve his position. No doubt that will leave him open to counters but at least he's being more offensive.
Williams wants to control from the top but Li keeps moving. #T2#
Li has a closed guard, preventing anything of note from happening. Perhaps he's looking to stall.
Li can't do much from the bottom at the moment, as Williams controls the pace.
Williams trying to control the position from guard on top but Li is wriggling around, looking for whatever he can.
A real slowdown in the pace of the fight for a moment, as Li holds on and takes a little breather. #T3#
Williams stands up and looks to throw the legs aside to pass to side control. Li swivels though and keeps the full guard.
Li pulls Williams in close to prevent any damage.
Li is trying to keep Williams in close.
Williams pushes down on Li's leg and manages to get into half guard.
Williams controlling the action here.#T4#
Li tries to get to full guard but Williams has control of the leg.
Williams wants to pass the guard but Li is defending well.
Li is looking to improve his position.
Li has his hands clasped together around Williams's back. He's all about the action.
Li is looking for a sweep. Williams is wise to his cunning plan and keeps the top position.#T5#
Li wants to control but Williams is keeping busy.
Williams is taking a breather. Li says something to him but it's hard to make out. Perhaps he's telling him to get on with it and actually do something.
Williams seems very keen to just sit and control from half guard but Li does not like that idea so much and is remaining active off his back.
Li slips a foot under and gets full guard. Nice work.
Li controlling Williams's posture.
Li's corner are shouting for him to control the position and he seems happy to oblige.#T6#
Williams advances position into side control! Score +3 for passing guard: Williams (5) vs (2) Li
Li is trying to escape the position but Williams is controlling the position. #T7#
Li struggling a bit here.
Li manages to land a sweep and he's now on top! Lovely Jiu Jitsu! Score +2 for sweep to guard / half guard: Williams (5) vs (4) Li
Li content to control rather than advance.
Williams is controlling Li's trapped leg to prevent Li from advancing to side control.
In the pre-fight buildup videos we saw Li working his ground and pound in the gym. He isn't landing a great percentage of his ground strikes so far though.
Williams gets full guard.#T8#
Williams keeping full guard, as Li tries to pass.
Williams trying to keep a closed guard but Li is proving a slippery customer.
Li is taking a break and basically stalling. The referee will not allow him to do that for long.
Williams is working the butterfly guard. He manages to land a nice scissor sweep and is now in half guard on the top. Nice move. Score +2 for sweep to guard / half guard: Williams (7) vs (4) Li
Williams wants to take a breather but Li is having none of it. #T9##SUB#
Williams is looking for a kimura here.
Li is working for an escape here. He's hooked one of Williams's legs and he's managed to sneak out and take Williams's back! Score +4 for clean sweep to past guard: Williams (7) vs (8) Li
Williams is in bad spot here.
What can Williams do to escape this position? He's going to have to figure it out pretty quick if he wants to stay in the fight!
Williams trying to control the action but Li just sinks the hooks in. #T10#
Li slows the pace down here. Having a little breather whilst he's in a dominant position, looking to rest and regain some energy, ready to go for the finish.
#T11#
Williams tries to escape the position - he's now mounted. Is that better or worse? Hard to tell!
Li wants to take Williams's back here but Williams is holding on to an arm, himself looking to escape.
Li controlling from mount.
Williams bucks up and manages to get a nice reversal! He's in guard on the top - nicely done! Score +2 for sweep to guard / half guard: Williams (9) vs (8) Li
Williams pressing down on his opponent's thigh, looking to pass guard. Li is keeping the position for now. #T12#
Li manages to sweep nicely, so he's now on top. Williams manages to get himself to full guard.
Score +2 for sweep to guard / half guard: Williams (9) vs (10) Li
Li looking to control the position here, rather than advance.
Williams looking for a sweep. Not yet Williams, not yet.
Williams is doing well to control the posture of his opponent and prevent any damage.
Williams is working the butterfly guard. He manages to land a nice scissor sweep and is now in half guard on the top. Nice move. Score +2 for sweep to guard / half guard: Williams (11) vs (10) Li#T13#
Li is looking to regain full guard. Not this time though.
Li is still trying to improve position.
Williams is controlling the pace.
Li is trying to get back to full guard.#T14#
Williams sitting and controlling from the half guard.
Li is not content to let Williams control the position.
Li wants to improve his position but Williams is controlling well.
Boooooooooooooooooooo!!! God, this has been a terrible round. Come on you two, sort yourselves out!
Williams trying to mount his opponent but Li defends it.
And that's the end of the fight!
Williams takes the fight on points by 11 to 10. |
|
|
|
Main event
|
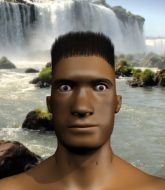
This TWGC bout is 1 fifteen minute round in the featherweight division. Introducing today's competitors. In the red corner, competing out of New York, with a TWGC record of 0 wins and 0 losses; Trey Smoke! And in the blue corner, fighting out of Las Vegas, with a TWGC record of 0 wins and 0 losses; Ronaldez Reno!
The judges for this bout are Chris Downing, Alan Glass and George Francis.
Let's get this grappling contest under way! Who will be victorious?
Reno doesn't manage to clinch there - Smoke circles away.
#CL#
Smoke clinches up against the cage.
Smoke is trying to drag Reno to the mat but Reno just about manages to keep his footing. He used the cage to his advantage there.
Reno tries for a takedown but Smoke manages to get underhooks.
#TD2#
Reno manages to pull guard.
Smoke not doing a lot at the moment. He'll have to show some more aggression or the fight will get stood up.
Reno trying to keep a closed guard but Smoke is proving a slippery customer.
We've had a slow start to the round here - hopefully the action picks up.
Smoke is looking to pass into half guard but Reno pushes him away with his feet and jumps on top - now Reno is in guard. Score +2 for sweep to guard / half guard: Smoke (0) vs (2) Reno
Reno wants to control from the top but Smoke keeps moving.
Reno sitting in guard, not really doing much. #T1#
Smoke managing to control the position.
The fighters are pressed up against the cage, both looking to find a bit of space to work.
Smoke keeping moving, preventing Reno from controlling successfully. #SUB2#
Reno is holding a leg here, probably looking for an ankle lock - he drops back and goes for it! Smoke is in trouble! Is it all over??? No! Smoke has escaped and now he's on top! Score +2 for sweep to guard / half guard: Smoke (2) vs (2) Reno
Reno wants to sweep but no luck. #T2#
Reno working a defensive guard here.
Smoke controlling from the guard. I say controlling but really, he's stalling. #SUB2#
Reno looking for submissions off his back, moving his hips, looking for an opening.
#T3#
Reno is trying to control the position but Smoke postures up.
Smoke is intent on slowing down the pace of the fight, simply looking to control.
Smoke trying to pass the guard but can't manage it just yet.
Smoke's corner is telling him to maintain position.
Smoke stands up and looks to throw the legs aside to pass to side control. Reno swivels though and keeps the full guard. #SUB#
Smoke has gone for a leg lock! Reno slips out almost immediately though and dives into Smoke's guard. Score +2 for sweep to guard / half guard: Smoke (2) vs (4) Reno#T4#
Smoke pulls Reno in to control the position.
Reno trying to control the position from guard on top but Smoke is wriggling around, looking for whatever he can.
Reno might have to switch it up a bit here because his efforts to control Smoke haven't been going to plan, at least at the current moment in time.
Reno is pushing down on Smoke's leg trying to pass to half guard. Smoke is fighting to maintain full guard but Reno has managed to sneak the leg through.
Reno trying to control from Smoke's half guard. Smoke has other ideas though and has regained full guard.
Smoke pulls Reno in to control the position.
Reno stands up and looks to throw the legs aside to pass to side control. Smoke swivels though and keeps the full guard. #T5#
Reno trying to control but Smoke is working from the bottom.
Reno forces his way into half guard.#SUB2#
Reno is looking for a kimura. It's going to be difficult to finish that from half guard though and Smoke defends it well.
Reno seems very keen to just sit and control from half guard but Smoke does not like that idea so much and is remaining active off his back. #T6#
Reno is stalling here. Smoke is in no mood to hang around though. He's locked up a kimura from the bottom! Reno seems to be keeping calm but he's forced to roll out of the hold and Smoke has ended up in side control on the top. Nice work. Score +4 for clean sweep to past guard: Smoke (6) vs (4) Reno
You can see the frustration on Reno's face, being in this tough position on the bottom.#SUB#
Smoke goes for an armbar here - this could be all over! But no, Reno has escaped beautifully and is now on top in side control! Oh, that's unlucky for Smoke but great work by Reno. Score +4 for clean sweep to past guard: Smoke (6) vs (8) Reno
The ref warns both fighters not to hold the cage as they work up against the meshing.
Reno wants to lay and pray for a moment but Smoke keeps working.
Smoke is looking for a sweep.
Reno trying to control the position but Smoke is working away. #T7#
Smoke is looking for a sweep.
Reno wants to lay and pray for a moment but Smoke keeps working.
Reno works to advance to full mount. Smoke defends for a few seconds but eventually he succumbs. Score +2 for reaching mount: Smoke (6) vs (10) Reno
Reno seems to be looking to move to his opponent's back but Smoke is holding on tight.
Smoke slips a leg in and gets back to half guard.
Smoke is breathing heavily.#SUB2#
Reno is working for a kimura but Smoke is defending it quite comfortably.
Smoke on his back here. We all know that wrestlers don't like being on their back so let's see if Smoke tries to get out of the position.
Reno trying to control from half guard but Smoke is working away. #T8##SUB#
Smoke is looking to sinch up a guillotine here but Reno pulls his head out easily.
Smoke is staying active underneath Reno, who seems content to just control the action from this position.
Smoke is doing well to avoid being mounted. He's controlling the position at the moment.
Reno trying to control the action but Smoke is working from the bottom. #SUB2#
Reno is working for submissions here but there's nothing on.
#T9#
Smoke wants to get back to full guard.
Reno is trying to control. Smoke wants to improve his position but can't escape this time.
Neither fighter is being very active at the moment, with Reno in particular looking to stall.
Reno is looking to stall here but Smoke recovers full guard.
Reno trying to control the position from guard on top but Smoke is wriggling around, looking for whatever he can.
Smoke is avoiding any damage by keeping wrist control. #T10#
Smoke is working an open guard here, looking to improve his position. No doubt that will leave him open to counters but at least he's being more offensive.
Smoke keeping moving, preventing Reno from controlling successfully. #SUB#
Smoke looks to be working for a triangle here. Oh, it looks like he might have it! Reno has picked Smoke up and slammed him! Smoke can't keep hold of the triangle and Reno manages to pass to side control! Score +3 for passing guard: Smoke (6) vs (13) Reno
Reno wants to control but Smoke is keeping him busy. #SUB2#
Reno wants to work for a kimura but he's foiled early by Smoke, who protects the arm well.
Reno trying to control the position but Smoke is working away. #T11#
Smoke is trying to get back to half guard.
Reno wants to control but Smoke is keeping him busy. #SUB2#
Reno is trying to land an Americana. He has the arm isolated but Smoke is keeping cool and he's avoided the danger for now.
Smoke has one of Reno's arms on lockdown, trying to prevent him from doing any damage.
Smoke is not content to let Reno control the position. #T12#
Smoke is looking to reverse the position.
Reno is looking to take a break and control but Smoke is keeping him honest, looking to work from the bottom.
Smoke is moving his hips around well on the bottom and has managed to get back to half guard.#T13#
Smoke is staying active underneath Reno, who seems content to just control the action from this position. #SUB2#
Reno is trying to work for a kimura. This could be trouble! No, Smoke has managed to free his arm - good work.
Smoke controlling the position well.
Reno is looking to take a break and control but Smoke is keeping him honest, looking to work from the bottom. #SUB2#
Reno is trying for a guillotine from the top but the pressure isn't in the right place so Smoke is just riding it out for now. Reno eventually gives up the hold.
Smoke is looking for a sweep. Reno is wise to his cunning plan and keeps the top position.#T14#
Reno trying to control the action but Smoke is working from the bottom.
Reno prevents Smoke from improving his position.
Boooooooooooooooooooo!!! God, this has been a terrible round. Come on you two, sort yourselves out!
Reno is looking to take a break and control but Smoke is keeping him honest, looking to work from the bottom.
And that's the end of the fight!
Reno wins on points by 13 to 6. |
|
|
|
|
|
|