 |
Summit Series 2 - MMA Round 4B PBP Commentary |
Undercard bout
|
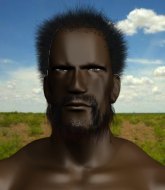
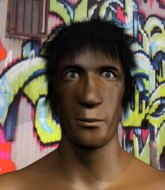
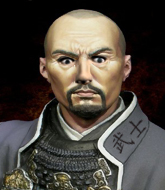
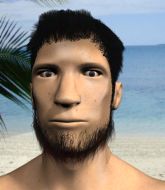
Coming up we have a lightweight MMA rules bout between Garry Hobbs (ranked 25272 p4p, 25276 weight class) and Cesar Borges (ranked 487 p4p, 475 weight class). Garry Hobbs could well score a knockout today. He has the power to get to Cesar Borges's chin.
 |
|
 |
| 180 cm
20
155
2 - 8 - 0 |
|
183 cm
20
155
1 - 8 - 0 |
BJJ Blue Belt
Basic striking
Good chin |
|
Good takedowns
Counter fighter
Good gas tank |
|
| |
|
Ladies and gentlemen. This fight is 3 rounds, in the lightweight division.
Introducing the fighter to my left, fighting out of the red corner.
With a record of 2 - 8 - 0, fighting out of New York, Garry Hobbs!
And introducing the fighter to my right, fighting out of the blue corner.
With a record of 1 - 8 - 0, fighting out of Rio de Janeiro, Cesar Borges!
The judges for this bout are Yukihiro Yamamoto, Taro Takaoka and Shirou Masuda.

The bell rings for round one and we are underway!
Hobbs tries for a takedown but Borges sees it coming a mile off and avoids it easily.
Hobbs shoots for a double leg takedown but Borges sprawls well. He's pushed Hobbs's face into the mat and manages to get back to his feet relatively easily.
Borges raises up his leg as if looking to counter with a high kick.
We can't be sure of the tactics at this early stage but we have heard that Borges has been working on his takedowns a lot in the buildup to the fight and we can only assume he's going to look to take this to the mat.
Hobbs shoots in looking for a takedown. Borges tries to sprawl out of it but Hobbs keeps driving through. The fighters are pinned against the cage. Borges manages to get underhooks and after a bit of a struggle, circles away and we're back to standing.
That's three failed takedown attempts in the round for Garry Hobbs. That's going to take a lot out of him.
Hobbs dives in for a single leg takedown but Borges sprawls and the fighters end up clinched against the cage.
Borges now looks to counter with a shot at the body.
Borges holding his opponent close, against the cage.
Hobbs keeps the fight in the clinch, despite Borges's efforts to push away.

Hobbs breaks the clinch.
No luck for Hobbs with that takedown attempt.
We've had a slow start to the round here - hopefully the action picks up.
Borges stuffs a takedown. It's all about dictating where the fight takes place and Borges wants it to stay on the feet.
Borges feints a counter leg kick.
Garry Hobbs seems to be the more aggressive standup fighter in this bout.
Hobbs is trying hard to land a takedown here. Borges sprawls well and keeps this one on the feet.
Borges appears to be waiting to throw a counter punch to the body.
Hobbs goes for a double leg but Borges avoids the attempt and the two fighters end up clinched against the cage as Borges continues to drive forward.
Hobbs breaks the clinch and we're back to striking at distance.
Hobbs definitely looks more muscular than last time we saw him fight.
Hobbs looks frustrated there after his takedown attempt is stuffed easily.
Borges counters with a body kick.
Cesar Borges is looking to keep the fight on the feet at all costs.

That's one minute gone in the round.
Hobbs tries for a takedown but Borges sees it coming a mile off and avoids it easily.
Hobbs will have to do better than that with his takedown attempts.
Borges stuffs the takedown.
A little jabbing left from Borges on the counter but it doesn't find it's target.
Hobbs shoots in with a takedown attempt and he has Borges pinned against the cage. Borges gets the underhooks and manages to circle away.
Hobbs is breathing heavily.
Hobbs fails with a rather predictable takedown attempt.
Nice sprawl there from Borges as Hobbs shoots in.
A little jabbing left from Borges on the counter but it doesn't find it's target.
A really sloppy takedown attempt there from Hobbs.
And an attempted straight right on the counter from Borges! But no joy.
Hobbs fails with a takedown attempt from distance.
Hobbs shoots in but Borges avoids the takedown attempt easily.
Borges counters with a body kick.

That's two minutes gone in the round.
Hobbs closes the distance and clinches up with Borges, looking for a takedown. Hobbs pushes Borges against the cage but Borges circles to the side and manages to break the clinch.
A nice side step and Borges releases a counter shot to the body, but it doesn't find it's home.
Hobbs shoots in for a takedown - he's clinched up with Borges but Borges pushes him off and we're back to square one.
Borges appears to be waiting to throw a counter punch to the body.
Hobbs fakes high and shoots in for a takedown but Borges avoids it really well and circles away.
Hobbs closes this distance looking for a takedown but Borges circles away.
Borges now looks to counter with a shot at the body.
Hobbs fails with a takedown attempt from distance.
It seemed like Borges was going to counter with the hook but didn't fully commit to it.
Hobbs shoots in looking for a takedown but Borges manages to keep the fight standing, pushing Hobbs's face into the canvas for good measure before circling away.
Hobbs goes for a double leg but Borges avoids the attempt and the two fighters end up clinched against the cage as Borges continues to drive forward.
Borges only half commits to the counter leg kick.
Hobbs keeps control of Borges as he tries to wriggle out of the double underhooks.
Borges is stalling here.
A battle for position here, against the cage.
A frustrated look appears on Borges's face as he tries to break the clinch.

That's three minutes gone in the round.
Hobbs's corner calls for him to break the clinch, which he does.
Borges displays good takedown defense there as he swats away a double leg from Hobbs.
Hobbs goes for a double leg but Borges avoids the attempt and the two fighters end up clinched against the cage as Borges continues to drive forward.
Borges is clearly trying to counter these attacks from Hobbs with a body shot.
Borges tries to break the clinch but Hobbs is controlling the position.
Borges looks like he'd prefer to be striking at range right now.
Hobbs manages to break the clinch.
Horrible takedown attempt by Hobbs or perhaps it was just good defense by Borges, which made it look bad.
Borges replies with a solid counter kick to the body but Hobbs blocks it well.
Hobbs shoots in for a takedown but Borges shows good takedown defense there and keeps this one on the feet.
Borges swings away with a counter right hand but no contact made.
Hobbs shoots in for a takedown. He's persisting with it as Borges sprawls well. Borges wins this battle and keeps the fight standing. Hobbs gets slowly back to his feet.
A really sloppy takedown attempt there from Hobbs.
A nice side step and Borges releases a counter shot to the body, but it doesn't find it's home.

That's four minutes gone in the round.
Hobbs darts in looking for a takedown but Borges gets double underhooks and turns Hobbs into the cage.
Borges feints a counter leg kick.
Hobbs wants to break the clinch but can't.
Borges tries to break the clinch but Hobbs is controlling the position.
Borges wants to get back to striking at distance but Hobbs won't allow it.
Hobbs pushes off and circles away, back to the middle of the mat.
Hobbs looks for a takedown here. Will he get it? Borges is fending him off so far but Hobbs persists. Nope, Borges circles away and we're back to standing.
It seemed like Borges was going to counter with the hook but didn't fully commit to it.
Borges stuffs a takedown. It's all about dictating where the fight takes place and Borges wants it to stay on the feet.
Hobbs throws a looping left and ducks down for a takedown. He's got his arms around Borges's waist but Borges gets an underhook and avoids the takedown by throwing Hobbs off to one side.
A countering left hand to the body from Borges misses.
Hobbs closes the distance and clinches up with Borges, looking for a takedown. Hobbs pushes Borges against the cage but Borges circles to the side and manages to break the clinch.
Borges tries a quick counter leg kick but Hobbs is wise to it.
Hobbs is trying hard to land a takedown here. Borges sprawls well and keeps this one on the feet.
Borges is trying to counter with his kicks.
Hobbs misses with a takedown attempt - Borges sprawls well and throws a nice strike on the way out which just misses.
Hobbs backing away here, and Borges unleashes a leg kick that just misses.
The crowd thankful this round is nearly over.
Hobbs shoots in looking for a double leg takedown. Borges defends it nicely.
Borges replies with a solid counter kick to the body but Hobbs blocks it well.
Borges leaves Hobbs with his face pressed against the mat as he sprawls beautifully, defending against a solid takedown attempt.
And that is the end of the round. The fighters go back to their corners.
Cesar Borges dominated that round.
The referee calls time. The cornermen exit stage left and we're back to business.

Borges stuffs a takedown. It's all about dictating where the fight takes place and Borges wants it to stay on the feet.
Hobbs changes levels and looks for a double leg takedown. Borges tries to avoid it but Hobbs manages to keep hold of a leg and drag Borges to the ground. Borges escapes though and pops straight back up to his feet.
Borges doesn't fully commit to the body shot counter.
Nice takedown defense from Borges. No joy for Hobbs on that attempt.
Hobbs backing away here, and Borges unleashes a leg kick that just misses.
That's three failed takedown attempts in the round for Garry Hobbs. That's going to take a lot out of him.
Hobbs fails with a takedown attempt from distance.
Borges follows through with a counter body kick but it doesn't land.
Hobbs looks frustrated there after his takedown attempt is stuffed easily.
Hobbs will have to do better than that with his takedown attempts.
Borges replies with a solid counter kick to the body but Hobbs blocks it well.
Hobbs shoots in for a takedown but Borges shows good takedown defense.
Hobbs looks for a takedown but Borges sprawls well.
We've had a slow start to the round here - hopefully the action picks up.
Hobbs fails with a takedown attempt.
Borges is trying to counter with his kicks.
Both fighters are absolutely exhausted here.
A telegraphed takedown attempt from Hobbs is defended easily by Borges.
Borges looks like he wants to counter punch here.
That's one minute gone in the round.
Hobbs looks frustrated there after his takedown attempt is stuffed easily.
Borges thinks about the counter body kick.
Horrible takedown attempt by Hobbs or perhaps it was just good defense by Borges, which made it look bad.
It seemed like Borges was going to counter with the hook but didn't fully commit to it.
Hobbs looks frustrated there after his takedown attempt is stuffed easily.
Borges appears to be waiting to throw a counter punch to the body.
Horrible takedown attempt by Hobbs or perhaps it was just good defense by Borges, which made it look bad.
Hobbs looks for a takedown but Borges sprawls well.
Hobbs fails with a takedown attempt from distance.
Borges stuffs the takedown.
And an attempted straight right on the counter from Borges! But no joy.
That's two minutes gone in the round.
A telegraphed takedown attempt from Hobbs is defended easily by Borges.
And Borges responds with a good body kick, but Hobbs manages to step out the way in time.
Hobbs has a takedown stuffed.
Hobbs shoots in but Borges avoids the takedown attempt easily.
Borges stuffs a takedown. It's all about dictating where the fight takes place and Borges wants it to stay on the feet.
Borges steps in looking to counter with the mid kick but it doesn't connect.
Hobbs closes this distance looking for a takedown but Borges circles away.
Borges is clearly trying to counter these attacks from Hobbs with a body shot.
Hobbs closes this distance looking for a takedown but Borges circles away.
Hobbs tries for a takedown but Borges sees it coming a mile off and avoids it easily.
A nice side step and Borges releases a counter shot to the body, but it doesn't find it's home.
Hobbs will have to do better than that with his takedown attempts.
Hobbs shoots in and drives through. Borges sprawls well.
And Borges responds with a good body kick, but Hobbs manages to step out the way in time.
Hobbs shoots for a takedown but Borges saw that one coming a mile off and avoided it easily.
A nice side step and Borges releases a counter shot to the body, but it doesn't find it's home.
That's three minutes gone in the round.
Hobbs shoots in looking for a double leg takedown. Borges defends it nicely.
Borges thinks about the counter body kick.
We are yet to see a takedown attempt from Borges in the fight. On paper you would think he is the more dominant ground fighter so let's see if these unusual tactics pay off.
Hobbs shoots in looking for a double leg takedown. Borges defends it nicely.
No luck with that takedown attempt from Hobbs.
Borges now looks to counter with a shot at the body.
Hobbs darts in looking for a takedown but Borges gets double underhooks and turns Hobbs into the cage.
Borges tries to break free but Hobbs pushes him back against the cage.
Borges has had enough of the clinch but Hobbs keeps him there for the moment.
Borges wants to push off and get back to the center of the mat but Hobbs has him pressed against the cage.
Hobbs wants to get back to striking at distance but Borges won't allow it.
Hobbs keeps control of Borges as he tries to wriggle out of the double underhooks.
Borges is trying to maintain a safe position but Hobbs gets an underhook and turns Borges into the cage.
Borges is trying to stall.
Stalling in the clinch from Borges.
That's four minutes gone in the round.
Neither fighter has done anything of merit for a good minute or two here and the crowd are not happy about it.
Hobbs tries to circle away but Borges has him pinned against the cage.
Borges is trying to break the clinch but Hobbs is controlling him.
Hobbs breaks from the clinch.
Borges displays good takedown defense there as he swats away a double leg from Hobbs.
No luck with that takedown attempt from Hobbs.
Borges only half commits to the counter leg kick.

Hobbs drives through with a takedown into Borges's guard. Let's see what he can do from the top position.
We could do with one of the fighters taking the initiative a bit more on the ground - they're both waiting to capitalize on a mistake.

Hobbs is posturing up here but Borges has hold of an arm and he's gone for an armbar! Hobbs tries to roll out but it's too tight and Hobbs has to tap! Slick submission there by Borges!
Ladies and gentlemen, after 4:59 of round 2, we have a winner by way of Submission (Armbar). Cesar Borges!
|
|
|
|
|
|
|
|
|
|
|
|
|
|
|
|
|
|
|
|
|
|
|
| S |
C
A |
G |
S |
C
B |
G |
|
S |
C |
G |
|
energy
A | B |
|
hype
A | B |
|
pop
A | B |
|
mgr
A | B |
|
FIGHT
RATING
36% |
|
|
|
|
|
|
|
Undercard bout
|
Coming up we have a lightweight MMA rules bout between Jermaine Plumson (ranked 4899 p4p, 4603 weight class) and Andre Pereira (ranked 440 p4p, 421 weight class). Both fighters look pumped up here. Let's hope this is a good fight!
 |
|
 |
| 175 cm
18
155
0 - 1 - 0 |
|
185 cm
20
155
4 - 6 - 0 |
Good wrestling
Brawler
Good chin |
|
Powerful takedowns
Brawler
Good gas tank |
|
| |
|
Ladies and gentlemen. This fight is 3 rounds, in the lightweight division.
Introducing the fighter to my left, fighting out of the red corner.
With a record of 0 - 1 - 0, fighting out of Tokyo, Jermaine Plumson!
And introducing the fighter to my right, fighting out of the blue corner.
With a record of 4 - 6 - 0, fighting out of Montreal, Andre Pereira!
The judges for this bout are Shigeki Sano, Hirohito Nitta and Kenichi Hosakawa.
The bell rings for round one and we are underway!
Plumson shoots in for a takedown - he's clinched up with Pereira but Pereira pushes him off and we're back to square one.

Pereira shoots in for a takedown from distance. He catches Plumson napping and manages to drive through into side control!
Pereira tries for a kimura but Plumson is defending well.
Plumson tries to bench press Pereira off him but Pereira keeps the position.
Pereira tries for an arm triangle. That looks pretty tight to me. Is this one over!?! Possibly, maybe, no Pereira has let go of the choke. Obviously it wasn't as tight as we thought!
Plumson wants to control but Pereira postures up.
We've had a slow start to the round here - hopefully the action picks up.
Plumson is looking to regain half guard here but Pereira keeps moving and retains side control.
You can see the frustration on Plumson's face, being in this tough position on the bottom.
Pereira is looking to finish here, going for an Americana. Plumson knows the correct defense though, so he's OK.
That's one minute gone in the round.
Pereira is trying to get an arm triangle but Plumson is defending well.
Pereira has hold of Plumson's arm here. He's working for an Americana. It looks like he might have it! Plumson tries to escape but he's just digging himself in deeper - Pereira cranks the arm and Plumson screams in pain! The ref makes a decision and ends the fight before the tap - no complains from Plumson, who is just happy to have his arm attached to his body.
Ladies and gentlemen, after 1:34 of round 1, we have a winner by way of Submission (Americana). Andre Pereira!
Andre Pereira decided to thank the fans in attendance for making a great atmosphere. It seemed to go down pretty well.
|
|
|
|
|
|
|
|
|
|
|
|
|
|
|
|
|
|
|
|
|
|
|
| S |
C
A |
G |
S |
C
B |
G |
|
S |
C |
G |
|
energy
A | B |
|
hype
A | B |
|
pop
A | B |
|
mgr
A | B |
|
FIGHT
RATING
54% |
|
|
|
|
|
|
|
Undercard bout
|
Coming up we have a lightweight MMA rules bout between Ryobi Sansho (ranked 25203 p4p, 3255 weight class) and Hardeep Nijjar (ranked 463 p4p, 340 weight class). Over to our ring announcer for the fighter introductions!
 |
|
 |
| 180 cm
20
160
2 - 7 - 0 |
|
168 cm
20
160
5 - 2 - 0 |
Decent wrestler
Brawler
Cardio machine |
|
Decent wrestler
Excellent boxer
Good gas tank |
|
| |
|
Ladies and gentlemen. This fight is 3 rounds, in the lightweight division.
Introducing the fighter to my left, fighting out of the red corner.
With a record of 2 - 7 - 0, fighting out of Montreal, Ryobi Sansho!
And introducing the fighter to my right, fighting out of the blue corner.
With a record of 5 - 2 - 0, fighting out of Tokyo, Hardeep Nijjar!
The judges for this bout are Ren Mimura, Taro Takaoka and Kenichi Hosakawa.
The bell rings for round one and we are underway!
Nijjar shuffles to his left behind two crisp jabs. Sansho eats them both and turns towards Nijjar to reposition himself and eats a stinging right hand-left hook combo.
Sansho misses with a few strikes there.
Sansho definitely looks more muscular than last time we saw him fight.
Sansho throws an ugly left hook that misses
enabling Nijjar to counter with a crisp jab.
Sansho misses the body punch
and Nijjar counters with a good right hand that lands right on the jaw.
Nijjar displays some good footwork, moving neatly out of range as Sansho throws out the jab.
Sansho is on the wrong end of a nice combination from Nijjar.
Nijjar takes a body punch that cleary hurt but he's trying not to show any weakness.
Fantastic stuff here - a very entertaining period of action, which has drawn cheers from the crowd.
Sansho misses with a combination
and Nijjar counters with a left to the body.
Sansho throws a lazy uppercut
letting Nijjar counter with a right hand.
Nijjar looks more muscular than last time we saw him. He must have been on the weights.
Nijjar cracks Sansho with a good jab.
 Sansho is rocked! Sansho is rocked!
and Nijjar counters with a massive uppercut that badly hurts Sansho! He's just covering up as Nijjar starts to tee off till the referee steps in and stops the fight!
Ladies and gentlemen, after 0:39 of round 1, we have a winner by way of TKO (Strikes). Hardeep Nijjar!
Hardeep Nijjar decided to go for the less than humble approach in his post fight interview, telling everyone how he is going to conquer the world. The crowd seemed to like it when really that sort of approach could have gone either way.
|
|
|
|
|
|
|
|
|
|
|
|
|
|
|
|
|
|
|
|
|
|
|
| S |
C
A |
G |
S |
C
B |
G |
|
S |
C |
G |
|
energy
A | B |
|
hype
A | B |
|
pop
A | B |
|
mgr
A | B |
|
FIGHT
RATING
100% |
|
|
|
|
|
|
|
Undercard bout
|
Coming up we have a lightweight MMA rules bout between Mark Spagnolo (ranked 4473 p4p, 4324 weight class) and Rory Birdwhistle (ranked 410 p4p, 400 weight class). Birdwhistle has chosen Davidian - Machine Head as his entrance music. The atmosphere really building for this one as we go over to our ring announcer for the fighter introductions!
 |
|
 |
| 178 cm
20
165
4 - 6 - 0 |
|
174 cm
20
162
4 - 5 - 0 |
Decent wrestler
Basic striking
Good chin |
|
Good wrestler
Excellent boxer
Good gas tank |
|
| |
|
Ladies and gentlemen. This fight is 3 rounds, in the lightweight division.
Introducing the fighter to my left, fighting out of the red corner.
With a record of 4 - 6 - 0, fighting out of Rio de Janeiro, Mark Spagnolo!
And introducing the fighter to my right, fighting out of the blue corner.
With a record of 4 - 5 - 0, fighting out of London, Rory Birdwhistle!
The judges for this bout are Hirohito Nitta, Shigeki Sano and Tatsuya Matsuyama.
The bell rings for round one and we are underway!
Spagnolo swings widly with a right hand
and Birdwhistle cracks him with a counter punch right on the button.
Birdwhistle swings wildly with a couple of big hooks

and Spagnolo counters into the clinch. Nicely done.
Birdwhistle has managed to pull guard. Let's see whether he can work an aggressive guard. It will also be interesting to see what tactics Spagnolo uses from the top position.
Birdwhistle looking for a sweep. Not yet Birdwhistle, not yet.
Spagnolo trying to control the position from guard on top but Birdwhistle is wriggling around, looking for whatever he can.
Spagnolo controlling from the top position.
We've had a slow start to the round here - hopefully the action picks up.
Birdwhistle has a closed guard, preventing anything of note from happening. Perhaps he's looking to stall.
That's one minute gone in the round.
Spagnolo pressing down on his opponent's thigh, looking to pass guard. Birdwhistle is keeping the position for now.
Birdwhistle wants to control here, rather than go for any submissions from the bottom. At least for now.

The referee decides to stand the fighters back up.
Birdwhistle lands with a shot to the body.
Spagnolo fails to land with a series of punches.
Birdwhistle doesn't fully commit to the body shot counter.
Spagnolo takes a shot to the nose. Hopefully that hasn't broken it.
Birdwhistle tries to close the distance and clinch up but Spagnolo swats him away and circles back towards the center.
Birdwhistle lands with a good body shot.
Birdwhistle is looking for a takedown here. He's shot in and has managed to get it, finishing up in Spagnolo's half guard.
Birdwhistle thows a wild elbow that connects with the canvas.
That's two minutes gone in the round.
Birdwhistle keeping composed on the top, looking to control the action.
Spagnolo on his back here. We all know that wrestlers don't like being on their back so let's see if Spagnolo tries to get out of the position.
Birdwhistle is thwarting Spagnolo's attempts to control the position.
Birdwhistle sitting in half guard, looking to land shots. Spagnolo defending well though.
Birdwhistle seems to be working for a kimura but Spagnolo defends the submission attempt.
Birdwhistle performing his best blanket impression for a moment.
Birdwhistle is keen to just control but Spagnolo is a slippery customer.
That's three minutes gone in the round.
Birdwhistle thows a wild elbow that connects with the canvas.
Spagnolo keeping his head moving to avoid the ground and pound.
Birdwhistle controlling the action here.
Spagnolo knows he needs to get back to his feet asap. He's simply no match for Birdwhistle on the ground.
Birdwhistle is looking to take a break and control but Spagnolo is keeping him honest, looking to work from the bottom.
Birdwhistle thows a huge punch but Spagnolo dodges it nicely.
Birdwhistle is trying to control the action in half guard but Spagnolo is working away on the bottom, looking perhaps to get back to full guard.
The referee decides to stand the fighters back up.
That's four minutes gone in the round.
The crowd are hurling abuse towards the fighters... You can hardly blame them though because there isn't a lot going on in the fight.
Spagnolo swings for the body but Birdwhistle moves out of range.
Birdwhistle cracks Spagnolo with a good jab.
Spagnolo walks forward and throws out a flicking leg kick. Birdwhistle checks it nicely though, as he moves to the side.
Spagnolo is pinned up against the cage taking some big shots here. The referee is looking closely deciding whether he should stop the fight.
Spagnolo misses with a lunging right hand
and Birdwhistle counters with a crisp hook to the side of the head.

Birdwhistle takes the fight into the clinch.
I was talking to Spagnolo's coach per-fight and he was telling me that they'd been working on the clinch in the runup to this fight.
Spagnolo can't find room to land a body shot as Birdwhistle controls the action.
Spagnolo takes a shot to the head.
Spagnolo throws a hook to the body. More of an arm punch but it's all scoring with the judges.
Birdwhistle has moved round to his opponent's back and is looking for a suplex! Oh snap! He's tossed Spagnolo clear over his head and slammed him to the mat!
Birdwhistle missing with punches from the back.
Birdwhistle misses with an elbow to the head.
And that is the end of the round. The fighters go back to their corners.
Rory Birdwhistle dominated that round.
Well, the break between rounds is over. Let's get back to the scrappin!
Nice shot lands for Birdwhistle.
Nice shot lands for Spagnolo.
Birdwhistle connects with a looping right hand.
Birdwhistle has been working his punching technique in the buildup to the fight and it appears to be paying off.
Spagnolo looks to clinch
and Birdwhistle connects with a straight left hand counter down the middle.
Spagnolo avoids the head kick by Birdwhistle.
Spagnolo gets to the clinch - let's see what his plan is here.
Birdwhistle is working on a leg, looking for a takedown but Spagnolo is defending well.
Birdwhistle has clasped his hands together around Spagnolo's back... aaand, he's got a takedown into side control. Nicely done.
Wooooo! Give it up for these two warriors! They are putting on a show!
The ground and pound from Birdwhistle seems to be hitting the mat more than his opponent.
Birdwhistle tries for an arm triangle. That looks pretty tight to me. Is this one over!?! Possibly, maybe, no Birdwhistle has let go of the choke. Obviously it wasn't as tight as we thought!
Birdwhistle throwing strikes but missing, from side control.
Birdwhistle tries to land with some ground and pound but misses.
That's one minute gone in the round.
Birdwhistle is looking to finish here, going for an Americana. Spagnolo knows the correct defense though, so he's OK.
Birdwhistle is looking for a kimura. He might have it! No, Spagnolo has escaped the position, nice work there.
Birdwhistle postures up a little and throws a couple of hammerfists but they don't connect properly.
Birdwhistle misses with the ground and pound.
Spagnolo defending against the ground and pound.
That's two minutes gone in the round.
The crowd are hurling abuse towards the fighters... You can hardly blame them though because there isn't a lot going on in the fight.
Birdwhistle tries to move to mount but Spagnolo blocks the move with his legs.
Birdwhistle has been the more effective fighter overall so far.
Spagnolo is not content to let Birdwhistle control the position.
Birdwhistle happy to just control the position for now.
Spagnolo defending against the ground and pound.
Spagnolo is not content to let Birdwhistle control the position.
That's three minutes gone in the round.
Birdwhistle tries to land with some ground and pound but misses.
Birdwhistle throwing strikes but missing, from side control.
Birdwhistle wants to control but Spagnolo is keeping him busy.
The referee has stepped in and called for a break in the action. We'll restart on the feet.
Spagnolo misses with a straight right.
Birdwhistle goes for a double leg but Spagnolo avoids the attempt and the two fighters end up clinched against the cage as Spagnolo continues to drive forward.
Birdwhistle fakes a jab and throws a low kick but Spagnolo checks it well.
Birdwhistle cracks Spagnolo with a hook to the jaw. Both fighters smile at eachother and high-five before getting back down to business.
That's four minutes gone in the round.
Nice shot by Birdwhistle.
Spagnolo misses the jab.
Spagnolo tries to land a front kick but Birdwhistle steps back. That was a bit too telegraphed.
Birdwhistle throws out a powerful jab.
A decent looking cross lands there for Spagnolo.
Birdwhistle scores a trip takedown into side control. Nice.
We've seen a great period of action over the last minute or so - credit to both fighters for going all out!
Spagnolo is not content to let Birdwhistle control the position.
Birdwhistle tries for a kimura but Spagnolo is defending well.
Birdwhistle working the ground and pound.
And that is the end of the round. The fighters go back to their corners.
Rory Birdwhistle showed his class in that round. I'd imagine he'll take it on all the scorecards.
The fighters get back to their feet, the hooter sounds and we're back to the action! The crowd applaud as we get ready to start the final round!

Birdwhistle scores with a shot to the body.
Birdwhistle throws a big shot that misses.
A low kick from Spagnolo misses
and Birdwhistle connects with a straight left hand counter down the middle.
Birdwhistle ducks under a wild hook from Spagnolo.
Rory Birdwhistle seems to be getting the better of the standup.
Spagnolo throws an uppercut from half a mile away. Birdwhistle sees it coming and avoids it easily.
Spagnolo is looking to chop away at Birdwhistle's legs.
Birdwhistle lands a nice hook to Spagnolo's body. Spagnolo takes it in his stride and looks to land his own strikes.
Birdwhistle closes the distance, clinches up and gets a nice trip takedown into side control. Very smooth.
Birdwhistle trying to control the action but Spagnolo is working from the bottom.
Spagnolo parries the strikes from Birdwhistle easily there. Birdwhistle is wary of posturing up too much because it might enable Spagnolo to escape.
Birdwhistle throwing strikes but missing, from side control.
That's one minute gone in the round.
Spagnolo being controlled for a moment.
Birdwhistle wants to lay and pray for a moment but Spagnolo keeps working.
Birdwhistle in side control, working for a kimura. He's got hold of an arm and he's torquing it... Spagnolo is tapping! That's the end of the fight!
Ladies and gentlemen, after 1:49 of round 3, we have a winner by way of Submission (Kimura). Rory Birdwhistle!
Rory Birdwhistle decided to thank the fans in attendance for making a great atmosphere. It seemed to go down pretty well.
|
|
|
|
|
|
|
|
|
|
|
|
|
|
|
|
|
|
|
|
|
|
|
| S |
C
A |
G |
S |
C
B |
G |
|
S |
C |
G |
|
energy
A | B |
|
hype
A | B |
|
pop
A | B |
|
mgr
A | B |
|
FIGHT
RATING
49% |
|
|
|
|
|
|
|
Co-main event
|
Coming up we have a lightweight MMA rules bout between Hiroshimo Sakamoto (ranked 3603 p4p, 4589 weight class) and Edward Krause (ranked 360 p4p, 420 weight class). Both these guys have really solid chins. Will we see a standup war or will they both decide that a knockout is unlikely and try to win the fight elsewhere?
 |
|
 |
| 176 cm
20
159
4 - 6 - 0 |
|
183 cm
20
160
5 - 4 - 0 |
BJJ White Belt
Solid Muay Thai
Very quick |
|
BJJ Blue Belt
Excellent MT
Granite chin |
|
| |
|
Ladies and gentlemen. This fight is 3 rounds, in the lightweight division.
Introducing the fighter to my left, fighting out of the red corner.
With a record of 4 - 6 - 0, fighting out of Los Angeles, Hiroshimo Sakamoto!
And introducing the fighter to my right, fighting out of the blue corner.
With a record of 5 - 4 - 0, fighting out of New York, Edward Krause!
The judges for this bout are Ren Mimura, Yukihiro Shimada and Sosuke Kotani.
The bell rings for round one and we are underway!
Sakamoto throws a jab but it's blocked by Krause.
And Krause tries to counter it with a takedown but Sakamoto pushes his down on his head and steps out.
Sakamoto tries to bum rush Krause with a series of wild strikes but Krause uses good footwork to avoid the assault.
And Krause tries to counter it with a takedown but Sakamoto pushes his down on his head and steps out.
Sakamoto throws a hook to the body but it doesn't connect.
Sakamoto throws a lazy body kick
and Krause counters with a nice shoot takedown that brings the fighters to the ground.
Krause throwing elbows and punches but not connecting, as Sakamoto works some decent striking defense from the bottom.
Krause working some strikes from top position.
We've had a slow start to the round here - hopefully the action picks up.
Krause postures up in Sakamoto's guard and throws a big left but Sakamoto blocks it.
Krause is looking to work some ground and pound but Sakamoto has wrist control.
Krause throws a big right hand that misses.
Krause in full guard, throwing the ground and pound. No damage this time.
Sakamoto trying to control the position.
Krause loading up with the ground and pound but he's missing more than he's landing in this flurry.
That's one minute gone in the round.
Krause keeps in close for a moment and lands a decent shot to the side of Sakamoto's head.
Krause pushing down on Sakamoto's thigh, trying to pass to half guard. He's managed it... Nice work.
Sakamoto definitely looks more muscular than last time we saw him fight.
Krause prevents Sakamoto from improving his position.
Sakamoto keeping his head moving to avoid the ground and pound.
Krause is thwarting Sakamoto's attempts to control the position.
Krause has the superior BJJ but he's also working some ground strikes into his gameplan.
Sakamoto wants to get back to full guard.
Krause winds up and cracks Sakamoto with a swinging punch to the side of the head.
Sakamoto is looking to control Krause's leg but it's slowly edging free. Can Sakamoto avoid being mounted?
Krause prevents Sakamoto from improving his position.
Sakamoto avoiding damage under a succession of punches from Krause.
Krause missing with some ground and pound from the half guard.
Krause missing with some ground and pound from the half guard.
Sakamoto has hold of Krause's hands but Krause slips his arm to the side and lands an elbow.
The ref warns both fighters not to hold the cage as they work up against the meshing.
That's two minutes gone in the round.
Sakamoto keeping his head moving to avoid the ground and pound.
Krause missing with some ground and pound from the half guard.
Krause throwing shots but they're hitting the canvas more than the man.
Krause looks more muscular than last time we saw him. He must have been on the weights.
Krause thows a wild elbow that connects with the canvas.
Sakamoto blocking the ground and pound attempt from Krause.
Sakamoto keeping his head moving to avoid the ground and pound.
Sakamoto avoiding damage under a succession of punches from Krause.
Sakamoto keeping his head moving to avoid the ground and pound.
Krause thows a huge punch but Sakamoto dodges it nicely.
Krause missing with some ground and pound from the half guard.
Krause missing with some ground and pound from the half guard.
This has been an exciting period of action!
Sakamoto keeping his head moving to avoid the ground and pound.
The fighters are pressed up against the cage, both looking to find a bit of space to work.
Krause throwing shots but they're hitting the canvas more than the man.
Krause sitting in half guard, looking to land shots. Sakamoto defending well though.
Krause is nestled in close to Sakamoto, controlling him well. He's worked in a nice elbow to the side of the head as well, for good measure.
Krause throwing shots but they're hitting the canvas more than the man.
Krause throwing shots but they're hitting the canvas more than the man.
That's three minutes gone in the round.
Sakamoto avoiding damage under a succession of punches from Krause.
Sakamoto on his back here. We all know that wrestlers don't like being on their back so let's see if Sakamoto tries to get out of the position.
Krause not throwing his punches with enough precision this time.
Krause throwing shots but they're hitting the canvas more than the man.
Krause throwing punches and elbows but they're not doing any damage.
Sakamoto is looking to control Krause's leg but it's slowly edging free. Can Sakamoto avoid being mounted?
Krause thows a huge punch but Sakamoto dodges it nicely.
Krause sitting in half guard, looking to land shots. Sakamoto defending well though.
Sakamoto avoiding damage under a succession of punches from Krause.
Sakamoto trying to control from the bottom.
Krause throwing shots but they're hitting the canvas more than the man.
Krause lands strikes from half guard.
Krause missing with some ground and pound from the half guard.
Krause not throwing his punches with enough precision this time.
Krause throwing shots but they're hitting the canvas more than the man.
Sakamoto avoiding damage under a succession of punches from Krause.
Krause thumps the canvas. Not on purpose obviously - he just missed Sakamoto's head.
That's four minutes gone in the round.
Krause missing with the ground and pound from half guard.
Sakamoto avoiding damage under a succession of punches from Krause.
Krause not landing any meaningful shots this time.
Sakamoto is looking to improve his position.
Sakamoto keeping his head moving to avoid the ground and pound.
Krause throwing punches and elbows but they're not doing any damage.
Krause thows a huge punch but Sakamoto dodges it nicely.
Krause thumps the canvas. Not on purpose obviously - he just missed Sakamoto's head.
Sakamoto is trying to maintain the position but Krause is very close to passing his half guard.
Krause winds up and cracks Sakamoto with a swinging punch to the side of the head.
Krause thumps the canvas. Not on purpose obviously - he just missed Sakamoto's head.
Krause missing with some ground and pound from the half guard.
Wooooo! Give it up for these two warriors! They are putting on a show!
Krause thows a huge punch but Sakamoto dodges it nicely.
Krause missing with the ground and pound from half guard.
Sakamoto avoiding damage under a succession of punches from Krause.
And that is the end of the round. The fighters go back to their corners.
Edward Krause dominated that round.
That's the end of the round. The referee orders the cornermen out of the cage so we can get back down to business.
Sakamoto swings for the body but Krause moves out of range.
Krause avoids a lazy jab quite easily.
Krause tries a counter takedown but it's more of a dummy move, and he uses it to push himself away.
Sakamoto just misses with a punch to the body.
Krause is definitely looking for the counter takedowns here.
Sakamoto throws a leg kick that misses.
Sakamoto throws a hook but Krause avoids it easily.
Krause drops down looking to force a counter takedown but Sakamoto defends it well.
We've had a slow start to the round here - hopefully the action picks up.
Sakamoto throws the kick towards the body but Krause avoids it.
Sakamoto moves into range and clinches up with Krause.
That's one minute gone in the round.
Sakamoto tries a body shot but Krause blocks it.
Krause swings away with an uppercut that misses.
A head punch blocked on the inside by Sakamoto.
An uppercut on the inside fails to land for Krause.
Krause swings away with an uppercut that misses.
Krause scores with a shoulder strike.
Sakamoto throws a head punch that misses.
Sakamoto working some nice short punches in the clinch.
Sakamoto lands a body punch.
Sakamoto working aggressively here.
A head punch on the inside from Sakamoto fails to land.
Sakamoto has a couple of punches blocked by Krause.
An uppercut on the inside fails to land for Sakamoto.
Krause swings wildly with an uppercut but Sakamoto uses good head movement to avoid it.
Krause managing to block the knees to the body from Sakamoto.
Krause swings away with an uppercut that misses.
Krause has been the more effective fighter overall so far.
Krause throws a punch but it's blocked by Sakamoto.
Krause lands with a good tight uppercut to the head.
Krause blocking some punches.
That's two minutes gone in the round.
Krause swings away with an uppercut that misses.
Sakamoto lands a hook that snaps the head of Krause backwards.
This is a great period of action - very entertaining stuff!
Krause working aggressively here.
Sakamoto misses with a punch on the inside.
Good body shot from Sakamoto.
Sakamoto using the Thai plumb to throw knees but Krause has his back arched nicely, preventing the strike.
Sakamoto working on landing some head shots here - that one got through nicely.
An uppercut on the inside fails to land for Krause.
Krause lands with a short shot to the head.
Krause pushes Sakamoto back against the cage and lands a hook to the side of the head.
Sakamoto throws a punch but it's blocked by Krause.
Krause swings away with an uppercut that misses.
Sakamoto lands a right hand.
A left hand lands to the body for Sakamoto.
Sakamoto blocks an uppercut.
Nice body punch from Sakamoto - that landed with a thud.
Krause misses with the head strike.
Krause takes a shot to the head.
Sakamoto misses with a short punch on the inside.
Sakamoto lands with a light punch inside.
Krause lands with a short shot to the head.
That's three minutes gone in the round.
Nice body punch from Sakamoto - that landed with a thud.
Krause throws a punch but it's blocked by Sakamoto.
Krause swings wildly with an uppercut but Sakamoto uses good head movement to avoid it.
Sakamoto blocks a couple of punches on the inside.
Krause working aggressively here.
A shot in the inside from Krause.
Sakamoto misses the knee to the body. Nice hip positioning from Krause.
Sakamoto fails to land with a short punch on the inside.
Krause throws a punch but it's blocked by Sakamoto.
A head punch blocked on the inside by Sakamoto.
Krause swings wildly with an uppercut but Sakamoto uses good head movement to avoid it.
Sakamoto misses with the head strike.
Krause blocks a punch to the side of the head.
Sakamoto blocks a punch to the side of the head.
Hiroshimo Sakamoto has scored more points in the clinch so far.
Krause swings wildly with an uppercut but Sakamoto uses good head movement to avoid it.
Krause has a couple of punches blocked by Sakamoto.
Sakamoto scores with a hook to the body.
That's four minutes gone in the round.
Sakamoto takes a shot to the head.
Krause blocks a punch to the side of the head.
Krause's head jolts backwards as he takes an uppercut right on the button!
Sakamoto tries a shoulder strike but it doesn't do any damage.
With the fighters clinched against the cage, Krause creates a bit of distance for himself and scores with a nice uppercut.
We've seen a great period of action over the last minute or so - credit to both fighters for going all out!
Sakamoto blocks a punch to the side of the head.
Krause working aggressively here.
Krause lands a hook that snaps the head of Sakamoto backwards.
Krause tries a shoulder strike but it doesn't do any damage.
Krause misses with some punches.
An uppercut on the inside fails to land for Krause.
Krause misses with some punches.
Sakamoto lands with a short head shot on the inside.
Sakamoto tries a body shot but Krause blocks it.
Sakamoto blocks an uppercut.
Krause throws a blind hook that connects with the side of Sakamotos head.
Krause has a couple of punches blocked by Sakamoto.
Sakamoto using the Thai plumb to throw knees but Krause has his back arched nicely, preventing the strike.
Sakamoto throws a punch but it's blocked by Krause.
Krause swings wildly with an uppercut but Sakamoto uses good head movement to avoid it.
Krause lands a shoulder strike.
And that is the end of the round. The fighters go back to their corners.
A close second round but Edward Krause will probably get the nod - 10:9.
OK. That's time! The bell goes and we're back to the action. This is the final round!
Sakamoto does a little shimmy and throws a leg kick. The leg kick missed by a considerable margin though, making him look a little bit silly for doing the shimmy.
Krause steps to the side to avoid the strikes from Sakamoto.
Sakamoto misses with a looping right.
Sakamoto misses with a two punch combination.
Krause drops down looking to force a counter takedown but Sakamoto defends it well.
Krause staying out of range there.
Krause is definitely looking for the counter takedowns here.
We've had a slow start to the round here - hopefully the action picks up.
Sakamoto rushes forward with a series of wild hooks but Krause moves out of range and avoids them all easily.
Krause with the counter takedown but Sakamoto avoids it easily.
Krause's hands are dropping dangerously low here and Sakamoto connects clean with a right hook that sends him down to one knee! Krause scrambles back to his feet.
That's one minute gone in the round.
Sakamoto misses with a body shot. Nice footwork from Krause.
Sakamoto looks to land a right hand but Krause moved out of range.
Sakamoto throws a leg kick but Krause checks it.
Sakamoto misses with a body shot.
Krause is definitely looking for the counter takedowns here.
Sakamoto throws a looping overhand right but Krause ducks down to avoid it.
Krause drops down looking to force a counter takedown but Sakamoto defends it well.
Sakamoto throws a body shot but no joy.
Krause changes levels for a counter takedown but doesn't follow through with his attempt.
Hiroshimo Sakamoto has stepped it up - he knows he needs a finish here!
That's two minutes gone in the round.
A few boos can be heard. I'm sure they will multiply if the fighters don't pick up the pace.
Sakamoto misses with an uppercut.
And Krause tries to counter it with a takedown but Sakamoto pushes his down on his head and steps out.
Sakamoto misses with a body shot.
Krause drops down looking to force a counter takedown but Sakamoto defends it well.
Sakamoto is really struggling to find his range with his punches. Krause's reach advantage is clearly causing him problems.
Krause avoids a lazy jab quite easily.
Krause tries a counter takedown but it's more of a dummy move, and he uses it to push himself away.
Hiroshimo Sakamoto seems to be the more aggressive standup fighter in this bout.
Krause staying out of range there.
Sakamoto misses the shot to the body.
Sakamoto throws a body punch but Krause moves out of range.
That's three minutes gone in the round.
A swing and a miss from Sakamoto.
Krause with the counter takedown but Sakamoto avoids it easily.
Sakamoto takes a swing at Krause's ribcage but misses.
Krause with the counter takedown but Sakamoto avoids it easily.
Sakamoto misses with an uppercut. Krause saw that one coming.
Krause is definitely looking for the counter takedowns here.
Sakamoto throws a combination but comes up with nothing but fresh air.
Sakamoto tries to bum rush Krause with a series of wild strikes but Krause uses good footwork to avoid the assault.
Krause drops down looking to force a counter takedown but Sakamoto defends it well.
Sakamoto fails to land with the punch combination there - jab, cross, hook, miss, miss, miss.
Krause tries a counter takedown but it's more of a dummy move, and he uses it to push himself away.
That's four minutes gone in the round.
Krause steps to the side to avoid the strikes from Sakamoto.
Sakamoto lands a lovely overhand right.
Sakamoto gets to the clinch - let's see what his plan is here.
Sakamoto blocking some punches.
Sakamoto blocking some punches.
Krause working aggressively here.
Sakamoto lands a right hand.
Boooooooooooooooooooo!!! God, this has been a terrible round. Come on you two, sort yourselves out!
Sakamoto throws a head punch that misses.
Krause misses with some punches.
Krause has a couple of punches blocked by Sakamoto.
Krause working aggressively here.
Krause lands punches inside but they're not really causing much damage.
And that's the end of the fight!
Hiroshimo Sakamoto showed his dominance in that final round.
I think Krause has won this one but let's see whether the judges agree with me. Over to the ring announcer for the scorecards.
Ladies and gentlemen, after 3 rounds of action, we go to the scorecards for a decision.
Judge Ren Mimura scores the fight 28:29
Judge Yukihiro Shimada scores the fight 28:29
Judge Sosuke Kotani scores the fight 29:28
In favor of your winner, by split decision... Edward Krause!
An out of breath Edward Krause thanked his loyal fans in his post fight interview, giving them credit for his success over the course of his career.
|
|
|
|
|
|
|
|
|
|
|
|
|
|
|
|
|
|
|
|
|
|
|
| S |
C
A |
G |
S |
C
B |
G |
|
S |
C |
G |
|
energy
A | B |
|
hype
A | B |
|
pop
A | B |
|
mgr
A | B |
|
FIGHT
RATING
47% |
|
|
|
|
|
|
|
Main event
|
Coming up we have a lightweight MMA rules bout between Maurice Lemaire (ranked 4885 p4p, 3523 weight class) and Yakami Sansho (ranked 439 p4p, 355 weight class). Sansho has chosen Sordid by Amon Tobin as his entrance music. Yakami Sansho told me before the fight that he's been watching a lot of DVDs so let's see if that helps him in this one! I can't wait to find out!
 |
|
 |
| 170 cm
20
162
6 - 3 - 0 |
|
180 cm
20
160
5 - 4 - 1 |
Decent wrestler
Counter fighter
Granite chin |
|
BJJ Brown Belt
Excellent MT
Granite chin |
|
| |
|
Ladies and gentlemen. This fight is 3 rounds, in the lightweight division.
Introducing the fighter to my left, fighting out of the red corner.
With a record of 6 - 3 - 0, fighting out of Sydney, Maurice Lemaire!
And introducing the fighter to my right, fighting out of the blue corner.
With a record of 5 - 4 - 1, fighting out of Montreal, Yakami Sansho!
The judges for this bout are Ren Mimura, Shigeki Fujiwara and Yuuki Gou.
The bell rings for round one and we are underway!
Lemaire scores with a reasonable looking shot to the body. Sansho doesn't seem bothered though.
Sansho throws an uppercut from half a mile away. Lemaire sees it coming and avoids it easily.
Lemaire definitely looks more muscular than last time we saw him fight.
Sansho pushing out the jab but it's not landing.
Lemaire closes the distance and clinches.
Sansho blocks an uppercut.
Lemaire throws a punch but it's blocked by Sansho.
Lemaire lands a left hand that snaps the head of Sansho backwards.
Sansho jumps guard but Lemaire stands there with Sansho around his waist. Sansho gives up and drops back to his feet. We remain in the clinch.
Sansho is leaning against Lemaire and scores with a nice uppercut to the body.
Lemaire lands a nice uppercut.
Sansho lands with a short punch from the clinch.
Sansho ties up his opponent against the cage and manages to drag the fight down to the ground. Sansho no doubt will be looking to work submissions from his guard.
Lemaire got a little sloppy there for a moment and Sansho has worked his way into a loose triangle - can he finish it?! No, Lemaire has managed to get both his arms back between Sansho's legs - danger averted.
The fans in attendance giving it up for the two fighters, who have really let it all hang out in the last minute or so!
Lemaire trying to control but Sansho is working from the bottom.
Sansho looking for submissions off his back, moving his hips, looking for an opening.
That's one minute gone in the round.
Sansho is looking to cinch up a triangle. Lemaire throws the leg off to one side though and gets in tight to Sansho's body to avoid the submission. Sansho has instead reached around Lemaire's neck and now has a guillotine! Oh, this is biiiig trouble! Sansho arches his back and squeezes and forces the tap from his hapless opponent.
Ladies and gentlemen, after 1:23 of round 1, we have a winner by way of Submission (Guillotine). Yakami Sansho!
An out of breath Yakami Sansho thanked his loyal fans in his post fight interview, giving them credit for his success over the course of his career.
|
|
|
|
|
|
|
|
|
|
|
|
|
|
|
|
|
|
|
|
|
|
|
| S |
C
A |
G |
S |
C
B |
G |
|
S |
C |
G |
|
energy
A | B |
|
hype
A | B |
|
pop
A | B |
|
mgr
A | B |
|
FIGHT
RATING
78% |
|
|
|
|
|
|
|
|
|
|
