 |
GC 526 Kumadyot VS Hickey PBP Commentary |
Undercard bout
|
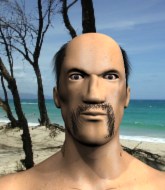
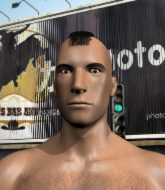
Coming up we have a lightweight MMA rules bout between Fu Gu (ranked 5133 p4p, 5051 weight class) and Hikaru Sulu (ranked 413 p4p, 410 weight class). Fu Gu has the better chin. Will he look to stand and bang today?
 |
|
 |
| 179 cm
19
164
0 - 1 - 0 |
|
178 cm
19
160
0 - 1 - 0 |
Good wrestling
Brawler
Very quick |
|
Good wrestler
Counter fighter
Experienced |
|
| |
|
Ladies and gentlemen. This fight is 3 rounds, in the lightweight division.
Introducing the fighter to my left, fighting out of the red corner.
With a record of 0 - 1 - 0, fighting out of Hilo, Fu Gu!
And introducing the fighter to my right, fighting out of the blue corner.
With a record of 0 - 1 - 0, fighting out of Las Vegas, Hikaru Sulu!
The judges for this bout are Chris Downing, Alan Glass and Cecil Peabody.

The bell rings for round one and we are underway!
Sulu looks to land a combination. Gu sees it coming but can only parry a couple of the shots.

Sulu feints and then dives in with a takedown. That was a long way out but the feint bought him enough time to close the distance and complete the takedown. Now we'll play guard for a bit and see who can get the better of that position.
Sulu works over Gu with some ground and pound from guard.
Sulu slows down the pace of the fight, as he sits in guard.
Sulu makes a bit of distance and scores with some ground and pound, still in guard.
Sulu throws a big right hand that misses.
Sulu trying to control the position from guard on top but Gu is wriggling around, looking for whatever he can.
Sulu postures up and lands a big shot to Gu's brow.
Gu looking to control.
Gu is looking to get back to his feet but can't, whilst Sulu is controlling him.
Sulu looking to control the position here, rather than advance.

That's one minute gone in the round.
Gu trying to keep a closed guard but Sulu is proving a slippery customer.
The fighters are pressed up against the cage, both looking to find a bit of space to work.
Hammerfist, elbow! yells Sulu's corner. There ya go! There ya go!

Gu working away from the bottom but not quite defensive enough there because Sulu has passed into half guard!
Gu tries to regain full guard. Instead though, Sulu has advanced to mount. Uh oh.
Gu definitely looks more muscular than last time we saw him fight.
Sulu fakes a shot to the body and cracks his opponent in the head. Nice ground and pound there!

That's two minutes gone in the round.
Sulu controlling from mount.
Gu is trying to escape the mount.
Gu manages to regain half guard. Good work.
Nice strikes from Sulu there.
Sulu passes the guard and advances to mount!
Gu is in all sorts of trouble here.

That's three minutes gone in the round.
Sulu lands with some vicious ground and pound - can Gu hang on?
Sulu looks more muscular than last time we saw him. He must have been on the weights.
Gu flailing away with punches but nothing is landing.
Gu tries to hold on but Sulu postures up.
Sulu lands a shot to the body, followed up by a shot to the exposed head of his trapped opponent.
Sulu scores with a couple of good head shots there.
Sulu blocks Gu's feeble attempts to strike from the bottom.
Sulu controlling the position easily from mount.
Gu trying desperately to get to his feet.
Sulu looking to finish here with some ground and pound. He lands one big shot that has Gu covering up... and two more big strikes land, forcing the referee to step in and put and end to proceedings! This fight is all over!
Ladies and gentlemen, after 4:56 of round 1, we have a winner by way of TKO (Strikes). Hikaru Sulu!
In his post fight interview, Hikaru Sulu started talking himself up. Luckily his charisma kept the crowd on side and gave him a good reception.
|
|
|
|
|
|
|
|
|
|
|
|
|
|
|
|
|
|
|
|
|
|
|
| S |
C
A |
G |
S |
C
B |
G |
|
S |
C |
G |
|
energy
A | B |
|
hype
A | B |
|
pop
A | B |
|
mgr
A | B |
|
FIGHT
RATING
36% |
|
|
|
|
|
|
|
Undercard bout
|
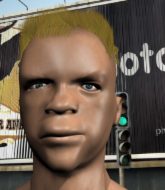
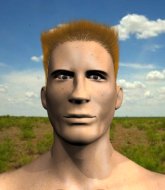
Coming up we have a featherweight MMA rules bout between Brad Brook (ranked 5068 p4p, 4566 weight class) and Gianni Hamilton (ranked 326 p4p, 312 weight class). Gianni Hamilton is the more experienced fighter, so let's see if that makes a difference tonight.
 |
|
 |
| 172 cm
18
141
1 - 0 - 0 |
|
175 cm
19
145
1 - 2 - 0 |
BJJ White Belt
Excellent MT
KO power |
|
BJJ Blue Belt
Brawler
Granite chin |
|
| |
|
Ladies and gentlemen. This fight is 3 rounds, in the featherweight division.
Introducing the fighter to my left, fighting out of the red corner.
With a record of 1 - 0 - 0, fighting out of Las Vegas, Brad Brook!
And introducing the fighter to my right, fighting out of the blue corner.
With a record of 1 - 2 - 0, fighting out of Las Vegas, Gianni Hamilton!
The judges for this bout are Frank Dennis, George Francis and Wesley Smith.
The bell rings for round one and we are underway!
That's a knee to de groin and it's over and out! Hamilton crumples to the ground after an illegal strike from Brook - the referee stops the clock and Hamilton gets 5 minutes to recover from that one. "I'm sorry" says Brook. Hamilton manages to get back to his feet and the fight resumes.
Brook tries a switch kick but it misses it's target.
Brad Brook seems to be the more aggressive standup fighter in this bout.
Hamilton throws a head kick that connects with a bit of head and a bit of hand.
Brook lands a head kick!
Brook throws a head kick that misses and slips in the process. He scrambles back to his feet and the fighters circle.
We can't be sure of the tactics at this early stage but we have heard that Hamilton has been working on his takedowns a lot in the buildup to the fight and we can only assume he's going to look to take this to the mat.
Hamilton slips a straight right by Brook.
Brook misses with a body kick.
Hamilton tries to close the distance and clinch up but Brook swats him away and circles back towards the center.
We've been told by Brook's head coaches at The Death Star that he's been working on his takedown defense in preparation for this fight.
Hamilton slips under a jab from Brook.
Brook throws a nice outside leg kick.
A nice inside leg kick there by Brook. That's going to slow Hamilton down.
Brook dances in quickly and lands a nice inside leg kick on Hamilton. That did some damage!
Hamilton scores with a takedown into Brook's guard.
Fantastic stuff here - a very entertaining period of action, which has drawn cheers from the crowd.
Hamilton throws a big right hand that misses.
The fighters are pressed up against the cage, both looking to find a bit of space to work.
That's one minute gone in the round.
Brook can't do much from the bottom at the moment, as Hamilton controls the pace.
Brook keeping moving, preventing Hamilton from controlling successfully.
Brook is trying to control the position from the bottom.
Hamilton in full guard, throwing the ground and pound. No damage this time.
Hamilton won't allow Brook to sweep him here.
Brook wants to control here, rather than go for any submissions from the bottom. At least for now.
Hamilton trying to control the position from guard on top but Brook is wriggling around, looking for whatever he can.

The referee has stepped in and called for a break in the action. We'll restart on the feet.
That's two minutes gone in the round.
There's not a lot going on here and the crowd are letting the fighters know they're not willing to tolerate a lack of action.
Brook looks to land a body kick but Hamilton moved away.
Brook leaves Hamilton with his face pressed against the mat as he sprawls beautifully, defending against a solid takedown attempt.
Hamilton tries to close the distance and clinch up against the cage but Brook paws at him with a jab and circles away.
Hamilton tries to drive through with a takedown attempt but Brook defends well and Hamilton ends up having to push Brook into the cage where they will battle it out in the clinch.
Hamilton tries to check a leg kick but that clearly hurt him.
Hamilton shoots in and gets a takedown into half guard. Hamilton showed some decent athleticism there.
Hamilton throwing shots but Brook is blocking nicely.
Brook tries to roll over but Hamilton keeps him under control.
Brook is working hard here to advance position.
That's three minutes gone in the round.
Hamilton wants to pass to mount but Brook is defending the position.
Hamilton seems very keen to just sit and control from half guard but Brook does not like that idea so much and is remaining active off his back.
Brook is trying to maintain the position but Hamilton is very close to passing his half guard.
The referee wants the fighters to be more active or he's going to reset them on the feet.
The ref warns both fighters not to hold the cage as they work up against the meshing.
Hamilton thows a huge punch but Brook dodges it nicely.

That's four minutes gone in the round.
Neither fighter has done anything of merit for a good minute or two here and the crowd are not happy about it.
Brook is looking for a sweep. Hamilton is wise to his cunning plan and keeps the top position.
Hamilton missing with some ground and pound from the half guard.
Brook controlling the position well.
The referee has stepped in and called for a break in the action. We'll restart on the feet.
Brook tried to score with a low kick but Hamilton checks it.
Brad Brook is looking to keep the fight on the feet at all costs.
Hamilton blocks a head kick by Brook.
Nice sprawl there from Brook as Hamilton shoots in.
Brad Brook has stuffed three takedown attempts in the round now. That's going to take a lot out of Gianni Hamilton.
A nice leg kick lands there from Brook.
Hamilton wants to clinch up but Brook keeps it at a distance.
Hamilton is looking to clinch.
The crowd thankful this round is nearly over.
Brook circles away from the clinch attempt.
Brook throws a head kick that misses.
Brook defends well against a solid takedown attempt from Hamilton.
And that is the end of the round. The fighters go back to their corners.
Brad Brook dominated that round.
That's the end of the interval. I'm sure that seemed a lot quicker than a minute for our two fighters! Back to the action.

Brook tries a switch kick but it misses it's target.
Hamilton has a nice red mark on his side after a thudding body kick by Brook.
Hamilton looks for a takedown but Brook sprawls well.
Hamilton defending well as Brook loads up on a big left hand.
Hamilton defending well as Brook loads up on a big left hand.
Brook tries to score with a low kick but Hamilton moves his leg out of the way.
Brook is really dominating this fight. Is there anything that Hamilton can do to turn this around?
Brook misses with a half-hearted attempt at a head kick.
Brook fakes with a right hand and throws a good leg kick, right into the thigh. That had to hurt Hamilton.
Brook attempts a leg kick but it's missed by a good margin.
We've had a slow start to the round here - hopefully the action picks up.
Brook misses with a hook.
A clash of legs there as Hamilton blocks the low kick.
Hamilton misses with a series of wild punches.
That's one minute gone in the round.
Brook throws out a leg kick but Hamilton moves out of range and Brook only half commits.
Some bone on bone action there as Hamilton checks a low kick. Luckily it wasn't a particularly hard one.
Hamilton tries to clinch up but Brook circles away and keeps his distance.
Brook throws a head kick but Hamilton moves out of range.
Gianni Hamilton is looking to throw some combinations by the looks of things.
Hamilton tries for a takedown but Brook sees it coming a mile off and avoids it easily.
Brook misses with a body kick.
Nice sprawl there from Brook as Hamilton shoots in.
Brad Brook has stuffed three takedown attempts in the round now. That's going to take a lot out of Gianni Hamilton.
Brook lands a head kick!
Hamilton fails in his attempt to clinch.
Brook fires out a quick counter leg kick but Hamilton just manages to avoid it.
A really sloppy takedown attempt there from Hamilton.
Brook jabbing away but nothing is landing.
Hamilton slips a straight right by Brook.
As Brook backs off Hamilton throws a huge counter combo but Brook manages to avoid it all.
Brook misses with a low kick as Hamilton jumps back.
That's two minutes gone in the round.
Brook tries a head kick but it misses.
Hamilton lands a nice shot to the body.
Brook misses with a half-hearted attempt at a head kick.
Hamilton takes a kick to the side of the head.
A nice inside leg kick there by Brook. That's going to slow Hamilton down.
Brook scores with a spinning back kick!
The crowd cheering loudly, showing their appreciation for the quality fight we're seeing here.
Brook scores with a slapping inside leg kick.
Hamilton keeping at a good range here, avoiding a leg kick.
Brook throws a head kick that misses
enabling Hamilton to counter with a crisp jab.
Good work by Hamilton as he checks the leg kick.

Hamilton darts in and clinches Brook up against the cage.

Brook escapes the clinch and we're back to striking.
Brook throws a leg kick
and Hamilton counters with a three punch combination, finished off with a leg kick. Nice work.
That's three minutes gone in the round.
Brook throws a solid leg kick but Hamilton takes the impact on his shin and smiles at Brook.
A really sloppy takedown attempt there from Hamilton.
Hamilton has his front leg slapped to the side - a nice low kick landing there from Brook.
Some bone on bone action there as Hamilton checks a low kick. Luckily it wasn't a particularly hard one.
Hamilton avoids the head kick by Brook.
Brook looks for the body kick but Hamilton saw that one coming.
Brook motions for Hamilton to come forward. Brook throws a leg kick but it misses it's target.
Brook throws a head kick that misses and slips in the process. He scrambles back to his feet and the fighters circle.
Hamilton drops down looking to force a counter takedown but Brook defends it well.
Hamilton fails with an attempt to clinch.
Brad Brook is winning the standup battle so far.
Brook throws a leg kick but Hamilton sees it coming and checks it nicely.
Brook throws a head kick that misses.
That's four minutes gone in the round.
A decent looking body kick lands there for Brook.
Brook fakes with a right hand and throws a good leg kick, right into the thigh. That had to hurt Hamilton.
The sound of bone on bone echoes around the arena as Hamilton checks a leg kick.
Hamilton's leg has a nasty welt from taking a succession of leg kicks. That must be slowing him down.
Brook thows a leg kick but Hamilton checks it
and Hamilton counters with a three punch combination, finished off with a leg kick. Nice work.
Brook misses with an uppercut. Hamilton saw that one coming.
Hamilton looking to score a takedown here. Brook is defending well but Hamilton drives through and ends up in Brook's guard.
Hamilton has the superior BJJ but he's also working some ground strikes into his gameplan.
Fantastic stuff here - a very entertaining period of action, which has drawn cheers from the crowd.

Hamilton stands up and waves to Brook to follow him.
Brook swats away the attempt to clinch by Hamilton.
Brook throws a quick head kick that skims the top of Hamilton's head.
Brook wants to land a leg kick but Hamilton is out of range.
And that is the end of the round. The fighters go back to their corners.
Brad Brook dominated that second round.
The fighters' corners scream their final instructions, as the referee calls time. Here we go, back to the action! So, we enter the final round. Let's see if either fighter can bring us a finish, or whether we're going to the judges scorecards.

Brook throws the kick towards the body but Hamilton avoids it.
Brook misses with a low kick.
Hamilton appears to be waiting to throw a counter punch to the body.
Hamilton is looking to take this fight into the clinch.
Brook is looking to chop away at Hamilton's legs.
Brook scores with a head kick. Hamilton tried to block it but didn't get his arm up in time.
Brook misses with a straight right.
Brook tries to land a leg kick but Hamilton saw it coming and moves away.
Hamilton will have to do better than that with his takedown attempts.
We've had a slow start to the round here - hopefully the action picks up.
Hamilton throws a hook to the body but it doesn't connect.
Hamilton shoots in for a takedown - he's clinched up with Brook but Brook pushes him off and we're back to square one.
An inside leg kick lands from Brook.
That's one minute gone in the round.
Hamilton on the wrong end of a nice low kick. He's acting like it's no big deal but he doesn't want to take many more of those.
Brook looks to land a left hand but Hamilton moved out of range nicely.
Hamilton is trying to avoid his opponent's strikes and get into the clinch.
Brook attempts a leg kick but it's missed by a good margin.
Hamilton tries to clinch up.
Hamilton shoots for a double leg takedown but Brook sprawls well. He's pushed Hamilton's face into the mat and manages to get back to his feet relatively easily.
Brad Brook has stuffed three takedown attempts in the round now. That's going to take a lot out of Gianni Hamilton.
Hamilton avoids a kick to the body.
Hamilton checks a low kick. Bone on bone - not my idea of a good time.
Hamilton shoots in for a takedown - he's clinched up with Brook but Brook pushes him off and we're back to square one.
Brook appeared to be looking to counter that last move with a leg kick.
Hamilton uses decent footwork to sidestep a right hand from Brook.
Some wild striking there from Hamilton.
Hamilton takes a big intake of breath there - he's definitely tired.
Hamilton darts in looking for a takedown but Brook gets double underhooks and turns Hamilton into the cage.
That's two minutes gone in the round.
A nice leg kick from Brook, right into the meat of the thigh.
That kick from Brook tenderised Hamilton's leg. Hamilton is trying to keep his angry face on.
Hamilton blocks a head kick by Brook.
Hamilton checks a low kick. Bone on bone - not my idea of a good time.
Brook does a little shimmy and throws a leg kick. The leg kick missed by a considerable margin though, making him look a little bit silly for doing the shimmy.
Brook avoids the clinch attempt nicely.
Hamilton is looking to clinch.
That kick from Brook tenderised Hamilton's leg. Hamilton is trying to keep his angry face on.
Hamilton defending well as Brook loads up on a big left hand.
Hamilton checks a low kick from Brook.
Brook stuffs the takedown attempt from Hamilton. Hamilton gets slowly back to his feet.
Brook is looking to land body kicks.
That's three minutes gone in the round.
Hamilton chopped to the floor by a nice leg kick but he springs right back up before Brook can pounce on him.
Hamilton is trying hard to land a takedown here. Brook sprawls well and keeps this one on the feet.
Hamilton takes a step back and watches a body kick go sailing past his mid section.
Hamilton is definitely looking for the counter takedowns here.
Brook shapes like he's going to throw a leg kick but settles back down.
Brook throws a feint and then finishes with a kick to the body.
Hamilton looking to throw a kick but he's pulled out of it.
Hamilton has his front leg slapped to the side - a nice low kick landing there from Brook.
Brook swings away with a leg kick that misses.
Brook goes for a spinning back kick but it misses.
Hamilton shoots in and drives through. Brook sprawls well.
Brook quickly followed up with a counter body kick but doesn't connect.
Brook tries to score with an inside leg kick but telegraphs it and Hamilton is able to avoid easily.
Brook lands a leg kick and bounces back out of range.
That's four minutes gone in the round.
Nice sprawl there from Brook as Hamilton shoots in.
Hamilton tries to clinch up against the cage, rushing in to close the distance. Brook manages to break the clinch and circles back to the middle of the mat.
Hamilton on the wrong end of a kick to the body.
Hamilton has developed a nice purple lump on his ribcage, as a result of some heavy body kicks from Brook.
Brook avoids the head kick by Hamilton.
Brad Brook is fighting for a decision here - he's started to take the cautious approach.
Brook misses with a head kick.
Brook throws out a leg kick but Hamilton moves out of range and Brook only half commits.
Good work by Hamilton as he checks the leg kick.
Brook tries to land a front kick but Hamilton steps back. That was a bit too telegraphed.
Hamilton swings away with a counter right hand but no contact made.
Brook misses with a head kick.
Brook stuffs a takedown. It's all about dictating where the fight takes place and Brook wants it to stay on the feet.
The crowd cheering loudly, showing their appreciation for the quality fight we're seeing here.
Hamilton looks to clinch
and Brook counters with a leg kick.
Brook throws a body kick that digs right into the meat.
Gianni Hamilton has stepped it up - he knows he needs a finish here!
Hamilton takes a nasty kick to the mid section... That should keep him thinking. Does he try and block and risk a head kick landing?
And that's the end of the fight!
Brad Brook showed his dominance in that final round.
Well I reckon that's a shut out for Brook, winning every round. Will the judges agree? They are the ones who matter, even if they are often depressingly incompetent. Over to the ring announcer for the scorecards.
Ladies and gentlemen, after 3 rounds of action, we go to the scorecards for a decision.
Judge Frank Dennis scores the fight for Brad Brook!
Judge George Francis scores the fight for Brad Brook!
Judge Wesley Smith scores the fight for Brad Brook!
Brad Brook wins by unanimous decision!
|
|
|
|
|
|
|
|
|
|
|
|
|
|
|
|
|
|
|
|
|
|
|
| S |
C
A |
G |
S |
C
B |
G |
|
S |
C |
G |
|
energy
A | B |
|
hype
A | B |
|
pop
A | B |
|
mgr
A | B |
|
FIGHT
RATING
46% |
|
|
|
|
|
|
|
Undercard bout
|
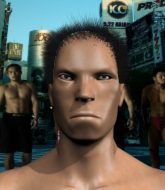
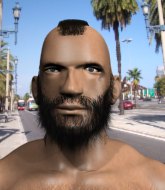
Coming up we have a light heavyweight MMA rules bout between Maddox Deleon (ranked 3662 p4p, 3862 weight class) and Jimmy Newman (ranked 348 p4p, 370 weight class). Jimmy Newman is the more experienced fighter, so let's see if that makes a difference tonight.
 |
|
 |
| 183 cm
19
210
1 - 0 - 0 |
|
188 cm
19
215
2 - 0 - 0 |
Good wrestling
Basic striking
Cardio machine |
|
BJJ White Belt
Excellent MT
Good gas tank |
|
| |
|
Ladies and gentlemen. This fight is 3 rounds, in the light heavyweight division.
Introducing the fighter to my left, fighting out of the red corner.
With a record of 1 - 0 - 0, fighting out of Las Vegas, Maddox Deleon!
And introducing the fighter to my right, fighting out of the blue corner.
With a record of 2 - 0 - 0, fighting out of Las Vegas, Jimmy Newman!
The judges for this bout are Frank Dennis, Chris Downing and Alan Glass.
The bell rings for round one and we are underway!
Deleon takes a step towards his opponent and connects with a left hand, before circling away.
Deleon lands a glancing blow to the side of Newman's head.
Jimmy Newman seems to be the more aggressive standup fighter in this bout.
Newman scores with a hook.
Newman tries to close the distance and clinch but Deleon swats him to one side with an open hand palm strike and circles away.
Newman has been spending a lot of time sparring his boxing in the run up to the fight, trying to sharpen up those hands and look for a knockout.
Deleon misses the shot to the body.
Deleon loads up on a big right hand but Newman slips the punch.
Newman misses with a hook.
Newman looks to score with a jab to the body but Deleon is just out of range.
Deleon slips a jab from Newman.
Deleon uses good footwork to avoid the strikes from Newman.
Newman will need to tighten up his combinations if he doesn't want to gas himself out, swinging at thin air.
Newman is looking to clinch.
Newman lands a jab-cross combination.
Newman slips under a jab.
Newman tries to close the distance and clinch but Deleon swats him to one side with an open hand palm strike and circles away.
Newman misses with a wild body shot.
Deleon swung with a counter right hand that didn't connect.
Wooooo! Give it up for these two warriors! They are putting on a show!
Deleon misses with an uppercut. Newman saw that one coming.
Newman misses with a straight right.
Deleon misses with a looping left.
Deleon definitely looks more muscular than last time we saw him fight.
That's one minute gone in the round.
Newman is looking to clinch but Deleon is avoiding it.
Deleon pushing out the jab but it's not landing.
Newman uses good footwork to avoid the strikes from Deleon.
Newman tries to clinch but Deleon is having none of it.
Newman doesn't manage to clinch there - Deleon circles away.
Deleon swings and misses with a hook to the body.
Newman throws out a loose jab but Deleon uses good head movement to avoid it.
Deleon throws a shot from downtown. Newman moves away and avoids it.
Newman looks to score with a jab to the body but Deleon is just out of range.
Jimmy Newman is looking to keep the fight on the feet at all costs.
Deleon ducks down and throws a hook to the body but Newman moves away.
Deleon misses with a hook.
Newman misses with a wild body shot.
Deleon misses with a straight left.
Newman thows a leg kick but Deleon checks it

and Deleon counters with a nice double leg into half guard.
Deleon drops an elbow to the side of Newman's head.
Deleon landing with strikes to the body and head, softening up his opponent.
The crowd are loving this. Great action here.
Deleon controlling the action here.
That's two minutes gone in the round.
Deleon takes advantage of the dominant position to land a couple of big hammer fists.
Deleon tries to pass the half guard into mount. Newman knows what he's doing though and prevents the attempt.
Deleon perhaps working for something from half guard, or maybe not. It looks like he's just sitting there.
Deleon passes the half guard and he's now in mount! Big trouble for Newman!
Deleon content just to control the position here.
Deleon working away from the top, dropping strikes.
That's three minutes gone in the round.
Deleon landing punches.
The referee warns Newman that he has to improve his position here as he takes two more clean shots to the head.
Whack. That's a big, big shot from Deleon! Newman is out cold! This one is all over!
Ladies and gentlemen, after 3:35 of round 1, we have a winner by way of KO (Strikes). Maddox Deleon!
Maddox Deleon spent the whole post fight interview bigging himself up. It didn't go down that well with the fans after a while as they thought it was a bit arrogant.
|
|
|
|
|
|
|
|
|
|
|
|
|
|
|
|
|
|
|
|
|
|
|
| S |
C
A |
G |
S |
C
B |
G |
|
S |
C |
G |
|
energy
A | B |
|
hype
A | B |
|
pop
A | B |
|
mgr
A | B |
|
FIGHT
RATING
52% |
|
|
|
|
|
|
|
Undercard bout
|
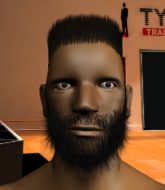
Coming up we have a super heavyweight MMA rules bout between Lance Higgins (ranked 3738 p4p, 3400 weight class) and Mario Vargas Llosa (ranked 134 p4p, 123 weight class). The key to victory for Lance Higgins has got to be keeping the fight on the feet.
 |
|
 |
| 199 cm
19
255
2 - 0 - 0 |
|
190 cm
19
230
2 - 0 - 0 |
BJJ Blue Belt
Excellent MT
Cardio machine |
|
Good wrestler
Basic striking
Granite chin |
|
| |
|
Ladies and gentlemen. This fight is 3 rounds, in the super heavyweight division.
Introducing the fighter to my left, fighting out of the red corner.
With a record of 2 - 0 - 0, fighting out of Las Vegas, Lance Higgins!
And introducing the fighter to my right, fighting out of the blue corner.
With a record of 2 - 0 - 0, fighting out of Rio de Janeiro, Mario Vargas Llosa!
The judges for this bout are Alan Glass, Stewart Dunkirk and Chris Downing.
The bell rings for round one and we are underway!
Vargas Llosa throws a leg kick that is checked

and Higgins counters by clinching up.
Higgins tries a body shot but Vargas Llosa blocks it.
Vargas Llosa stalling in the clinch but Higgins improves position.
Higgins misses with a body punch.
Higgins tries to throw a body punch but Vargas Llosa avoids it by throwing Higgins back against the cage.
Higgins lands a shoulder strike that jolts his opponent's head backwards.
Vargas Llosa wants to stall.
Vargas Llosa fails to land with a short punch on the inside.
Vargas Llosa stalling in the clinch but Higgins improves position.
Higgins throws a head punch that misses.
Higgins's corner calls for him to break the clinch, which he does.
A big left from Vargas Llosa misses.
We've had a slow start to the round here - hopefully the action picks up.
Higgins clinches up against the cage.
Higgins blocking some punches.
Vargas Llosa looks like he'd prefer to be striking at range right now.
Higgins tries to work over Vargas Llosa's body with a swooping hook but it only glances the target.
Vargas Llosa tries to break the clinch but Higgins is controlling the position.
Higgins lands a hook to the side of the head.
Vargas Llosa lands a body punch.
That's one minute gone in the round.
Vargas Llosa throws a punch but it's blocked by Higgins.
Higgins lands a hook that snaps the head of Vargas Llosa backwards.
Vargas Llosa's corner are urging him to control the action in the clinch for a moment, rather than mount any serious offense. I'm sure the crowd appreciate those instructions... not.
Vargas Llosa tried to land a shot to the body but connects with Higgins's elbow.
Higgins is leaning against Vargas Llosa and scores with a nice uppercut to the body.
A quick uppercut on the inside from Higgins.
Higgins changes levels and goes for a takedown here. Vargas Llosa fights it off and pushes away nicely.
Higgins tries to clinch up but Vargas Llosa circles away and keeps his distance.
Higgins fails with an attempt to clinch.
Vargas Llosa tries to land a front kick but Higgins steps back. That was a bit too telegraphed.
Vargas Llosa looks to land a body kick but Higgins moved away.
Vargas Llosa throws a body punch but Higgins moves out of range.
Higgins looks to be in better condition than last time we saw him fight. Obviously he's been working hard on his cardio.
Vargas Llosa has closed the distance and engaged Higgins in a clinch.
Vargas Llosa is clearly stalling here... Pick up the pace son.
A frustrated look appears on Vargas Llosa's face as he tries to break the clinch.
That's two minutes gone in the round.
Higgins throws a blind hook that connects with the side of Vargas Llosas head.
Higgins makes some space for himself and lands an uppercut.
Higgins digs a right hand underneath Vargas Llosa's ribcage. Vargas Llosa let out a lung full of air as it connected.
Vargas Llosa taking a breather.
Vargas Llosa is looking to control Higgins's arms but Higgins gets an underhook and turns him. Now Vargas Llosa has his back to the cage.
Vargas Llosa is persisting with his attempts to control the action in the clinch, rather than do any real damage.
Higgins pushes off and circles away, back to the middle of the mat.
We've seen a great period of action over the last minute or so - credit to both fighters for going all out!
Vargas Llosa misses with a jab and misses with a cross straight after too.
Higgins half commits to a counter takedown before pushing away, out of range.
Higgins moves out of range of the body kick from Vargas Llosa.
Higgins tries to close the distance and clinch up but Vargas Llosa swats him away and circles back towards the center.
Vargas Llosa wants to counter with a clinch but Higgins pushes him away.

Higgins lands a left and a right that send Vargas Llosa crashing to the mat, dazed. Higgins thinks about following him to the mat but decides to wave him back up to his feet!
 Vargas Llosa is rocked! Vargas Llosa is rocked!
 It looks like Mario Vargas Llosa has been cut. It looks like Mario Vargas Llosa has been cut.
Vargas Llosa looks winded!
Higgins keeps the fight on the outside.
Vargas Llosa avoids the clinch attempt nicely.
Vargas Llosa misses with a body kick.
Higgins keeping a good distance there, avoiding the body shot.
Higgins moves into the clinch.
Vargas Llosa working aggressively here.
Vargas Llosa looking to slow down the pace here.
That's three minutes gone in the round.
Vargas Llosa tries to stall but Higgins uses the opportunity to gain a better position.
Vargas Llosa swings away with an uppercut that misses.
Vargas Llosa misses with a punch to the body.
Vargas Llosa wants to strike at distance but he can't break free of the clinch.
An uppercut on the inside fails to land for Vargas Llosa.
Higgins tried to land a shot to the body but connects with Vargas Llosa's elbow.
A body shot lands from Higgins.
Higgins lands a body punch - he's looking to wear down Vargas Llosa.
Higgins lands a shoulder strike that jolts his opponent's head backwards.
Higgins lands an uppercut.
Higgins lands a body punch - he's looking to wear down Vargas Llosa.
Higgins lands a body punch - he's looking to wear down Vargas Llosa.
Higgins lands a body shot.
Higgins lands a nice shot to the body.
Higgins lands a nice shot to the body.
Higgins lands punches inside but they're not really causing much damage.
Higgins lands a hook to the body. It's hard to tell if that hurt Vargas Llosa or not.
That's four minutes gone in the round.
Higgins lands a hook to the body. It's hard to tell if that hurt Vargas Llosa or not.
The fans in attendance giving it up for the two fighters, who have really let it all hang out in the last minute or so!
Higgins lands a left hand.
A short left from Higgins.
Higgins working some nice short punches in the clinch.
Higgins lands a body punch - he's looking to wear down Vargas Llosa.
Higgins lands a left hand that snaps the head of Vargas Llosa backwards.
Higgins's corner calls for him to break the clinch, which he does.
Higgins instigates a clinch.
Higgins lands a nice looking hook to the body, against the cage.
Higgins lands a nice looking hook to the body, against the cage.
Higgins pushes Vargas Llosa back against the cage and unloads with a body punch.
Higgins is looking to take this one to the mat.
Higgins lands a nice looking hook to the body, against the cage.
Higgins lands a shoulder strike.
Higgins breaks from the clinch.
Vargas Llosa keeps the fight on the outside.
Higgins moves into the clinch successfully.
The crowd applaud the fighters' efforts here as the round comes to an end.
Higgins has Vargas Llosa pressed up against the cage. He's trying to work for a single leg takedown. Higgins pulls back from the cage and twists to the side, sending Vargas Llosa tumbling to the mat - Higgins dives into Vargas Llosa's guard.
And that is the end of the round. The fighters go back to their corners.
Lance Higgins dominated that round.
The cut man is working on Mario Vargas Llosa's cut.
OK. That's time! The bell goes and we're back to the action.
Higgins wants to clinch.
Higgins clinches up against the cage.
Higgins blocks a couple of punches on the inside.
A body shot lands from Higgins.
Higgins is leaning against Vargas Llosa and scores with a nice uppercut to the body.
A hook to the body from Higgins.
A left hand lands to the body for Higgins.
Higgins makes some space for himself and lands an uppercut.
Higgins lands a left hand.
We've had a slow start to the round here - hopefully the action picks up.
Higgins works on Vargas Llosa's body with a couple of short punches.
Vargas Llosa is breathing heavily.
Higgins lands a nice looking hook to the body, against the cage.
Higgins lands a shoulder strike that jolts his opponent's head backwards.
Higgins lands with a short shot to the head.
Higgins lands a short shot on the inside that snaps the head of Vargas Llosa backwards.
Vargas Llosa is still on wobbly legs! Can Higgins finish him?
That's one minute gone in the round.
A right hand to the body from Higgins.
A body shot lands from Higgins.
Vargas Llosa seems to have recovered his senses.
Higgins is working Vargas Llosa over against the cage.
A short left from Higgins.
Higgins drops Vargas Llosa onto one knee with a big uppercut from the clinch! Vargas Llosa is propped up by the cage and works his way back to his feet!
Higgins has Vargas Llosa pressed against the cage. Vargas Llosa drops his hands and Higgins takes advantage by unloading with a massive hook that sends Vargas Llosa tumbling to the canvas! Higgins rains down with more punches but Vargas Llosa was already out! That's a highlight reel knockout for Higgins!
Ladies and gentlemen, after 1:27 of round 2, we have a winner by way of KO (Punch). Lance Higgins!
Lance Higgins decided to thank the fans in attendance for making a great atmosphere. It seemed to go down pretty well.
|
|
|
|
|
|
|
|
|
|
|
|
|
|
|
|
|
|
|
|
|
|
|
| S |
C
A |
G |
S |
C
B |
G |
|
S |
C |
G |
|
energy
A | B |
|
hype
A | B |
|
pop
A | B |
|
mgr
A | B |
|
FIGHT
RATING
69% |
|
|
|
|
|
|
|
Undercard bout
|
Coming up we have a light heavyweight MMA rules bout between Glenn Goodwin (ranked 5011 p4p, 3256 weight class) and Aoki Sato (ranked 424 p4p, 322 weight class). Goodwin comes to the cage accompanied by Dead Celebs X Biz. Over to our ring announcer for the fighter introductions!
 |
|
 |
| 202 cm
19
215
2 - 1 - 0 |
|
194 cm
18
212
1 - 0 - 0 |
BJJ Blue Belt
Excellent boxer
Cardio machine |
|
Good takedowns
Basic striking
Granite chin |
|
| |
|
Ladies and gentlemen. This fight is 3 rounds, in the light heavyweight division.
Introducing the fighter to my left, fighting out of the red corner.
With a record of 2 - 1 - 0, fighting out of Sydney, Glenn Goodwin!
And introducing the fighter to my right, fighting out of the blue corner.
With a record of 1 - 0 - 0, fighting out of London, Aoki Sato!
The judges for this bout are Cecil Peabody, George Francis and Stewart Dunkirk.
The bell rings for round one and we are underway!
Nice sprawl there from Goodwin as Sato shoots in.
Goodwin misses with a looping right.
Sato shoots in for a takedown. He's persisting with it as Goodwin sprawls well. Goodwin wins this battle and keeps the fight standing. Sato gets slowly back to his feet.
Goodwin gets taken down but at least he's managed to land in guard.
The ref warns both fighters not to hold the cage as they work up against the meshing.
Goodwin has a loose triangle. He'll be looking to tighten that up but Sato can see exactly what he's planning and manages to posture up and free himself.
Goodwin keeping full guard, as Sato tries to pass.
Goodwin not looking particularly offensive just at the moment.
We've had a slow start to the round here - hopefully the action picks up.
Sato with a nice head shot there.
Sato content to strike from guard, landing some decent shots.
Sato keeps in close for a moment and lands a decent shot to the side of Goodwin's head.
Goodwin trying to control the position.
Sato sneaks a leg through and gets to half guard. That was like a knife through butter how easily he passed Goodwin's guard.
That's one minute gone in the round.
Goodwin is looking to regain full guard. Not this time though.
Sato is keeping good posture, landing some ground and pound.
Sato seems to be taking a bit of a break to think of his next move. He lands a short punch in the meantime.
Goodwin knows he needs to get back to his feet asap. He's simply no match for Sato on the ground.
Sato is thwarting Goodwin's attempts to control the position.
Sato looks towards his corner to check for any instructions. The corner give him nothing to work with, so he cracks Goodwin with a short hammerfist. I guess that's as good as any advice he could get in this position.
Sato is keeping good posture, landing some ground and pound.
The two fighters exchange a few words. I couldn't hear what they were saying but maybe it's more fun if you make it up yourself. Sato connects with a nice short shot to Goodwin's temple.
Nice strikes from Sato there.
Sato trying to mount his opponent but Goodwin defends it.
Sato lands a big shot. The thud that echoes around the arena is like music to the fans' ears.
Goodwin is in a tricky position but he's been working on his transitions down at KO MMA, so we'll see if he gets out of it.
Goodwin wants to get back to full guard.
The two fighters exchange a few words. I couldn't hear what they were saying but maybe it's more fun if you make it up yourself. Sato connects with a nice short shot to Goodwin's temple.
That's two minutes gone in the round.
Goodwin tries to get to full guard but Sato has control of the leg.
Sato is nestled in close to Goodwin, controlling him well. He's worked in a nice elbow to the side of the head as well, for good measure.
Sato drops an elbow to the side of Goodwin's head.
Fantastic stuff here - a very entertaining period of action, which has drawn cheers from the crowd.
Sato takes advantage of the dominant position to land a couple of big hammer fists.
Sato passes to full mount!
Sato lands a couple of nice shots there from mount.
Goodwin wants to hold on but Sato pushes him away.
Goodwin is desperately trying to get back to half guard.
Sato postures up and cracks his opponent a couple of times before moving back into close ground control. Goodwin looks a forlorn figure.
Sato lands a big elbow.
 Goodwin is rocked! Goodwin is rocked!
Goodwin is looking to improve his position but Sato isn't that keen on the idea.
Goodwin is working hard here to advance position.
That's three minutes gone in the round.
Sato has the superior BJJ but he's also working some ground strikes into his gameplan.
Sato raining down hammerfists from mount.
The crowd growing excited in anticipation of a finish here! Right on cue, Sato cracks his opponent with a massive right hand that draws loud cheers!
Sato lands an elbow that was bordering on illegal but the referee lets it go with a warning.
Goodwin in a bad spot here, taking shots to the head.
Oh Goodwin is still in real trouble! Will he be able to recover?!!
 It looks like Glenn Goodwin has been cut. It looks like Glenn Goodwin has been cut.
A big strike lands for Sato! That's really hurt Goodwin and he's turned his back - Sato keeps firing away and the ref dives in to stop the fight! Sato jumps to his feet to celebrate the victory!
Ladies and gentlemen, after 3:45 of round 1, we have a winner by way of TKO (Strikes). Aoki Sato!
|
|
|
|
|
|
|
|
|
|
|
|
|
|
|
|
|
|
|
|
|
|
|
| S |
C
A |
G |
S |
C
B |
G |
|
S |
C |
G |
|
energy
A | B |
|
hype
A | B |
|
pop
A | B |
|
mgr
A | B |
|
FIGHT
RATING
55% |
|
|
|
|
|
|
|
Co-main event
|
Coming up we have a featherweight MMA rules bout between Depends On How U Play It (ranked 3259 p4p, 3297 weight class) and Duane Milot (ranked 248 p4p, 254 weight class). This should be a great matchup!
 |
|
 |
| 178 cm
19
155
1 - 0 - 0 |
|
167 cm
19
148
1 - 0 - 0 |
BJJ Purple Belt
Solid boxing
Granite chin |
|
BJJ Brown Belt
Counter fighter
Good gas tank |
|
| |
|
Ladies and gentlemen. This fight is 3 rounds, in the featherweight division.
Introducing the fighter to my left, fighting out of the red corner.
With a record of 1 - 0 - 0, fighting out of Hilo, Depends On How U Play It!
And introducing the fighter to my right, fighting out of the blue corner.
With a record of 1 - 0 - 0, fighting out of Montreal, Duane Milot!
The judges for this bout are Daniel Franklin, Alan Glass and Stewart Dunkirk.
The bell rings for round one and we are underway!
Milot steps to the side to avoid the strikes from How U Play It.
Milot throws a right and a left that How U Play It avoids nicely.
How U Play It misses with an uppercut. Milot saw that one coming.
How U Play It throws a hook but Milot blocks it.
Milot with the counter takedown but How U Play It avoids it easily.
How U Play It misses with a wild combination.
A decent looking cross lands there for Milot.
We've had a slow start to the round here - hopefully the action picks up.
Milot takes an uppercut right on the jaw but it doesn't phase him.
It looks like Duane Milot has been cut.
Milot misses with a half-hearted attempt at a head kick.
Milot throws a left and a right that both miss
and How U Play It counters with a crisp hook to the side of the head.
Milot throws a series of punches but How U Play It avoids them all with ease.
That's one minute gone in the round.
BOOM! How U Play It lands a beautiful left hook that drops Milot. Milot tries to recover but How U Play It is having none of it, landing more punishing shots from mount. One final crushing shot and Milot lies motionless on the canvas. The fight is over!
Ladies and gentlemen, after 1:07 of round 1, we have a winner by way of TKO (Strikes). Depends On How U Play It!
An out of breath Depends On How U Play It thanked his loyal fans in his post fight interview, giving them credit for his success over the course of his career.
|
|
|
|
|
|
|
|
|
|
|
|
|
|
|
|
|
|
|
|
|
|
|
| S |
C
A |
G |
S |
C
B |
G |
|
S |
C |
G |
|
energy
A | B |
|
hype
A | B |
|
pop
A | B |
|
mgr
A | B |
|
FIGHT
RATING
56% |
|
|
|
|
|
|
|
Main event
|
Coming up we have a middleweight MMA rules bout between Humindot Kumadyot (ranked 2459 p4p, 3207 weight class) and Wee Bey Brice Hickey (ranked 262 p4p, 330 weight class). Over to our ring announcer for the fighter introductions!
 |
|
 |
| 200 cm
19
190
1 - 0 - 0 |
|
185 cm
19
195
1 - 0 - 0 |
BJJ Brown Belt
Counter fighter
Granite chin |
|
BJJ Purple Belt
Decent boxing
Tends to cut |
|
| |
|
Ladies and gentlemen. This fight is 3 rounds, in the middleweight division.
Introducing the fighter to my left, fighting out of the red corner.
With a record of 1 - 0 - 0, fighting out of Helsinki, Humindot Kumadyot!
And introducing the fighter to my right, fighting out of the blue corner.
With a record of 1 - 0 - 0, fighting out of Hilo, Wee Bey Brice Hickey!
The judges for this bout are Frank Dennis, Robert Twigg and Daniel Franklin.
The bell rings for round one and we are underway!
Kumadyot ducks under a wild hook from Hickey.
Hickey throws an uppercut from half a mile away. Kumadyot sees it coming and avoids it easily.
Kumadyot tries to counter with a takedown but Hickey is quick to defend against it.
Hickey misses the shot to the body.
Kumadyot moves out of range of the strikes.
Hickey throws a lazy right hand but Kumadyot sees it coming a mile off and sidesteps it easily.
Kumadyot really does look like a pencil wearing a pair of gloves. Let's hope he has a gameplan to suit that ridiculous body shape.
Hickey misses with a straight right.
Hickey lands a really nice looking cross but Kumadyot seems unphased.
Kumadyot looks to have improved his striking defense since last time we saw him fight.
Hickey is the aggressor but that punch slipped nicely by Kumadyot.
Hickey is really struggling to land any decent head shots against his taller opponent.
We've had a slow start to the round here - hopefully the action picks up.
Kumadyot slips a straight right by Hickey.
Kumadyot throws a big counter combination but Hickey scrambles out of danger and avoids any damage.
Kumadyot moves away from the strike by Hickey.
Kumadyot swinging wildly here.
That's one minute gone in the round.
Kumadyot staying out of range there.
Kumadyot shoots for a takedown but Hickey saw that one coming a mile off and avoided it easily.
Kumadyot goes for a double leg but Hickey avoids the attempt and the two fighters end up clinched against the cage as Hickey continues to drive forward.
Kumadyot is working on a leg, looking for a takedown but Hickey is defending well.
That's three failed takedown attempts in the round for Humindot Kumadyot. That's going to take a lot out of him.

Hickey manages to break the clinch.
Kumadyot blocks a jab.
Kumadyot attempts a counter takedown but Hickey avoids it well and moves away.
Hickey has worked on his takedown defense in the runup to this fight and it is paying off so far.
Kumadyot uses decent footwork to sidestep a right hand from Hickey.
Hickey misses with a hook.
Kumadyot uses good head movement to avoid the hook from Hickey.
Kumadyot appears to be looking for a counter takedown.
A jab from Hickey misses.
That's two minutes gone in the round.
Kumadyot fails with the takedown
and Hickey counters with a good right hand that lands right on the jaw.
Kumadyot uses good footwork to avoid the strikes from Hickey.
Hickey lands a jab-cross combination.
Hickey looks to throw the jab but Kumadyot is out of range.
Hickey throws a monster uppercut resembling something out of street fighter but it doesn't land.
A punch combination from Kumadyot misses.
Wooooo! Give it up for these two warriors! They are putting on a show!
Kumadyot defending well as Hickey loads up on a big left hand.
A slow jab from Hickey misses its intended target.
Kumadyot tries to counter by moving into the clinch but Hickey manages to circle out of the way.
A telegraphed right hand from Hickey misses the target.
That's three minutes gone in the round.
Kumadyot avoids a lazy jab quite easily.
Hickey throws out a token jab with nothing on it.
Hickey misses with a looping left.
Hickey misses with an uppercut.
A big left from Hickey misses.
Hickey dips to his left and cracks Kumadyot with an uppercut!
Hickey looks to land a left hand but Kumadyot moved out of range nicely.
Kumadyot attempts a counter takedown but Hickey avoids it well and moves away.
Hickey displays good takedown defense there as he swats away a double leg from Kumadyot.
Hickey looks to land a right hand but Kumadyot moved out of range.
Hickey throws a looping overhand right but Kumadyot ducks down to avoid it.
That's four minutes gone in the round.
Kumadyot slips under a jab.
A jab lands there for Hickey.
Hickey throws a hook but Kumadyot blocks it.
Hickey misses with a looping right.
Kumadyot shoots in for a takedown but Hickey shows good takedown defense.
Hickey thows a left - swing and a miss!
Kumadyot went nuts there looking for a big combo counter but none of the flurry connected.
Hickey defends well against a solid takedown attempt from Kumadyot.
Hickey might want to mix his strikes up a bit more. He's just going for head shots at the moment and that can become a bit predictable.
Kumadyot slips under a jab.
Hickey looks to land a left hand but Kumadyot moved out of range nicely.
Kumadyot went nuts there looking for a big combo counter but none of the flurry connected.
Hickey throws an ugly left hook that misses
and Kumadyot counters with a three punch combo that has Hickey backing up. Hickey nods at Kumadyot to acknowledge the strikes.
And that is the end of the round. The fighters go back to their corners.
Wee Bey Brice Hickey dominated that round.
That's time! Back to the action!
Kumadyot keeping his hands up high there, blocking the jab from Hickey.
Kumadyot uses decent footwork to sidestep a right hand from Hickey.
Kumadyot slips under a jab.
Hickey misses with an uppercut.
Kumadyot walks straight into a jab right on the nose. That one stung - he's blinking and trying to clear his head.
Kumadyot with a poor takedown
and Hickey counters with a nice uppercut.
Hickey lands three nice shots there - that looked like it hurt!
Wee Bey Brice Hickey seems to be the more aggressive standup fighter in this bout.
We've had a slow start to the round here - hopefully the action picks up.
Kumadyot blocks a jab.
Kumadyot shoots in and gets a takedown into Hickey's guard.
The ref warns both fighters not to hold the cage as they work up against the meshing.
Kumadyot pressing down on his opponent's thigh, looking to pass guard. Hickey is keeping the position for now.
Wooooo! Give it up for these two warriors! They are putting on a show!

Hickey has managed to wall walk up one of the corner posts to get back to his feet. Kumadyot is pushing him up against the cage, looking to control the position.
That's one minute gone in the round.
Hickey breaks from the clinch.
Kumadyot takes a jab on the nose there. A little bit of blood seems to be coming out. Hopefully that won't affect his breathing.
Hickey throws a combination but comes up with nothing but fresh air.
Kumadyot feinted with a counter takedown.
Kumadyot misses with a takedown attempt - Hickey sprawls well and throws a nice strike on the way out which just misses.
Hickey has been the more effective fighter overall so far.
Hickey throws a combination but it was largely blocked by Kumadyot.
Kumadyot appears to be looking for a counter takedown.
Kumadyot avoids a lazy jab quite easily.
Kumadyot looks for a takedown but Hickey sprawls well.
That's three failed takedown attempts in the round for Humindot Kumadyot. That's going to take a lot out of him.
That's two minutes gone in the round.
Kumadyot fails with a takedown attempt.
Hickey throws an uppercut from half a mile away. Kumadyot sees it coming and avoids it easily.
Kumadyot tries to counter by moving into the clinch but Hickey manages to circle out of the way.
Kumadyot ducks under a wild hook from Hickey.
Kumadyot half commits to a counter takedown before pushing away, out of range.
Kumadyot uses good head movement to avoid the hook from Hickey.
Kumadyot appears to be looking for a counter takedown.
Kumadyot throws a looping left and ducks down for a takedown. He's got his arms around Hickey's waist but Hickey gets an underhook and avoids the takedown by throwing Kumadyot off to one side.
Wee Bey Brice Hickey seems to be getting the better of the standup.
Hickey swings for the body but Kumadyot moves out of range.
Kumadyot showing good head movement there, avoiding the strikes from Hickey.
Kumadyot changes levels looking for a counter takedown but doesn't commit.
That's three minutes gone in the round.
Hickey stuffs the takedown attempt from Kumadyot. Kumadyot gets slowly back to his feet.
Hickey looks to land a left hand but Kumadyot moved out of range nicely.
Kumadyot uses good head movement to avoid the hook from Hickey.
Nice sprawl there from Hickey as Kumadyot shoots in.
Humindot Kumadyot is looking to throw some combinations by the looks of things.
Hickey throws a combination but it was largely blocked by Kumadyot.
Kumadyot staying out of range there.
Hickey stuffs the takedown.
Hickey throws a big shot that misses.
Kumadyot feinted with a counter takedown.
That's four minutes gone in the round.
Hickey slaps away a takedown attempt from Kumadyot, before circling back to the center of the mat.
Hickey appears to be waiting to throw a counter punch to the body.
Hickey throws a body shot but no joy.
Kumadyot attempts a counter takedown but Hickey avoids it well and moves away.
Wee Bey Brice Hickey is looking to keep the fight on the feet at all costs.
Hickey pushing out the jab but it's not landing.
Hickey misses with a looping left.
Kumadyot tries for a takedown but Hickey sees it coming a mile off and avoids it easily.
And an attempted straight right on the counter from Hickey! But no joy.
Kumadyot misses with a takedown attempt
letting Hickey counter with a right hand.
Hickey misses with a straight right.
A jab from Hickey misses.
Kumadyot attempts a counter takedown but Hickey avoids it well and moves away.
Kumadyot has his takedown stuffed
and Kumadyot takes a counter punch right on the button for his troubles.
And that is the end of the round. The fighters go back to their corners.
Wee Bey Brice Hickey showed his class in that round. I'd imagine he'll take it on all the scorecards.
That's the end of the interval. I'm sure that seemed a lot quicker than a minute for our two fighters! Back to the action. This is the final round!
Hickey cracks Kumadyot with a hook to the jaw. Both fighters smile at eachother and high-five before getting back down to business.
Hickey lands with a nice body punch.
Hickey tries to bum rush Kumadyot with a series of wild strikes but Kumadyot uses good footwork to avoid the assault.
Hickey throws a right and a left that Kumadyot avoids nicely.
No luck with that takedown attempt from Kumadyot.
Hickey throws out a counter right but Kumadyot avoids it with no problem.
Hickey misses the jab.
Kumadyot attempts a counter takedown but Hickey avoids it well and moves away.
We've had a slow start to the round here - hopefully the action picks up.
Kumadyot moves out of range as Hickey strikes.
Hickey misses with a body shot.
A jab from Hickey misses.
Kumadyot attempts a counter takedown but Hickey avoids it well and moves away.
That's one minute gone in the round.
Hickey throws a looping overhand right but Kumadyot ducks down to avoid it.
Kumadyot looking to score a takedown here. Hickey is defending well but Kumadyot drives through and ends up in Hickey's guard.

Hickey manages to escape and get back to his feet.
Kumadyot shoots in for a takedown but Hickey shows good takedown defense there and keeps this one on the feet.
Kumadyot displays some good footwork, moving neatly out of range as Hickey throws out the jab.
Hickey throws a hook but Kumadyot blocks it.
Kumadyot ducks right into an uppercut from Hickey.
Kumadyot avoids a lazy jab quite easily.
Kumadyot half commits to a counter takedown before pushing away, out of range.
Hickey throws a body shot but no joy.
Kumadyot half commits to a counter takedown before pushing away, out of range.
Hickey with a hook.
That's two minutes gone in the round.
We've seen a great period of action over the last minute or so - credit to both fighters for going all out!
A really sloppy takedown attempt there from Kumadyot.
That's three failed takedown attempts in the round for Humindot Kumadyot. That's going to take a lot out of him.
Hickey misses the jab.
Kumadyot tries to counter with a takedown but Hickey is quick to defend against it.
Hickey throws an uppercut from half a mile away. Kumadyot sees it coming and avoids it easily.
Kumadyot drops down looking for a counter takedown but Hickey sprawls and moves away.
Hickey throws a monster uppercut resembling something out of street fighter but it doesn't land.
Hickey missing with a left hand there. Kumadyot was out of range so wasted energy throwing that one.
Kumadyot half commits to a counter takedown before pushing away, out of range.
Hickey throws a monster uppercut resembling something out of street fighter but it doesn't land.
Kumadyot drops down looking for a counter takedown but Hickey sprawls and moves away.
Kumadyot keeping his hands up high there, blocking the jab from Hickey.
Kumadyot misses with a takedown attempt - Hickey sprawls well and throws a nice strike on the way out which just misses.
That's three minutes gone in the round.
Kumadyot defending well as Hickey loads up on a big left hand.
Kumadyot uses decent footwork to sidestep a right hand from Hickey.
Kumadyot drops down looking for a counter takedown but Hickey sprawls and moves away.
Hickey misses with a hook. Kumadyot ducked under it nicely.
Hickey loads up on a big right hand but Kumadyot slips the punch.
Kumadyot fails with a takedown attempt.
A slow jab from Hickey misses its intended target.
That's four minutes gone in the round.
There's not a lot going on here and the crowd are letting the fighters know they're not willing to tolerate a lack of action.
Kumadyot throws a looping left and ducks down for a takedown. He's got his arms around Hickey's waist but Hickey gets an underhook and avoids the takedown by throwing Kumadyot off to one side.
Kumadyot throws a looping left and ducks down for a takedown. He's got his arms around Hickey's waist but Hickey gets an underhook and avoids the takedown by throwing Kumadyot off to one side.
Both fighters are breathing heavily.
Hickey scores with a sloppy right hand. Kumadyot should have avoided that one.
A telegraphed right hand from Hickey misses the target.
Hickey connects with a single shot there.
Kumadyot closes this distance looking for a takedown but Hickey circles away.
Hickey looked like he wanted to counter with a punch but didn't throw it.
Hickey scores with a nice looking left hook and follows it up with an uppercut!
Hickey sizes up Kumadyot with a pawing jab and scores with a straight right down the middle.
Humindot Kumadyot has stepped it up - he knows he needs a finish here!
Wee Bey Brice Hickey is fighting for a decision here - he's started to take the cautious approach.
Hickey lands a right hook to the body.
And that's the end of the fight!
Wee Bey Brice Hickey comfortably won the final round on my scorecard.
Well Hickey has outworked and out performed his opponent in all aspects of the game today. He was simply too good and the decision should be no more than a formality. Over to the ring announcer for the scorecards.
Ladies and gentlemen, after 3 rounds of action, we go to the scorecards for a decision.
Judge Frank Dennis scores the fight for Wee Bey Brice Hickey!
Judge Robert Twigg scores the fight for Wee Bey Brice Hickey!
Judge Daniel Franklin scores the fight for Wee Bey Brice Hickey!
Wee Bey Brice Hickey wins by unanimous decision!
A very excited looking Wee Bey Brice Hickey made sure he remembered to thank all the fans both in the arena and on the internet. He said all the coolest people spend all day on MMA websites, which got a big reaction.
In defeat, Humindot Kumadyot stepped up to the mic, saying 'Aight. You know it will happen. And it is happening now. As it happens, you will know.'.
|
|
|
|
|
|
|
|
|
|
|
|
|
|
|
|
|
|
|
|
|
|
|
| S |
C
A |
G |
S |
C
B |
G |
|
S |
C |
G |
|
energy
A | B |
|
hype
A | B |
|
pop
A | B |
|
mgr
A | B |
|
FIGHT
RATING
46% |
|
|
|
|
|
|
|
|
|
|
