|
|
PBP Commentary |
Coming up we have a lightweight MMA rules bout between Jay Bark (ranked 4516 p4p, 0 weight class) and Clay Hayden (ranked 4446 p4p, 0 weight class). We have two fighters making their debuts here, so let's see who comes out of this one with their first professional victory.
 |
|
 |
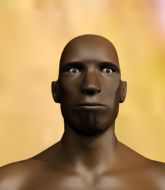
| 175 cm
25
165 lbs
0 - 0 - 0 |
|
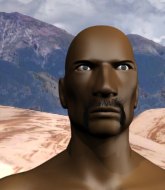
174 cm
25
164 lbs
0 - 0 - 0 |
Good takedowns
Brawler
Big heart |
|
BJJ Blue Belt
Brawler
Intelligent |
|
| |
|
Ladies and gentlemen. This fight is 3 rounds, in the lightweight division.
Introducing the fighter to my left, fighting out of the red corner.
With a record of
0 - 0 - 0, fighting out of London, Jay Bark!
And introducing the fighter to my right, fighting out of the blue corner.
With a record of
0 - 0 - 0, fighting out of London, Clay Hayden!
The judges for this bout are Sam Margolis, Paul Tew and Andrew Berry.

The bell rings for round one and we are underway!

Hayden gets taken down but at least he's managed to land in guard.
Bark with a flurry of punches that miss.
Hayden keeping full guard, as Bark tries to pass.
Hayden not looking particularly offensive just at the moment.
Hayden pulls Bark in to control the position.
Bark stands up and looks to throw the legs aside to pass to side control. Hayden swivels though and keeps the full guard.
Hayden striking off his back but it's not causing Bark any problems.
We've had a slow start to the round here - hopefully the action picks up.
Bark content to stall in guard here.
A real slowdown in the pace of the fight for a moment, as Hayden holds on and takes a little breather.

The referee has stepped in and called for a break in the action. We'll restart on the feet.

That's one minute gone in the round.
Excellent takedown into side control there by Bark.
Hayden is trying to work for a sweep but Bark has mounted him!
Bark raining down hammerfists from mount.
Poor strikes thrown by Bark there. More accuracy and less frantic strikes would help!
Hayden working to try and regain half guard.
Bark has been looking to land a fair amount of strikes on the ground. He might be looking to soften his opponent up in order to work for a submission.
Bark scoring with some good ground and pound from mount here. Will he manage to finish Hayden?
Hayden avoids a series of strikes thrown by Bark.

That's two minutes gone in the round.
Hayden is in a horrible position here. Bark smacks him with another shot as he tries to escape the position.
Bark fakes a shot to the body and cracks his opponent in the head. Nice ground and pound there!
This is a great period of action - very entertaining stuff!
Bark looking to finish Hayden with some ground and pound. This is bad for Hayden!
Bark sitting in mount, just looking to control for the moment.
Bark raining down hammerfists from mount.

Hayden is rocked!
Hayden tries to reverse the position but Bark maintains control.
Bark landing strikes from the mount and Hayden is in trouble!
Hayden is still in real trouble! Can Bark finish him?
Hayden reaches up to try and control the position but Bark seems to have an arm triangle now! Uh oh! Hayden rolls and tries to escape and now Bark has his back!
Hayden seems to have recovered his senses.

That's three minutes gone in the round.
Bark lands with a big left hand that may well have hurt his opponent. Can Hayden hold on?!
Bark struggling to keep hold of the position.

Bark looking for the choke from the back.
Hayden trying to control the action but Bark just sinks the hooks in.
Bark has his opponent trapped and is landing shots. Not a good position for Hayden.
Hayden finds himself mounted whilst avoiding strikes.
Bark takes a little breather and maintains the position. The referee will be looking for him to stay active from such a dominant position though.
Bark throws some wild stikes that Hayden manages to avoid easily.

That's four minutes gone in the round.
Bark dominating with strikes here.
Poor strikes thrown by Bark there. More accuracy and less frantic strikes would help!
Bark sitting in mount, just looking to control for the moment.
Bark trying to control but Hayden is having none of it.
Bark cracks Hayden with a nasty head shot there - the crowd let out an audible gasp there, as the noise reverberated around the arena.
And that�s the end of the round � the fighters go back to their corners.
Jay Bark dominated that round.
The minute break is over - no more time for sponges and pep talks - back to the action!

Bark tries a switch kick but it misses it's target.
Hayden fails in his attempt to clinch.

Bark gets caught flat footed, as Hayden shoots in with a quick takedown into guard.
Hayden controls from within his opponent's guard.
Bark has Hayden pulled in close to control his posture.
Hayden is posturing up here but Bark has hold of an arm and he's gone for an armbar! Hayden tries to roll out but it's too tight and Hayden has to tap! Slick submission there by Bark!
Ladies and gentlemen, after 0:55 of round 2, we have a winner by way of Submission (Armbar). Jay Bark!
|
|
|
|
|
|
|
|
|
|
|
|
|
|
|
|
|
|
|
|
|
|
|
| S |
C
A |
G |
S |
C
B |
G |
|
S |
C |
G |
|
energy
A | B |
|
hype
A | B |
|
pop
A | B |
|
mgr
A | B |
|
FIGHT
RATING
39% |
|
|
|
|
|
|
