|
|
PBP Commentary |
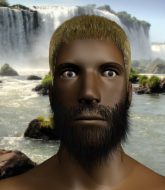
Coming up we have a lightweight MMA rules bout between Marshal Mayhem (ranked 53 p4p, 858 weight class) and Naoko Marui (ranked 9 p4p, 109 weight class). These two fighters really are very evenly matched on the feet - it will be fascinating to see who can assert themselves in that aspect of the fight.
 |
|
 |
| 178 cm
20
157
13 - 2 - 0 |
|
167 cm
27
150
11 - 6 - 0 |
Good wrestling
Excellent boxer
Granite chin |
|
Decent wrestler
Decent boxing
Good gas tank |
|
| |
|
Ladies and gentlemen. This fight is 3 rounds, in the lightweight division.
Introducing the fighter to my left, fighting out of the red corner.
With a record of 13 - 2 - 0, fighting out of The Island, Marshal Mayhem!
And introducing the fighter to my right, fighting out of the blue corner.
With a record of 11 - 6 - 0, fighting out of The Island, Naoko Marui!
The judges for this bout are Michael Johnstone, Peter Branson and Winston Alpacca.

The bell rings for round one and we are underway!
The bell rings for round one and we are underway!
A swing and a miss from Marui.
Mayhem jabs Marui to the body, keeping him at a distance.
Marui throws a hook but Mayhem avoids it easily.
Marui looks to score with a jab to the body but Mayhem is just out of range.
Mayhem pushing out the jab but it's not landing.
Marui throws a left and a right that both miss
and Mayhem connects with a straight left hand counter down the middle.
Mayhem with a jab.
A telegraphed right hand from Marui misses the target.
Marui pushing out the jab but it's not landing.
Mayhem drops his hands momentarily and Marui takes advantage with a crisp shot to the head.
Marui falls off balance throwing a combination
and Mayhem counters with a straight right hand.
Mayhem lands a glancing blow to the side of Marui's head.
Wooooo! Give it up for these two warriors! They are putting on a show!
The fighters circling - Marui throws out the jab but it was never going to land.
Marui misses the jab.
Mayhem keeping a good distance there, avoiding the body shot.
Marui ducks down and throws a hook to the body but Mayhem moves away.
Mayhem definitely looks more muscular than last time we saw him fight.
Marui looks to throw the jab but Mayhem is out of range.
Nice shot by Marui.

That's one minute gone in the round.
Marui throws a nice looking combination but Mayhem bobs and weaves to avoid any damage.
Mayhem looks to score with a combo but nothing lands.
Marui takes a jab on the nose there. A little bit of blood seems to be coming out. Hopefully that won't affect his breathing.
Marui has been spending a lot of time sparring his boxing in the run up to the fight, trying to sharpen up those hands and look for a knockout.
Mayhem throws a body punch but Marui moves out of range.
Marui misses with a body shot. Nice footwork from Mayhem.
Marui lands a nice shot to the body.
Marui throws a jab, cross combination which is slipped
and Mayhem connects with a straight left hand counter down the middle.
Mayhem is using his height advantage well here, landing a good percentage of his punches.
Mayhem defending well as Marui loads up on a big left hand.
Mayhem blocks a jab.
Marui throws a jab but it's blocked by Mayhem.
Mayhem is using his reach advantage well here, landing the more effective single shots from range.
Marui misses with an uppercut
and Mayhem counters with a nice uppercut.
Mayhem lands a two punch combo.

Marui is rocked!
The crowd cheering loudly, showing their appreciation for the quality fight we're seeing here.
Marui throws an off balance right hand
and Mayhem counters with a straight punch to the midsection.
Marui is still on wobbly legs! Can Mayhem finish him?
Mayhem on the wrong end of a nice jab.
Mayhem lands a straight punch to the body, keeping Marui at a distance.
Marui seems to have recovered his senses.
Mayhem scores with a nice strike.
Marui defending well as Mayhem loads up on a big left hand.
A slow jab from Marui misses its intended target.
Mayhem is looking to counter punch.

That's two minutes gone in the round.
Marui misses with a wild body shot.
Mayhem throws a big counter combination but Marui scrambles out of danger and avoids any damage.
Marui is really struggling to land any decent head shots against his taller opponent.
Mayhem takes a punch right to his stomach. That took the wind out of him momentarily.
Marui takes a jab right on the nose. That must have hurt but he shrugs his shoulders and looks to return the favor.
Mayhem takes a shot right to the liver - Bas would have been proud of that punch.
Marui takes a shot to the body in his stride.
Marui swings and misses with a hook to the body.
Marui's hands are dropping dangerously low here and Mayhem connects clean with a right hook that sends him down to one knee! Marui scrambles back to his feet.
Marui misses with a combination
and Mayhem cracks him with a counter punch right on the button.
Marui looks to score with a combo but nothing lands.
Mayhem's corner calls for a 1-2. Mayhem obliges with the 1 part as he scores the single shot and moves back out of range.

Mayhem moves into the clinch.
Marui tries to break free but Mayhem pushes him back against the cage.
Marui blocking some punches.
Mayhem lands with a short head shot on the inside.
Mayhem digs a right hand into Marui's ribs. Those have got to be taking their toll on Marui's gas tank.

That's three minutes gone in the round.
Mayhem misses with a shot to the kidneys.
Mayhem tries to jump guard but he falls flat on his backside. Marui smiles and moves away.
Marui misses with a body shot.
Marui throws a hook to the side of Mayhem's head but Mayhem sees it coming and ducks under it beautifully.
Marui misses with a body punch
and Mayhem counters with a crisp hook to the side of the head.
Mayhem avoids a lazy jab quite easily.
A jab from Mayhem does it's job there.
Danga de danga de dang - Marui scores with a four punch combination!
Marui throws a wild combination but nothing lands.
Mayhem swung with a counter right hand that didn't connect.
Marui moves into range and throws a combination. A nice jab followed by a hook to the body.
This has been an exciting period of action!
Marui throws a right hand that misses
and Mayhem counters with a straight punch to the midsection.
Mayhem scores with a punch to the gut of his opponent.
Marui misses with a right hand
and Mayhem cracks him with a counter punch right on the button.
Mayhem lands with a shot to the body.
Mayhem ducks under an overhand right and circles away with a smile on his face.
Marui swings away with a body shot that misses
and Mayhem holds on and brings the fighters into a clinch.

That's four minutes gone in the round.
Marui tries to throw a body punch but Mayhem avoids it by throwing Marui back against the cage.
Marui lands with a quick shot inside that doesn't really do much damage.
A body shot lands from Mayhem.
Marui blocks a body shot from Mayhem.
Mayhem swings wildly with an uppercut but Marui uses good head movement to avoid it.
Mayhem scores with a nice hook to the head.
A short right from Marui on the inside.
Mayhem digs a right hand into Marui's ribs. Those have got to be taking their toll on Marui's gas tank.
Mayhem stays in close to his opponent and throws a right hand to the body.
As the round comes to an end the crowd are showing their appreciation for a great round of action.
Marui struggles to land a body shot inside as Mayhem controls his hands.
Mayhem fails to land with a short punch on the inside.
Mayhem misses with some punches.
And that�s the end of the round � the fighters go back to their corners.
Marshal Mayhem dominated that round.
OK. That's time! The bell goes and we're back to the action.

Marui stuns Mayhem with a nice body shot, before stepping back out of range.
A looping hook to the body misses from Mayhem. Marui does a little dance to reset his feet.
Marshal Mayhem is winning the standup battle so far.
Marui lands with a good body shot.
Marui throws a body shot but no joy.
An attempted straight right counter from Mayhem misses the target.
Naoko Marui seems to be the more aggressive standup fighter in this bout.
Marui throws a combination that misses
and Mayhem counters with a lovely straight right hand!
Marui fakes high and swings low for a body shot but Mayhem manages to avoid it.
Mayhem dodges the punch combination from Marui.
Mayhem clinches up with Marui and pushes him back against the cage.
Mayhem misses with some punches.
We've had a slow start to the round here - hopefully the action picks up.
Mayhem misses with some punches.
Marui misses with a punch to the body.
Marui can't find room to land a body shot as Mayhem controls the action.
A quick uppercut on the inside from Mayhem.
Marui tries to work over Mayhem's body with a swooping hook but it only glances the target.
That's one minute gone in the round.
An uppercut to the body lands inside from Mayhem.
Marui stalling in the clinch but Mayhem improves position.
Mayhem lands with a left to the head.
Mayhem working on landing some head shots here - that one got through nicely.
A head punch on the inside from Marui fails to land.
Mayhem lands with a quick shot inside that doesn't really do much damage.
Marui wants to break the clinch but can't.
Mayhem managing to block the knees to the body from Marui.
Mayhem misses with the head strike.
Mayhem lands a body punch - he's looking to wear down Marui.
Mayhem scores with an uppercut up the middle.
Mayhem lands a hook that snaps the head of Marui backwards.
Marui misses with a hook from the clinch.
That's two minutes gone in the round.
Mayhem misses with a body punch.
Mayhem can't find room to land a body shot as Marui controls the action.
Mayhem lands a short shot on the inside that snaps the head of Marui backwards.
Mayhem fails to land with a short punch on the inside.
Marui taking a break, stalling in the clinch.
Mayhem lands an uppercut.
This has been an exciting period of action!

Marui breaks the clinch and we're back to striking at distance.
Marui walks straight into an uppercut. Luckily it didn't land flush.
Mayhem tries to close the distance and clinch up against the cage but Marui paws at him with a jab and circles away.
Mayhem stuns Marui with a nice body shot, before stepping back out of range.
Mayhem fakes a jab and then connects with a hook.
Marui jabs Mayhem to the body, keeping him at a distance.
Marui scores with a shot to the body.
Nice jab there from Mayhem.
Marui tries to land with a swinging hook to the body but Mayhem was well out of range. Poor timing from Marui.
That's three minutes gone in the round.
Marui throws out a loose jab but Mayhem uses good head movement to avoid it.
Mayhem slips a straight right by Marui.
Decent striking displayed by Marui there.
Marui throws a hard body shot but it just misses.
Marui digs a good body shot into Mayhem's ribs.
Marui throws a jab, cross combination which is slipped
and Mayhem counters with a straight right hand.
Mayhem gets in close and instigates a clinch.
Marui is struggling to control the position.
A quick uppercut on the inside from Mayhem.
Mayhem is really dominating this fight. Is there anything that Marui can do to turn this around?
A quick uppercut on the inside from Marui.
Mayhem scores with an uppercut up the middle.
Mayhem lands on the inside with an uppercut.
The fans in attendance giving it up for the two fighters, who have really let it all hang out in the last minute or so!
Marui misses with a punch to the body.
That's four minutes gone in the round.
Marui tries to throw a body punch but Mayhem avoids it by throwing Marui back against the cage.
Mayhem misses with some punches.
Mayhem leaning against his opponent.
Mayhem misses with a punch on the inside.
Marui tried to land a shot to the body but connects with Mayhem's elbow.
Mayhem misses with a punch on the inside.
Mayhem lands an uppercut.
Marui tries to throw a body punch but Mayhem avoids it by throwing Marui back against the cage.
Marui wants to break free but Mayhem has control.
Marui tries to break free but Mayhem pushes him back against the cage.
Mayhem misses with a punch to the body.
Mayhem tries a shoulder strike but it doesn't do any damage.
Mayhem misses with a short punch on the inside.
And that�s the end of the round � the fighters go back to their corners.
Marshal Mayhem dominated that second round.
That's time! Mayhem's corner gives him a slap on the ass as he gets ready to fight. This is the final round!

Marui on the wrong end of a decent looking cross there.
Mayhem cracks a nice hook into Marui's ribs.
Marui lands a slapping body shot.
Mayhem throws a hook to the body but it doesn't connect.
Mayhem scores with a body shot.
Mayhem moves out of range as Marui strikes.
Marui takes a swing at Mayhem's ribcage but misses.
Mayhem takes one on the chin but seems OK.
Mayhem misses with a wild body shot.
Mayhem throws a combination but it was largely blocked by Marui.
Marui looks to land a left hand but Mayhem moved out of range nicely.
An attempted straight right counter from Mayhem misses the target.
A swing and a miss from Marui.
Mayhem slips a jab and a cross from Marui.
Marui takes one to the chin there.
The fans in attendance giving it up for the two fighters, who have really let it all hang out in the last minute or so!
Marui misses with a left hand
and Mayhem connects with a straight left hand counter down the middle.
Marui throws a body shot but no joy.
Marui is looking to land body kicks.
Mayhem is looking to counter with a shot to the body.
That's one minute gone in the round.
Marui tries to land with a swinging hook to the body but Mayhem was well out of range. Poor timing from Marui.
A slow jab from Marui misses its intended target.
Marui lands a jab to Mayhem's midsection.
Mayhem scores with a decent looking hook.
Marui has a pretty nasty looking mouse under his right eye.
Mayhem looks to score with a jab to the body but Marui is just out of range.
Marui fakes high and swings low for a body shot but Mayhem manages to avoid it.
Marui misses with a straight left.
Mayhem swung with a counter punch to the body but it didn't connect.
Marui takes a swing at Mayhem's ribcage but misses.
Marui lands a really nice looking cross but Mayhem seems unphased.
Marui moves out of range as Mayhem strikes.
Marui takes one to the side of the head.
A looping hook to the body misses from Mayhem. Marui does a little dance to reset his feet.
Marui takes a solid shot to the body. That one hurt him but he's trying not to show it.
A swing and a miss from Marui.
A slow jab from Marui misses its intended target.
Marui throws a nice hook to the body that draws an oooh from the crowd.
Marshal Mayhem is fighting for a decision here - he's started to take the cautious approach.
That's two minutes gone in the round.
This is a great period of action - very entertaining stuff!
Marui throws a lazy uppercut
and Mayhem cracks him with a counter punch right on the button.
Mayhem tests Marui's chin there with a solid looking shot.
Marui throws an ugly left hook that misses
and Mayhem counters with a lovely straight right hand!
Mayhem punishes Marui's body with a nice straight punch.
Marui ducks down and throws a hook to the body but Mayhem moves away.
Mayhem cracks a nice hook into Marui's ribs.
Mayhem scores with a nice right hand.
Marui lunges in with an uppercut that skims his opponent's chin.
Mayhem lands with a straight right. Marui didn't see that one coming.
Marui swings wildly with a right hand that was never going to find it's target.
Marui misses with a hook
enabling Mayhem to counter with a crisp jab.
Marui pushes forward with a 1-2 combination that forces Mayhem back to the cage. Marui follows up with a solid lead hook to the liver.
Mayhem scores with a sloppy punch to the body. Not much technique there but it did the business.
Marui rushes in with a sloppy looking punch
and Marui takes a counter punch right on the button for his troubles.
Marui's corner calls for a 1, 2 combination and Marui duly obliges.
Marui ducks down and throws a hook to the body but Mayhem moves away.
Marui takes a big intake of breath there - he's definitely tired.
That's three minutes gone in the round.
Marui swings wildly with a right hand that was never going to find it's target.
Marui takes a shot to the eye socket. That's gotta hurt.
Marui ducks down and throws a hook to the body but Mayhem moves away.
A shot to the body from Marui misses
and Mayhem counters with a straight right hand.
Mayhem throws a right hand that Marui ducks under and follows up with a left that Marui also avoids with ease.
Mayhem takes a punch right to his stomach. That took the wind out of him momentarily.
Marui misses with a hook
and Mayhem counters with a lovely shot to the body.
Mayhem keeping a good distance there, avoiding the body shot.
Marui gets cracked with a nice right hand there by Mayhem.
Mayhem misses with the combination.
Mayhem fakes a jab and then connects with a hook.
Marui misses with a combination
and Marui takes a counter punch right on the button for his troubles.
Mayhem comes forward and lands a shot to the body, then darts back out of range.
That's four minutes gone in the round.
The crowd cheering loudly, showing their appreciation for the quality fight we're seeing here.
Mayhem lands with a shot to the body.
Marui gets cracked with a nice right hand there by Mayhem.
Marui misses with a body punch
and Mayhem counters nicely by changing levels and landing a hook to the body.
Mayhem rushes Marui and pushes him back against the cage in a clinch.
Marui misses with the head strike.
A short right hand to the side of the head by Mayhem.
A shot in the inside from Marui.
Marui can't find room to land a body shot as Mayhem controls the action.
The crowd applaud the fighters' efforts here as the round comes to an end.
Marui misses with a punch to the body.
Naoko Marui has stepped it up - he knows he needs a finish here!
Mayhem letting Marui take a breather here.
Marshal Mayhem has scored more points in the clinch so far.
Mayhem misses with a body punch.
And that's the end of the fight!
Marshal Mayhem showed his dominance in that final round.
Well I reckon that's a shut out for Mayhem, winning every round. Will the judges agree? They are the ones who matter, even if they are often depressingly incompetent. Over to the ring announcer for the scorecards.
Ladies and gentlemen, after 3 rounds of action, we go to the scorecards for a decision.
Judge Michael Johnstone scores the fight for Marshal Mayhem!
Judge Peter Branson scores the fight for Marshal Mayhem!
Judge Winston Alpacca scores the fight for Marshal Mayhem!
Marshal Mayhem wins by unanimous decision!
A very excited looking Marshal Mayhem made sure he remembered to thank all the fans both in the arena and on the internet. He said all the coolest people spend all day on MMA websites, which got a big reaction.
|
|
|
|
|
|
|
|
|
|
|
|
|
|
|
|
|
|
|
|
|
|
|
| S |
C
A |
G |
S |
C
B |
G |
|
S |
C |
G |
|
energy
A | B |
|
hype
A | B |
|
pop
A | B |
|
mgr
A | B |
|
FIGHT
RATING
84% |
|
|
|
|
|
|
