|
|
PBP Commentary |
Coming up we have a middleweight MMA rules bout between Sir Turner (ranked 3834 p4p, 6112 weight class) and Better Dead Ii (ranked 491 p4p, 696 weight class). Sir Turner has the better chin. Will he look to stand and bang today?
 |
|
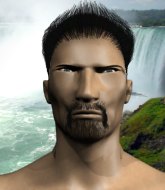 |
| 183 cm
25
190
1 - 2 - 0 |
|
189 cm
18
181
0 - 1 - 0 |
BJJ White Belt
Brawler
Granite chin |
|
Good wrestler
Basic striking
Determined |
|
| |
|
Ladies and gentlemen. This fight is 3 rounds, in the middleweight division.
Introducing the fighter to my left, fighting out of the red corner.
With a record of 1 - 2 - 0, fighting out of The Island, Sir Turner!
And introducing the fighter to my right, fighting out of the blue corner.
With a record of 0 - 1 - 0, fighting out of The Island, Better Dead Ii!
The judges for this bout are Michael Johnstone, Dirk Anderson and David Hoff.

The bell rings for round one and we are underway!
Turner throws a mid kick that lands with a slap.
Dead Ii looks to score with a jab to the body but Turner is just out of range.
Turner misses with a double jab.
Dead Ii shoots in for a takedown - he's clinched up with Turner but Turner pushes him off and we're back to square one.
Turner lands a glancing blow to the side of Dead Ii's head.
Dead Ii walks forward, straight into a front kick from Turner.
Turner misses with a body kick.
Turner misses with a jab, cross combination.
A nice inside leg kick there by Turner. That's going to slow Dead Ii down.
A low kick lands for Turner.
Turner lands a kick to the ribs of his opponent. Nice work there - in and out in a flash.
Dead Ii fails to land the takedown.
Fantastic stuff here - a very entertaining period of action, which has drawn cheers from the crowd.
Dead Ii shoots in for a takedown. He's persisting with it as Turner sprawls well. Turner wins this battle and keeps the fight standing. Dead Ii gets slowly back to his feet.
Sir Turner has stuffed three takedown attempts in the round now. That's going to take a lot out of Better Dead Ii.

That's one minute gone in the round.
Turner lands with a thumping leg kick.
Turner slips under a jab from Dead Ii.
Turner wants to take advantage of his opponent's missed offense by moving into the clinch.
Turner lands a nice hook to Dead Ii's body. Dead Ii takes it in his stride and looks to land his own strikes.
Nice takedown defense from Turner. No joy for Dead Ii on that attempt.
Dead Ii throws a jab when Turner was well out of range.
Turner lands a jab-cross combination.
Turner closes the distance and lands a one-two.

Dead Ii is rocked!
Dead Ii takes a step back and watches a body kick go sailing past his mid section.
Dead Ii is still on wobbly legs! Can Turner finish him?
Turner moves out of range of the strikes.
Dead Ii seems to have recovered his senses.

That's two minutes gone in the round.
Turner scores with a shot to the body.
A left and a right from Turner both land. Nice combination.
Fantastic stuff here - a very entertaining period of action, which has drawn cheers from the crowd.
Dead Ii lands a jab to Turner's midsection.
Turner looks to land a body kick but Dead Ii moved away.
An inside leg kick lands from Turner.
Sir Turner is looking to keep the fight on the feet at all costs.
Dead Ii jabbing away but nothing is landing.
Dead Ii checks a leg kick.
Dead Ii throws a lazy right hand but Turner sees it coming a mile off and sidesteps it easily.
Turner misses the body punch

and Dead Ii moves into the clinch.
Dead Ii misses with a punch to the body.

Turner breaks the clinch and we're back to striking at distance.
No joy there for Turner, who threw a few shots but didn't land.
Better Dead Ii seems to be the more aggressive standup fighter in this bout.
An inside leg kick lands from Turner.

That's three minutes gone in the round.
Dead Ii keeping at a good range here, avoiding a leg kick.
Turner is breathing heavily.
Dead Ii shoots in for a takedown - he's clinched up with Turner but Turner pushes him off and we're back to square one.
A little feinted left hand from Turner on the counter but he doesn't commit to it.
Turner fails to land with a series of punches.
Turner uses some good footwork to avoid the body shot by Dead Ii.
Turner appears to be looking for a big counter.
Dead Ii misses with a body shot.
Turner is looking for a counter combo.
The fight moves into the clinch position.
Dead Ii drops down looking for an ankle pick but Turner pulls his leg out and moves away.
An inside leg kick lands from Turner.
Turner slips a jab from Dead Ii.
Turner scores with a three punch combo!

That's four minutes gone in the round.
Dead Ii throws a combination but it was largely blocked by Turner.
We've been told by Turner's head coaches at Acme Island Savages that he's been working on his takedown defense in preparation for this fight.
Dead Ii shoots in for a takedown but Turner shows good takedown defense.
Dead Ii throws a hard body shot but it just misses.
Turner fails to land with the punch combination there - jab, cross, hook, miss, miss, miss.
Turner misses with a wild combination.
Sloppy strikes from Turner. Those never looked like landing.
And an attempted straight right on the counter from Dead Ii! But no joy.
Wooooo! Give it up for these two warriors! They are putting on a show!
Turner uses decent footwork to sidestep a right hand from Dead Ii.
As Dead Ii looks to move away, Turner throws a big counter combo but Dead Ii just gets out of the way.
Dead Ii has taken the fight to the clinch.
Turner pushes off and circles away, back to the middle of the mat.
Dead Ii tries to check a leg kick but that clearly hurt him.
Turner misses with a low kick.
Turner uses good head movement to avoid the hook from Dead Ii.
And that is the end of the round. The fighters go back to their corners.
Sir Turner dominated that round.
That's time! Back to the action!

Turner keeping his hands up high there, blocking the jab from Dead Ii.
Sir Turner is winning the standup battle so far.

Turner drops Dead Ii with a nice combination! Turner dives into Dead Ii's guard, looking to finish!
Turner is looking to work some ground and pound but Dead Ii has wrist control.
Dead Ii looking for a sweep. Not yet Dead Ii, not yet.
Turner cracks Dead Ii with a solid left hand.
Dead Ii seems keen to control rather than go for a submission, at least for now.
Turner with a flurry of punches that miss.
Turner is really dominating this fight. Is there anything that Dead Ii can do to turn this around?
Turner trying to land body shots but he keeps hitting the mat.
Turner being controlled here momentarily.
We've been informed that Dead Ii has been working hard on his conditioning in the buildup to the fight.
That's one minute gone in the round.
The fighters are starting to perspire pretty heavily.
Turner postures up and lands some nice ground and pound.
There's a bit of a scramble here and now Dead Ii is on top in guard.

Dead Ii is frustrating his opponent with some stalling tactics from top position.
Turner wants to stand up but Dead Ii is controlling him.
That's two minutes gone in the round.
Dead Ii controlling from the top position.
Dead Ii looking to pass the guard.
Dead Ii slows down the pace of the fight, as he sits in guard.
The fighters are pressed up against the cage, both looking to find a bit of space to work.
That's three minutes gone in the round.
Dead Ii prevents Turner from getting back to his feet.

The referee has motioned to the fighters to stand back up.
Turner tries to keep at a distance but Dead Ii has taken the fight into the clinch.
Turner blocks a punch to the side of the head.
Dead Ii wants a takedown.
Dead Ii is looking to break free of the clinch but Turner has double underhooks.
Turner escapes the clinch and we're back to striking.
Turner throws a quick inside leg kick.
Turner misses with a series of wild punches.
Dead Ii clinches up against the cage.
That's four minutes gone in the round.
Dead Ii can't get the takedown.
Come on Dead Ii - let's have some action - none of this stalling nonsense.
Turner breaks the clinch and we're back to striking at distance.
Dead Ii looks to land a combination but Turner avoids it well.
Turner seem to be loading up, looking for a big counter.
Turner scores with a slapping inside leg kick.
Turner scores to the head and body with a nice combination!
Dead Ii ducks down and throws a hook to the body but Turner moves away.
Dead Ii tries to shoot in for a takedown. He's got hold of a leg but Turner swivels and escapes.
Sir Turner has stuffed three takedown attempts in the round now. That's going to take a lot out of Better Dead Ii.
The fans in attendance giving it up for the two fighters, who have really let it all hang out in the last minute or so!
Nice defenses there by Turner.
Turner bobs and weaves well there to avoid the strikes.
The crowd thankful this round is nearly over.
Turner avoids the body shot from Dead Ii.
Turner lands a two punch combo.
Dead Ii's leg has a nasty welt from taking a succession of leg kicks. That must be slowing him down.
Dead Ii dodges the punch combination from Turner.
And that is the end of the round. The fighters go back to their corners.
Sir Turner dominated that second round.
That's time! Turner's corner gives him a slap on the ass as he gets ready to fight. This is the final round!

Dead Ii throws a right hand that Turner ducks under and follows up with a left that Turner also avoids with ease.
As Dead Ii looks to move away, Turner throws a big counter combo but Dead Ii just gets out of the way.
A combination from Turner does no damage.
Dead Ii shoots in looking for a takedown. Turner tries to sprawl out of it but Dead Ii keeps driving through. The fighters are pinned against the cage. Turner manages to get underhooks and after a bit of a struggle, circles away and we're back to standing.
Turner comes forward and lands a shot to the body, then darts back out of range.
Turner with a nice looking leg kick. You could hear that one land in a back row.
We've had a slow start to the round here - hopefully the action picks up.
Dead Ii fails with the takedown.
Sir Turner is looking to throw some combinations by the looks of things.
Dead Ii closes the distance and presses his opponent up against the cage.
That's one minute gone in the round.
Dead Ii misses with a punch on the inside.
Dead Ii working hard to break the clinch.
Turner manages to break the clinch.
Dead Ii stumbles momentarily as he takes a strong leg kick from Turner.
Turner blocks a jab.
Dead Ii avoids the head kick by Turner.
Turner ducks under a wild hook from Dead Ii.
Turner lands a slapping body shot.
Dead Ii swings and misses with a shot to the body
and Turner counters with a three punch combo that has Dead Ii backing up. Dead Ii nods at Turner to acknowledge the strikes.
Turner lands with a nice combination. Dead Ii backs away looking to recover.
Both fighters are breathing heavily.
Dead Ii throws a body punch but Turner moves out of range.
Turner throws a leg kick but Dead Ii sees it coming and moves out of range.
Turner will need to tighten up his combinations if he doesn't want to gas himself out, swinging at thin air.
That's two minutes gone in the round.
Dead Ii swings wildly with a right hand that was never going to find it's target.
As Dead Ii looks to move away, Turner throws a big counter combo but Dead Ii just gets out of the way.
The crowd cheering loudly, showing their appreciation for the quality fight we're seeing here.
Turner's corner calls for a 1, 2 combination and Turner duly obliges.
Turner keeping a good distance there, avoiding the body shot.
Turner uses some good footwork to avoid the body shot by Dead Ii.
Dead Ii throws a right hand that Turner ducks under and follows up with a left that Turner also avoids with ease.
Dead Ii throws a poor cross that misses
and Turner counters with a one-two to the body.
A shot to the body from Dead Ii misses
and Turner counters with a one-two to the body.
Dead Ii throws a body punch but Turner moves out of range.
Dead Ii throws a body shot but no joy.
Dead Ii shoots in for a takedown. "Ole!" shouts Turner as he jumps to the side.
Sir Turner has stuffed three takedown attempts in the round now. That's going to take a lot out of Better Dead Ii.
Dead Ii looks for a takedown here. Will he get it? Turner is fending him off so far but Dead Ii persists. Nope, Turner circles away and we're back to standing.
That's three minutes gone in the round.
Dead Ii looks for a takedown but Turner sprawls well.
Dead Ii looks to land a right hand but Turner moved out of range.
Dead Ii throws a poor cross that misses
and Turner counters with a two punch combo.
Turner is looking to wear down Dead Ii with body shots, infact he's throwing more body shots than head shots at the moment.
A clash of legs there as Dead Ii blocks the low kick.
A slapping leg kick lands for Turner.
Dead Ii shoots in but no luck this time.
Turner pushes forward with a 1-2 combination that forces Dead Ii back to the cage. Turner follows up with a solid lead hook to the liver.
Dead Ii looks to score with a combo but nothing lands.
Dead Ii takes a punch to the jaw and another one to the bread basket.
Dead Ii tries to drive through with a takedown attempt but Turner defends well and Dead Ii ends up having to push Turner into the cage where they will battle it out in the clinch.
We've seen a great period of action over the last minute or so - credit to both fighters for going all out!
Dead Ii takes a solid shot to the body. That one hurt him but he's trying not to show it.
That's four minutes gone in the round.
Dead Ii shoots in for a takedown. "I don't think so" says Turner as he avoids it easily.
Turner misses with a series of wild punches.
Dead Ii misses with a looping right.
Dead Ii is trying desperately to land a takedown but Turner is having absolutely none of it. This is turning into a bit of a nightmare for Dead Ii.
Dead Ii has managed to clinch.
Dead Ii has Turner pushed against the cage.
Turner escapes the clinch and we're back to striking.
Dead Ii misses with a shot to the body
and Turner counters with a straight punch to the midsection.
A looping hook to the body misses from Dead Ii. Turner does a little dance to reset his feet.
Dead Ii fails to land with the punch combination there - jab, cross, hook, miss, miss, miss.
Dead Ii throws a right hand that misses
and Turner counters with a three punch combination, finished off with a leg kick. Nice work.
Better Dead Ii has stepped it up - he knows he needs a finish here!
Sir Turner is fighting for a decision here - he's started to take the cautious approach.
A slow jab from Dead Ii misses its intended target.
And that's the end of the fight!
Sir Turner showed his dominance in that final round.
Well I reckon that's a shut out for Turner, winning every round. Will the judges agree? They are the ones who matter, even if they are often depressingly incompetent. Over to the ring announcer for the scorecards.
Ladies and gentlemen, after 3 rounds of action, we go to the scorecards for a decision.
Judge Michael Johnstone scores the fight 30:27
Judge Dirk Anderson scores the fight 30:27
Judge David Hoff scores the fight 30:27
In favor of your winner, by unanimous decision... Sir Turner!
The defeated Better Dead Ii had this to say: 'Just laying low for now'.
|
|
|
|
|
|
|
|
|
|
|
|
|
|
|
|
|
|
|
|
|
|
|
| S |
C
A |
G |
S |
C
B |
G |
|
S |
C |
G |
|
energy
A | B |
|
hype
A | B |
|
pop
A | B |
|
mgr
A | B |
|
FIGHT
RATING
56% |
|
|
|
|
|
|

