|
|
PBP Commentary |
Coming up we have a welterweight MMA rules bout between Shaun Hawkins (ranked 6278 p4p, 3970 weight class) and Jake Moossaka (ranked 669 p4p, 503 weight class). Over to our ring announcer for the fighter introductions!
 |
|
 |
| 180 cm
25
179
0 - 1 - 0 |
|
180 cm
25
181
1 - 1 - 0 |
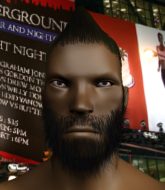
Good wrestling
Basic striking
Big heart |
|
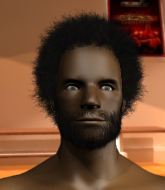
BJJ Purple Belt
Great elbows
Very confident |
|
| |
|
Ladies and gentlemen. This fight is 3 rounds, in the welterweight division.
Introducing the fighter to my left, fighting out of the red corner.
With a record of 0 - 1 - 0, fighting out of The Island, Shaun Hawkins!
And introducing the fighter to my right, fighting out of the blue corner.
With a record of 1 - 1 - 0, fighting out of The Island, Jake Moossaka!
The judges for this bout are Santiago Holmes, David Hoff and Daniel Franklin.

The bell rings for round one and we are underway!
Moossaka moves in looking to clinch but Hawkins pushes him off.
Moossaka fails in his attempt to clinch.
Moossaka throws a combination that misses

and Hawkins counters with a nice shoot takedown that brings the fighters to the ground.
Moossaka looks more muscular than last time we saw him. He must have been on the weights.
Moossaka utilising some decent striking defenses from the guard, preventing the ground and pound.
The ref warns both fighters not to hold the cage as they work up against the meshing.
Hawkins is frustrating his opponent with some stalling tactics from top position.
Hawkins throwing strikes but missing.
Moossaka keeping moving, preventing Hawkins from controlling successfully.
We've had a slow start to the round here - hopefully the action picks up.
Hawkins throws an elbow that misses. Moossaka uses the momentum to reverse the position. He's now in Hawkins's guard. Nice move by Moossaka!

Moossaka wanted to stand there but Hawkins had control of the position.

That's one minute gone in the round.
Hawkins pulls Moossaka in close to his closed guard and prevents Moossaka from doing any damage or advancing position.

That's two minutes gone in the round.
The crowd are hurling abuse towards the fighters... You can hardly blame them though because there isn't a lot going on in the fight.
Hawkins lands a beautiful sweep and he's now moved into his opponent's guard.

Hawkins trying to control the position from guard on top but Moossaka is wriggling around, looking for whatever he can.
Hawkins engaging in some classic timewasting tactics.
Hawkins trying to control the position from guard on top but Moossaka is wriggling around, looking for whatever he can.
Hawkins definitely looks more muscular than last time we saw him fight.
Moossaka working the defensive guard well to avoid strikes from Hawkins.

That's three minutes gone in the round.
Moossaka keeping moving, preventing Hawkins from controlling successfully.
Hawkins postures up in Moossaka's guard and throws a big left but Moossaka blocks it.
Moossaka controls Hawkins momentarily but Hawkins frees himself.

The referee has motioned to the fighters to stand back up.
Moossaka is looking to clinch but Hawkins is avoiding it.
Jake Moossaka seems to be the more aggressive standup fighter in this bout.
Nice shot by Moossaka.
Hawkins misses with a body shot.
Moossaka is loading up here, looking for a big counter of his own.
Moossaka is looking to take this fight into the clinch.
Hawkins feinted with a counter takedown.
Hawkins feints and then dives in with a takedown. That was a long way out but the feint bought him enough time to close the distance and complete the takedown. Now we'll play guard for a bit and see who can get the better of that position.
Hawkins wants to control from the top but Moossaka keeps moving.
Hawkins with a nice head shot there.

That's four minutes gone in the round.
Hawkins throwing shots from guard but he's hitting more mat than opponent.
Hawkins postures up to throw the ground and pound strikes but they don't connect.
Hawkins trying to control the position from guard on top but Moossaka is wriggling around, looking for whatever he can.
Hawkins stands up over Moossaka, holding his feet. He dives back in and lands a decent shot to the head.
Hawkins postures up to throw the ground and pound strikes but they don't connect.
Hawkins stands and throws Moossaka's legs to the side, diving into side control.
Boooooooooooooooooooo!!! God, this has been a terrible round. Come on you two, sort yourselves out!
Moossaka prevents Hawkins from improving position.
Hawkins trying to control the position but Moossaka is working away.
And that is the end of the round. The fighters go back to their corners.
Shaun Hawkins dominated that round.
OK. That's time! The bell goes and we're back to the action.

Moossaka looks to clinch
and Hawkins counters with a nice double leg into half guard.
Moossaka avoiding damage under a succession of punches from Hawkins.
Hawkins takes a deep breath and rests his weight momentarily on top of his opponent, to control the position.
Hawkins misses with a head shot. Moossaka uses the momentum to regain guard.
Hawkins throws a big elbow that misses.
We've had a slow start to the round here - hopefully the action picks up.
Moossaka keeping moving, preventing Hawkins from controlling successfully.
Shaun Hawkins overall seems to be getting the better of the ground position in the fight so far.
Hawkins lands a nice shot whilst sitting in his opponent's guard.
That's one minute gone in the round.
Moossaka looking to hit a scissor sweep but Hawkins is one step ahead there.
Hawkins throws an elbow that misses. Moossaka uses the momentum to reverse the position. He's now in Hawkins's guard. Nice move by Moossaka!
Hawkins manages to sweep nicely, so he's now on top. Moossaka manages to get himself to full guard.
Hawkins landing some decent shots from guard.
Hawkins seems content to control from guard here. He's going to have to remain active though if he doesn't want to get stood back up.
That's two minutes gone in the round.
Moossaka is trying to keep Hawkins in close.
Hawkins postures up and lands a big shot to Moossaka's brow.
Hawkins wants to control from the top but Moossaka keeps moving.
Hawkins prevents Moossaka from getting back to his feet.
Moossaka trying to keep a closed guard but Hawkins is proving a slippery customer.
Hawkins throwing strikes from guard but Moossaka blocks nicely.
That's three minutes gone in the round.
Moossaka wants to sweep but no luck.
Hawkins trying to pass the guard but can't manage it just yet.
Hawkins looking to sit in guard and control but Moossaka gets the butterfly guard and sweeps. He's now in the guard on the top.
Hawkins has a butterfly guard looking to sweep but Moossaka has passed into side control.
Hawkins tries to buck Moossaka off but Moossaka is having none of it.
Hawkins is trying to control Moossaka's posture but Moossaka avoids it.
Hawkins is really dominating this fight. Is there anything that Moossaka can do to turn this around?
Hawkins is in a bad position, trying to hold on for dear life but he is really struggling to maintain any sort of control.
That's four minutes gone in the round.
Sloppy strikes there by Moossaka.
Hawkins is looking for a sweep.
Hawkins is trying to control Moossaka's posture but Moossaka avoids it.
Hawkins tries to bench press Moossaka off him but Moossaka keeps the position.
Hawkins struggling a bit here.
Boooooooooooooooooooo!!! God, this has been a terrible round. Come on you two, sort yourselves out!
Moossaka wants to lay and pray for a moment but Hawkins keeps working.
The referee has stepped in and called for a break in the action. We'll restart on the feet.
Hawkins shoots in for a takedown! He's got it and he's managed to land in side control! That's better than Hawkins was expecting from the takedown attempt, I'm sure!
And that is the end of the round. The fighters go back to their corners.
That was a close second round but I would say that Shaun Hawkins will probably get the nod.
The referee calls time. The cornermen exit stage left and we're back to business. This is the final round!

Moossaka rushes forward with a series of wild hooks but Hawkins moves out of range and avoids them all easily.
Moossaka scores with a three punch combo!
Moossaka wants to clinch
and Hawkins counters with a nice double leg into side control. Moossaka won't be happy with that.
Hawkins landing with strikes to the head and body from side control.
Moossaka bucks up and tries to throw Hawkins off but instead Hawkins has got his back!
Moossaka finds himself mounted whilst avoiding strikes.
Poor strikes thrown by Hawkins there. More accuracy and less frantic strikes would help!
The crowd cheering loudly, showing their appreciation for the quality fight we're seeing here.
Hawkins sitting in mount, just looking to control for the moment.
Hawkins landing punches.
That's one minute gone in the round.
Hawkins with the ground and pound from mount.
Moossaka keeping his composure momentarily, calmly looking to get back to half guard.
Moossaka is bucking up trying to escape but Hawkins cracks him with another couple of good strikes.
The fighters are pressed up against the cage, both looking to find a bit of space to work.
Moossaka tries to get back to half guard but can't.
Hawkins scores with a couple of good head shots there.
Hawkins lands a nice shot to the head.
Moossaka tries to reverse the position but Hawkins maintains control.
Hawkins trying to control but he's not successful this time.
That's two minutes gone in the round.
Hawkins misses with a series of strikes from mount. He'll no doubt be working on his ground and pound when he gets back to the gym.
Moossaka avoids a series of strikes thrown by Hawkins.
Hawkins tries to control but Moossaka wriggling away.
Hawkins looking to ground and pound his opponent to a finish here.
This has been an exciting period of action!
Hawkins throws some wild stikes that Moossaka manages to avoid easily.
Hawkins is in the full mount, landing strikes.
Jake Moossaka has stepped it up - he knows he needs a finish here!
That's three minutes gone in the round.
Hawkins with good strikes from the mount here!
Hawkins landing punches.

Moossaka is rocked!
Moossaka wriggling around on the bottom manages to avoid the strikes thrown by Hawkins.
Hawkins trying to control but Moossaka is having none of it.
Hawkins in mount throwing good strikes here, bouncing his opponent's head off the canvas.
Moossaka is still in real trouble! Can Hawkins finish him?
Hawkins misses with a series of strikes from mount. He'll no doubt be working on his ground and pound when he gets back to the gym.
Moossaka seems to have recovered his senses.
Hawkins looking to finish with strikes here!
Hawkins looking to finish with strikes here!
That's four minutes gone in the round.
Hawkins raining down hammerfists from mount.
Shaun Hawkins is fighting for a decision here - he's started to take the cautious approach.
The referee warns Moossaka that he has to improve his position here as he takes two more clean shots to the head.
Hawkins loads up on a couple of big shots to the head that have Moossaka scrambling to escape. He can't get free though and several more unanswered shots from Hawkins land to the head. The referee has no choice but to stop the fight. Hawkins stands and salutes the crowd.
Ladies and gentlemen, after 4:45 of round 3, we have a winner by way of TKO (Strikes). Shaun Hawkins!
|
|
|
|
|
|
|
|
|
|
|
|
|
|
|
|
|
|
|
|
|
|
|
| S |
C
A |
G |
S |
C
B |
G |
|
S |
C |
G |
|
energy
A | B |
|
hype
A | B |
|
pop
A | B |
|
mgr
A | B |
|
FIGHT
RATING
49% |
|
|
|
|
|
|
