|
|
PBP Commentary |
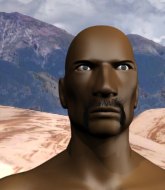
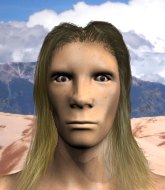
Coming up we have a lightweight MMA rules bout between Clay Hayden (ranked 3529 p4p, 3796 weight class) and Biggie Shackleton (ranked 434 p4p, 453 weight class). Both fighters look pumped up here. Let's hope this is a good fight!
 |
|
 |
| 174 cm
30
159
6 - 7 - 0 |
|
170 cm
25
156
4 - 5 - 0 |
BJJ Purple Belt
Solid Muay Thai
Cardio machine |
|
BJJ Purple Belt
Brawler
Knockout power |
|
| |
|
Ladies and gentlemen. This fight is 3 rounds, in the lightweight division.
Introducing the fighter to my left, fighting out of the red corner.
With a record of 6 - 7 - 0, fighting out of London, Clay Hayden!
And introducing the fighter to my right, fighting out of the blue corner.
With a record of 4 - 5 - 0, fighting out of Tokyo, Biggie Shackleton!
The judges for this bout are Jeff Smith, Chris Saunders and Josh West.

The bell rings for round one and we are underway!
Shackleton throws a nice looking combination but Hayden bobs and weaves to avoid any damage.
Shackleton shoots in but doesn't get the takedown
and Hayden makes him pay by landing a thudding low kick.

Hayden gets a takedown into half guard.
Hayden wants to lay and pray for a moment but Shackleton keeps working.
Hayden takes a deep breath and rests his weight momentarily on top of his opponent, to control the position.

Shackleton looking to force a kimura from the bottom here. He's concentrating on that move too much though and Hayden pushes past his half guard into mount!
We've had a slow start to the round here - hopefully the action picks up.
Hayden landing shots from mount.
Hayden is landing with some decent strikes but Shackleton is trying to advance his position so the referee is letting the fight continue.
The ref warns both fighters not to hold the cage as they work up against the meshing.
Shackleton tries to get back to half guard but can't.
This has been an exciting period of action!
Shackleton keeps trying to improve his position.
Hayden lands a big elbow.

That's one minute gone in the round.
Shackleton tries to hold on but Hayden postures up.
Hayden has improved his flexibility recently so we will have to see if he can use that to his advantage.
Shackleton keeping his composure momentarily, calmly looking to get back to half guard.
Shackleton regains half guard.
Hayden lands strikes from half guard.
Hayden lands a big shot. The thud that echoes around the arena is like music to the fans' ears.
Shackleton is trying to stand.
Hayden trying to pass the guard but Shackleton defending well.
Hayden is trying to control. Shackleton wants to improve his position but can't escape this time.

That's two minutes gone in the round.
Hayden has been looking to land a fair amount of strikes on the ground. He might be looking to soften his opponent up in order to work for a submission.
Hayden lands with an elbow from half guard - that looked like it hurt.
Shackleton wants to control but Hayden is keeping busy.
Shackleton on the receiving end of some nice ground and pound.
Shackleton tries to roll over but Hayden keeps him under control.
Hayden takes a deep breath and rests his weight momentarily on top of his opponent, to control the position.
Hayden scoring with strikes to the body and head.
Hayden looks towards his corner to check for any instructions. The corner give him nothing to work with, so he cracks Shackleton with a short hammerfist. I guess that's as good as any advice he could get in this position.
Shackleton gets full guard.

That's three minutes gone in the round.
Shackleton is trying to keep Hayden in close.
There's a bit of a scramble here and now Shackleton is on top in guard.

Shackleton wants to control from the top but Hayden keeps moving.

Hayden looking for submissions from the bottom here. Moving his hips around, possibly looking for an armbar.
Shackleton wants to pass the guard but Hayden is keeping the position.
Hayden trying to control the position.

That's four minutes gone in the round.
Shackleton wants to stand but Hayden has a closed guard, so he can't escape.
Shackleton is frustrating his opponent with some stalling tactics from top position.
Shackleton trying to control but Hayden is working from the bottom.
Hayden lands a beautiful sweep and he's now moved into his opponent's guard.

The crowd thankful this round is nearly over.
Shackleton looking for a sweep. Not yet Shackleton, not yet.
And that is the end of the round. The fighters go back to their corners.
Clay Hayden dominated that round.
The referee calls time. The cornermen exit stage left and we're back to business.

Hayden keeping his hands up high there, blocking the jab from Shackleton.
Hayden lands a powerful looking uppercut that connected with his opponent's jaw.
Hayden connects with an inside leg kick.
Shackleton looks to land a combination but Hayden avoids it well.
Some wild striking there from Hayden.
Shackleton throws a counter combo.
Hayden ducks under an overhand right and circles away with a smile on his face.
A shot to the body from Shackleton misses

and Hayden counters by clinching up.
Shackleton goes for a takedown attempt but Hayden pushes him away and we're back to fighting at a distance.
Hayden is really dominating this fight. Is there anything that Shackleton can do to turn this around?
We've had a slow start to the round here - hopefully the action picks up.
Shackleton misses with a hook. Hayden ducked under it nicely.
Hayden lands a head kick. Shackleton smiles back at him and beckons him forward.
Shackleton tries to bum rush Hayden with a series of wild strikes but Hayden uses good footwork to avoid the assault.
Shackleton throws a body kick but he was well out of range there.
Hayden tried to counter with a leg kick but Shackleton avoided it.
That's one minute gone in the round.
An inside leg kick lands from Hayden.
Hayden is looking to slow Shackleton down with leg kicks.
Shackleton connects with a hook to the side of his opponent's head.
A kick lands to the mid section there for Hayden.
Hayden scores with a jab to the body.
Hayden drops his hands momentarily and Shackleton takes advantage with a crisp shot to the head.
Hayden connects with a lovely right hand, straight down the pipe.
Shackleton misses with a jab to the body
and Hayden counters with a leg kick that reverborates around the arena.
Hayden is moving around nicely and scores here with a single head shot.
Shackleton throws a shot from downtown. Hayden moves away and avoids it.
Hayden lands a straight punch to the body, keeping Shackleton at a distance.
We've seen a great period of action over the last minute or so - credit to both fighters for going all out!
Shackleton looks to throw the jab but Hayden is out of range.
That's two minutes gone in the round.
Shackleton is the aggressor but that punch slipped nicely by Hayden.
Hayden half committed to a counter leg kick.
Hayden buckles his opponent's knee momentarily with a nice leg kick.
Shackleton pushing out the jab but it's not landing.
Hayden fires out a quick counter leg kick but Shackleton just manages to avoid it.
Shackleton on the wrong end of a nice low kick. He's acting like it's no big deal but he doesn't want to take many more of those.
Hayden lands with a two punch combination before moving back out of range.
Biggie Shackleton seems to be the more aggressive standup fighter in this bout.
Hayden slips under a jab from Shackleton.
Hayden throws a nice inside leg kick.
Hayden displays some good footwork, moving neatly out of range as Shackleton throws out the jab.
Hayden dives in and grabs Shackleton's left leg, looking for a takedown. Shackleton pushes down on Hayden's head and hops out.
Hayden staying out of range there.
Clay Hayden is winning the standup battle so far.
Shackleton tries to check a leg kick but that clearly hurt him.
Horrible takedown attempt by Shackleton or perhaps it was just good defense by Hayden, which made it look bad.
That's three minutes gone in the round.
Shackleton shakes his hands off, looking to compose himself, but takes a jab to the jaw whilst he does it.
Hayden throws a body kick that sends a sickening thudding noise reverberating around the arena.
Hayden is looking to slow Shackleton down with leg kicks.
Shackleton misses with a straight right.
Shackleton misses with a wild combination.
Hayden dips to his left and cracks Shackleton with an uppercut!
Shackleton misses with a body shot.
Hayden is looking for a counter combo.
A swing and a miss from Shackleton.
That's four minutes gone in the round.
Hayden lands a nice leg kick that just misses Shackleton's sensitive parts.
Shackleton rushes forward with a series of wild hooks but Hayden moves out of range and avoids them all easily.
Hayden drops down looking for a counter takedown but Shackleton sprawls and moves away.
Shackleton on the receiving end of a decent leg kick there by Hayden. Hayden obviously looking to wear him down.
Shackleton throws a looping overhand right but Hayden ducks down to avoid it.
Hayden has taken the fight to the clinch.
Hayden managing to block the knees to the body from Shackleton.
Fantastic stuff here - a very entertaining period of action, which has drawn cheers from the crowd.
Hayden leaning his opponent against the cage.
Hayden pressing his opponent against the cage.
Both fighters working to control the clinch.
Shackleton tries to circle away but Hayden has him pinned against the cage.
And that is the end of the round. The fighters go back to their corners.
Clay Hayden dominated that second round.
That's the end of the round. The referee orders the cornermen out of the cage so we can get back down to business. This is the final round!

Shackleton throws a body shot but no joy.
Shackleton misses with a takedown
and Hayden counters with a good right hand that lands right on the jaw.
Hayden shoots in for a takedown - he's clinched up with Shackleton but Shackleton pushes him off and we're back to square one.
Shackleton tries to clinch up against the cage, rushing in to close the distance. Hayden manages to break the clinch and circles back to the middle of the mat.
Hayden wants to clinch up but Shackleton keeps it at a distance.
Hayden lands a nice leg kick that just misses Shackleton's sensitive parts.
We've had a slow start to the round here - hopefully the action picks up.
Shackleton throws a right hand that misses
and Hayden counters with a good right hand that lands right on the jaw.
Shackleton misses with a hook. Hayden ducked under it nicely.
A little feinted left hand from Hayden on the counter but he doesn't commit to it.
Shackleton takes a swing at Hayden's ribcage but misses.

Shackleton clinches up against the cage.
That's one minute gone in the round.
Hayden is trying to pull guard but Shackleton has him pressed against the cage.
Shackleton working aggressively here.
Shackleton tries a knee to the head but he's missed.
Shackleton is trying to maintain a safe position but Hayden gets an underhook and turns Shackleton into the cage.
Hayden pressing his opponent against the cage.
Shackleton controlling the action here for a moment.
Shackleton's leg has a nasty welt from taking a succession of leg kicks. That must be slowing him down.
Hayden is looking to control Shackleton's arms but Shackleton gets an underhook and turns him. Now Hayden has his back to the cage.
A short right from Shackleton.
Hayden managing to block the knees to the body from Shackleton.
Hayden avoiding damage.
Hayden manages to get underhooks and slows down the pace for a moment.
Hayden gets a warning from the ref for wasting time.
Hayden managing to block the knees to the body from Shackleton.
That's two minutes gone in the round.
Hayden stalling in the clinch but Shackleton improves position.
Hayden has Shackleton pressed up against the cage. He's trying to work for a single leg takedown. Hayden pulls back from the cage and twists to the side, sending Shackleton tumbling to the mat - Hayden dives into Shackleton's guard.
Shackleton wants to stand and escape but Hayden is having none of it.
Shackleton looking for a sweep. Not yet Shackleton, not yet.
The fighters are pressed up against the cage, both looking to find a bit of space to work.
Shackleton is trying to keep Hayden in close.
Shackleton might have to switch it up a bit here because his efforts to control Hayden haven't been going to plan, at least at the current moment in time.
Hayden wants to control from the top but Shackleton keeps moving.
Hayden passes Shackleton's left leg - he's now in half guard.
That's three minutes gone in the round.
Hayden is keen to just control but Shackleton is a slippery customer.
Shackleton is trying to control but can't.
Hayden winds up and cracks Shackleton with a swinging punch to the side of the head.
Shackleton is trying to maintain the position but Hayden is very close to passing his half guard.
Hayden wants to lay and pray for a moment but Shackleton keeps working.
Hayden is keeping good posture, landing some ground and pound.
Shackleton is looking to control Hayden's leg but it's slowly edging free. Can Shackleton avoid being mounted?
Hayden performing his best blanket impression for a moment.
Hayden passes the guard and advances to mount!
Biggie Shackleton has stepped it up - he knows he needs a finish here!
That's four minutes gone in the round.
Hayden has his opponent pinned against the cage, landing some nasty ground and pound that is really making a bit of a mess out of Shackleton's face.
Clay Hayden overall seems to be getting the better of the ground position in the fight so far.
Hayden lands a big shot there that rocks Shackleton but he's holding on and managing to survive for now.
Shackleton working to try and regain half guard.
Shackleton tries to hold on but Hayden pushes him away.
Hayden wants to control the pace but Shackleton is squirming around nicely.
The crowd thankful this round is nearly over.
Shackleton sneaks a leg back under and regains half guard and is working straight away to try and get back to guard. He hasn't managed just yet though.
Clay Hayden is fighting for a decision here - he's started to take the cautious approach.
Hayden drops an elbow to the side of Shackleton's head.
And that's the end of the fight!
Clay Hayden showed his dominance in that final round.
Well I reckon that's a shut out for Hayden, winning every round. Will the judges agree? They are the ones who matter, even if they are often depressingly incompetent. Over to the ring announcer for the scorecards.
Ladies and gentlemen, after 3 rounds of action, we go to the scorecards for a decision.
Judge Jeff Smith scores the fight 30:27
Judge Chris Saunders scores the fight 30:27
Judge Josh West scores the fight 30:27
In favor of your winner, by unanimous decision... Clay Hayden!
An out of breath Clay Hayden thanked his loyal fans in his post fight interview, giving them credit for his success over the course of his career.
|
|
|
|
|
|
|
|
|
|
|
|
|
|
|
|
|
|
|
|
|
|
|
| S |
C
A |
G |
S |
C
B |
G |
|
S |
C |
G |
|
energy
A | B |
|
hype
A | B |
|
pop
A | B |
|
mgr
A | B |
|
FIGHT
RATING
42% |
|
|
|
|
|
|
