|
|
PBP Commentary |
Coming up we have a middleweight MMA rules bout between Bob Dock (ranked 1704 p4p, 848 weight class) and Cameron Bye (ranked 274 p4p, 133 weight class). Dock comes to the cage accompanied by The Hangover Soundtrack- Iko Iko. Cameron Bye looks lathargic as he enters the arena. Wake up son, you're about to have a fight!
 |
|
 |
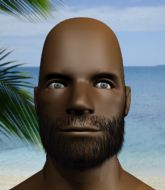
| 225 cm
42
200
28 - 46 - 0 |
|
189 cm
24
195
6 - 2 - 0 |
BJJ Brown Belt
World class MT
Insanely flexible |
|
BJJ Brown Belt
World class MT
Heavy handed |
|
| |
|
Ladies and gentlemen. This fight is 3 rounds, in the middleweight division.
Introducing the fighter to my left, fighting out of the red corner.
With a record of 28 - 46 - 0, fighting out of New York, Bob Dock!
And introducing the fighter to my right, fighting out of the blue corner.
With a record of 6 - 2 - 0, fighting out of Sydney, Cameron Bye!
The judges for this bout are Saam Ante, Albert Achterberg and Wagner Zegers.

The bell rings for round one and we are underway!
Bye's corner calls for a 1, 2 combination and Bye duly obliges.
Dock tries to land a body kick
and Bye counters with a nice body shot.
Dock misses with a half-hearted attempt at a head kick.
Bye is loading up here, looking for a big counter of his own.

Dock clinches up against the cage.
Our sources have told us that Dock has been working on his knees in the buildup to the fight.
Dock misses the knee to the body. Nice hip positioning from Bye.
Dock misses with a knee to the head.
Dock tries to land knees in the clinch but Bye avoids the damage to the body.
Bye managing to block the knees to the body from Dock.
Dock missing with knees to the body.
Dock lands a nice knee to the body.
Bye is trying to slow down the pace in the clinch, to catch his breath.
Dock misses with a knee strike.
Dock tries to land a knee to the head but Bye blocks with his arms.
Bye blocks a knee to the body. He'll have a nicely bruised forearm in the morning.
Dock looking to throw knees to the head but Bye is blocking nicely.

That's one minute gone in the round.
Dock misses the knee to the body. Nice hip positioning from Bye.
Dock tries to land a knee to the head but Bye blocks with his arms.
Dock unloads a knee to the mid-section. Bye lets out a prehistoric sounding urrrrgh.
Dock putting his Muay Thai to good use. He has Bye in a tight clinch and is doing some damage with knees to the body.
Bye takes a knee right on the jaw!
A right hook to the body lands for Bye.
Dock misses with a knee to the head.
Dock is breathing heavily.

Bye breaks the clinch and we're back to striking at distance.
Bye connects with a hook to the side of his opponent's head.
Dock misses with a head kick.
Bye throws a mid kick that lands with a slap.
Dock tries to clinch up but Bye circles away and keeps his distance.

Bye changes levels and drives through with a really nice takedown into side control. Dock looks really pissed at himself for not defending that better.
This has been an exciting period of action!
Bye wants to control but Dock is keeping him busy.
Dock tries to improve position but can't.

That's two minutes gone in the round.

Bye stands up and beckons Dock to his feet.
Dock looks for the body kick but Bye saw that one coming.
Dock throws a head kick that misses.
Bye swings away with a counter right hand but no contact made.
Dock lands a kick to the ribs of his opponent. Nice work there - in and out in a flash.
Dock throws a body kick that sends a sickening thudding noise reverberating around the arena.
Dock darts in and clinches Bye up against the cage.
Dock is looking to score with knees to the body. Maybe he'll change it up and go body then head. Bye is defending well for now.
Bye blocks a knee to the body. He'll have a nicely bruised forearm in the morning.
Bye breaks the clinch and we return to the middle of the mat.
Dock avoids a kick to the body.
Dock throws a leg kick which misses Bye's front leg but catches the back leg as Bye tries to avoid it.
Dock pulls out of a head kick attempt.
As Dock backs off Bye throws a huge counter combo but Dock manages to avoid it all.
Dock throws a mid kick that lands with a slap.

That's three minutes gone in the round.
Dock pulls out of a head kick attempt.
Bye swings and misses with a hook to the body.
Dock fakes with a right hand and throws a good leg kick, right into the thigh. That had to hurt Bye.
The fight stays on the outside here - Dock looks like he's thinking about clinching though.
Dock throws a wild body kick that Bye sees coming a mile off.

Bye pushes Dock up against the cage in a clinch.
Dock unloads a knee to the mid-section.
Bye blocks a knee to the body. He'll have a nicely bruised forearm in the morning.
Bye is trying to push Dock away but Dock has him pressed against the cage, so he's going nowhere.
Dock tries to land a knee to the head but misses.
Dock tries to land a knee to the head but Bye blocks with his arms.
Dock tries to land knees in the clinch but Bye avoids the damage to the body.
Dock looking to throw knees to the head but Bye is blocking nicely.

That's four minutes gone in the round.
Bye pushes off and circles away, back to the middle of the mat.
Bye throws a one two combo.
Bob Dock seems to be the more aggressive standup fighter in this bout.
Dock is looking to clinch.
Dock moves out of range of the body kick.
Dock looking to land some kicks to the body here.
Dock throws a head kick that misses and slips in the process. He scrambles back to his feet and the fighters circle.
Bye throws a big counter head kick but Dock avoids it with no problem.
The crowd are loving this. Great action here.
Dock misses with a head kick.
Dock has managed to clinch.
Dock tries a knee to the head but he's missed.
Dock tries to land knees in the clinch but Bye avoids the damage to the body.
Dock tries a knee to the head but Bye blocks it.
Dock misses the knee to the body. Nice hip positioning from Bye.
Bye wants a takedown but no success here.
Bye avoiding damage as Dock throws knees to the body.
And that is the end of the round. The fighters go back to their corners.
Bob Dock dominated that round.
That's the end of the round. The referee orders the cornermen out of the cage so we can get back down to business.

Bye pushes Dock up against the cage in a clinch.
Dock tries to land knees in the clinch but Bye avoids the damage to the body.
Bye on the defensive, avoiding the knees to the body.
Dock keeps control of Bye as he tries to wriggle out of the double underhooks.
Dock landing knees to the body. They look like they could hurt.
Dock throws a knee to the head but misses.
Bye can't break the clinch.
Bye has had enough of the clinch but Dock keeps him there for the moment.
Dock really does look like a pencil wearing a pair of gloves. Let's hope he has a gameplan to suit that ridiculous body shape.
A knee to the head by Dock.
Bye managing to block the knees to the body from Dock.
We've had a slow start to the round here - hopefully the action picks up.
Dock throws a vicious knee straight up the middle but Bye blocks it with crossed arms.
Dock is really dominating this fight. Is there anything that Bye can do to turn this around?
Both fighters are absolutely exhausted here.
The fighters are going at a pretty good pace and they're both starting to sweat now.
Bye breaks the clinch and we return to the middle of the mat.
Dock fakes with an overhand right and moves in to clinch with Bye, pushing him back against the cage.
Dock looking to throw knees to the head but Bye is blocking nicely.
That's one minute gone in the round.
Dock missing with knees to the body.
Bob Dock has scored more points in the clinch so far.
Bye can't break the clinch.
Dock missing with knees to the body.
Dock trying to land knees to the body.
Dock landing some nice looking knees to the body.
Dock missing with knees to the body.
Dock misses the knee to the body. Nice hip positioning from Bye.
Dock tries to land a knee to the body but he is off balance and Bye avoids it.
Bye breaks the clinch and we're back to striking at distance.
Dock fails in his attempt to clinch.
Dock drives through and clinches with Bye against the cage.
Dock misses the knee to the body. Nice hip positioning from Bye.
Dock missing with knees to the body.
Dock misses with a knee to the head.
That's two minutes gone in the round.
Bye can't break the clinch.
Dock with an attempt at a knee that misses.
Dock with the Thai clinch. He's looking to land a big knee but he's not managed it this time.
Dock is looking to score with knees to the body. Maybe he'll change it up and go body then head. Bye is defending well for now.
Dock tries a knee to the head but Bye blocks it.
Bye escapes the clinch and we're back to striking.
Cameron Bye is looking to throw some combinations by the looks of things.
Bye clinches up with Dock and pushes him back against the cage.
Bye's corner calls for him to break the clinch, which he does.
Bye clinches with his opponent.
Wooooo! Give it up for these two warriors! They are putting on a show!
Bye pushes off and circles away, back to the middle of the mat.
Bye avoids the head kick by Dock.
Dock moves forwards but Bye connects with a nice, crisp jab.
Dock throws a head kick that misses and slips in the process. He scrambles back to his feet and the fighters circle.
Dock looks to clinch
and Bye counters with a crisp hook to the side of the head.
Bob Dock is looking to keep the fight on the feet at all costs.
That's three minutes gone in the round.
Dock uses some good footwork to avoid the body shot by Bye.
Dock lands a head kick. Bye smiles back at him and beckons him forward.
Bye throws a feint and then finishes with a kick to the body.
Bye jabs Dock right on the nose. Dock blinks but takes it well.
Cameron Bye seems to be getting the better of the standup.
Bye rushes forward with a series of wild hooks but Dock moves out of range and avoids them all easily.
Bye gets in close and instigates a clinch.
Dock is looking to score with knees to the body. Maybe he'll change it up and go body then head. Bye is defending well for now.
Dock tries to land a knee to the head but misses.
Bye blocks a knee to the body. He'll have a nicely bruised forearm in the morning.
Dock tries a knee to the head but he's missed.
Bye stalling.
Bye avoiding damage as Dock throws knees to the body.
Bye wants to strike at distance but he can't break free of the clinch.
Bye tries to break the clinch but Dock is controlling the position.
That's four minutes gone in the round.
Dock tries to land knees in the clinch but Bye avoids the damage to the body.
Dock is looking to score with knees to the body. Maybe he'll change it up and go body then head. Bye is defending well for now.
Dock throws a vicious knee straight up the middle but Bye blocks it with crossed arms.
Bye breaks the clinch and we return to the middle of the mat.
Bye jabs at Dock's body.
This has been an exciting period of action!
Dock throws a quick head kick that skims the top of Bye's head.
Dock fails with an attempt to clinch.
Dock takes a body punch that cleary hurt but he's trying not to show any weakness.
Bye lands an overhand left. A wild punch that just about connected.
Bye scores with a jab to the head.
Dock tries a head kick but it misses.
Dock looks for the body kick but Bye saw that one coming.
Thud! ouch! good body kick from Bye - that will leave a mark!
Dock wants to clinch up but Bye keeps it at a distance.
And that is the end of the round. The fighters go back to their corners.
That was a close second round but I would say that Bob Dock will probably get the nod.
The referee calls time. The cornermen exit stage left and we're back to business. This is the final round!

Dock throws a leg kick but Bye sees it coming and checks it nicely.
A countering left hand to the body from Bye misses.
Bye with a nice calf kick.
Donk. Bye catches Dock right on the button with a cross.
Bye fakes with an overhand right and moves in to clinch with Dock, pushing him back against the cage.
Dock tries to land a knee to the head but Bye blocks with his arms.
Bye tries to land knees in the clinch but Dock avoids the damage to the body.
Dock missing with knees to the body.
Bye controlling the action here for a moment.
Bye avoiding damage as Dock throws knees to the body.
We've had a slow start to the round here - hopefully the action picks up.
Dock unloads a knee to the mid-section. Bye lets out a prehistoric sounding urrrrgh.
Dock is trying to wear down his opponent with knees to the body.
Bye managing to block the knees to the body from Dock.
Bye has been looking to improve his clinch game in recent weeks. Dock seems to have the measure of him in the clinch so far, so let's see if Bye can turn it around.
That's one minute gone in the round.
Dock misses with a knee strike.
Both fighters are breathing heavily.
Bye managing to block the knees to the body from Dock.
Bye managing to block the knees to the body from Dock.
Bye is trying to break the clinch but Dock has him pressed against the cage.
Bye pushes off and circles away, back to the middle of the mat.
Bye avoids the head kick by Dock.
Dock misses with a head kick.
Bye keeps the fight on the outside.
Dock tries to clinch up but Bye circles away and keeps his distance.
The fight moves into the clinch position.
Bye blocks a knee to the body. He'll have a nicely bruised forearm in the morning.
Bye's corner calls for him to break the clinch, which he does.
Bye blocks a leg kick.
That's two minutes gone in the round.
Dock throws a nice head kick!
Dock tries to clinch up.
Bye closes the distance and presses his opponent up against the cage.
Dock misses with a knee strike.
Dock unloads a knee to the mid-section.
Bye breaks the clinch and we're back to striking at distance.
Dock fails with an attempt to clinch.
Dock attempts a low kick but it misses it's target.
Bye is trying to counter with his kicks.
The crowd cheering loudly, showing their appreciation for the quality fight we're seeing here.
Dock tries to clinch up against the cage, rushing in to close the distance. Bye manages to break the clinch and circles back to the middle of the mat.
Bye blocks a head kick by Dock.
Bye throws a counter combo.
Bye lands with a nice low kick. That'll leave a bruise.
Dock throws a lazy head kick
and Bye counters with a one-two to the body.
Well, he's not going to score with shots like that. A lazy body kick attempt from Dock.
That's three minutes gone in the round.
Bye scores with a crisp jab that stopped Dock in his tracks.
Bye lands with a nice low kick. That'll leave a bruise.
Dock moves in looking to clinch but Bye pushes him off.
Dock misses with a head kick.
Dock tries to close the distance and clinch but Bye swats him to one side with an open hand palm strike and circles away.
Bye misses with a head kick.
A low kick lands for Bye.
Cameron Bye has stepped it up - he knows he needs a finish here!
Dock tries to score with an inside leg kick but telegraphs it and Bye is able to avoid easily.
A little jabbing left from Bye on the counter but it doesn't find it's target.
Dock moves to clinch but Bye breaks away
and Bye counters with a quick right hand to the jaw.
A head kick misses from Dock.
Dock throws a head kick but Bye moves out of range.
Dock dodges the punch combination from Bye.
That's four minutes gone in the round.
Dock clinches up with Bye and pushes him back against the cage.
Bye successfully pulls guard.

Bye uses the cage to get back to his feet.
Fantastic stuff here - a very entertaining period of action, which has drawn cheers from the crowd.
Bye listening to his corner there, landing a nice uppercut.
Dock is looking to land body kicks.
Dock moves into range and clinches up with Bye.
Bye's corner calls for him to break the clinch, which he does.
Bye fakes high and shoots in for a takedown but Dock avoids it really well and circles away.
Dock attempts a counter takedown but Bye avoids it well and moves away.
Dock fakes with an overhand right and moves in to clinch with Bye, pushing him back against the cage.
And that's the end of the fight!
I would just about give that final round to Cameron Bye.
I think Dock has won this one but let's see what the judges have to say. Over to the ring announcer for the scorecards.
Ladies and gentlemen, after 3 rounds of action, we go to the scorecards for a decision.
Judge Saam Ante scores the fight 29:28
Judge Albert Achterberg scores the fight 29:28
Judge Wagner Zegers scores the fight 30:27
In favor of your winner, by unanimous decision... Bob Dock!
|
|
|
|
|
|
|
|
|
|
|
|
|
|
|
|
|
|
|
|
|
|
|
| S |
C
A |
G |
S |
C
B |
G |
|
S |
C |
G |
|
energy
A | B |
|
hype
A | B |
|
pop
A | B |
|
mgr
A | B |
|
FIGHT
RATING
59% |
|
|
|
|
|
|
