|
|
PBP Commentary |
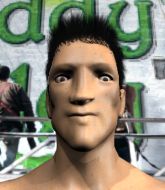
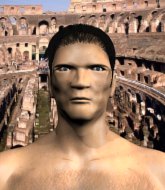
Coming up we have a light heavyweight MMA rules bout between Chad Billingsly (ranked 2565 p4p, 3549 weight class) and Brock Hardman (ranked 329 p4p, 445 weight class). Chad Billingsly could well score a knockout today. He has the power to get to Brock Hardman's chin.
 |
|
 |
| 192 cm
22
226
8 - 4 - 0 |
|
191 cm
21
205
3 - 3 - 0 |
Good wrestling
Solid boxing
Granite chin |
|
BJJ Purple Belt
Excellent MT
Good gas tank |
|
| |
|
Ladies and gentlemen. This fight is 3 rounds, in the light heavyweight division.
Introducing the fighter to my left, fighting out of the red corner.
With a record of 8 - 4 - 0, fighting out of Helsinki, Chad Billingsly!
And introducing the fighter to my right, fighting out of the blue corner.
With a record of 3 - 3 - 0, fighting out of London, Brock Hardman!
The judges for this bout are Paul Tew, Phil Schofield and James Atkins.

The bell rings for round one and we are underway!
Billingsly dodges the punch combination from Hardman.
Billingsly ducks under a wild hook from Hardman.
Hardman throws a combination but comes up with nothing but fresh air.
Billingsly avoids the body shot from Hardman.
Hardman just misses with a punch to the body.
Hardman tries to bum rush Billingsly with a series of wild strikes but Billingsly uses good footwork to avoid the assault.
Billingsly shoots in for a takedown but doesn't get it.
Hardman lands three nice shots there - that looked like it hurt!
Hardman chopped to the floor by a nice leg kick but he springs right back up before Billingsly can pounce on him.
Billingsly connects with a high kick.
Hardman cracks a nice hook into Billingsly's ribs.
Fantastic stuff here - a very entertaining period of action, which has drawn cheers from the crowd.
Hardman connects with a body shot.
Billingsly avoids the body shot from Hardman.
Hardman fakes and then throws a beautiful body shot. Billingsly looks a bit winded and takes a step backwards to take a breath.
Hardman is throwing a lot of body shots here, looking to wear down Billingsly rather than just go for the knockout.

Billingsly instigates a clinch.
Billingsly taking a breather.
Billingsly lands a shoulder strike.
A short uppercut from Hardman.
Billingsly tries to throw a body punch but Hardman avoids it by throwing Billingsly back against the cage.
Hardman misses with a shot to the kidneys.
Hardman lands a left hand.

That's one minute gone in the round.
Billingsly working aggressively here.
Hardman misses with the head strike.
Billingsly misses with some punches.
Hardman swings away with an uppercut that misses.
Billingsly has a couple of punches blocked by Hardman.
Hardman swings away with an uppercut that misses.
Hardman can't find room to land a body shot as Billingsly controls the action.
Billingsly swings away with an uppercut that misses.
Hardman misses with a hook to the ribs.
A left hand lands to the body for Billingsly.
Billingsly swings away with an uppercut that misses.
Billingsly tries a shoulder strike but it doesn't do any damage.
Stalling in the clinch from Billingsly.
Billingsly lands with a short head shot on the inside.
A short right from Hardman.
Billingsly blocks a couple of punches on the inside.
Billingsly lands with a good tight uppercut to the head.
We've been informed that Hardman has been sparring a lot of Muay Thai in the buildup to this fight so let's see if that has an impact on the result.
Hardman has a couple of punches blocked by Billingsly.
Hardman doesn't land with the attempted body shot.
A head punch on the inside from Billingsly fails to land.
A right hook to the body lands for Billingsly.
Hardman can't find room to land a body shot as Billingsly controls the action.
Hardman lands with a short punch from the clinch.

That's two minutes gone in the round.
The crowd are loving this. Great action here.
Hardman working on landing some head shots here - that one got through nicely.
Hardman misses with the head strike.
Hardman fails to land with a short punch on the inside.
Billingsly misses with a shot to the kidneys.
Hardman tries a shoulder strike but it doesn't do any damage.
Hardman goes for a body shot but it's blocked.
Billingsly misses with a punch to the body.
Hardman lands with a left to the head.
Hardman swings away with an uppercut that misses.
Billingsly blocks a body shot from Hardman.
Billingsly lands a nice shot to the body.
Hardman tries to throw a body punch but Billingsly avoids it by throwing Hardman back against the cage.
A short body shot lands from Billingsly as the two fighters clinch.
An uppercut on the inside fails to land for Billingsly.
Billingsly works for underhooks and lands a body shot in the process.
Billingsly lands with a short punch from the clinch.
Hardman tries a body shot but Billingsly blocks it.
Hardman letting Billingsly take a breather here.
Billingsly stalling in the clinch but Hardman improves position.
Hardman struggles to land a body shot inside as Billingsly controls his hands.

That's three minutes gone in the round.
Hardman misses with a punch to the body.
Billingsly working on landing some head shots here - that one got through nicely.
Hardman working aggressively here.
A bit of stalling here from Billingsly.
Billingsly throws a blind hook that connects with the side of Hardmans head.
Billingsly lands with a short punch from the clinch.
Billingsly gets through Hardman's defenses to land a nice punch to the side of the head.
Billingsly tried to land a shot to the body but connects with Hardman's elbow.
Hardman fails to land with a short punch on the inside.
Billingsly tries to land a shot to the body but it's blocked.
Hardman blocks a body shot from Billingsly.
Hardman blocks a body shot from Billingsly.
Hardman throws a blind hook that connects with the side of Billingslys head.
Billingsly blocks a body shot from Hardman.
Hardman struggles to land a body shot inside as Billingsly controls his hands.
Hardman throws a punch but it's blocked by Billingsly.
A hook to the body from Hardman.
Hardman lands a left hand that snaps the head of Billingsly backwards.
Hardman can't find room to land a body shot as Billingsly controls the action.
Billingsly lands a left hand.
This has been an exciting period of action!
Billingsly lands a body shot in the clinch.
A head punch blocked on the inside by Billingsly.

That's four minutes gone in the round.
Billingsly blocks an uppercut.
Hardman blocks a couple of punches on the inside.
Hardman pushes Billingsly back against the cage and unloads with a body punch.
Billingsly is breathing heavily.
Billingsly taking a breather.
Hardman scores with a shoulder strike.
The fighters are going at a pretty good pace and they're both starting to sweat now.
Billingsly tries a body shot but Hardman blocks it.
Hardman tried to land a shot to the body but connects with Billingsly's elbow.
Hardman tries to work over Billingsly's body with a swooping hook but it only glances the target.
Hardman tries to throw a body punch but Billingsly avoids it by throwing Hardman back against the cage.
Hardman lands an uppercut.
Billingsly can't find room to land a body shot as Hardman controls the action.
Hardman misses with a shot to the kidneys.
Hardman misses with some punches.
Hardman misses with the head strike.
Stalling in the clinch from Billingsly.
Billingsly gets double underhooks to prevent a takedown attempt from Hardman.
The crowd applaud the fighters' efforts here as the round comes to an end.
Hardman blocks a punch to the side of the head.
Billingsly blocking some punches.
Hardman working aggressively here.
And that is the end of the round. The fighters go back to their corners.
Brock Hardman dominated that round.
Well, the break between rounds is over. Let's get back to the scrappin!

Billingsly goes for a double leg but Hardman avoids the attempt and the two fighters end up clinched against the cage as Hardman continues to drive forward.
Billingsly is trying to work out of this bad position, with his back against the cage.
Billingsly swings wildly with an uppercut but Hardman uses good head movement to avoid it.
Hardman blocks an uppercut.
Hardman tries to land a shot to the body but it's blocked.
Hardman lands a hook that snaps the head of Billingsly backwards.
Billingsly fails to land with a short punch on the inside.
Hardman lands with a light punch inside.
A quick uppercut on the inside from Hardman.
Hardman tries a body shot but Billingsly blocks it.
Hardman tried to land a shot to the body but connects with Billingsly's elbow.
Hardman works for underhooks and lands a body shot in the process.
Billingsly tries to work over Hardman's body with a swooping hook but it only glances the target.
Billingsly blocks a punch to the side of the head.
We've had a slow start to the round here - hopefully the action picks up.
A right hand to the body from Hardman.
A body shot lands from Hardman.
An uppercut to the body lands inside from Hardman.
Hardman lands a left hand.
Both fighters are absolutely exhausted here.
Hardman working aggressively here.
Hardman misses with a shot to the kidneys.
Hardman throws a head punch that misses.
That's one minute gone in the round.
Billingsly blocks a body shot from Hardman.
With the fighters clinched against the cage, Hardman creates a bit of distance for himself and scores with a nice uppercut.
Billingsly blocks an uppercut.
Hardman misses with a punch to the body.
Hardman is leaning against Billingsly and scores with a nice uppercut to the body.
Hardman's head jolts backwards as he takes an uppercut right on the button!
A short right hand to the side of the head by Hardman.
Billingsly tries to land a shot to the body but it's blocked.
Billingsly swings wildly with an uppercut but Hardman uses good head movement to avoid it.
Hardman misses with a hook to the ribs.
Hardman scores with a hook to the body.
Billingsly throws a punch but it's blocked by Hardman.
An uppercut on the inside fails to land for Billingsly.
Hardman has a couple of punches blocked by Billingsly.
Hardman scores with an uppercut up the middle.
Billingsly misses with the head strike.
Hardman can't find room to land a body shot as Billingsly controls the action.
A right hook to the body lands for Hardman.
Hardman lands with a short shot to the head.
A quick uppercut on the inside from Billingsly.
This has been an exciting period of action!
A head punch on the inside from Billingsly fails to land.
That's two minutes gone in the round.
An uppercut on the inside fails to land for Billingsly.
Hardman lands a hook that snaps the head of Billingsly backwards.
Billingsly misses with some punches.
A nice left hand lands by Hardman.
Hardman blocks a punch to the side of the head.
Hardman working aggressively here.
Billingsly blocks a body shot from Hardman.
With the fighters clinched against the cage, Hardman creates a bit of distance for himself and scores with a nice uppercut.
Hardman struggles to land a body shot inside as Billingsly controls his hands.
An uppercut on the inside fails to land for Billingsly.
Hardman has been the more effective fighter overall so far.
Hardman misses with a short punch on the inside.
Hardman doesn't land with the attempted body shot.
Hardman lands a shoulder strike.
Billingsly misses with a short punch on the inside.
Good body shot from Billingsly.
Billingsly misses with a hook to the ribs.
Hardman misses with a shot to the kidneys.
Hardman struggles to land a body shot inside as Billingsly controls his hands.
A quick uppercut on the inside from Billingsly.
A head punch blocked on the inside by Hardman.
A head punch on the inside from Billingsly fails to land.
That's three minutes gone in the round.
Hardman working some nice short punches in the clinch.
A head punch blocked on the inside by Hardman.
Billingsly lands a hook to the body. It's hard to tell if that hurt Hardman or not.
Billingsly lands a nice uppercut.
Hardman tries to work over Billingsly's body with a swooping hook but it only glances the target.
Billingsly lands a body punch in the clinch.
Hardman cracks Billingsly with a nice body shot.
Billingsly blocking some punches.
Billingsly wants to break free but Hardman has control.
Hardman fails to land with a short punch on the inside.
Hardman blocking some punches.
Hardman tried to land a shot to the body but connects with Billingsly's elbow.
Hardman goes for a body shot but it's blocked.
Billingsly tries a body shot but Hardman blocks it.
Billingsly blocks an uppercut.
Billingsly lands a nice looking hook to the body, against the cage.
Billingsly lands a shot to the body.
Billingsly lands a body shot in the clinch.
A right handed body shot lands from Billingsly.
A nice right hand lands inside from Billingsly.
That's four minutes gone in the round.
Billingsly throws a hook to the body. More of an arm punch but it's all scoring with the judges.
Billingsly lands a right uppercut that snaps the head of Hardman backwards.
The crowd are loving this. Great action here.
Hardman goes for a body shot but it's blocked.

Billingsly's corner calls for him to break the clinch, which he does.
Brock Hardman is looking to keep the fight on the feet at all costs.
Hardman looks to land a left hand but Billingsly moved out of range nicely.
Brock Hardman seems to be the more aggressive standup fighter in this bout.
Hardman moves out of range of the body kick.
Chad Billingsly is looking to throw some combinations by the looks of things.
Hardman blocks a low kick nicely.
Billingsly clinches up against the cage.
Billingsly lands a right hand.
Hardman struggles to land a body shot inside as Billingsly controls his hands.
A head punch blocked on the inside by Billingsly.
Hardman tries to work over Billingsly's body with a swooping hook but it only glances the target.
Billingsly lands a shot to the body.
Brock Hardman seems to be working more effectively in the clinch in the fight so far.
Hardman lands a shoulder strike that jolts his opponent's head backwards.
A nice right hand lands inside from Billingsly.
Billingsly throws a blind hook that connects with the side of Hardmans head.
Hardman misses with the head strike.
Billingsly fails to land with a short punch on the inside.
Billingsly lands a body shot.
With the fighters clinched against the cage, Billingsly creates a bit of distance for himself and scores with a nice uppercut.
And that is the end of the round. The fighters go back to their corners.
A close second round but Brock Hardman will probably get the nod - 10:9.
OK. That's time! The bell goes and we're back to the action. Let's get this one finished - here comes the final round!

Hardman misses with an uppercut
and Billingsly counters nicely by changing levels and landing a hook to the body.
Hardman throws a body punch but Billingsly moves out of range.
Hardman swings for the body but Billingsly moves out of range.
Billingsly with a body punch. A glancing blow.
Wow, both these guys are really going for it!
A slow jab from Hardman misses its intended target.
Billingsly misses with a low kick as Hardman jumps back.
Hardman looks like he wants to counter punch here.
Hardman throws a body punch but Billingsly moves out of range.
Hardman closes the distance and takes a jab right on the nose as he does so.

Hardman is rocked!
Brock Hardman seems to be getting the better of the standup.
Hardman throws a body shot but no joy.
Billingsly loads up on a big right hand but Hardman slips the punch.
Billingsly darts in and clinches Hardman up against the cage.
Billingsly misses with the head strike.
Billingsly lands a body punch.
Hardman takes a big intake of breath there - he's definitely tired.
We've had a slow start to the round here - hopefully the action picks up.
The pace really dropping off here, momentarily.
A short uppercut from Billingsly.
Hardman is still on wobbly legs! Can Billingsly finish him?
A head punch on the inside from Hardman fails to land.
Billingsly lands a short shot on the inside that snaps the head of Hardman backwards.
Fantastic stuff here - a very entertaining period of action, which has drawn cheers from the crowd.
Billingsly scores with a shot to the side of Hardman's head.
That's one minute gone in the round.
Hardman prevents a body shot from Billingsly.
Billingsly dips a shoulder and cracks Hardman with a mighty uppercut! Hardman falls back against the cage and Billingsly unloads with a barrage of strikes! Hardman is completely out with his eyes open, only supported by the cage! Save him ref! Eventually the ref decides to do his job and jumps in - Billingsly screams abuse at the incompetent official before going over to celebrate with his corner. Brutal stuff!
Ladies and gentlemen, after 1:14 of round 3, we have a winner by way of TKO (Strikes). Chad Billingsly!
A loyal slave to those sponsorship dollars, Chad Billingsly made sure he mentioned Dick Dolla Douchebag, along with how happy he was to win his fight.
|
|
|
|
|
|
|
|
|
|
|
|
|
|
|
|
|
|
|
|
|
|
|
| S |
C
A |
G |
S |
C
B |
G |
|
S |
C |
G |
|
energy
A | B |
|
hype
A | B |
|
pop
A | B |
|
mgr
A | B |
|
FIGHT
RATING
80% |
|
|
|
|
|
|
