|
|
Printing 1 PBP Commentary |
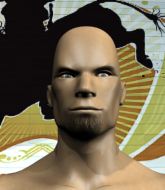
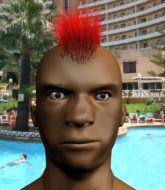
This TWGC bout is 1 fifteen minute round in the super heavyweight division. Introducing today's competitors. In the red corner, competing out of Amsterdam, with a TWGC record of 0 wins and 0 losses; Just Here! And in the blue corner, fighting out of Hilo, with a TWGC record of 0 wins and 0 losses; Banker Eleven!
The judges for this bout are Colin Fray, Paul Gruel and Roger Salmon.
Let's get this grappling contest under way! Who will be victorious?
Nice sprawl there from Eleven as Here shoots in.

Eleven shoots in and scores a nice double leg takedown into half guard. Score +2 for takedown into guard / half guard: Here (0) vs (2) Eleven
Here wants to control but Eleven is keeping busy and won't allow it.
Here tries to get to full guard but Eleven has control of the leg.
Here wants to control but Eleven is keeping busy.
Here might be looking to lock onto one of his opponent's long limbs for a submission, whilst we're on the ground.
We've had a slow start to the round here - hopefully the action picks up.
Eleven perhaps working for something from half guard, or maybe not. It looks like he's just sitting there.
Eleven wants to take a breather but Here is having none of it.

That's one minute gone in the round.
Eleven is thwarting Here's attempts to control the position.
Eleven is just sitting in half guard, waiting for something to happen.

Eleven is looking for an arm triangle, whilst trying to pass to side control. Here doesn't seem that keen to cooperate though. No luck this time Eleven.
Eleven wants to pass to mount but Here is defending the position.

That's two minutes gone in the round.
Eleven is looking to take a break and control but Here is keeping him honest, looking to work from the bottom.
Here is looking to improve his position.
Eleven stalling away here and it's allowed Here to slip out his trapped foot and regain full guard.
Eleven looking to control the position here, rather than advance.
Here looking to control.

That's three minutes gone in the round.
Eleven is looking to advance position but Here has hit a scissor sweep - now he's on top in mount! Score +4 for clean sweep to past guard: Here (4) vs (2) Eleven
Eleven regains half guard.
Eleven looking for submissions off his back.
Here is figuring out what he wants to do next.
Eleven looking for submissions off his back.

That's four minutes gone in the round.
Here wants to take a breather but Eleven is having none of it.
Eleven is trying to get back to full guard.
Eleven wants to control but Here is keeping busy.
Here passes to full mount! Score +3 for passing guard: Here (7) vs (2) Eleven
Eleven tries to hold on but Here postures up.
The fighters are pressed up against the cage, both looking to find a bit of space to work.

That's five minutes gone in the round.
Eleven stops Here from taking his back. Still, being mounted isn't any better.
Here takes Eleven's back. Could be looking for a rear naked choke here - either way, Eleven is in trouble. Score +3 for taking back: Here (10) vs (2) Eleven
Eleven rolls and manages to get back to half guard. Nicely done.
Here trying to mount his opponent but Eleven defends it.
The ref warns both fighters not to hold the cage as they work up against the meshing.
Eleven is looking to control Here's leg but it's slowly edging free. Can Eleven avoid being mounted?

That's six minutes gone in the round.
Eleven is trying to get back to full guard.
Eleven is controlling Here's trapped leg to prevent Here from advancing to side control.
Eleven gets full guard.
Eleven looking to hit a scissor sweep but Here is one step ahead there.
Eleven bucks up whilst keeping hold of a body lock, managing to reverse the position. Now he's in top in Here's guard. Score +2 for sweep to guard / half guard: Here (10) vs (4) Eleven

That's seven minutes gone in the round.
Eleven trying to control but Here is working from the bottom.
Eleven looking to sit in guard and control but Here gets the butterfly guard and sweeps. He's now in the guard on the top. Score +2 for sweep to guard / half guard: Here (12) vs (4) Eleven
Eleven is working from a closed guard but he's struggling to control his opponent.
Here preventing the sweep.
Eleven controls Here momentarily but Here frees himself.

That's eight minutes gone in the round.
Here passes Eleven's right leg, so he's now in half guard.

Here is trying for a guillotine from the top but the pressure isn't in the right place so Eleven is just riding it out for now. Here eventually gives up the hold.
Eleven controlling the leg, holding on to half guard.
Here wants to lay and pray for a moment but Eleven keeps working.

That's nine minutes gone in the round.
Here tries to pass to full mount but Eleven defends it.
Eleven tries to roll over but Here keeps him under control.
Eleven trying to hold on to Here's head to control him but Here postures up.
Eleven actively working from the bottom here.
Here trying to mount his opponent but Eleven defends it.

That's ten minutes gone in the round.
Here looking for a kimura but he'll have to free his other leg if he wants to finish that. Perhaps he's just using it as a distraction technique.
Eleven works his way to full guard. Good work.
Here trying to control the position from guard on top but Eleven is wriggling around, looking for whatever he can.

That's eleven minutes gone in the round.
Eleven looking to control but Here passes into half guard.
Eleven tries to get to full guard but Here has control of the leg.
Here is thwarting Eleven's attempts to control the position.
Here seems content to maintain position for now, rather than mounting any offense.

That's twelve minutes gone in the round.
Eleven is looking to get back to full guard here but Here has managed to pass to side control instead. Score +3 for passing guard: Here (15) vs (4) Eleven
Eleven is looking to regain half guard here but Here keeps moving and retains side control.
Here advances nicely into full mount. Score +2 for reaching mount: Here (17) vs (4) Eleven

That's thirteen minutes gone in the round.
Here manages to capitalize on a mistake by Eleven to take his back! Score +3 for taking back: Here (20) vs (4) Eleven
Here is persistently looking for the submission but Eleven is defending it well.
Here is looking to finish the fight by rear naked choke. Eleven knows exactly what he's got planned though, so he's defending well. Maybe a few strikes would soften Eleven for a finish.
Here tightening his grip on Eleven, looking for the choke.
Here is breathing heavily.
Here has his hand under the chin of his opponent looking for the choke. He's nearly got it! This one could be all over! But no, Eleven has freed his hand and lives to survive another� well, another couple of seconds at least!

That's fourteen minutes gone in the round.
Here looking for the choke from the back.
Eleven can't escape the position.
Here doesn't have the hooks in and Eleven manages to turn into his guard.
Score +2 for sweep to guard / half guard: Here (20) vs (6) Eleven
Boooooooooooooooooooo!!! God, this has been a terrible round. Come on you two, sort yourselves out!
Eleven drops back, looking for a kneebar! Here looks panicked! The fighters roll across the mat, one looking to finish, one looking to escape. Here looks to have wriggled free... Yes, he's got his leg free and he's dived into side control! Good work there from Here! Score +4 for clean sweep to past guard: Here (24) vs (6) Eleven
Eleven sneaks a leg under to get back to half guard.
And that's the end of the fight!
Here takes the fight on points by 24 to 6. |
|
|
|
|
|