|
|
PBP Commentary |
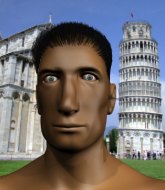
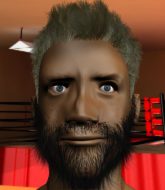
Coming up we have a featherweight MMA rules bout between Catchy Cartwright (ranked 1531 p4p, 2790 weight class) and AU ST (ranked 164 p4p, 275 weight class). Cartwright comes into the arena with Spiders blaring out of the sound system. Catchy Cartwright could well score a knockout today. He has the power to get to AU ST's chin.
 |
|
 |
| 171 cm
26
150
5 - 0 - 0 |
|
168 cm
26
155
3 - 1 - 0 |
BJJ Brown Belt
Counter fighter
Big heart |
|
Good wrestler
Brawler
Enjoys gardening |
|
| |
|
Ladies and gentlemen. This fight is 5 rounds, for the featherweight championship of the world!
Introducing the champion to my left, fighting out of the red corner.
With a record of 5 - 0 - 0, fighting out of Hilo, Catchy Cartwright!
And introducing the challenger to my right, fighting out of the blue corner.
With a record of 3 - 1 - 0, fighting out of Sydney, AU ST!
The judges for this bout are Darius Henderson, Francis DeMontford and Topper Green.

The bell rings for round one and we are underway!

ST takes the fight into the clinch.
Cartwright gets through ST's defenses to land a nice punch to the side of the head.

Cartwright manages to pull guard. Let's see whether he can land a sub off his back.
ST pressing down on his opponent's thigh, looking to pass guard. Cartwright is keeping the position for now.
Cartwright is trying to control the position but ST postures up.
Cartwright has his hands on ST's head, controlling the position.
We've had a slow start to the round here - hopefully the action picks up.
ST stopping the sweep attempt from Cartwright.
Cartwright keeping moving, preventing ST from controlling successfully.

That's one minute gone in the round.

Cartwright looking for submissions from the bottom here. Moving his hips around, possibly looking for an armbar.
ST postures up to throw the ground and pound strikes but they don't connect.
Cartwright trying to control the position.
ST wants to control from the top but Cartwright keeps moving.
ST with a flurry of punches that miss.
Cartwright keeping moving, preventing ST from controlling successfully.
ST stands up and looks to throw the legs aside to pass to side control. Cartwright swivels though and keeps the full guard.

That's two minutes gone in the round.
Well. There's a bit of a lull in the action here and the crowd are starting to get restless.
Cartwright wants to get back to his feet but ST is in a dominant position and won't allow it.

The referee has decided to stand the fighters back up, so we'll restart on the feet.
A really sloppy takedown attempt there from ST.
We've been hearing reports that Cartwright has been drilling takedowns in recent sessions so let's see if that has an impact on the result of this fight.
ST dives in for a single leg takedown but Cartwright sprawls and the fighters end up clinched against the cage.
Cartwright wants to take advantage of his opponent's missed offense by moving into the clinch.
ST tries to clinch but is not successful on this occasion.
ST is trying hard to land a takedown here. Cartwright sprawls well and keeps this one on the feet.
Catchy Cartwright has stuffed three takedown attempts in the round now. That's going to take a lot out of AU ST.
ST misses with a takedown attempt - Cartwright sprawls well and throws a nice strike on the way out which just misses.

ST changes levels and drives through with a really nice takedown into side control. Cartwright looks really pissed at himself for not defending that better.

That's three minutes gone in the round.
Cartwright regains half guard.
Cartwright is trying to get back to full guard.

Cartwright is defending against the submission attempts here by ST.
ST looking to pass the half guard. Not this time.
ST stops Cartwright from getting back to his feet.

That's four minutes gone in the round.
Neither fighter has done anything of merit for a good minute or two here and the crowd are not happy about it.
Cartwright wants to get back to full guard.
ST looks over to his corner - he wants some instructions but his corner are not responding.
ST really doesn't want to stay on the ground with Cartwright. If he can't get it back to his feet, it's only a matter of time before he'll be tapping out.
Cartwright trying to hold on to ST's head to control him but ST postures up.
ST is trying to work for a kimura but Cartwright is defending well.
ST is looking to advance position but Cartwright won't allow it.
Boooooooooooooooooooo!!! God, this has been a terrible round. Come on you two, sort yourselves out!
ST prevents Cartwright from improving his position.
And that is the end of the round. The fighters go back to their corners.
Catchy Cartwright dominated that round.
The fighters' corners scream their final instructions, as the referee calls time. Here we go, back to the action!

ST fails with a takedown attempt from distance.
ST shoots in and drives through. Cartwright sprawls well.
Cartwright fails with a rather predictable takedown attempt.
ST misses with a takedown
and ST takes a counter punch right on the button for his troubles.
Catchy Cartwright has stuffed three takedown attempts in the round now. That's going to take a lot out of AU ST.
ST fails with a takedown attempt from distance.
We've had a slow start to the round here - hopefully the action picks up.
ST misses with a double jab.
Cartwright seemed to be looking to counter by closing the distance.
Cartwright gets tackled into the cage by ST. ST maintains the clinch.
ST throws a vicious knee straight up the middle but Cartwright blocks it with crossed arms.
ST is clearly stalling here... Pick up the pace son.
That's one minute gone in the round.
ST jumps guard but Cartwright turns him against the cage and keeps the fight standing.
Cartwright can't get the takedown.
Cartwright fails to pull guard.
ST prevents a takedown attempt there.
Cartwright is working on a leg, looking for a takedown but ST is defending well.
Cartwright is fighting off a takedown attempt but ST is just too persistent for him and manages to trip Cartwright to the mat. Cartwright regains guard as soon as the fighters hit the mat.
Cartwright manages to sweep nicely, so he's now on top. ST manages to get himself to full guard.

ST tries to land a sweep but no joy.
ST is trying to stand up but he's not managed so far.
Cartwright landing with the ground and pound.
That's two minutes gone in the round.
Cartwright lands a couple of elbows.
ST is working an open guard here, looking to improve his position. No doubt that will leave him open to counters but at least he's being more offensive.
ST throwing his legs up looking for a triangle.
ST is working an open guard here, looking to improve his position. No doubt that will leave him open to counters but at least he's being more offensive.
The ref warns both fighters not to hold the cage as they work up against the meshing.
Cartwright pushes down on ST's leg and manages to get into half guard.
That's three minutes gone in the round.
Cartwright seems to be working for a kimura but ST defends the submission attempt.
ST is defending against the submission attempts here by Cartwright.
ST is looking to sinch up a guillotine here but Cartwright pulls his head out easily.
ST trying to get back to full guard but Cartwright takes advantage of the position and moves to full mount!
Cartwright swings around for an armbar but it's a sloppy attempt and ST is now in Cartwright's guard. A big mistake from Cartwright there, giving up the dominant position!
That's four minutes gone in the round.
Cartwright wants to control here, rather than go for any submissions from the bottom. At least for now.
Cartwright is trying to control the position but ST postures up.
ST preventing the sweep.
ST looking to pass the guard.
The crowd thankful this round is nearly over.
Cartwright is working the butterfly guard. He manages to land a nice scissor sweep and is now in half guard on the top. Nice move.
We get told so often about how wrestlers don't like to be on their backs. Let's see if ST can do anything to dispel that myth.
ST wants to get back to his feet.
And that is the end of the round. The fighters go back to their corners.
That was a close second round but I would say that Catchy Cartwright will probably get the nod.
OK. That's time! The bell goes and we're back to the action.

ST tries to clinch there but Cartwright circles away.
ST doesn't manage to clinch there - Cartwright circles away.
ST drives through with a really nice takedown into side control.
ST working away.
Cartwright is trying to improve his position.
ST working away.
We've had a slow start to the round here - hopefully the action picks up.
Cartwright is looking to regain half guard here but ST keeps moving and retains side control.
Cartwright manages to get one leg in to regain half guard.
That's one minute gone in the round.
Cartwright blocking the ground and pound attempt from ST.
ST prevents Cartwright from standing back up.
ST throwing shots but they're hitting the canvas more than the man.
Cartwright is looking to improve his position.
ST is trying for a guillotine from the top but the pressure isn't in the right place so Cartwright is just riding it out for now. ST eventually gives up the hold.
ST slows the pace down in half guard.
That's two minutes gone in the round.
Well. There's a bit of a lull in the action here and the crowd are starting to get restless.
Cartwright wants to get back to full guard.
Cartwright has a hand on ST's thigh, trying to get back to full guard. ST takes advantage of the position though and mounts him!
Cartwright working to try and regain half guard.
ST tries to control but Cartwright wriggling away.
ST misses with a series of strikes from mount. He'll no doubt be working on his ground and pound when he gets back to the gym.
That's three minutes gone in the round.
Cartwright working to try and regain half guard.
ST working for a guillotine from mount but Cartwright is in no mood to give up.
Cartwright is desperately trying to improve his position but ST has a good base and remains in mount.
Cartwright sneaks a leg under to get to half guard.
Cartwright works his way to full guard. Good work.
Catchy Cartwright overall seems to be getting the better of the ground position in the fight so far.
ST with a flurry of punches that miss.
That's four minutes gone in the round.
Cartwright has ST pulled in close to control his posture.
ST missing there with some ground and pound from the guard.
ST scoring with some ground and pound.
ST wants to control from the top but Cartwright keeps moving.
Cartwright has a loose triangle. He'll be looking to tighten that up but ST can see exactly what he's planning and manages to posture up and free himself.
Cartwright escapes his hips to the side and looks to be working for an armbar. ST gives him a little smile and shakes his head. No chance.
Boooooooooooooooooooo!!! God, this has been a terrible round. Come on you two, sort yourselves out!
ST drops back, looking for a kneebar! Cartwright looks panicked! The fighters roll across the mat, one looking to finish, one looking to escape. Cartwright looks to have wriggled free... Yes, he's got his leg free and he's dived into side control! Good work there from Cartwright!
And that is the end of the round. The fighters go back to their corners.
That was a close round but Catchy Cartwright did the better work so I'd imagine he'll take it.
The minute break is over - no more time for sponges and pep talks - back to the action!

ST takes a shot right to the bread basket.
ST will need to tighten up his combinations if he doesn't want to gas himself out, swinging at thin air.
ST tries for a takedown but Cartwright sees it coming a mile off and avoids it easily.
Well, he's not going to score with shots like that. A lazy body kick attempt from Cartwright.
We've had a slow start to the round here - hopefully the action picks up.
ST looking to take his opponent's legs away with the low kicks.
ST wants to clinch up but Cartwright keeps it at a distance.
Cartwright drops down looking for a counter takedown but ST sprawls and moves away.
ST rushes Cartwright and pushes him back against the cage in a clinch.
That's one minute gone in the round.
Cartwright tries to take the fight to the ground by pulling guard but can't manage it.
Both fighters working to control the clinch.
Cartwright is looking to take this one to the mat.
Cartwright misses with an elbow strike.
ST successfully pulls guard.
ST is active off his back here, looking for submissions.
Cartwright works over ST with some ground and pound from guard.
Cartwright postures up.
Cartwright trying to control the position from guard on top but ST is wriggling around, looking for whatever he can.
ST is working an open guard here, looking to improve his position. No doubt that will leave him open to counters but at least he's being more offensive.
That's two minutes gone in the round.
ST looking for submissions from the bottom but instead Cartwright passes into half guard.
Cartwright drops an elbow to the side of ST's head.
Cartwright scoring with strikes to the body and head.
Cartwright is looking for a kimura but ST is holding onto that half guard position, so it's hard for Cartwright to get the leverage.
Cartwright is working for a submission of some sort.
Cartwright is working for submissions here but there's nothing on.
That's three minutes gone in the round.
ST trying to control from the bottom.
Cartwright trying to control from half guard but ST is working away.
ST trying to hold on to Cartwright's head to control him but Cartwright postures up.
Cartwright lands with a punch from half guard.
ST trying to control but Cartwright postures up.
The two fighters exchange a few words. I couldn't hear what they were saying but maybe it's more fun if you make it up yourself. Cartwright connects with a nice short shot to ST's temple.
That's four minutes gone in the round.
A few boos can be heard. I'm sure they will multiply if the fighters don't pick up the pace.
Cartwright is looking for a kimura. It's going to be difficult to finish that from half guard though and ST defends it well.
Cartwright is scoring with some nice ground and pound from the dominant position.
Cartwright lands a big shot. The thud that echoes around the arena is like music to the fans' ears.
Cartwright landing with strikes to the body and head, softening up his opponent.

ST is rocked!
The fighters are pressed up against the cage, both looking to find a bit of space to work.
Cartwright slips a nice elbow through ST's hands, connecting with ST's forehead.
ST is still in real trouble! Can Cartwright finish him?
Cartwright perhaps working for something from half guard, or maybe not. It looks like he's just sitting there.
ST wants to get back to his feet.
ST looking for submissions from an awkward position here.
ST is absolutely dripping with sweat - he looks exhausted.
Cartwright maintaining the dominant position here and is working for a kimura. He's locked it up! ST could be in real trouble here! He's trying to wriggle out but Cartwright has cracked it and ST is screaming in pain - he's tapped out! Great finish by Cartwright!
Ladies and gentlemen, after 4:59 of round 4, we have a winner by way of Submission (Kimura). Catchy Cartwright!
Catchy Cartwright is the new featherweight champion!
An out of breath Catchy Cartwright thanked his loyal fans in his post fight interview, giving them credit for his success over the course of his career.
|
|
|
|
|
|
|
|
|
|
|
|
|
|
|
|
|
|
|
|
|
|
|
| S |
C
A |
G |
S |
C
B |
G |
|
S |
C |
G |
|
energy
A | B |
|
hype
A | B |
|
pop
A | B |
|
mgr
A | B |
|
FIGHT
RATING
34% |
|
|
|
|
|
|
