|
|
PBP Commentary |
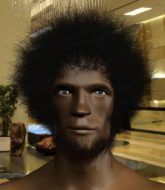
Coming up we have a light heavyweight MMA rules bout between Jaycen Solo (ranked 1959 p4p, 2096 weight class) and Jupiter Smalls (ranked 260 p4p, 279 weight class). Jupiter Smalls is staring across the cage at his opponent, tweaking his nipples.
 |
|
 |
| 190 cm
27
222
15 - 11 - 0 |
|
191 cm
24
213
11 - 3 - 0 |
Good wrestling
Excellent boxer
Cardio machine |
|
Good wrestler
Decent boxing
Good gas tank |
|
| |
|
Ladies and gentlemen. This fight is 3 rounds, in the light heavyweight division.
Introducing the fighter to my left, fighting out of the red corner.
With a record of 15 - 11 - 0, fighting out of New York, Jaycen Solo!
And introducing the fighter to my right, fighting out of the blue corner.
With a record of 11 - 3 - 0, fighting out of Montreal, Jupiter Smalls!
The judges for this bout are William Peck, Steve Smith and Dillan Fox.

The bell rings for round one and we are underway!

Solo takes the fight into the clinch.
Solo goes for a takedown attempt but Smalls pushes him away and we're back to fighting at a distance.
Solo looks for a takedown but Smalls sprawls well.
Smalls has done a lot of speed work in the buildup to this fight.
Smalls lands a pitter patter jab to the forehead of his opponent.
Solo shoots in for a takedown. "Ole!" shouts Smalls as he jumps to the side.
That's three failed takedown attempts in the round for Jaycen Solo. That's going to take a lot out of him.
Solo lands a nice looking body shot.
We've had a slow start to the round here - hopefully the action picks up.
Solo clinches with his opponent.

Smalls breaks the clinch and we're back to striking at distance.
Solo darts in and clinches Smalls up against the cage.
Solo drops down looking for an ankle pick but Smalls pulls his leg out and moves away.
Solo misses the body punch
enabling Smalls to counter with a crisp jab.

That's one minute gone in the round.
No luck with that takedown attempt from Solo.
Solo looks to have improved his striking defense since last time we saw him fight.
Jupiter Smalls is looking to keep the fight on the feet at all costs.
Solo lands a pitter patter jab to the forehead of his opponent.
Jaycen Solo seems to be the more aggressive standup fighter in this bout.
Solo tries for a takedown but Smalls sees it coming a mile off and avoids it easily.
Solo changes levels and looks for a double leg takedown. Smalls tries to avoid it but Solo manages to keep hold of a leg and drag Smalls to the ground. Smalls escapes though and pops straight back up to his feet.
Solo tries for a takedown but Smalls circles away easily
and Smalls counters with a left and a right that stings Solo.
Solo closes the distance and clinches.
An uppercut to the body lands inside from Smalls.
Solo is looking to take this one to the mat.
Solo is looking for a takedown up against the cage. Smalls gets underhooks though and prevents the takedown attempt.
Smalls breaks the clinch and we return to the middle of the mat.
Smalls uses decent footwork to sidestep a right hand from Solo.

That's two minutes gone in the round.
The fight moves into the clinch position.
Smalls is defending well against a takedown attempt.
Solo is looking to take this one to the mat.
Solo drops down looking for an ankle pick but Smalls pulls his leg out and moves away.
Smalls throws a right and a left that Solo avoids nicely.
This is a great period of action - very entertaining stuff!
Solo shoots in but no luck this time.
Solo is breathing heavily.
Solo fails miserably with a takedown attempt.
Smalls throws a counter combo.
Solo doesn't succeed with the takedown
and Smalls counters with a straight punch to the midsection.
Solo changes levels and looks for a double leg takedown. Smalls tries to avoid it but Solo manages to keep hold of a leg and drag Smalls to the ground. Smalls escapes though and pops straight back up to his feet.
Nice cross by Smalls.
No joy there for Smalls, who threw a few shots but didn't land.

That's three minutes gone in the round.
Solo clinches up with Smalls and pushes him back against the cage.
Solo is working on a leg, looking for a takedown but Smalls is defending well.
Solo wants a takedown.
Smalls tries to land a knee to the head but misses.
Smalls manages to break the clinch.
Solo has a takedown stuffed.
Solo moves into range and clinches up with Smalls.
Smalls manages to break the clinch.
Solo fails with the takedown
and Smalls counters with a three punch combo that has Solo backing up. Solo nods at Smalls to acknowledge the strikes.
Smalls throws out a leg kick but Solo moves out of range and Smalls only half commits.
Smalls tries to keep at a distance but Solo has taken the fight into the clinch.

That's four minutes gone in the round.
Solo tries for a takedown. No joy.
Solo looking for a takedown.
Smalls prevents a takedown attempt there.
Smalls breaks the clinch.
Smalls lands with a good body shot.
Fantastic stuff here - a very entertaining period of action, which has drawn cheers from the crowd.

Smalls moves into range and clinches up with Solo.
Smalls breaks the clinch and we return to the middle of the mat.
Smalls goes to the watering hole and comes back with a big thumbs up from the judges as he scores a three punch combo.

Oooooh!!! Smalls has knocked Solo down with a huge combo! Smalls steps away and waves a wobbly Solo back to his feet! This one might not go much longer!

Solo is rocked!
Smalls clinches with his opponent.
Oh Solo is still all over the place! His legs are completely gone! Will he be able to recover?!!
Smalls escapes the clinch and we're back to striking.
Smalls clinches up against the cage.
A short left from Smalls.
And that is the end of the round. The fighters go back to their corners.
Jupiter Smalls dominated that round.
The fighters' corners scream their final instructions, as the referee calls time. Here we go, back to the action!

Solo looks for a takedown here. Will he get it? Smalls is fending him off so far but Solo persists. Nope, Smalls circles away and we're back to standing.
Solo seems to have got his legs back now.
Solo throws a looping left and ducks down for a takedown. He's got his arms around Smalls's waist but Smalls gets an underhook and avoids the takedown by throwing Solo off to one side.
Smalls throws a counter combo.
Solo shoots in looking for a takedown. Smalls tries to sprawl out of it but Solo keeps driving through. The fighters are pinned against the cage. Smalls manages to get underhooks and after a bit of a struggle, circles away and we're back to standing.
Smalls let fly with a counter punch to the body but it didn't land.
That's three failed takedown attempts in the round for Jaycen Solo. That's going to take a lot out of him.
Solo closes the distance and pushes Smalls back into the cage.
Smalls has been the more effective fighter overall so far.
Smalls breaks the clinch.
We've had a slow start to the round here - hopefully the action picks up.
Solo gets in close and instigates a clinch.
Solo is working on a leg, looking for a takedown but Smalls is defending well.
Smalls's corner calls for him to break the clinch, which he does.
Solo takes a punch to the jaw and another one to the bread basket.
Smalls closes the distance and presses his opponent up against the cage.
That's one minute gone in the round.

Solo works for the underhooks and manages to get a trip takedown into guard.
Smalls wants to stand up but Solo is controlling him.
Solo scores with a decent looking elbow strike.
Solo lands a nice shot whilst sitting in his opponent's guard.
Smalls wants to stand but Solo is controlling the position.
Solo throwing shots from guard but he's hitting more mat than opponent.
Solo connects with a couple of short punches.
Solo throwing strikes from guard but Smalls blocks nicely.
Solo working some strikes from top position.
The ref warns both fighters not to hold the cage as they work up against the meshing.
Solo in full guard, throwing the ground and pound. No damage this time.
Smalls wants to stand and escape but Solo is having none of it.
That's two minutes gone in the round.
Solo with a nice head shot there.
Solo stands up and looks to throw the legs aside to pass to side control. Smalls swivels though and keeps the full guard.
The fighters are pressed up against the cage, both looking to find a bit of space to work.
Solo keeps in close for a moment and lands a decent shot to the side of Smalls's head.

Smalls is rocked!
Solo missing there with some ground and pound from the guard.
Smalls is still in real trouble! Can Solo finish him?
Solo connects with a couple of short punches.
Solo arches his back and unloads with a massive left and a right! Smalls's eyes roll back into his head, he's out cold! The ref dives in to stop the fight - wow, they were hard shots!
Ladies and gentlemen, after 2:40 of round 2, we have a winner by way of KO (Strikes). Jaycen Solo!
Jaycen Solo managed to slip a mention for his sponsors, Mile High, into his post fight interview.
|
|
|
|
|
|
|
|
|
|
|
|
|
|
|
|
|
|
|
|
|
|
|
| S |
C
A |
G |
S |
C
B |
G |
|
S |
C |
G |
|
energy
A | B |
|
hype
A | B |
|
pop
A | B |
|
mgr
A | B |
|
FIGHT
RATING
58% |
|
|
|
|
|
|
