|
|
PBP Commentary |
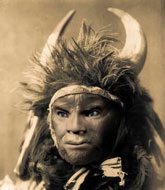
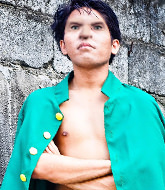
Coming up we have a lightweight MMA rules bout between Jay Simon (ranked 171 p4p, 155 weight class) and Yusuke Urameshi (ranked 23 p4p, 21 weight class). Urameshi has chosen Smile Bomb as his entrance music. Fingers crossed for an exciting fight - I'm sure both fighters are looking for a nice under the table bonus!
 |
|
 |
| 179 cm
29
165
22 - 4 - 0 |
|
172 cm
34
160
31 - 14 - 1 |
Great wrestler
World class MT
Insanely flexible |
|
Good wrestler
World class MT
Good gas tank |
|
| |
|
Ladies and gentlemen. This fight is 5 rounds, in the lightweight division.
Introducing the fighter to my left, fighting out of the red corner.
With a record of 22 - 4 - 0, fighting out of Amsterdam, Jay Simon!
And introducing the fighter to my right, fighting out of the blue corner.
With a record of 31 - 14 - 1, fighting out of Las Vegas, Yusuke Urameshi!
The judges for this bout are Yukihiro Yamamoto, Yuuki Gou and Shigeki Sano.

The bell rings for round one and we are underway!
A jab from Urameshi misses.
Urameshi scores with a straight right hand, right through his opponent's guard.
Simon slips under a jab from Urameshi.
Simon jabs Urameshi to the body, keeping him at a distance.
Urameshi has been spending a lot of time sparring his boxing in the run up to the fight, trying to sharpen up those hands and look for a knockout.
Urameshi waving his hands out in front of him, looking to distract Simon.
Urameshi scores with a punch to the head.
Simon doesn't react quick enough there as he takes a shot to the body.
Urameshi avoids the body shot from Simon.
A little jabbing left from Urameshi on the counter but it doesn't find it's target.
Urameshi connects with a body shot.
Simon loads up on a big right hand but Urameshi slips the punch.
Urameshi displays some good footwork, moving neatly out of range as Simon throws out the jab.
Simon shoots in looking for a takedown. Urameshi tries to sprawl out of it but Simon keeps driving through. The fighters are pinned against the cage. Urameshi manages to get underhooks and after a bit of a struggle, circles away and we're back to standing.
Simon ducks down and throws a hook to the body but Urameshi moves away.
Urameshi throws out a token jab with nothing on it.
Urameshi walks straight into a jab right on the nose. That one stung - he's blinking and trying to clear his head.
We've been hearing reports that Simon has been drilling takedowns in recent sessions so let's see if that has an impact on the result of this fight.

That's one minute gone in the round.
Simon moving in and out of range nicely, whilst landing the scoring shot.
Nice jab there from Simon.
Simon throws a big shot that misses.
Horrible takedown attempt by Simon or perhaps it was just good defense by Urameshi, which made it look bad.
A left lands for Simon.
Simon takes a jab on the nose there. A little bit of blood seems to be coming out. Hopefully that won't affect his breathing.
A swing and a miss from Urameshi.
Urameshi pushing out the jab but it's not landing.
It looked like Simon wanted to counter with a hook but didn't fully commit.
Simon swings widly with a right hand
and Urameshi counters with a straight right hand.
Simon misses with a wild body shot.
Urameshi takes one on the button.
Simon takes a shot to the body in his stride.
The crowd cheering loudly, showing their appreciation for the quality fight we're seeing here.
Urameshi misses with an uppercut.
Urameshi scores with a hook.

That's two minutes gone in the round.
Simon misses with a takedown attempt. He shot from a bit too far out.
That's three failed takedown attempts in the round for Jay Simon. That's going to take a lot out of him.
Simon tries to clinch but Urameshi is having none of it.
A jab from Simon misses.
Simon throws a body punch but Urameshi moves out of range.
Urameshi moves out of range of the strikes.
Urameshi lands a straight punch to the body, keeping Simon at a distance.
Simon shoots in but Urameshi avoids the takedown attempt easily.
Urameshi misses with a hook. Simon ducked under it nicely.
Urameshi ducks down and throws a hook to the body but Simon moves away.
Simon throws a body shot but no joy.
Simon takes a swing at Urameshi's ribcage but misses.
Simon walks into a straight right hand from Urameshi.
Urameshi misses the shot to the body.

That's three minutes gone in the round.
Urameshi swings wildly with a right hand that was never going to find it's target.
Urameshi looks to score with a combo but nothing lands.
Urameshi shakes his hands off, looking to compose himself, but takes a jab to the jaw whilst he does it.
A telegraphed right hand from Urameshi misses the target.
Simon drops down looking for a counter takedown but Urameshi sprawls and moves away.
Yusuke Urameshi is looking to keep the fight on the feet at all costs.
Urameshi throws a lazy uppercut

and Simon counters with a nice double leg into half guard.
Urameshi wants to get back to his feet.
The ref warns both fighters not to hold the cage as they work up against the meshing.

Urameshi pushes Simon off and gets back to his feet.
Simon throws a body shot but no joy.
Simon misses with an uppercut.
Wooooo! Give it up for these two warriors! They are putting on a show!
Simon throws a body shot but no joy.
It seemed like Urameshi was going to counter with the hook but didn't fully commit to it.
Urameshi walks into a left hand.

That's four minutes gone in the round.
Simon fakes an overhand right and shoots for a takedown. Urameshi sprawls well initially but Simon persists and gets the takedown into half guard.
Urameshi pushes Simon off looking to stand but Simon dives back in and keeps control.
Simon works his foot free and advances to mount.
Simon sitting in mount, just looking to control for the moment.
Both fighters have adopted an aggressive gameplan on the ground!
Simon seems to have a rather negative gameplan on the ground. He seems keen to just score the takedown and hold down Urameshi for as long as he can get away with.
Urameshi really wants to buck Simon off and get back to his feet.
Simon moves to the back.
The fighters are pressed up against the cage, both looking to find a bit of space to work.

Simon is looking for the choke from the back position but Urameshi is controlling his hands well.
Urameshi trying to get back to his feet but Simon is in full control for now.
The fighters are starting to perspire pretty heavily.
And that is the end of the round. The fighters go back to their corners.
A close round but Yusuke Urameshi will probably get the nod.
The corners get their ten second warning. Both fighters stand from their stools and stare each other down, ready to get back to the action.

Urameshi throws a hook to the side of Simon's head but Simon sees it coming and ducks under it beautifully.
A jab from Simon finds it's way through Urameshi's defenses.
Simon shoots in with a lovely double leg takedown. Urameshi manages to land in full guard to minimise the damage.
Simon pushes down on Urameshi's leg and manages to get into half guard.
Jay Simon overall seems to be getting the better of the ground position in the fight so far.
Simon is working for a submission of some sort.
Urameshi tries to kick Simon off but Simon keeps his base steady and stays in half guard.
Simon frees up his trapped foot and advances to mount.
Simon wants to take his opponent's back but he's not managed it.
We've had a slow start to the round here - hopefully the action picks up.
Simon mounts Urameshi! Really nice guard pass there!
Urameshi is trying to stand but he's not in a good position to be doing that! Simon has taken his back!
Simon has his hand under the chin of his opponent looking for the choke. He's nearly got it! This one could be all over! But no, Urameshi has freed his hand and lives to survive another� well, another couple of seconds at least!
That's one minute gone in the round.
Urameshi is trying to get back to his feet but he's not managed it yet.
Simon looking for the choke from the back.
Simon working for a choke but Urameshi is defending well.
Urameshi fending off the submission attempt from Simon.
Urameshi wants to get back to his feet.
That's two minutes gone in the round.
Simon is riding his opponent, not letting Urameshi buck him off.
Urameshi trying to get back to his feet but Simon is in full control for now.
Urameshi manages to get to his feet, escaping the difficult position.
Simon darts in and lands a nice takedown into half guard.
The fans in attendance giving it up for the two fighters, who have really let it all hang out in the last minute or so!
Simon stops Urameshi from getting back to his feet.
Simon looking for a kimura but he'll have to free his other leg if he wants to finish that. Perhaps he's just using it as a distraction technique.
Simon is working for a submission of some sort.
Simon is really dominating this fight. Is there anything that Urameshi can do to turn this around?
That's three minutes gone in the round.
Urameshi is trying to stand up here but Simon is controlling him well.
Urameshi is defending against the submission attempts here by Simon.
Simon stops Urameshi from getting back to his feet.
Urameshi is using up a lot of energy trying to get back to his feet. Perhaps he should improve his position first.
That's four minutes gone in the round.
Neither fighter has done anything of merit for a good minute or two here and the crowd are not happy about it.
Simon trying to mount his opponent but Urameshi defends it.
Simon is looking for a kimura here.
Urameshi won't allow Simon to pass to mount.
Urameshi is staying active underneath Simon, who seems content to just control the action from this position.
Urameshi is trying to stand.
Simon tries to pass the half guard into mount. Urameshi knows what he's doing though and prevents the attempt.
Urameshi tries to kick Simon off but Simon keeps his base steady and stays in half guard.
The crowd thankful this round is nearly over.

The referee decides to stand the fighters back up.
Urameshi misses with a right hand
and Simon counters with a lovely straight right hand!
Simon closes the distance looking to clinch
and Urameshi counters with a nice body shot.
And that is the end of the round. The fighters go back to their corners.
Jay Simon dominated that second round.
The fighters' corners scream their final instructions, as the referee calls time. Here we go, back to the action!

Urameshi scores with a jab to the head.
Simon throws a body shot but no joy.
Urameshi throws a jab when Simon was well out of range.
A big left from Urameshi misses.
Simon throws the overhand right but ducks down into a quick takedown attempt. Urameshi was covering up waiting for the punch and Simon finishes the takedown easily into guard.
Simon won't allow Urameshi to get back to his feet.
We've had a slow start to the round here - hopefully the action picks up.
Urameshi keeping moving, preventing Simon from controlling successfully.
Urameshi is looking to get back to his feet but can't, whilst Simon is controlling him.
Simon wants to control from the top but Urameshi keeps moving.
The referee must be thinking about standing these guys back up.
That's one minute gone in the round.
The referee has decided to stand the fighters back up, so we'll restart on the feet.
Urameshi looks to land a right hand but Simon moved out of range.
Urameshi moves into range and throws a combination. A nice jab followed by a hook to the body.
Simon connects with a lovely jab that went straight through the gap between Urameshi's hands.
Simon is using his height advantage well here, landing a good percentage of his punches.
Urameshi looks to score with a jab to the body but Simon is just out of range.

Simon closes the distance and clinches.
Urameshi has a couple of punches blocked by Simon.
Simon has Urameshi pressed up against the cage. He's trying to work for a single leg takedown. Simon pulls back from the cage and twists to the side, sending Urameshi tumbling to the mat - Simon dives into Urameshi's guard.
The fighters are working up against the cage. Urameshi manages to wriggle his way back to his feet, so the fighters are now clinched against the cage.
This is a great period of action - very entertaining stuff!
Simon gets through Urameshi's defenses to land a nice punch to the side of the head.
Simon lands with a good tight uppercut to the head.
Simon working some nice short punches in the clinch.
Urameshi wants to strike at distance but he can't break free of the clinch.
That's two minutes gone in the round.
A short right from Urameshi on the inside.
Urameshi blocks an uppercut.
Urameshi is trying to force a seperation but Simon has the dominant position.
Simon is looking for a takedown.
Simon has hold of a leg and is looking for a trip takedown. Urameshi avoids it nicely though and we remain in the clinch.
Urameshi scores with a hook to the body.
Simon throws a head punch that misses.
Urameshi lands with a short punch from the clinch.
A short body shot lands from Urameshi as the two fighters clinch.
Both fighters are breathing heavily.
Simon misses with a punch to the body.
Simon's head jolts backwards as he takes an uppercut right on the button!
Simon's head jolts backwards as he takes an uppercut right on the button!
Simon tries to score a body lock takedown but Urameshi shows good agility there to stay on his feet.
That's three failed takedown attempts in the round for Jay Simon. That's going to take a lot out of him.
Urameshi lands a hook that snaps the head of Simon backwards.
Urameshi scores with a shot to the side of Simon's head.
Urameshi misses with a body punch.
Simon misses with a punch on the inside.
A short left from Simon.
Simon lands with a good tight uppercut to the head.
Urameshi lands a hook to the side of the head.
Urameshi misses with a punch on the inside.
That's three minutes gone in the round.
Simon lands a right hand.
Simon has Urameshi pressed up against the cage and is working for takedown. Urameshi manages to improve position though and keeps the fight standing.
Urameshi gets through Simon's defenses to land a nice punch to the side of the head.
Urameshi tries to work over Simon's body with a swooping hook but it only glances the target.
Simon tried to land a shot to the body but connects with Urameshi's elbow.
Simon has dropped down and is working for a takedown. Urameshi is trying to keep an underhook but Simon manages to get the takedown into half guard.

Urameshi kicks off Simon and gets to his feet.
Urameshi throws out a token jab with nothing on it.
Simon thows a left - swing and a miss!
A telegraphed right hand from Simon misses the target.
Urameshi throws a big shot that misses.
We've seen a great period of action over the last minute or so - credit to both fighters for going all out!
Simon ducks under a wild hook from Urameshi.
Simon tries to clinch but Urameshi moves out of range.
Simon misses with a hook to the body
and Urameshi counters with a quick right hand to the jaw.
Simon staying out of range there.
Simon half commits to a counter takedown before pushing away, out of range.
The crowd cheers as Urameshi lands an impressive looking overhand right. Simon doesn't seem phased though.
That's four minutes gone in the round.
Urameshi moves out of range of the strikes.
Urameshi fails to land with the punch combination there - jab, cross, hook, miss, miss, miss.
Urameshi misses with a lunging right hand
and Simon counters with a stiff right hand.
Simon with a body punch. A glancing blow.
Simon fails with an attempt to clinch.
Urameshi is clearly trying to counter these attacks from Simon with a body shot.
Simon keeping his hands up high there, blocking the jab from Urameshi.
Urameshi throws a body shot but no joy.
Urameshi throws a combination but it was largely blocked by Simon.
Urameshi misses with a looping right.
A looping hook to the body misses from Simon. Urameshi does a little dance to reset his feet.
Simon is looking to clinch but Urameshi is avoiding it.
A countering left hand to the body from Urameshi misses.
The crowd applaud the fighters' efforts here as the round comes to an end.
Simon rushes in with a sloppy looking punch
and Urameshi counters with a crisp hook to the side of the head.
Simon tries to clinch but Urameshi moves out of range.
Simon ducks down and throws a hook to the body but Urameshi moves away.
A nice side step and Urameshi releases a counter shot to the body, but it doesn't find it's home.
And that is the end of the round. The fighters go back to their corners.
Yusuke Urameshi really dominated that round.
Well, the break between rounds is over. Let's get back to the scrappin!

Simon avoids the body shot from Urameshi.
Urameshi just misses with a punch to the body.
Simon misses with a straight left.
Nice sprawl there from Urameshi as Simon shoots in.
Simon fakes high and shoots in for a takedown but Urameshi avoids it really well and circles away.
Urameshi now looks to counter with a shot at the body.
Urameshi throws a big shot that misses.
A looping hook to the body misses from Simon. Urameshi does a little dance to reset his feet.
Simon throws an ugly left hook that misses
and Urameshi connects with a straight left hand counter down the middle.
We've had a slow start to the round here - hopefully the action picks up.
Urameshi throws a hook but Simon avoids it easily.
Simon lands with a good body shot.
This fight brought to you by 5M nutrition - it's mmmmm tasty. Nice jab by Simon.
Simon misses with a hook.
A countering left hand to the body from Urameshi misses.
Simon avoids a lazy jab quite easily.
That's one minute gone in the round.
Simon fails with a takedown attempt from distance.
That's three failed takedown attempts in the round for Jay Simon. That's going to take a lot out of him.
Simon tries to clinch up but Urameshi circles away and keeps his distance.
Urameshi missing with a left hand there. Simon was out of range so wasted energy throwing that one.
Urameshi throws an overhand right that lands on Simon's shoulder, as Simon tries to avoid the shot.
Simon gets a takedown into half guard.
Simon wants to control but Urameshi is keeping him busy.
Simon stops Urameshi from getting back to his feet.
Simon has freed up his trapped foot and advances to mount.
Urameshi's corner are shouting for him to stand up but that's bad cornering - how is he meant to stand up when he's mounted? He should be looking to improve his position on the ground before trying to stand back up.
Urameshi is squirming around, avoiding Simon's attempts to control the action.
You get the feeling that Urameshi really doesn't like being in this position too much.
That's two minutes gone in the round.
Simon is working on an americana here. Ooh, that looks pretty nasty! Nope, Urameshi has managed to escape the submission attempt.
Simon wants to take Urameshi's back but he can't do it this time.
Simon moves to the back position.
This is a great period of action - very entertaining stuff!
Urameshi trying to get back to his feet but Simon is in full control for now.
That's three minutes gone in the round.
Simon has his hand under the chin of his opponent looking for the choke. He's nearly got it! This one could be all over! But no, Urameshi has freed his hand and lives to survive another� well, another couple of seconds at least!
Urameshi is trying to stand back up.
Urameshi is displaying good submission defense - not really looking in danger of submitting to the rear naked choke at the moment. That could change in an instant of course if Simon gets his way!
That's four minutes gone in the round.
Urameshi is trying to get back to his feet but Simon has full control of the position and if anything, Urameshi has just worked his way into a worse spot.
The crowd thankful this round is nearly over.
Urameshi is displaying good submission defense - not really looking in danger of submitting to the rear naked choke at the moment. That could change in an instant of course if Simon gets his way!
Simon is riding his opponent, not letting Urameshi buck him off.
And that is the end of the round. The fighters go back to their corners.
Jay Simon had his way with Yusuke Urameshi in that round.
That's the end of the round. The referee orders the cornermen out of the cage so we can get back down to business. This is the final round!

Urameshi fakes high and swings low for a body shot but Simon manages to avoid it.
Urameshi thows a left - swing and a miss!
Simon throws a right hand that Urameshi ducks under and follows up with a left that Urameshi also avoids with ease.
Urameshi swings wildly with a right hand that was never going to find it's target.
Urameshi keeping a good distance there, avoiding the body shot.
Simon ducks down and throws a hook to the body but Urameshi moves away.
Simon fakes a head shot and lands one to the body.
Simon throws a hard body shot but it just misses.
Simon tries to clinch
and Urameshi counters with a quick right hand to the jaw.
Simon fails with the takedown.
We've had a slow start to the round here - hopefully the action picks up.
Simon lands a beauty of a right hand that gets the crowd cheering.
Simon closes the distance and clinches up, looking for a takedown. He shifts his weight and gets a nice trip into half guard.
Urameshi pushes Simon off and gets back to his feet.
That's one minute gone in the round.
Simon throws a jab when Urameshi was well out of range.
Simon with a poor takedown
and Urameshi counters with a shot to the ribs. That looked like it hurt.
Yusuke Urameshi seems to be getting the better of the standup.
Simon misses with a wild body shot.
Urameshi slips under a jab from Simon.
A little jabbing left from Urameshi on the counter but it doesn't find it's target.
Simon tries to score a power double leg takedown but Urameshi sees that one coming and sprawls well. That will dishearten Simon somewhat.
That's three failed takedown attempts in the round for Jay Simon. That's going to take a lot out of him.
Both of our modern day gladiators look out of it here - a gruelling 5 rounds of action taking it's toll on them, no doubt.
Urameshi uses some good footwork to avoid the body shot by Simon.
Simon uses decent footwork to sidestep a right hand from Urameshi.
A big left from Simon misses.
Urameshi throws a hook to the side of Simon's head but Simon sees it coming and ducks under it beautifully.
Simon moves out of range of the strikes.
Simon shoots in but doesn't get the takedown
and Simon takes a counter punch right on the button for his troubles.
That's two minutes gone in the round.
Simon wings a very wild body shot but it does the job and lands to the midsection.
Urameshi throws a lazy right hand but Simon sees it coming a mile off and sidesteps it easily.
No luck with that takedown attempt from Simon.
Simon cracks Urameshi with a hook to the jaw. Both fighters smile at eachother and high-five before getting back down to business.
This is a great period of action - very entertaining stuff!
Urameshi thows a left - swing and a miss!
Urameshi looks to land a right hand but Simon moved out of range.
Urameshi feints a straight left to the body, then turns around with a flashy move and hits Simons jaw with a dramatic spinning back fist!
Simon uses decent footwork to sidestep a right hand from Urameshi.
Simon swings for the body but Urameshi moves out of range.
Urameshi fakes a jab and then connects with a hook.
That's three minutes gone in the round.
Simon just misses with a punch to the body.
Simon blocks a jab.
A telegraphed takedown attempt from Simon is defended easily by Urameshi.
Urameshi uses good head movement to avoid the hook from Simon.
A looping hook to the body misses from Urameshi. Simon does a little dance to reset his feet.
Urameshi misses with a looping left.
A telegraphed right hand from Urameshi misses the target.
Urameshi swings for the body but Simon moves out of range.
Simon ducks under an overhand right and circles away with a smile on his face.
Simon darts in looking for a takedown but Urameshi gets double underhooks and turns Simon into the cage.
Simon misses with a hook to the ribs.

Urameshi breaks the clinch and we return to the middle of the mat.
Simon takes a swing at Urameshi's ribcage but misses.
That's four minutes gone in the round.
Simon fakes high and swings low for a body shot but Urameshi manages to avoid it.
Urameshi swings and misses with a hook to the body.
Urameshi missing with a left hand there. Simon was out of range so wasted energy throwing that one.
Simon takes a swing at Urameshi's ribcage but misses.
Urameshi takes a punch right to his stomach. That took the wind out of him momentarily.
Urameshi throws a hard body shot but it just misses.
Simon lands with an overhand left.
Simon fails with a takedown attempt.
Simon keeping a good distance there, avoiding the body shot.
Simon scores with a hook to the body. Urameshi takes a step back and tries to catch his breath.
This has been an exciting period of action!
Urameshi throws the left hand but Simon avoids the punch easily.
Simon fails with a takedown attempt.
And that's the end of the fight!
Yusuke Urameshi comfortably won the final round on my scorecard.
I think Urameshi has won this one but let's see whether the judges agree with me. Over to the ring announcer for the scorecards.
Ladies and gentlemen, after 5 rounds of action, we go to the scorecards for a decision.
Judge Yukihiro Yamamoto scores the fight 48:48
Judge Yuuki Gou scores the fight 48:48
Judge Shigeki Sano scores the fight 47:48
The fight is ruled a majority draw!
|
|
|
|
|
|
|
|
|
|
|
|
|
|
|
|
|
|
|
|
|
|
|
| S |
C
A |
G |
S |
C
B |
G |
|
S |
C |
G |
|
energy
A | B |
|
hype
A | B |
|
pop
A | B |
|
mgr
A | B |
|
FIGHT
RATING
60% |
|
|
|
|
|
|
