|
|
PBP Commentary |
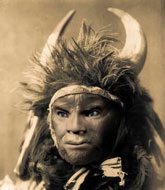
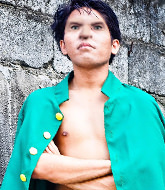
Coming up we have a lightweight MMA rules bout between Jay Simon (ranked 202 p4p, 185 weight class) and Yusuke Urameshi (ranked 29 p4p, 24 weight class). Urameshi is bobbing his head along to his entrance song: Smile Bomb. Man, I cannot wait for this one!
 |
|
 |
| 179 cm
29
165
22 - 4 - 1 |
|
172 cm
34
160
31 - 14 - 2 |
Great wrestler
World class MT
Insanely flexible |
|
Good wrestler
World class MT
Good gas tank |
|
| |
|
Ladies and gentlemen. This fight is 5 rounds, in the lightweight division.
Introducing the fighter to my left, fighting out of the red corner.
With a record of 22 - 4 - 1, fighting out of Amsterdam, Jay Simon!
And introducing the fighter to my right, fighting out of the blue corner.
With a record of 31 - 14 - 2, fighting out of Las Vegas, Yusuke Urameshi!
The judges for this bout are Hirohito Nitta, Ren Mimura and Shirou Masuda.

The bell rings for round one and we are underway!
Urameshi loads up on a big right hand but Simon slips the punch.
Simon connects with a hook to the side of his opponent's head.
Simon throws a jab to the body, straight down the pipe. Boom. That sent Urameshi stumbling backwards but he manages to regain his composure quickly.
Simon with a nice cross.
Urameshi steps to the side to avoid the strikes from Simon.
A little jabbing left from Urameshi on the counter but it doesn't find it's target.
Urameshi fakes low and throws an overhand right that catches Simon on the side of the head.
Simon shoots for a takedown but Urameshi saw that one coming a mile off and avoided it easily.
Simon punishes Urameshi's body with a nice straight punch.
Simon lands a really nice looking cross but Urameshi seems unphased.
Simon fakes a head shot and lands one to the body.
Urameshi avoids the body shot from Simon.
Simon doesn't succeed with the takedown
and Urameshi counters with a good right hand that lands right on the jaw.
This is a great period of action - very entertaining stuff!
Urameshi jabs Simon right on the nose. Simon blinks but takes it well.
Urameshi misses with a looping right.
Simon scores with a nice right hand.
Urameshi smiles there as he lands a nice right hand right on the button.
Simon looks to have improved his striking defense since last time we saw him fight.
Simon throws a body punch but Urameshi moves out of range.

That's one minute gone in the round.
Urameshi pushes forward with a 1-2 combination that forces Simon back to the cage. Urameshi follows up with a solid lead hook to the liver.
Simon looks to score with a jab to the body but Urameshi is just out of range.
Simon tries to score a power double leg takedown but Urameshi sees that one coming and sprawls well. That will dishearten Simon somewhat.
That's three failed takedown attempts in the round for Jay Simon. That's going to take a lot out of him.
Simon shoots in and drives through. Urameshi sprawls well.
Urameshi stuffs a takedown. It's all about dictating where the fight takes place and Urameshi wants it to stay on the feet.
Urameshi swings and misses with a shot to the body
and Simon connects with a straight left hand counter down the middle.
Urameshi tries to land with a swinging hook to the body but Simon was well out of range. Poor timing from Urameshi.
Simon drops down looking for a counter takedown but Urameshi sprawls and moves away.
Simon throws a body shot but no joy.
Simon connects with a body shot that sends Urameshi's belly button to the back.
Urameshi waving his hands out in front of him, looking to distract Simon.
Simon is using his height advantage well here, landing a good percentage of his punches.
Simon ducks under a wild hook from Urameshi.
Simon is looking to wear down Urameshi with body shots, infact he's throwing more body shots than head shots at the moment.
Simon throws out a loose jab but Urameshi uses good head movement to avoid it.
Simon throws a couple of head shots and lands with the final one - a decent hook, which struck Urameshi on the side of the head.
Urameshi misses with a looping right.

That's two minutes gone in the round.
Urameshi takes one on the button.
The crowd cheering loudly, showing their appreciation for the quality fight we're seeing here.
Urameshi throws a jab but it's blocked by Simon.
Urameshi misses with a looping right.
Simon tries for a takedown but Urameshi circles away easily
and Urameshi counters with a nice body shot.
Simon cracks Urameshi with a good jab.
Urameshi misses with a hook.
Simon swung with a counter right hand that didn't connect.

Simon has closed the distance and engaged Urameshi in a clinch.
Simon has a couple of punches blocked by Urameshi.
Urameshi throws a punch but it's blocked by Simon.
Urameshi has a couple of punches blocked by Simon.
Urameshi lands a shoulder strike that jolts his opponent's head backwards.
Simon doesn't land with the attempted body shot.
Simon lands a body shot in the clinch.
A short right from Simon on the inside.
Simon struggles to land a body shot inside as Urameshi controls his hands.
Urameshi misses with a body punch.
A short uppercut from Urameshi.
Simon can't get the takedown.
Simon digs a right hand into Urameshi's ribs. Those have got to be taking their toll on Urameshi's gas tank.

That's three minutes gone in the round.
A short right hand to the side of the head by Simon.
Simon doesn't land with the attempted body shot.
A short left from Urameshi.
A hook to the body from Simon.
Urameshi swings wildly with an uppercut but Simon uses good head movement to avoid it.
Simon blocks a couple of punches on the inside.
Simon throws a punch but it's blocked by Urameshi.
Urameshi makes some space for himself and lands an uppercut.
Simon misses with a short punch on the inside.
Urameshi is looking to break free of the clinch but Simon has double underhooks.
Simon drops to a knee looking for a takedown but Urameshi gets the underhooks and prevents it.
Urameshi tries to break the clinch but Simon is controlling the position.
Urameshi misses with a short punch on the inside.
Urameshi takes a shot to the head.
Urameshi misses with some punches.
Urameshi swings away with an uppercut that misses.
Simon tries a shoulder strike but it doesn't do any damage.
A short body shot lands from Urameshi as the two fighters clinch.
Urameshi goes for a body shot but it's blocked.

That's four minutes gone in the round.
Urameshi scores with an uppercut up the middle.
Simon tries a body shot but Urameshi blocks it.
The crowd cheering loudly, showing their appreciation for the quality fight we're seeing here.
Simon misses with a shot to the kidneys.
Simon goes for a takedown attempt but Urameshi pushes him away and we're back to fighting at a distance.
Simon punishes Urameshi's body with a nice straight punch.
Simon looks to land a left hand but Urameshi moved out of range nicely.
Simon takes one on the button.
Simon throws a hook to the body but it doesn't connect.
Simon tries to clinch but Urameshi is having none of it.
Urameshi connects with a body shot.

Simon scores with a takedown into Urameshi's guard.
The crowd applaud the fighters' efforts here as the round comes to an end.

Urameshi pushes Simon off and gets back to his feet.
A shot to the body from Simon misses
enabling Urameshi to counter with a crisp jab.
Jay Simon seems to be the more aggressive standup fighter in this bout.
Simon misses with a hook to the body
and Urameshi counters with a right hand to the body.
Urameshi misses with a body shot.
And that is the end of the round. The fighters go back to their corners.
A close round but Yusuke Urameshi will probably get the nod.
OK. That's time! The bell goes and we're back to the action.

Simon misses with a looping right.
Jab, jab by Simon - just one landing.
Simon has a takedown stuffed.
Urameshi swings away with a counter right hand but no contact made.
Simon throws a body punch but Urameshi moves out of range.
Urameshi misses with a body shot. Nice footwork from Simon.
Decent striking displayed by Simon there.
Urameshi looks to land a left hand but Simon moved out of range nicely.
Urameshi misses the shot to the body.
Nice defenses there by Urameshi.
A jab lands there for Simon.
We've had a slow start to the round here - hopefully the action picks up.
Simon thuds his right hand into Urameshi's forehead from close range. That could be painful for both fighters.
Urameshi throws an uppercut from half a mile away. Simon sees it coming and avoids it easily.
Simon keeping a good distance there, avoiding the body shot.
Simon attempts a counter takedown but Urameshi avoids it well and moves away.
Simon takes a step towards his opponent and connects with a left hand, before circling away.
Urameshi slips under a jab.
Simon shoots in for a takedown - he's clinched up with Urameshi but Urameshi pushes him off and we're back to square one.
That's one minute gone in the round.
Simon swings wildly with a right hand that was never going to find it's target.
Simon misses with a wild body shot.
It seemed like Urameshi was going to counter with the hook but didn't fully commit to it.
Urameshi cracks a nice hook into Simon's ribs.
Urameshi waving his hands out in front of him, looking to distract Simon.
Simon tries to counter with a takedown but Urameshi is quick to defend against it.
Simon fails with a takedown attempt from distance.
That's three failed takedown attempts in the round for Jay Simon. That's going to take a lot out of him.
Urameshi tests Simon's chin there with a solid looking shot.
Simon bobs and weaves into range and then changes levels and scores with a nice takedown into side control.
Urameshi tries to get back to his feet but has found himself mounted instead. Damn, that's gotta suck.
Urameshi is trying to get to the cage to help him get back to his feet.
Simon takes a little breather and maintains the position. The referee will be looking for him to stay active from such a dominant position though.

Simon working for a submission but Urameshi is keeping him at bay.
The crowd cheering loudly, showing their appreciation for the quality fight we're seeing here.
Urameshi wants to use the cage to get back to his feet here.
That's two minutes gone in the round.
Simon is in full mount, looking to secure a guillotine but Urameshi is surviving well by controlling Simon's body position as best he can.
Urameshi is trying to stand up.
Simon wants to control the pace but Urameshi is squirming around nicely.
Urameshi is looking to get back to his feet - it's going to be hard from this position.
Urameshi has given up his back here. Will Simon look for the submission or keep pounding away?
Simon is looking for the choke from the back position but Urameshi is controlling his hands well.
Urameshi is trying to get back to his feet but Simon has full control of the position and if anything, Urameshi has just worked his way into a worse spot.
Urameshi defending nicely against the rear naked choke attempt.
Both fighters have adopted an aggressive gameplan on the ground!
Simon is staying calm and holding on to the back position, whilst working on a rear naked choke. Urameshi is defending well though. Simon let's go of the attempt for now.
That's three minutes gone in the round.
Urameshi is trying to stand back up.
Urameshi is using up a lot of energy trying to get back to his feet. Perhaps he should improve his position first.
What can Urameshi do to escape this position? He's going to have to figure it out pretty quick if he wants to stay in the fight!
Urameshi is looking to stand back up. He's having to work hard to escape but eventually he manages it.
Simon fakes high and swings low for a body shot but Urameshi manages to avoid it.
Simon displays some good footwork, moving neatly out of range as Urameshi throws out the jab.
Simon appears to be looking for a counter takedown.
Urameshi thows a left - swing and a miss!
Yusuke Urameshi seems to be getting the better of the standup.
That's four minutes gone in the round.
Simon lands a glancing blow to the side of Urameshi's head.
Simon gets a double leg takedown into Urameshi's guard.

Urameshi has scooted to the edge of the canvas and used the cage to get back to his feet. Simon has stuck on his opponent and is forcing him back against the cage.
Wooooo! Give it up for these two warriors! They are putting on a show!
A nice left hand lands by Urameshi.
Urameshi misses with a short punch on the inside.
Urameshi misses with a shot to the kidneys.
Yusuke Urameshi seems to be working more effectively in the clinch in the fight so far.
Urameshi is working Simon over against the cage.
A short uppercut from Urameshi.
Simon blocking some punches.
Urameshi throws a head punch that misses.
Urameshi misses with a punch to the body.
Urameshi lands with a right to the head.
Urameshi throws a blind hook that connects with the side of Simons head.
Urameshi lands a body punch.
Still in the clinch, Urameshi scores with a nice short uppercut.
Simon can't find room to land a body shot as Urameshi controls the action.
Urameshi misses with a punch to the body.
An uppercut to the body lands inside from Simon.
An uppercut on the inside fails to land for Urameshi.
Simon blocking some punches.
And that is the end of the round. The fighters go back to their corners.
A close second round but Yusuke Urameshi will probably get the nod - 10:9.
Well, the break between rounds is over. Let's get back to the scrappin!

Urameshi fakes a head punch and goes low to the body. Nicely done.
Simon takes a body punch but keeps moving.
Simon slips a jab from Urameshi.
Simon fails miserably with a takedown attempt.
Simon moves out of range of the strikes.
Simon works his jab well there, keeping his opponent at a distance.
Simon shoots in and scores a nice double leg takedown into half guard.
Urameshi pushes Simon off looking to stand but Simon dives back in and keeps control.
We've had a slow start to the round here - hopefully the action picks up.
Simon wants to pass the guard but Urameshi is defending well.
Simon trying to control the action but Urameshi is working from the bottom.
Simon stops Urameshi from getting back to his feet.
That's one minute gone in the round.
Simon is trying to control. Urameshi wants to improve his position but can't escape this time.
Simon trying to mount his opponent but Urameshi defends it.
Urameshi manages to create a bit of space in order to work his way back to his feet. Simon keeps hold of his opponent and drives him back against the cage.
Simon lands an uppercut.
Urameshi swings away with an uppercut that misses.
Urameshi lands a body punch in the clinch.
Urameshi cracks Simon with a nice body shot.
A head punch blocked on the inside by Urameshi.
Urameshi tries to circle away but Simon has him pinned against the cage.
Simon tries to work over Urameshi's body with a swooping hook but it only glances the target.
Urameshi can't break the clinch.
A right hook to the body lands for Urameshi.
Simon lands with a short shot to the head.
Urameshi is trying to break the clinch but Simon has him pressed against the cage.
Simon is working Urameshi over against the cage.
Urameshi makes some space for himself and lands an uppercut.
Urameshi doesn't land with the attempted body shot.
A short left from Simon.
That's two minutes gone in the round.
Fantastic stuff here - a very entertaining period of action, which has drawn cheers from the crowd.
Simon cracks Urameshi with a nice body shot.
Urameshi blocks a body shot from Simon.
Urameshi lands a right uppercut that snaps the head of Simon backwards.
Urameshi scores with an uppercut up the middle.
Simon tries for a takedown. No joy.
Urameshi swings away with an uppercut that misses.
Urameshi lands a body punch in the clinch.
Both fighters are breathing heavily.
Urameshi blocks a couple of punches on the inside.
Simon is struggling to control the position.
Simon lands a nice shot to the body.
An uppercut on the inside fails to land for Urameshi.
Simon working aggressively here.
Urameshi can't break the clinch.
Urameshi lands a nice uppercut.
A head punch blocked on the inside by Urameshi.
Urameshi gets underhooks to prevent Simon's takedown attempt.
That's three failed takedown attempts in the round for Jay Simon. That's going to take a lot out of him.

Urameshi manages to break the clinch.
Urameshi punishes Simon's body with a nice straight punch.
Urameshi scores with a sloppy right hand. Simon should have avoided that one.
That's three minutes gone in the round.
No luck for Simon with that takedown attempt.
A slow jab from Simon misses its intended target.
Urameshi tries to land with a swinging hook to the body but Simon was well out of range. Poor timing from Urameshi.
Simon shoots for a double leg takedown but Urameshi sprawls well. He's pushed Simon's face into the mat and manages to get back to his feet relatively easily.
Urameshi looks like he wants to counter punch here.
Urameshi misses the shot to the body.
Urameshi uses good footwork to get in and out and land a nice right hand before Simon has time to react.
Simon misses the shot to the body.
Urameshi just misses with a punch to the body.
Simon has his takedown stuffed
and Urameshi counters with a lovely shot to the body.
Urameshi feints a straight left to the body, then turns around with a flashy move and hits Simons jaw with a dramatic spinning back fist!
A jab lands there for Urameshi.
Simon blocks a jab.
Simon swung with a counter right hand that didn't connect.
Urameshi takes an uppercut right on the button but keeps his composure.
That's four minutes gone in the round.
Simon gets cracked with a nice right hand there by Urameshi.
Urameshi throws a looping overhand right but Simon ducks down to avoid it.
Urameshi keeping a good distance there, avoiding the body shot.
This is a great period of action - very entertaining stuff!
Urameshi stooping low to avoid any incoming strikes and then lunges in with an uppercut come cross that lands flush.
Nice defenses there by Simon.
Urameshi throws a combination but it was largely blocked by Simon.
Simon swings for the body but Urameshi moves out of range.
Nice defenses there by Urameshi.
Simon missing with a left hand there. Urameshi was out of range so wasted energy throwing that one.
Simon keeping his hands up high there, blocking the jab from Urameshi.
Simon lands a jab to the head.
Nice sprawl there from Urameshi as Simon shoots in.
No luck for Simon with that takedown attempt.
And that is the end of the round. The fighters go back to their corners.
Yusuke Urameshi really dominated that round.
That's time! Simon's corner gives him a slap on the ass as he gets ready to fight.

Simon throws out a loose jab but Urameshi uses good head movement to avoid it.
Urameshi misses with a looping right.
Simon shakes his hands off, looking to compose himself, but takes a jab to the jaw whilst he does it.
Urameshi looks to score with a combo but nothing lands.
Simon uses some good footwork to avoid the body shot by Urameshi.
Urameshi displays good takedown defense there as he swats away a double leg from Simon.
A big right from Urameshi misses.
Urameshi avoids the body shot from Simon.
Simon works the jab nicely.
We've had a slow start to the round here - hopefully the action picks up.
Nice straight punches there by Simon. You know Roy Jones Jr respects the hands of Simon.
Donk. Simon catches Urameshi right on the button with a cross.
Urameshi rushes in with a sloppy looking punch
and Simon cracks him with a counter punch right on the button.
Simon lands a beauty of a right hand that gets the crowd cheering.
Simon on the wrong end of a decent looking cross there.
That's one minute gone in the round.
Simon missing with a left hand there. Urameshi was out of range so wasted energy throwing that one.
Urameshi keeping a good distance there, avoiding the body shot.
Urameshi keeps the fight standing with a nice sprawl.
Simon dips down and scores with a jab to the body.
Urameshi misses with a body shot. Nice footwork from Simon.
Urameshi moves out of range as Simon strikes.
Urameshi works the jab nicely.
Urameshi misses with a body shot.
Simon changes levels looking for a counter takedown but doesn't commit.
Simon tries to shoot in for a takedown. He's got hold of a leg but Urameshi swivels and escapes.
A little jabbing left from Urameshi on the counter but it doesn't find it's target.
That's three failed takedown attempts in the round for Jay Simon. That's going to take a lot out of him.
Simon loads up on a big right hand but Urameshi slips the punch.
Urameshi has a pretty nasty looking mouse under his right eye.
Simon scores with a jab to the jaw.
A nice combination there by Simon.
Simon displays some good footwork, moving neatly out of range as Urameshi throws out the jab.
That's two minutes gone in the round.
Simon throws a jab but it's blocked by Urameshi.
Simon connects nicely with a jab. Noted by the judges no doubt.
Simon lands a nice looking body shot.
Wooooo! Give it up for these two warriors! They are putting on a show!
Simon throws the overhand right but ducks down into a quick takedown attempt. Urameshi was covering up waiting for the punch and Simon finishes the takedown easily into guard.
Simon won't allow Urameshi to get back to his feet.
Simon wants to control from the top but Urameshi keeps moving.
Simon looking to control the position here, rather than advance.
Urameshi kicks Simon off and gets to his feet.
That's three minutes gone in the round.
Simon has his hands up protecting his head but a hook from Urameshi finds it's way round the side to connect with Simon's head.
Urameshi is the aggressor but that punch slipped nicely by Simon.
Simon just misses with a punch to the body.
Simon drives through with a takedown into Urameshi's guard. Let's see what he can do from the top position.
Simon drops back for a leg! It's a sloppy attempt though and Simon jumps back into guard quickly, to retain the dominant position.
Urameshi wants to get back to his feet but Simon is in a dominant position and won't allow it.
Simon wants to control from the top but Urameshi keeps moving.
Simon prevents Urameshi from getting back to his feet.
Urameshi pushes Simon off and gets back to his feet.
Simon misses with a left hand
and Urameshi counters with a good right hand that lands right on the jaw.
Urameshi keeping a good distance there, avoiding the body shot.
Urameshi throws a lazy right hand but Simon sees it coming a mile off and sidesteps it easily.
That's four minutes gone in the round.
Simon takes a body punch that cleary hurt but he's trying not to show any weakness.
We've seen a great period of action over the last minute or so - credit to both fighters for going all out!
Simon lands a jab.
Urameshi ducks under a wild hook from Simon.
Urameshi doesn't fully commit to the body shot counter.
Simon scores with a sloppy punch to the body. Not much technique there but it did the business.
Excellent takedown into side control there by Simon.
Urameshi is trying to stand back up. He's worked his way up against the cage but Simon has just dragged him back down to the mat.
Simon trying to control the position but Urameshi is working away.
Simon working hard here to secure a kimura but he's not really in the right position for it.
Urameshi is trying to get back to his feet.
Simon trying to control the position but Urameshi is working away.
Urameshi is trying to buck Simon off.
And that is the end of the round. The fighters go back to their corners.
That was a close fourth round but I would say that Jay Simon will probably get the nod.
The corners get their ten second warning. Both fighters stand from their stools and stare each other down, ready to get back to the action. This is the final round!

Urameshi stuffs the takedown.
Urameshi swings away with a counter right hand but no contact made.
Simon avoids a lazy jab quite easily.
Simon looks shocked there as he takes a right hand to the temple.
Urameshi throws a hook but Simon blocks it.
Simon stuns Urameshi with a nice body shot, before stepping back out of range.
Simon looks to score with a jab to the body but Urameshi is just out of range.
Simon digs a good body shot into Urameshi's ribs.
Simon ducks low and lands a nice hook to the body of his opponent.
Urameshi ducks under an overhand right and circles away with a smile on his face.
Simon misses with a straight left.
We've had a slow start to the round here - hopefully the action picks up.
Urameshi bobs and weaves and throws out a fast jab that snaps Simon's head backwards.
Urameshi fakes high and swings low for a body shot but Simon manages to avoid it.
Urameshi scores with a jab to the jaw.
Urameshi misses with a series of wild punches.
That's one minute gone in the round.
Simon is looking to clinch.
Urameshi wings a very wild body shot but it does the job and lands to the midsection.
Urameshi wings a very wild body shot but it does the job and lands to the midsection.
Urameshi moves into range and connects with a jab.
Simon slips a jab and a cross from Urameshi.
Simon with a lazy takedown attempt
and Urameshi counters with a crisp hook to the side of the head.
Simon changes levels and looks for a double leg takedown. Urameshi tries to avoid it but Simon manages to keep hold of a leg and drag Urameshi to the ground. Urameshi escapes though and pops straight back up to his feet.
That's three failed takedown attempts in the round for Jay Simon. That's going to take a lot out of him.
Urameshi misses the shot to the body.
Simon ducks down and throws a hook to the body but Urameshi moves away.
Simon throws a body shot but no joy.
Simon misses with a jab to the body
and Urameshi cracks him with a counter punch right on the button.
Urameshi fakes high and swings low for a body shot but Simon manages to avoid it.
Simon avoids the body shot from Urameshi.
Simon appears to be looking for a counter takedown.
This fight brought to you by 5M nutrition - it's mmmmm tasty. Nice jab by Simon.
Jay Simon has stepped it up - he knows he needs a finish here!
Yusuke Urameshi is looking to keep the fight on the feet at all costs.
That's two minutes gone in the round.
Simon misses with a hook.
Simon misses with a hook. Urameshi ducked under it nicely.
It seemed like Urameshi was going to counter with the hook but didn't fully commit to it.
Simon uses decent footwork to sidestep a right hand from Urameshi.
The fans in attendance giving it up for the two fighters, who have really let it all hang out in the last minute or so!
Urameshi gets his head snapped back by a nice shot there.
Simon throws a hook to the body but it doesn't connect.
Simon lands with a good body shot.
Urameshi throws a hook to the side of Simon's head but Simon sees it coming and ducks under it beautifully.
Simon misses with a body shot. Nice footwork from Urameshi.
Simon scores with a nice right hand.
Urameshi missing with a left hand there. Simon was out of range so wasted energy throwing that one.
Urameshi missing with a left hand there. Simon was out of range so wasted energy throwing that one.
Simon slips a jab from Urameshi.
Simon lands an overhand right.
Urameshi needs to keep his hands up - Simon had a free shot at his head there.
That's three minutes gone in the round.
A momentary lapse in concentration from Urameshi enables Simon to shoot in and score with a neat double leg. Urameshi manages to secure a closed guard as the fighters hit the mat.
Simon postures up and lands some nice ground and pound.
Urameshi wants to stand but Simon is controlling the position.
Simon pressing down on his opponent's thigh, looking to pass guard. Urameshi is keeping the position for now.
Urameshi wants to get back to his feet but he's too absorbed in his own little project and Simon manages to pass to side control.
Simon is trying to work for a kimura but Urameshi is defending well.
Urameshi wants to get back to his feet.
That's four minutes gone in the round.
Simon looking for a kimura but he'll have to free his other leg if he wants to finish that. Perhaps he's just using it as a distraction technique.
Simon is looking for an arm triangle, whilst trying to pass to side control. Urameshi doesn't seem that keen to cooperate though. No luck this time Simon.
Yusuke Urameshi is fighting for a decision - hopefully he's judged it right and he's actually winning the fight.
Simon trying to control the pace.
Simon stops Urameshi from getting back to his feet.
And that's the end of the fight!
That was a close round. You could make an argument for either fighter but I would give it to Jay Simon.
I think Urameshi has won this one but let's see whether the judges agree with me. Over to the ring announcer for the scorecards.
Ladies and gentlemen, after 5 rounds of action, we go to the scorecards for a decision.
Judge Hirohito Nitta scores the fight 47:48
Judge Ren Mimura scores the fight 48:48
Judge Shirou Masuda scores the fight 47:48
In favor of your winner, by majority decision... Yusuke Urameshi!
After winning the bout, Yusuke Urameshi thanked all his fans and promised he'd do even better in his next fight. The crowd seemed to love his humility.
|
|
|
|
|
|
|
|
|
|
|
|
|
|
|
|
|
|
|
|
|
|
|
| S |
C
A |
G |
S |
C
B |
G |
|
S |
C |
G |
|
energy
A | B |
|
hype
A | B |
|
pop
A | B |
|
mgr
A | B |
|
FIGHT
RATING
73% |
|
|
|
|
|
|
