|
|
PBP Commentary |
Coming up we have a super heavyweight MMA rules bout between Tom Breedon (ranked 2429 p4p, 2802 weight class) and Marcus St Stone (ranked 64 p4p, 101 weight class). Breedon comes to the cage accompanied by Quiet Riot - Come On Feel The Noise. Both fighters look fresh as a daisy as they make their way towards the cage.
 |
|
 |
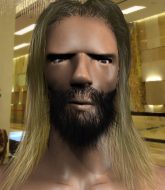
| 183 cm
31
211
10 - 5 - 1 |
|
196 cm
30
282
14 - 23 - 0 |
Good wrestling
Excellent boxer
Cardio machine |
|
BJJ Brown Belt
World class MT
Good gas tank |
|
| |
|
Ladies and gentlemen. This fight is 3 rounds, in the super heavyweight division.
Introducing the fighter to my left, fighting out of the red corner.
With a record of 10 - 5 - 1, fighting out of London, Tom Breedon!
And introducing the fighter to my right, fighting out of the blue corner.
With a record of 14 - 23 - 0, fighting out of Las Vegas, Marcus St Stone!
The judges for this bout are Sam Margolis, Andrew Berry and Richard Clark.

The bell rings for round one and we are underway!
St Stone tries to clinch up.
St Stone tries to close the distance and clinch but Breedon swats him to one side with an open hand palm strike and circles away.
An attempted straight right counter from Breedon misses the target.
St Stone closes the distance looking to clinch
and Breedon counters with a nice jab to the body that keeps St Stone thinking.

Breedon looks for a takedown. He's got it. We're now in half guard.
Still in half guard, Breedon seems content to control.
The ref warns both fighters not to hold the cage as they work up against the meshing.
St Stone is trying to control but can't.
The fighters are pressed up against the cage, both looking to find a bit of space to work.
Ground and pound from Breedon.
Breedon is looking to advance position but St Stone won't allow it.
St Stone is looking to regain full guard. Not this time though.
We've had a slow start to the round here - hopefully the action picks up.
St Stone keeps trying to improve his position.
Breedon with a momentary lay and pray from half guard.

That's one minute gone in the round.
St Stone is looking to regain full guard. Not this time though.
Breedon stalling.
St Stone regains full guard. Nicely done.

St Stone has an omoplata and is looking to use it perhaps as a submission or perhaps to transition. Breedon is in a bit of discomfort here, but he's managed to free himself and has dived into side control! That didn't work out too well for St Stone.
St Stone taking punishment in the form of punches.
St Stone tries to bench press Breedon off him but Breedon keeps the position.

Breedon is looking to finish here, going for an Americana. St Stone knows the correct defense though, so he's OK.
St Stone can't do much from the bottom here.

That's two minutes gone in the round.
St Stone is positioning himself to get back to half guard.
The fighters are starting to perspire pretty heavily.
St Stone is not content to let Breedon control the position.
St Stone tries to work a leg under to get back to half guard but Breedon wriggles his own leg back out and remains in side control.

That's three minutes gone in the round.
Breedon lands an elbow.
St Stone tries to buck Breedon off but Breedon is having none of it.
Breedon has control of an arm but St Stone manages to advance to Breedon's back!
St Stone working for the choke.
St Stone has the hooks in. Breedon is trying to push off one leg but he has to do so cautiously to avoid being submitted.
St Stone working for a RNC but it's not happening just yet.
Breedon is displaying good submission defense - not really looking in danger of submitting to the rear naked choke at the moment. That could change in an instant of course if St Stone gets his way!
St Stone is working for the rear naked choke. He has one arm under the chin but Breedon has hold of the other arm. A bit of a stalemate here.
St Stone doesn't have the hooks in and Breedon manages to turn into his guard.
Breedon showing good wrestling skills to control the position.

That's four minutes gone in the round.
Breedon scoring with some ground and pound.
Breedon postures up and scores with a shot to the body and a follow up elbow to the head.
St Stone looking to hit a scissor sweep but Breedon is one step ahead there.
St Stone is throwing his legs up, looking for submissions. Breedon is aware though and is defending well.
Breedon might be looking to lock onto one of his opponent's long limbs for a submission, whilst we're on the ground.
The fans in attendance giving it up for the two fighters, who have really let it all hang out in the last minute or so!
St Stone looking for submissions off his back, moving his hips, looking for an opening.
The crowd thankful this round is nearly over.
Breedon trying to pass the guard but can't manage it just yet.
St Stone keeping moving, preventing Breedon from controlling successfully.
And that is the end of the round. The fighters go back to their corners.
Tom Breedon dominated that round.
Well, the break between rounds is over. Let's get back to the scrappin!

St Stone wants to clinch up but Breedon keeps it at a distance.
St Stone is looking to take this fight into the clinch.
Breedon closes the distance and looks for a trip takedown... aaaand he's got it - Breedon lands in his opponent's guard.
Breedon wants to control from the top but St Stone keeps moving.
St Stone has his foot on Breedon's thigh. He's trying to push off and get in position for a triangle, I think. Breedon works his way back into a safe position though.
Breedon slows down the pace of the fight for a moment. He'll need to remain active if he doesn't want to see the fight stood back up.
We've had a slow start to the round here - hopefully the action picks up.
Breedon trying to control the position from guard on top but St Stone is wriggling around, looking for whatever he can.
St Stone looking for submissions from the bottom here. Moving his hips around, possibly looking for an armbar.
Breedon sitting in guard, not really doing much.
That's one minute gone in the round.
St Stone is throwing his legs up, looking for submissions. Breedon is aware though and is defending well.
St Stone is trying to keep Breedon in close.
St Stone is working actively off his back, looking to secure an arm or perhaps work for a triangle.
Breedon content to stall in guard here.
Breedon has controlled the position for a good 20 seconds, which will no doubt be starting to frustrate his opponent.
That's two minutes gone in the round.
Well. There's a bit of a lull in the action here and the crowd are starting to get restless.
St Stone looking to control.
Breedon stays in close to St Stone's body and controls the position.

The ref stands the fighters back up due to a lack of activity.

St Stone rushes Breedon and presses him up against the cage.
St Stone is working hard here but doesn't seem to be able to control effectively, up against the cage.
Breedon has dropped down and is looking to force the takedown but it's defended by St Stone after a bit of a struggle.
St Stone is defending well against a takedown attempt.
Breedon is looking for a takedown up against the cage. St Stone gets underhooks though and prevents the takedown attempt.
That's three failed takedown attempts in the round for Tom Breedon. That's going to take a lot out of him.
Breedon goes for a takedown in the clinch but St Stone prevents it.
Breedon is working for takedown but St Stone is calmly controlling the position for now.
St Stone throws an elbow that misses.
Breedon wants to take the fight to the mat but St Stone manages to get underhooks and keep the fight in the clinch.
That's three minutes gone in the round.
St Stone gets double underhooks to prevent a takedown attempt from Breedon.
St Stone lands a nice elbow from the clinch.

It looks like Tom Breedon has been cut.
Breedon is looking to take this one to the mat.
Breedon wants a takedown but no success here.
St Stone slows down the pace here.
Nice elbow from St Stone.
St Stone controlling the action here for a moment.
Breedon looking for a takedown.
Breedon is looking for a takedown up against the cage. St Stone gets underhooks though and prevents the takedown attempt.
Breedon is trying to work for a single leg takedown but St Stone pulls him back up using the underhooks.
St Stone is pressed up against the cage. Breedon has hold of a leg and is looking to drag St Stone down to the mat. St Stone avoids the attempt though and has circled away. We're back to striking at a distance.
That's four minutes gone in the round.
St Stone moves into the clinch.
St Stone lands an elbow just above Breedon 's eye.
Breedon wants the takedown. St Stone is fighting it off but Breedon persists and manages to bring the fight to the ground, ending up in St Stone's guard against the cage.
Both fighters are absolutely exhausted here.
St Stone looking to sweep here. No luck so far.
St Stone is looking for a triangle but Breedon pushes his legs off easily.
Breedon controlling from the top position.
St Stone looking for subs off his back but Breedon has passed one foot through into half guard.
We've seen a great period of action over the last minute or so - credit to both fighters for going all out!
The crowd thankful this round is nearly over.
Breedon works his foot free and advances to mount.
And that is the end of the round. The fighters go back to their corners.
A close second round but Marcus St Stone will probably get the nod - 10:9.
The cut man is working on Tom Breedon's cut.
That's the end of the round. The referee orders the cornermen out of the cage so we can get back down to business. Let's hear some noise people - this is the final round!

The fight moves into the clinch position.
Breedon looking for a takedown.
St Stone lands a nice elbow.
Tom Breedon's cut is getting worse.
Breedon tries for a takedown. No joy.
St Stone throws a knee to the head but misses.
Breedon avoids a wild elbow strike from St Stone.
Breedon wants to take the fight to the mat but St Stone manages to get underhooks and keep the fight in the clinch.
That's three failed takedown attempts in the round for Tom Breedon. That's going to take a lot out of him.
St Stone is trying to slow down the pace of the fight but Breedon is keeping busy.
St Stone dictating the pace here, as the fighters clinch against the cage.
We've had a slow start to the round here - hopefully the action picks up.
Breedon wants a takedown but no success here.
St Stone is trying to stall.
St Stone comes over the top with an elbow. That landed flush.
That's one minute gone in the round.
St Stone throws an elbow but it misses.
St Stone misses with a shot to the kidneys.
Breedon turns his hips and lands a very nice judo throw into side control!
St Stone is looking to reverse the position.
Breedon trying to control the position but St Stone is working away.
St Stone regains half guard.
St Stone wants to control but Breedon is keeping busy and won't allow it.
Breedon tries to pass the half guard into mount. St Stone knows what he's doing though and prevents the attempt.
St Stone is looking to sinch up a guillotine here but Breedon pulls his head out easily.
That's two minutes gone in the round.
Still in half guard, Breedon seems content to control.
St Stone looking for submissions from an awkward position here.
Breedon is looking to take a break and control but St Stone is keeping him honest, looking to work from the bottom.
St Stone tries to get to full guard but Breedon has control of the leg.
Breedon looking for a kimura but he'll have to free his other leg if he wants to finish that. Perhaps he's just using it as a distraction technique.
St Stone is trying to get back to full guard.
That's three minutes gone in the round.
St Stone looking to work for a kimura from the bottom.
Breedon stalling.
If this pace continues, the referee will definitely step in and force a standup.
The referee decides to stand the fighters back up.
St Stone tries to close the distance and clinch up against the cage but Breedon paws at him with a jab and circles away.
That's four minutes gone in the round.
My god... these two guys really need to pick up the pace or everyone will leave to go get a beer.
St Stone tries to clinch but is not successful on this occasion.
Breedon gets a double leg takedown into St Stone's guard.
St Stone working away from the bottom but not quite defensive enough there because Breedon has passed into half guard!
Tom Breedon overall seems to be getting the better of the ground position in the fight so far.
Breedon is trying to control. St Stone wants to improve his position but can't escape this time.
Breedon passes to side control.
St Stone tries to get back to half guard but can't.
Breedon taking a breather here.
Boooooooooooooooooooo!!! God, this has been a terrible round. Come on you two, sort yourselves out!
You can see the frustration on St Stone's face, being in this tough position on the bottom.
And that's the end of the fight!
Tom Breedon showed his dominance in that final round.
I think Breedon has won this one but let's see what the judges have to say. Over to the ring announcer for the scorecards.
Ladies and gentlemen, after 3 rounds of action, we go to the scorecards for a decision.
Judge Sam Margolis scores the fight 29:28
Judge Andrew Berry scores the fight 29:28
Judge Richard Clark scores the fight 29:28
In favor of your winner, by unanimous decision... Tom Breedon!
|
|
|
|
|
|
|
|
|
|
|
|
|
|
|
|
|
|
|
|
|
|
|
| S |
C
A |
G |
S |
C
B |
G |
|
S |
C |
G |
|
energy
A | B |
|
hype
A | B |
|
pop
A | B |
|
mgr
A | B |
|
FIGHT
RATING
31% |
|
|
|
|
|
|
