|
|
PBP Commentary |
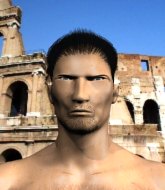
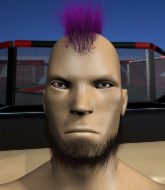
Coming up we have a welterweight MMA rules bout between John Piercer (ranked 3817 p4p, 2782 weight class) and Darryl Haze (ranked 457 p4p, 344 weight class). Both these guys have really solid chins. Will we see a standup war or will they both decide that a knockout is unlikely and try to win the fight elsewhere?
 |
|
 |
| 177 cm
21
170
1 - 0 - 0 |
|
179 cm
22
170
5 - 4 - 0 |
BJJ Blue Belt
Excellent boxer
Good chin |
|
Good wrestler
Decent boxing
Granite chin |
|
| |
|
Ladies and gentlemen. This fight is 3 rounds, in the welterweight division.
Introducing the fighter to my left, fighting out of the red corner.
With a record of 1 - 0 - 0, fighting out of Amsterdam, John Piercer!
And introducing the fighter to my right, fighting out of the blue corner.
With a record of 5 - 4 - 0, fighting out of Amsterdam, Darryl Haze !
The judges for this bout are Trevor Gratis, Steve Smith and William Peck.

The bell rings for round one and we are underway!
Haze misses with a jab and misses with a cross straight after too.
It looked like Piercer wanted to counter with a hook but didn't fully commit.
Haze lands with a nice combination. Piercer backs away looking to recover.
Haze works Piercer's body with a nice hook.
Piercer tries to land with a swinging hook to the body but Haze was well out of range. Poor timing from Piercer.
Haze misses with the combination.
Haze steps to his left, right into the path of a big body kick from Piercer. That one must have hurt.
Haze 's coach down at 88Fight Club Gym88.. 800pw (16 COACHES) was telling us pre-fight that they have been working on Haze 's balance. Obviously they view that as a key factor in the outcome of this fight.
Haze misses with a takedown attempt
and Piercer counters with a lovely straight right hand!
Piercer uses good footwork to avoid the strikes from Haze .
Haze gets cracked there but stands up to it.
Piercer throws a lazy uppercut
and Haze counters with a lovely shot to the body.
The crowd cheering loudly, showing their appreciation for the quality fight we're seeing here.
A telegraphed right hand from Piercer misses the target.
Haze let fly with a counter punch to the body but it didn't land.
Piercer swings for the body but Haze moves out of range.
Piercer misses with a looping right.
Some bone on bone action there as Piercer checks a low kick. Luckily it wasn't a particularly hard one.
Piercer fakes high and swings low for a body shot but Haze manages to avoid it.
Haze fakes high and swings low for a body shot but Piercer manages to avoid it.

That's one minute gone in the round.
Haze throws the left hand but Piercer avoids the punch easily.
Piercer uses some good footwork to avoid the body shot by Haze .
Haze looks frustrated there after his takedown attempt is stuffed easily.
Haze shoots in for a takedown. He's persisting with it as Piercer sprawls well. Piercer wins this battle and keeps the fight standing. Haze gets slowly back to his feet.
John Piercer has stuffed three takedown attempts in the round now. That's going to take a lot out of Darryl Haze .
Haze thows a left - swing and a miss!
Piercer misses with an uppercut.
Haze misses with a body shot. Nice footwork from Piercer.
Haze throws a jab when Piercer was well out of range.
Piercer swung with a counter punch to the body but it didn't connect.
Haze changes levels and looks for a double leg takedown. Piercer tries to avoid it but Haze manages to keep hold of a leg and drag Piercer to the ground. Piercer escapes though and pops straight back up to his feet.
A little feinted left hand from Piercer on the counter but he doesn't commit to it.

Haze shoots in and bounces Piercer off the cage to secure the takedown into guard.
Piercer bucks up whilst keeping hold of a body lock, managing to reverse the position. Now he's in top in Haze 's guard.


Haze is looking for a guillotine. You can't force these things though and Piercer defends well.

That's two minutes gone in the round.
Piercer trying to control the position from guard on top but Haze is wriggling around, looking for whatever he can.
The fighters are pressed up against the cage, both looking to find a bit of space to work.
Haze throwing his legs up looking for a triangle.

That's three minutes gone in the round.
Haze is looking for a guillotine. You can't force these things though and Piercer defends well.
Haze is looking for a guillotine. You can't force these things though and Piercer defends well.
Haze keeping moving, preventing Piercer from controlling successfully.
Piercer is going to have to think about doing something other than just controlling because Haze is managing to avoid having the position dictated to him.

That's four minutes gone in the round.
The crowd are getting on the fighters' backs, as the pace has dropped off in the last minute or so.
Haze had isolated an arm as going for a kimura. Piercer defends it easily.
Haze keeping moving, preventing Piercer from controlling successfully.
Piercer is intent on slowing down the pace of the fight, simply looking to control.
Haze looking for submissions from the bottom here. Moving his hips around, possibly looking for an armbar.
And that is the end of the round. The fighters go back to their corners.
Darryl Haze dominated that round.
That's the end of the round. The referee orders the cornermen out of the cage so we can get back down to business.

Haze connects with a body shot that sends Piercer's belly button to the back.
Haze will have to do better than that with his takedown attempts.
Piercer throws a looping overhand right but Haze ducks down to avoid it.
Haze closes the distance, clinches up and gets a nice trip takedown into side control. Very smooth.
Darryl Haze has got the better of the ground game so far.
Haze is looking to take a break and control but Piercer is keeping him honest, looking to work from the bottom.
Haze has been the more effective fighter overall so far.
The referee asks Haze politely if he wouldn't mind getting on with it and actually doing something. Haze prefers to stall for the moment though.
Piercer is trying to get back to half guard. He's pushing on Haze 's leg. He's managed it. Nice work.
Piercer looks like he's trying to stand up.
We've had a slow start to the round here - hopefully the action picks up.
Piercer is trying to get back to full guard.
Haze is trying to control. Piercer wants to improve his position but can't escape this time.
That's one minute gone in the round.
Haze is looking for a kimura but he's never going to get it from there.
Haze controlling the action here.
Piercer on his back here. We all know that wrestlers don't like being on their back so let's see if Piercer tries to get out of the position.
Haze lands a big shot. The thud that echoes around the arena is like music to the fans' ears.
Haze passes to full mount!
Piercer is squirming around, avoiding Haze 's attempts to control the action.
Piercer is trying to get back to his feet but can't.
Piercer is working to get back to half guard.
Haze content just to control the position here.
That's two minutes gone in the round.
Piercer really trying hard to get back to half guard here.
Haze trying to control but Piercer is having none of it.
Haze takes a little breather and maintains the position. The referee will be looking for him to stay active from such a dominant position though.
Haze tries to control but Piercer wriggling away.
That's three minutes gone in the round.
Haze controlling his opponent.
Haze wants to finish this one by submission but Piercer is holding onto his waist, trying to prevent any attacks from Haze .
Piercer is trying to escape the mount.
Haze controlling his opponent.
Haze can't quite control the action as he would like just now, as Piercer is looking to escape.
Haze controlling his opponent.
Piercer is desperately trying to get back to half guard.
That's four minutes gone in the round.
Haze controlling his opponent.
Piercer is wriggling around trying to escape.
BOOM! Haze connects with a massive shot to the dome!
Haze tucks in and makes sure he doesn't lose the dominant position.
Piercer is looking to improve his position but Haze isn't that keen on the idea.
Haze sitting in mount, just looking to control for the moment.
The crowd thankful this round is nearly over.
Haze thowing strikes but they're hitting the gloves, not doing any damage.
Haze content just to control the position here.
And that is the end of the round. The fighters go back to their corners.
Darryl Haze showed his class in that round. I'd imagine he'll take it on all the scorecards.
The fighters get back to their feet, the hooter sounds and we're back to the action! The crowd applaud as we get ready to start the final round!

Haze takes a step back and watches a body kick go sailing past his mid section.
Darryl Haze is looking to throw some combinations by the looks of things.
Nice jab there from Piercer.
Haze ducks down and throws a hook to the body.
Piercer scores with a slapping inside leg kick.
Haze cracks Piercer with a good shot that sees him stumbling back into the cage.
Piercer wants to land a leg kick but Haze is out of range.
Haze scores with a hook to the body. Piercer takes a step back and tries to catch his breath.
Piercer showing good head movement there, avoiding the strikes from Haze .
Haze misses the jab.
Haze misses the shot to the body.
We've had a slow start to the round here - hopefully the action picks up.
Piercer ducks down and throws a hook to the body but Haze moves away.
Haze throws a body punch but Piercer moves out of range.
Haze misses with a body shot. Nice footwork from Piercer.
Piercer tries to land a front kick but Haze steps back. That was a bit too telegraphed.
Haze throws a body shot but no joy.
Piercer looked to counter with a high kick but didn't commit.
Haze misses with a two punch combination.
That's one minute gone in the round.
Piercer swings wildly with a hook that is half blocked by Haze .
Haze slips a jab and a cross from Piercer.
Haze stuns Piercer with a nice body shot, before stepping back out of range.
Jab, cross, leg kick. Nice combination by Haze !
Haze works over Piercer's head and body with a nice combination.
A slow jab from Piercer misses its intended target.
Haze ducks right into an uppercut from Piercer.
Piercer tries to move into range but Haze moves to the side and lands with a nice right hand.
A big right from Haze misses.
John Piercer is looking to keep the fight on the feet at all costs.
We've seen a great period of action over the last minute or so - credit to both fighters for going all out!
Haze shoots in and gets a takedown into half guard. Haze showed some decent athleticism there.
Piercer has no desire to be mounted, so is trying to control. Haze is working away from the top position though.
Haze looking to pass the half guard. Not this time.
John Piercer has stepped it up - he knows he needs a finish here!
That's two minutes gone in the round.
Haze passes the guard and advances to mount!
Haze tucks in and makes sure he doesn't lose the dominant position.
Haze scoring with strikes but Piercer is staying in there.
Haze takes a little breather and maintains the position. The referee will be looking for him to stay active from such a dominant position though.
That's three minutes gone in the round.
Haze working for a submission but Piercer is keeping him at bay.
Haze working the ground and pound effectively.
Haze connects with a couple of good shots from mount.
Piercer is squirming around, avoiding Haze 's attempts to control the action.
Haze throws some wild stikes that Piercer manages to avoid easily.
Piercer really wants to buck Haze off and get back to his feet.
Haze content just to control the position here.
Let's hope that Haze has the urge to step up the pace any second now because for the last 15 or 20 seconds he's just been holding on tight.
That's four minutes gone in the round.
Piercer is looking to get to half guard.
Haze controlling the pace for now.
Haze is continuing to stall.
Piercer keeping his composure momentarily, calmly looking to get back to half guard.
Haze sitting in mount, just looking to control for the moment.
Haze with a couple of short strikes.
And that's the end of the fight!
Darryl Haze comfortably won the final round on my scorecard.
Well Haze has outworked and out performed his opponent in all aspects of the game today. He was simply too good and the decision should be no more than a formality. Over to the ring announcer for the scorecards.
Ladies and gentlemen, after 3 rounds of action, we go to the scorecards for a decision.
Judge Trevor Gratis scores the fight 27:30
Judge Steve Smith scores the fight 27:30
Judge William Peck scores the fight 27:30
In favor of your winner, by unanimous decision... Darryl Haze !
Darryl Haze very nearly forgot to thank The Dirty Needle Project amongst all the excitement of his win but just as the interview came to a close, he screamed their name. Hopefully he'll get a few nice freebies in the mail as a thank you.
|
|
|
|
|
|
|
|
|
|
|
|
|
|
|
|
|
|
|
|
|
|
|
| S |
C
A |
G |
S |
C
B |
G |
|
S |
C |
G |
|
energy
A | B |
|
hype
A | B |
|
pop
A | B |
|
mgr
A | B |
|
FIGHT
RATING
42% |
|
|
|
|
|
|
