|
|
CWC 290 - Hilo PBP Commentary |
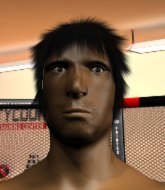
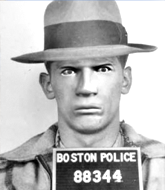
This TWGC bout is 1 fifteen minute round in the bantamweight division. Introducing today's competitors. In the red corner, competing out of Amsterdam, with a TWGC record of 20 wins and 11 losses; Kreepee Krawlee! And in the blue corner, fighting out of Montreal, with a TWGC record of 10 wins and 5 losses; Angelo Saldini!
The judges for this bout are Roger Salmon, Colin Fray and Paul Gruel.
Let's get this grappling contest under way! Who will be victorious?

Saldini gets a clinch.
Saldini is looking for a takedown up against the cage. Krawlee gets underhooks though and prevents the takedown attempt.
Krawlee goes for a takedown in the clinch but Saldini prevents it.
Krawlee wants to take the fight to the mat but Saldini manages to get underhooks and keep the fight in the clinch.
Krawlee is pressed up against the cage. Saldini has hold of a leg and is looking to drag Krawlee down to the mat. Krawlee avoids the attempt though and has circled away. We're back to striking at a distance.
We've had a slow start to the round here - hopefully the action picks up.
Krawlee tries to clinch up.
Krawlee tries to shoot in for a takedown. He's got hold of a leg but Saldini swivels and escapes.
Saldini changes levels for a counter takedown but doesn't follow through with his attempt.
That's three failed takedown attempts in the round for Kreepee Krawlee. That's going to take a lot out of him.

That's one minute gone in the round.
Krawlee shoots in but Saldini avoids the takedown attempt easily.
Saldini drops down looking to force a counter takedown but Krawlee defends it well.
Krawlee tries to close the distance and clinch but Saldini swats him to one side with an open hand palm strike and circles away.
Krawlee shoots in for a takedown. "I don't think so" says Saldini as he avoids it easily.
Saldini is definitely looking for the counter takedowns here.
Krawlee shoots in for a takedown - he's clinched up with Saldini but Saldini pushes him off and we're back to square one.

Krawlee closes the distance and pushes Saldini back into the cage.

That's two minutes gone in the round.
Saldini has Krawlee pressed up against the cage and is working for takedown. Krawlee manages to improve position though and keeps the fight standing.

Saldini is fighting off a takedown attempt but Krawlee is just too persistent for him and manages to trip Saldini to the mat. Saldini regains guard as soon as the fighters hit the mat. Score +2 for takedown into guard / half guard: Krawlee (2) vs (0) Saldini
Krawlee stands up and looks to throw the legs aside to pass to side control. Saldini swivels though and keeps the full guard.
Saldini keeping moving, preventing Krawlee from controlling successfully.
The ref warns both fighters not to hold the cage as they work up against the meshing.
Krawlee trying to pass the guard but can't manage it just yet.
Saldini keeping moving, preventing Krawlee from controlling successfully.

That's three minutes gone in the round.
Saldini is pulling down on Krawlee's head to control his posture.
Krawlee won't allow Saldini to sweep him here.

Krawlee drops back for a leg but he's not going to get it - he lets go and Saldini dives on top into guard. Score +2 for sweep to guard / half guard: Krawlee (2) vs (2) Saldini
Krawlee is trying to control the position but Saldini postures up.
Krawlee seems to have improved his submission grappling technique since last time we saw him. Let's see if he can pull off a submission.
Krawlee is going to have to think about doing something other than just controlling because Saldini is managing to avoid having the position dictated to him.
Krawlee has a closed guard, preventing anything of note from happening. Perhaps he's looking to stall.
Krawlee escapes his hips to the side and looks to be working for an armbar. Saldini gives him a little smile and shakes his head. No chance.

That's four minutes gone in the round.
Krawlee working from the bottom, still in full guard. He's managed to get a loose triangle. Saldini doesn't seem to be doing much to defend here, obviously he feels comfortable in the position. Saldini manages to throw the legs off his shoulder and he's back into guard - no problem.
Saldini is frustrating his opponent with some stalling tactics from top position.
Krawlee trying to control the position.

That's five minutes gone in the round.
Krawlee pulls Saldini in close to prevent any damage.
Krawlee is working actively off his back, looking to secure an arm or perhaps work for a triangle.
Krawlee trying to control the position.
Krawlee looking for submissions off his back, moving his hips, looking for an opening.
Krawlee working a defensive guard but Saldini manages to pass into side control anyway.
Score +3 for passing guard: Krawlee (2) vs (5) Saldini
You can see the frustration on Krawlee's face, being in this tough position on the bottom.
Krawlee prevents Saldini from moving into mount.

That's six minutes gone in the round.
Krawlee wants to control but Saldini postures up.
Krawlee gets back to half guard.
Saldini prevents Krawlee from improving his position.
Saldini controlling the action here.
Saldini passes to side control. Score +3 for passing guard: Krawlee (2) vs (8) Saldini
Saldini controlling the position.

That's seven minutes gone in the round.
Krawlee can't do much from the bottom here.
Krawlee tries to work a leg under to get back to half guard but Saldini wriggles his own leg back out and remains in side control.
The fighters are pressed up against the cage, both looking to find a bit of space to work.
A lull in the action here.
Saldini working away.

That's eight minutes gone in the round.
Saldini taking a breather here.
Saldini tries to move into full mount but can't pass Krawlee's legs.
Krawlee gets back to half guard.
Saldini moves nicely into side control. Score +3 for passing guard: Krawlee (2) vs (11) Saldini
Krawlee is looking to slip a leg under and get half guard but Saldini is one step ahead and moves to full mount! Score +2 for reaching mount: Krawlee (2) vs (13) Saldini
Saldini controlling the pace for now.
Krawlee working to try and regain half guard.

That's nine minutes gone in the round.
Saldini sitting in mount, just looking to control for the moment.
Krawlee is writhing around trying to get back to his feet.
Krawlee stops Saldini from taking his back. Still, being mounted isn't any better.
Krawlee tries to hold on but Saldini pushes him away.

That's ten minutes gone in the round.
Krawlee is trying desperately to improve position.
Krawlee is working hard here to advance position.
Saldini tucks in and makes sure he doesn't lose the dominant position.
Krawlee is wriggling around trying to escape.
Saldini controlling the position easily from mount.
Krawlee is squirming around, avoiding Saldini's attempts to control the action.

That's eleven minutes gone in the round.
Saldini takes a little breather and maintains the position. The referee will be looking for him to stay active from such a dominant position though.
Krawlee manages to regain half guard. Good work.
Krawlee wants to control but Saldini is keeping busy and won't allow it.
Saldini passes to full mount! Score +3 for passing guard: Krawlee (2) vs (16) Saldini
Krawlee tries to hold on but Saldini postures up.
Saldini content just to control the position here.
Krawlee wants to control but Saldini is having none of it.

That's twelve minutes gone in the round.
Krawlee is wriggling around trying to escape.
Saldini moves to the back. Score +3 for taking back: Krawlee (2) vs (19) Saldini
Krawlee trying to control but he's just got himself in more trouble.

Saldini working for a RNC but it's not happening just yet.
Krawlee really must keep his cool here. He's controlling one of Saldini's hands and whilst he does that, he's got a chance of escaping the position.
Krawlee wants to control his opponent's hands but Saldini gets his hands free.

That's thirteen minutes gone in the round.
Saldini is working hard for the rear naked choke here.
Krawlee trying to control the hands but Saldini won't let him.
Krawlee manages to reverse the position and now he's in Saldini's guard. Nice work there by Krawlee.
Score +2 for sweep to guard / half guard: Krawlee (4) vs (19) Saldini
Saldini is avoiding any damage by keeping wrist control.
Saldini wants to sweep but no luck.
Krawlee stands up and looks to throw the legs aside to pass to side control. Saldini swivels though and keeps the full guard.

That's fourteen minutes gone in the round.
Krawlee trying to control but Saldini is working from the bottom.
Saldini keeping full guard, as Krawlee tries to pass.
Krawlee trying to control but Saldini is working from the bottom.
Boooooooooooooooooooo!!! God, this has been a terrible round. Come on you two, sort yourselves out!
And that's the end of the fight!
Saldini wins on points by 19 to 4.
After winning the bout, Angelo Saldini thanked all his fans and promised he'd do even better in his next fight. The crowd seemed to love his humility. |
|
|
|
|
|