|
|
PBP Commentary |
Coming up we have a welterweight MMA rules bout between Luke Menzies (ranked 4850 p4p, 3003 weight class) and Losene Keita (ranked 390 p4p, 302 weight class). Menzies's ring entrance music is that housewives' favourite, Madison Beer - Blue (Live from The Ellen DeGeneres Show). We have two fighters making their debuts here, so let's see who comes out of this one with their first professional victory.
 |
|
 |
| 150 cm
23
130
0 - 0 - 0 |
|
176 cm
23
150
0 - 0 - 0 |
BJJ Blue Belt
Solid boxing
Inexperienced |
|
BJJ White Belt
Good kicks
Determined |
|
| |
|
Ladies and gentlemen. This fight is 3 rounds, in the welterweight division.
Introducing the fighter to my left, fighting out of the red corner.
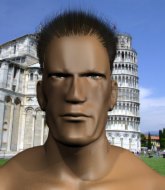
With a record of 0 - 0 - 0, fighting out of Amsterdam, Luke Menzies!
And introducing the fighter to my right, fighting out of the blue corner.
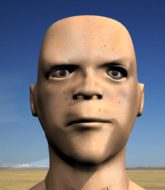
With a record of 0 - 0 - 0, fighting out of Amsterdam, Losene Keita!
The judges for this bout are Albert Achterberg, Saam Ante and Radbod Blank.

The bell rings for round one and we are underway!

Keita is looking for a takedown here. He's shot in and has managed to get it, finishing up in Menzies's half guard.

Menzies has managed to escape just enough to sneak back to his feet but Keita is on him like a limpet, forcing Menzies back against the cage.
Menzies tries to pull guard but Keita won't allow it.
Keita is trying to stall.
The pace really dropping off here, momentarily.
The referee calls for Menzies to work.
Menzies is looking for a takedown.

Menzies pushes off and circles away, back to the middle of the mat.

That's one minute gone in the round.

Menzies moves into range and clinches up with Keita.
Menzies's corner calls for him to break the clinch, which he does.
Menzies dodges the punch combination from Keita.
Menzies misses with a takedown attempt. He shot from a bit too far out.
That's three failed takedown attempts in the round for Luke Menzies. That's going to take a lot out of him.
Keita closes the distance, clinches up and gets a nice trip takedown into side control. Very smooth.
Menzies bucks up and manages to escape back to his feet!
Keita shoots in for a takedown! He's got it and he's managed to land in side control! That's better than Keita was expecting from the takedown attempt, I'm sure!
Menzies sneaks out the side door and pushes Keita away - he's back to his feet. The crowd show their appreciation for the escape.
The fans in attendance giving it up for the two fighters, who have really let it all hang out in the last minute or so!
Keita misses with a body shot. Nice footwork from Menzies.

That's two minutes gone in the round.
Menzies fakes high and shoots in for a takedown but Keita avoids it really well and circles away.
Keita fakes the leg kick and cracks Menzies in the body.
Losene Keita seems to be the more aggressive standup fighter in this bout.
Menzies avoids a punch combination nicely.
Keita gets a double leg takedown into Menzies's guard.
Menzies scrambles and gets back to his feet.
Menzies moves into the clinch successfully.

Menzies manages to pull guard.

That's three minutes gone in the round.
Menzies is pulling down on Keita's head. It's preventing any offense from Keita, at least for the moment.

Menzies is active off his back here, looking for submissions.
Keita trying to control the position from guard on top but Menzies is wriggling around, looking for whatever he can.
Menzies looking to sweep here. No luck so far.

Keita gets to his feet and steps away from his opponent.
Menzies shoots in for a takedown but doesn't get it.
Keita looks like he wants to counter punch here.

That's four minutes gone in the round.
My god... these two guys really need to pick up the pace or everyone will leave to go get a beer.
Keita with a nice looking leg kick. You could hear that one land in a back row.
Menzies rushes Keita and presses him up against the cage.
Menzies dictating the pace here, as the fighters clinch against the cage.
Menzies has a body lock and is looking for a takedown. Keita is bouncing around trying to prevent the takedown and somehow he has indeed managed to stay on his feet.
Menzies is fighting off a takedown attempt but Keita is just too persistent for him and manages to trip Menzies to the mat. Menzies regains guard as soon as the fighters hit the mat.
Menzies scrambles and gets back to his feet.

Keita gets to the clinch - let's see what his plan is here.

Keita breaks the clinch and we return to the middle of the mat.
Menzies shoots in for a takedown but doesn't get it.
And that is the end of the round. The fighters go back to their corners.
Luke Menzies dominated that round.
The fighters get back to their feet, the hooter sounds and we're back to the action!

Keita has closed the distance and engaged Menzies in a clinch.
Keita manages to break the clinch.
Menzies takes a head kick and keeps coming.
Keita rushes Menzies and pushes him back against the cage in a clinch.
Menzies using the Thai plumb to throw knees but Keita has his back arched nicely, preventing the strike.
Menzies is working on a leg, looking for a takedown but Keita is defending well.
Menzies pulls guard effortlessly.
Keita gets to his feet. Menzies looking to butt scoot but the ref puts an end to that. On your feet son!
We've had a slow start to the round here - hopefully the action picks up.
Keita throws a head kick that connects with a bit of head and a bit of hand.
Menzies feints and as Keita raises his hands in defense, Menzies changes levels and drives through with a takedown into guard.
We've seen a great period of action over the last minute or so - credit to both fighters for going all out!
Menzies sitting in guard, not really doing much.
That's one minute gone in the round.
Menzies throwing strikes from guard but Keita blocks nicely.
Menzies sitting in guard here, content to control.
Keita is working from a closed guard but he's struggling to control his opponent.
That's two minutes gone in the round.
My god... these two guys really need to pick up the pace or everyone will leave to go get a beer.
Keita tries to land a sweep but no joy.
Menzies is intent on slowing down the pace of the fight, simply looking to control.

Menzies gets to his feet and steps away from his opponent.
Keita misses with a body shot.
Keita looking to score a takedown here. Menzies is defending well but Keita drives through and ends up in Menzies's guard.
Menzies pushes Keita off and gets back to his feet.
Keita is breathing heavily.
Horrible takedown attempt by Menzies or perhaps it was just good defense by Keita, which made it look bad.
That's three minutes gone in the round.
Menzies shoots for a double leg takedown but Keita sprawls well. He's pushed Menzies's face into the mat and manages to get back to his feet relatively easily.
That's three failed takedown attempts in the round for Luke Menzies. That's going to take a lot out of him.
Keita lands a high kick!
Menzies shoots in for a takedown. He's persisting with it as Keita sprawls well. Keita wins this battle and keeps the fight standing. Menzies gets slowly back to his feet.
Menzies has his takedown stuffed
and Keita counters with a straight right hand.
Menzies moves in looking to clinch but Keita pushes him off.
Luke Menzies is looking to throw some combinations by the looks of things.
Keita has managed to clinch.
Menzies pushes off and circles away, back to the middle of the mat.
Keita closes the distance and clinches.
Menzies managing to block the knees to the body from Keita.
Keita breaks from the clinch.
That's four minutes gone in the round.
Menzies misses with a takedown attempt - Keita sprawls well and throws a nice strike on the way out which just misses.
Losene Keita seems to be getting the better of the standup.
Menzies takes a big uppercut there. He seems a bit wobbly but no, he's OK.
Keita fakes with an overhand right and moves in to clinch with Menzies, pushing him back against the cage.
Keita manages to break the clinch.
Menzies shoots in but no luck this time.
Despite the aggression on Keita's face he doesn't fully commit to the counter.
The crowd are loving this. Great action here.
Menzies shoots in with a takedown attempt and he has Keita pinned against the cage. Keita gets the underhooks and manages to circle away.
Keita lands a jab-cross combination.
And that is the end of the round. The fighters go back to their corners.
Losene Keita showed his class in that round. I'd imagine he'll take it on all the scorecards.
The fighters' corners scream their final instructions, as the referee calls time. Here we go, back to the action! This is the final round!

Keita keeping at a good range here, avoiding a leg kick.
A telegraphed takedown attempt from Menzies is defended easily by Keita.
Keita swings wildly with a couple of big hooks
and Menzies counters into the clinch. Nicely done.
Menzies stalling.
Menzies jumps into guard, dragging Keita to the mat.
Luke Menzies overall seems to be getting the better of the ground position in the fight so far.
Keita decides he's had enough of playing guard and decides to stand. Come on Menzies, up you get!
Menzies tries a head kick but it misses.
We've had a slow start to the round here - hopefully the action picks up.
Menzies misses with a takedown attempt - Keita sprawls well and throws a nice strike on the way out which just misses.
Keita throws a head kick that half lands.
Both fighters are breathing heavily.
Menzies takes a kick to the side of the head.
That's one minute gone in the round.
Keita moves into the clinch.
Menzies jumps guard but Keita stands there with Menzies around his waist. Menzies gives up and drops back to his feet. We remain in the clinch.
That's three failed takedown attempts in the round for Luke Menzies. That's going to take a lot out of him.
Keita has clasped his hands together around Menzies's back... aaand, he's got a takedown into side control. Nicely done.
Menzies bucks up and manages to escape back to his feet!
Keita fakes with an overhand right and moves in to clinch with Menzies, pushing him back against the cage.
Menzies escapes the clinch and we're back to striking.
A head kick misses from Keita.
Fantastic stuff here - a very entertaining period of action, which has drawn cheers from the crowd.
Menzies has managed to clinch.
Keita breaks the clinch and we're back to striking at distance.
That's two minutes gone in the round.
Keita drives through with a really nice takedown into side control.
Menzies sneaks out the side door and pushes Keita away - he's back to his feet. The crowd show their appreciation for the escape.
Keita throws a body shot but no joy.
Menzies tries to land with a swinging hook to the body but Keita was well out of range. Poor timing from Menzies.
Keita tries to keep at a distance but Menzies has taken the fight into the clinch.
Keita manages to break the clinch.
Menzies fails miserably with a takedown attempt.
Keita throws a combination but it was largely blocked by Menzies.
That's three minutes gone in the round.
Menzies shoots in but Keita avoids the takedown attempt easily.
Keita is moving around nicely and scores here with a single head shot.
A low kick lands for Keita.
Menzies closes the distance and clinches up with Keita, looking for a takedown. Menzies pushes Keita against the cage but Keita circles to the side and manages to break the clinch.
Menzies is the aggressor but that punch slipped nicely by Keita.
Keita drops down looking to force a counter takedown but Menzies defends it well.
Keita has taken the fight to the clinch.
Keita works for the underhooks and manages to get a trip takedown into guard.
Menzies has scooted to the edge of the canvas and used the cage to get back to his feet. Keita has stuck on his opponent and is forcing him back against the cage.
Keita gets double underhooks and manages to take the fight to the ground.
Menzies has his feet on Keita's hips. He pushes off and gets to his feet. Nice work.
That's four minutes gone in the round.
The fans in attendance giving it up for the two fighters, who have really let it all hang out in the last minute or so!
A telegraphed takedown attempt from Menzies is defended easily by Keita.
Menzies closes this distance looking for a takedown but Keita circles away.
Keita scores with a nice right hand.
Menzies gets taken down but at least he's managed to land in guard.
Menzies pushes Keita off and scrambles back to his feet.
The crowd applaud the fighters' efforts here as the round comes to an end.
Keita leaves Menzies with his face pressed against the mat as he sprawls beautifully, defending against a solid takedown attempt.
Keita pushes Menzies up against the cage in a clinch.
And that's the end of the fight!
That was a close round. You could make an argument for either fighter but I would give it to Luke Menzies.
I think Menzies has won this one but let's see what the judges have to say. Over to the ring announcer for the scorecards.
Ladies and gentlemen, after 3 rounds of action, we go to the scorecards for a decision.
Judge Albert Achterberg scores the fight for Luke Menzies!
Judge Saam Ante scores the fight for Luke Menzies!
Judge Radbod Blank scores the fight for Losene Keita!
Luke Menzies wins by split decision!
A less than humble Luke Menzies misjudged his post fight interview somewhat and came across a little too arrogant whilst trying to hype up his own abilities.
|
|
|
|
|
|
|
|
|
|
|
|
|
|
|
|
|
|
|
|
|
|
|
| S |
C
A |
G |
S |
C
B |
G |
|
S |
C |
G |
|
energy
A | B |
|
hype
A | B |
|
pop
A | B |
|
mgr
A | B |
|
FIGHT
RATING
67% |
|
|
|
|
|
|
