|
|
PBP Commentary |
Coming up we have a bantamweight MMA rules bout between Stick Figure Dos (ranked 4699 p4p, 6795 weight class) and Trae Jones (ranked 0 p4p, 0 weight class). Jones has chosen King Von as his entrance music. Over to our ring announcer for the fighter introductions!
 |
|
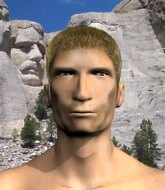 |
| 182 cm
18
145
1 - 0 - 0 |
|
150 cm
19
130
2 - 5 - 0 |
BJJ White Belt
Brawler
Good chin |
|
BJJ Blue Belt
Counter fighter
Solid chin |
|
| |
|
Ladies and gentlemen. This fight is 3 rounds, in the bantamweight division.
Introducing the fighter to my left, fighting out of the red corner.
With a record of 1 - 0 - 0, fighting out of Amsterdam, Stick Figure Dos!
And introducing the fighter to my right, fighting out of the blue corner.
With a record of 2 - 5 - 0, fighting out of St Petersburg, Trae Jones!
The judges for this bout are Saam Ante, Nard Betker and Albert Achterberg.

The bell rings for round one and we are underway!
Figure Dos cracks Jones with an open hand slap.
Jones takes an uppercut right on the button but keeps his composure.
Figure Dos ducks down and throws a hook to the body but Jones moves away.
Figure Dos just misses with a punch to the body.
Figure Dos waving his hands out in front of him, looking to distract Jones.
Figure Dos definitely looks more muscular than last time we saw him fight.
Figure Dos fakes high and swings low for a body shot but Jones manages to avoid it.
Jones feints the counter takedown.
Jones avoids the body shot from Figure Dos.
Jones drops down looking to force a counter takedown but Figure Dos defends it well.
Figure Dos with a jab.
Figure Dos throws a series of punches but Jones moves out of range.
A looping hook to the body misses from Figure Dos. Jones does a little dance to reset his feet.
And Jones tries to counter it with a takedown but Figure Dos pushes his down on his head and steps out.
Jones takes a jab right on the nose. That must have hurt but he shrugs his shoulders and looks to return the favor.
Figure Dos throws a hook but Jones avoids it easily.
Figure Dos looks to land a left hand but Jones moved out of range nicely.
Jab, cross, leg kick. Nice combination by Figure Dos!
This is a great period of action - very entertaining stuff!
Figure Dos works Jones's body with a nice hook.
Figure Dos misses with an uppercut. Jones saw that one coming.

That's one minute gone in the round.
Figure Dos scores with a straight right hand, right through his opponent's guard.
Jones takes one to the chin there.
Figure Dos throws a body punch but Jones moves out of range.
Jones changes levels for a counter takedown but doesn't follow through with his attempt.
Figure Dos throws a shot to the body.
Stick Figure Dos seems to be the more aggressive standup fighter in this bout.
Figure Dos loads up on a big right hand but Jones slips the punch.
Good standup being displayed there by Figure Dos as he connects with a hook.
Figure Dos throws a couple of head shots and lands with the final one - a decent hook, which struck Jones on the side of the head.
Figure Dos throws a jab when Jones was well out of range.
Jones feints the counter takedown.
Figure Dos throws a right hand that Jones ducks under and follows up with a left that Jones also avoids with ease.
Jones avoids a lazy jab quite easily.
Figure Dos swings wildly with a right hand that was never going to find it's target.
Jones drops down looking to force a counter takedown but Figure Dos defends it well.
Figure Dos throws an uppercut from half a mile away. Jones sees it coming and avoids it easily.
Figure Dos dips down and scores with a jab to the body.

That's two minutes gone in the round.
This has been an exciting period of action!
Figure Dos misses with a two punch combination.
Jones takes a jab on the nose there. A little bit of blood seems to be coming out. Hopefully that won't affect his breathing.
Figure Dos throws a combination but comes up with nothing but fresh air.
Jones with the counter takedown but Figure Dos avoids it easily.
Figure Dos is the aggressor but that punch slipped nicely by Jones.
Figure Dos bobbing and weaving, closes the distance and lands a hook to the side of Jones's head.
Figure Dos throws a hook but Jones avoids it easily.
Some wild striking there from Figure Dos.
Jones is definitely looking for the counter takedowns here.
A swing and a miss from Figure Dos.
A slow jab from Figure Dos misses its intended target.
Jones with the counter takedown but Figure Dos avoids it easily.
Figure Dos throws a jab but it's blocked by Jones.
Figure Dos misses with a body shot. Nice footwork from Jones.
Jones is definitely looking for the counter takedowns here.
Figure Dos is really peppering his opponent's head with punches.

That's three minutes gone in the round.
Figure Dos throws a body punch but Jones moves out of range.
Figure Dos misses with a hook.
Jones on the wrong end of a nice hook.
A swing and a miss from Figure Dos.
Jones doesn't react quick enough there as he takes a shot to the body.
Good shot there by Figure Dos.
Figure Dos misses with a body shot. Nice footwork from Jones.
Jones moves away from the strike by Figure Dos.
Jones drops down looking to force a counter takedown but Figure Dos defends it well.
Figure Dos misses with a hook. Jones ducked under it nicely.
Jones staying out of range there.
And Jones tries to counter it with a takedown but Figure Dos pushes his down on his head and steps out.
Jones uses some good footwork to avoid the body shot by Figure Dos.
Jones with the counter takedown but Figure Dos avoids it easily.
A cross from Figure Dos lands.
A slow jab from Figure Dos misses its intended target.
Jones with the counter takedown but Figure Dos avoids it easily.

That's four minutes gone in the round.
Jones keeping a good distance there, avoiding the body shot.
Figure Dos fakes high and swings low for a body shot but Jones manages to avoid it.
Figure Dos throws a looping overhand right but Jones ducks down to avoid it.
Figure Dos misses with a looping right.
Jones tries a counter takedown but it's more of a dummy move, and he uses it to push himself away.
Figure Dos throws a series of punches but Jones avoids them all with ease.
Jones feints the counter takedown.
The crowd cheering loudly, showing their appreciation for the quality fight we're seeing here.
Nice cross by Figure Dos.
Figure Dos works over Jones's head and body with a nice combination.
Figure Dos throws a looping overhand right but Jones ducks down to avoid it.
Figure Dos fails to land with the punch combination there - jab, cross, hook, miss, miss, miss.
Jones tries a counter takedown but it's more of a dummy move, and he uses it to push himself away.
Figure Dos rushes forward with a series of wild hooks but Jones moves out of range and avoids them all easily.
Jones is definitely looking for the counter takedowns here.
Figure Dos is breathing heavily.
Jones staying out of range there.
Jones tries a counter takedown but it's more of a dummy move, and he uses it to push himself away.
Figure Dos throws a monster uppercut resembling something out of street fighter but it doesn't land.
And that is the end of the round. The fighters go back to their corners.
Stick Figure Dos dominated that round.
That's time! Figure Dos's corner gives him a slap on the ass as he gets ready to fight.

Figure Dos swings wildly with a hook that is half blocked by Jones.
Figure Dos jabbing away but nothing is landing.
Figure Dos is really dominating this fight. Is there anything that Jones can do to turn this around?
A swing and a miss from Figure Dos.
Jones staying out of range there.
Figure Dos looks to land a right hand but Jones moved out of range.
Jones is definitely looking for the counter takedowns here.
Jones avoids a lazy jab quite easily.
Figure Dos throws a big shot that misses.
Jones drops down looking to force a counter takedown but Figure Dos defends it well.
A punch combination from Figure Dos misses.
Jones is definitely looking for the counter takedowns here.
Figure Dos throws a body shot but no joy.
Jones feints the counter takedown.
Jones should think about turning a few of those tyres round his middle into muscle if he wants people to take him seriously as an athlete.
We've had a slow start to the round here - hopefully the action picks up.
Good shot there by Figure Dos.
Figure Dos throws a hook to the body but it doesn't connect.
Figure Dos throws a hook to the side of Jones's head but Jones sees it coming and ducks under it beautifully.
Jones is definitely looking for the counter takedowns here.
Figure Dos ducks down and throws a hook to the body but Jones moves away.
Jones with the counter takedown but Figure Dos avoids it easily.
That's one minute gone in the round.
Jones is on the wrong end of a nice combination from Figure Dos.
Jones doesn't react quick enough there as he takes a shot to the body.
Figure Dos throws the left hand but Jones avoids the punch easily.
Jones tries a counter takedown but it's more of a dummy move, and he uses it to push himself away.
A swing and a miss from Figure Dos.
Figure Dos misses with a wild combination.
Both fighters are absolutely exhausted here.
A telegraphed right hand from Figure Dos misses the target.
Jones drops down looking to force a counter takedown but Figure Dos defends it well.
Figure Dos really does look like a pencil wearing a pair of gloves. Let's hope he has a gameplan to suit that ridiculous body shape.
Figure Dos throws a hook but Jones blocks it.
Jones changes levels for a counter takedown but doesn't follow through with his attempt.
Figure Dos throws a big shot that misses.
Jones with the counter takedown but Figure Dos avoids it easily.
Jones is trying desperately to land a takedown but Figure Dos is having absolutely none of it. This is turning into a bit of a nightmare for Jones.
Figure Dos waving his hands out in front of him, looking to distract Jones.
Figure Dos rushes forward with a series of wild hooks but Jones moves out of range and avoids them all easily.
Jones feints the counter takedown.
Jones bobs and weaves well there to avoid the strikes.
Figure Dos throws a right and a left that Jones avoids nicely.
That's two minutes gone in the round.
Figure Dos throws a jab when Jones was well out of range.
Jones drops down looking to force a counter takedown but Figure Dos defends it well.
Figure Dos throws a body shot but no joy.
Jones changes levels for a counter takedown but doesn't follow through with his attempt.
Trae Jones is looking to throw some combinations by the looks of things.
Figure Dos rushes forward with a series of wild hooks but Jones moves out of range and avoids them all easily.
The fans in attendance giving it up for the two fighters, who have really let it all hang out in the last minute or so!
Figure Dos just misses with a punch to the body.
A combination from Figure Dos does no damage.
Jones is definitely looking for the counter takedowns here.
Figure Dos with a hook.
Stick Figure Dos is winning the standup battle so far.
Figure Dos throws a body shot but no joy.
Jones changes levels for a counter takedown but doesn't follow through with his attempt.
A jab from Figure Dos misses.
Figure Dos waving his hands out in front of him, looking to distract Jones.
And Jones tries to counter it with a takedown but Figure Dos pushes his down on his head and steps out.
Figure Dos misses with a looping right.
A telegraphed right hand from Figure Dos misses the target.
Jones with the counter takedown but Figure Dos avoids it easily.
Jones ducks under a wild hook from Figure Dos.
A telegraphed right hand from Figure Dos misses the target.
Jones tries a counter takedown but it's more of a dummy move, and he uses it to push himself away.
That's three minutes gone in the round.
Jones uses some good footwork to avoid the body shot by Figure Dos.
And Jones tries to counter it with a takedown but Figure Dos pushes his down on his head and steps out.
Figure Dos misses with a body shot. Nice footwork from Jones.
Jones changes levels for a counter takedown but doesn't follow through with his attempt.
Figure Dos looks to land a left hand but Jones moved out of range nicely.
Figure Dos thows a left - swing and a miss!
And Jones tries to counter it with a takedown but Figure Dos pushes his down on his head and steps out.
Figure Dos just misses with a punch to the body.
A big left from Figure Dos misses.
Jones is definitely looking for the counter takedowns here.
Figure Dos throws a jab but it's blocked by Jones.
Figure Dos misses with a hook to the body

and Jones counters with a takedown into side control! That could mean trouble for Figure Dos!

Jones stands up and we're back to a striking position.
Jones avoids a punch combination nicely.
That's four minutes gone in the round.
Jones shakes his hands off, looking to compose himself, but takes a jab to the jaw whilst he does it.
Figure Dos looks to score with a combo but nothing lands.
Jones drops down looking to force a counter takedown but Figure Dos defends it well.
Jones avoids the body shot from Figure Dos.
Jones feints the counter takedown.
This is a great period of action - very entertaining stuff!
Jones steps to the side to avoid the strikes from Figure Dos.
Jones changes levels for a counter takedown but doesn't follow through with his attempt.
Figure Dos is using his reach advantage well here, landing the more effective single shots from range.
Figure Dos misses with a body shot. Nice footwork from Jones.
Jones slips a straight right by Figure Dos.
Jones slips a jab from Figure Dos.
Jones feints the counter takedown.
Jones slips a jab from Figure Dos.
Jones is definitely looking for the counter takedowns here.
Figure Dos tests Jones's chin there with a solid looking shot.
A left lands for Figure Dos.
Figure Dos throws a hook to the body but it doesn't connect.
Jones with the counter takedown but Figure Dos avoids it easily.
And that is the end of the round. The fighters go back to their corners.
Stick Figure Dos dominated that second round.
The fighters' corners scream their final instructions, as the referee calls time. Here we go, back to the action! Ladies and gentlemen, this is the final round!

Jones slips under a jab.
Jones walks into a straight right hand from Figure Dos.
Jones takes an uppercut right on the jaw but it doesn't phase him.
Nice defenses there by Jones.
Jones drops down looking to force a counter takedown but Figure Dos defends it well.
Figure Dos throws a hook but Jones avoids it easily.
Figure Dos throws a hook to the body but it doesn't connect.
Jones changes levels for a counter takedown but doesn't follow through with his attempt.
A jab from Figure Dos misses.
Figure Dos misses with a body shot. Nice footwork from Jones.
Jones drops down looking to force a counter takedown but Figure Dos defends it well.
Figure Dos throws a series of punches but Jones avoids them all with ease.
Jones tries a counter takedown but it's more of a dummy move, and he uses it to push himself away.
We've had a slow start to the round here - hopefully the action picks up.
Figure Dos throws a looping overhand right but Jones ducks down to avoid it.
Jones ducks under an overhand right and circles away with a smile on his face.
Jones feints the counter takedown.
Figure Dos throws a lazy right hand but Jones sees it coming a mile off and sidesteps it easily.
Both fighters are breathing heavily.
Figure Dos swings wildly with a right hand that was never going to find it's target.
That's one minute gone in the round.
Figure Dos lands a jab followed by a nice looking cross.
Figure Dos misses with a body shot.
Figure Dos looks to land a left hand but Jones moved out of range nicely.
Jones tries a counter takedown but it's more of a dummy move, and he uses it to push himself away.
Figure Dos misses with a few strikes there.
Figure Dos throws a hard body shot but it just misses.
Figure Dos swings for the body but Jones moves out of range.
Jones drops down looking to force a counter takedown but Figure Dos defends it well.
Figure Dos misses with a body shot.
A telegraphed right hand from Figure Dos misses the target.
Jones avoids the body shot from Figure Dos.
And Jones tries to counter it with a takedown but Figure Dos pushes his down on his head and steps out.
Figure Dos tries to land with a swinging hook to the body but Jones was well out of range. Poor timing from Figure Dos.
Figure Dos thows a left - swing and a miss!
Jones tries a counter takedown but it's more of a dummy move, and he uses it to push himself away.
Jones avoids the body shot from Figure Dos.
Jones ducks under a wild hook from Figure Dos.
Jones drops down looking to force a counter takedown but Figure Dos defends it well.
That's two minutes gone in the round.
Jones steps to the side to avoid the strikes from Figure Dos.
Jones feints the counter takedown.
Figure Dos throws a hook but Jones avoids it easily.
And Jones tries to counter it with a takedown but Figure Dos pushes his down on his head and steps out.
Figure Dos will need to tighten up his combinations if he doesn't want to gas himself out, swinging at thin air.
Jones with the counter takedown but Figure Dos avoids it easily.
Figure Dos throws a hard body shot but it just misses.
Jones tries a counter takedown but it's more of a dummy move, and he uses it to push himself away.
Figure Dos misses with a hook. Jones ducked under it nicely.
Figure Dos fails to land with the punch combination there - jab, cross, hook, miss, miss, miss.
Jones changes levels for a counter takedown but doesn't follow through with his attempt.
A telegraphed right hand from Figure Dos misses the target.
Jones drops down looking to force a counter takedown but Figure Dos defends it well.
The crowd are loving this. Great action here.
Figure Dos misses with a straight left.
Figure Dos lunges in with swinging rights and lefts but Jones circles away quickly and effectively.
Figure Dos swings for the body but Jones moves out of range.
Jones feints the counter takedown.
A slow jab from Figure Dos misses its intended target.
And Jones tries to counter it with a takedown but Figure Dos pushes his down on his head and steps out.
That's three minutes gone in the round.
Figure Dos throws a jab when Jones was well out of range.
Jones moves out of range as Figure Dos strikes.
And Jones tries to counter it with a takedown but Figure Dos pushes his down on his head and steps out.
Figure Dos swings for the body but Jones moves out of range.
And Jones tries to counter it with a takedown but Figure Dos pushes his down on his head and steps out.
Jones looks shocked there as he takes a right hand to the temple.
Figure Dos loads up on a big right hand but Jones slips the punch.
Jones feints the counter takedown.
Figure Dos looks to throw the jab but Jones is out of range.
Figure Dos takes a swing at Jones's ribcage but misses.
Jones takes a jab right on the kisser.
Jones steps to the side to avoid the strikes from Figure Dos.
Jones with the counter takedown but Figure Dos avoids it easily.
Figure Dos lunges in with swinging rights and lefts but Jones circles away quickly and effectively.
Figure Dos looks to land a left hand but Jones moved out of range nicely.
Jones with the counter takedown but Figure Dos avoids it easily.
Figure Dos ducks down and throws a hook to the body but Jones moves away.
Jones feints the counter takedown.
Figure Dos cracks Jones with a good jab.
That's four minutes gone in the round.
Jones blocks a jab.
Jones with the counter takedown but Figure Dos avoids it easily.
Jones takes a jab on the nose there. A little bit of blood seems to be coming out. Hopefully that won't affect his breathing.
Jones takes a shot right to the bread basket.
Stick Figure Dos is fighting for a decision here - he's started to take the cautious approach.
Jones keeping his hands up high there, blocking the jab from Figure Dos.
The fans in attendance giving it up for the two fighters, who have really let it all hang out in the last minute or so!
Figure Dos with a nice cross.
A jab lands there for Figure Dos.
Figure Dos throws a body shot but no joy.
Jones keeping his hands up high there, blocking the jab from Figure Dos.
Jones has a pretty nasty looking mouse under his right eye.
Figure Dos throws a body punch but Jones moves out of range.
Jones with the counter takedown but Figure Dos avoids it easily.
Figure Dos swings away but doesn't land with a series of punches.
Jones with the counter takedown but Figure Dos avoids it easily.
Figure Dos tries to bum rush Jones with a series of wild strikes but Jones uses good footwork to avoid the assault.
Trae Jones has stepped it up - he knows he needs a finish here!
Jones moves away from the strike by Figure Dos.
And that's the end of the fight!
Stick Figure Dos showed his dominance in that final round.
Well I reckon that's a shut out for Figure Dos, winning every round. Will the judges agree? They are the ones who matter, even if they are often depressingly incompetent. Over to the ring announcer for the scorecards.
Ladies and gentlemen, after 3 rounds of action, we go to the scorecards for a decision.
Judge Saam Ante scores the fight 30:24
Judge Nard Betker scores the fight 30:24
Judge Albert Achterberg scores the fight 30:24
In favor of your winner, by unanimous decision... Stick Figure Dos!
In defeat, Trae Jones stepped up to the mic, saying 'Ill Be better its a skill to work on'.
|
|
|
|
|
|
|
|
|
|
|
|
|
|
|
|
|
|
|
|
|
|
|
| S |
C
A |
G |
S |
C
B |
G |
|
S |
C |
G |
|
energy
A | B |
|
hype
A | B |
|
pop
A | B |
|
mgr
A | B |
|
FIGHT
RATING
58% |
|
|
|
|
|
|
