|
|
PBP Commentary |
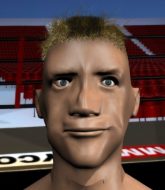
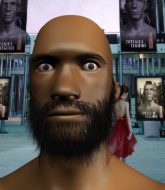
Coming up we have a lightweight MMA rules bout between Keith Seng (ranked 1340 p4p, 2335 weight class) and Jack Sadler (ranked 176 p4p, 278 weight class). This should be fireworks!
 |
|
 |
| 178 cm
26
161
10 - 7 - 0 |
|
184 cm
25
168
10 - 8 - 0 |
Good wrestling
World class boxer
Cardio machine |
|
Good wrestler
World class boxer
Heavy handed |
|
| |
|
Ladies and gentlemen. This fight is 3 rounds, in the lightweight division.
Introducing the fighter to my left, fighting out of the red corner.
With a record of 10 - 7 - 0, fighting out of Las Vegas, Keith Seng!
And introducing the fighter to my right, fighting out of the blue corner.
With a record of 10 - 8 - 0, fighting out of Las Vegas, Jack Sadler!
The judges for this bout are Radbod Blank, Aafke Stam and Nard Betker.

The bell rings for round one and we are underway!
Seng avoids the body shot from Sadler.
Sadler throws an uppercut from half a mile away. Seng sees it coming and avoids it easily.
Seng takes a shot to the body in his stride.
Seng showing good head movement there, avoiding the strikes from Sadler.
Seng walks into a jab.
Seng digs a good body shot into Sadler's ribs.
Sadler fakes high and swings low for a body shot but Seng manages to avoid it.
Sadler wings a very wild body shot but it does the job and lands to the midsection.
Seng ducks under a wild hook from Sadler.
Sadler misses with a hook
and Seng counters with a slapping leg kick.
A slow jab from Sadler misses its intended target.
A decent looking cross lands there for Seng.
Seng tries to clinch there but Sadler circles away.
Wow, both these guys are really going for it!
We've seen a great period of action over the last minute or so - credit to both fighters for going all out!
Seng punishes Sadler's body with a nice straight punch.
Seng fakes high and swings low for a body shot but Sadler manages to avoid it.
Sadler looked like he wanted to counter with a punch but didn't throw it.
Seng throws a hook but Sadler avoids it easily.
Seng swings and misses with a hook to the body.
Seng uses some good footwork to avoid the body shot by Sadler.
Seng misses with a hook.
Seng dips down and scores with a jab to the body.
Seng is looking to wear down Sadler with body shots, infact he's throwing more body shots than head shots at the moment.
Seng dips down and scores with a jab to the body.

That's one minute gone in the round.
Sadler throws a head kick but Seng moves out of range.
Seng thows a left - swing and a miss!
Seng fails in his attempt to clinch.
Sadler circles away from the clinch attempt.
Sadler misses with a hook. Seng ducked under it nicely.
Seng slips a straight right by Sadler.
Seng takes a shot to the eye socket. That's gotta hurt.
Seng moves out of range as Sadler strikes.
Seng ducks under a wild hook from Sadler.
Sadler scores with a hook to the body. Seng takes a step back and tries to catch his breath.

Seng moves into range and clinches up with Sadler.
Sadler looking to slow down the pace here.
Seng misses with a punch to the body.
Seng misses with the head strike.
Seng digs a right hand underneath Sadler's ribcage. Sadler let out a lung full of air as it connected.
Sadler gets through Seng's defenses to land a nice punch to the side of the head.
Sadler blocks a punch to the side of the head.
Sadler is trying to maintain a safe position but Seng gets an underhook and turns Sadler into the cage.
Sadler lands a left hand.
Come on Sadler - let's have some action - none of this stalling nonsense.

That's two minutes gone in the round.
Seng lands punches inside but they're not really causing much damage.
The fans in attendance giving it up for the two fighters, who have really let it all hang out in the last minute or so!
Seng scores with a nice hook to the head.
Seng works on Sadler's body with a couple of short punches.
Seng is trying to slow down the pace of the fight but Sadler is keeping busy.
Seng misses with the head strike.
Seng misses with some punches.
A short uppercut from Sadler.
Sadler tries to land a shot to the body but it's blocked.
An uppercut on the inside fails to land for Seng.
Sadler blocks a couple of punches on the inside.
Sadler lands a nice looking hook to the body, against the cage.
Sadler tries to stall but Seng uses the opportunity to gain a better position.
Seng lands a left hand.
Sadler leaning against his opponent.
Sadler blocks an uppercut.
Seng throws a punch but it's blocked by Sadler.
Seng just leaning against Sadler, taking a breather.
Sadler pushes Seng back against the cage and unloads with a body punch.
Sadler prevents a body shot from Seng.

That's three minutes gone in the round.
Seng lands a hook that snaps the head of Sadler backwards.
Sadler fails to land with a short punch on the inside.
A head punch blocked on the inside by Seng.
Seng digs a right hand underneath Sadler's ribcage. Sadler let out a lung full of air as it connected.
Seng throws a head punch that misses.
Sadler is looking to control Seng's arms but Seng gets an underhook and turns him. Now Sadler has his back to the cage.
A nice right hand lands inside from Seng.
Sadler misses with the head strike.
Sadler tries a shoulder strike but it doesn't do any damage.
Seng tries to throw a body punch but Sadler avoids it by throwing Seng back against the cage.
With the fighters clinched against the cage, Seng creates a bit of distance for himself and scores with a nice uppercut.
Seng digs a right hand underneath Sadler's ribcage. Sadler let out a lung full of air as it connected.
Sadler is looking to control Seng's arms but Seng gets an underhook and turns him. Now Sadler has his back to the cage.
Seng lands a hook to the side of the head.

Seng's corner calls for him to break the clinch, which he does.
Sadler smiles there as he lands a nice right hand right on the button.
Seng uses good footwork to avoid the strikes from Sadler.
Sadler swings for the body but Seng moves out of range.
Sadler looks to score with a jab to the body but Seng is just out of range.
The crowd are loving this. Great action here.
Sadler avoids the clinch attempt nicely.
A little jabbing left from Sadler on the counter but it doesn't find it's target.

That's four minutes gone in the round.
Sadler goes to the watering hole and comes back with a big thumbs up from the judges as he scores a three punch combo.
Seng doesn't manage to clinch there - Sadler circles away.
Seng ducks down and throws a hook to the body but Sadler moves away.
Sadler works Seng's body with a nice hook.
Sadler throws a poor cross that misses
and Seng counters with a two punch combo.
Seng closes the distance and clinches.
Seng working on landing some head shots here - that one got through nicely.
Seng goes for a body shot but it's blocked.
Sadler's corner are urging him to control the action in the clinch for a moment, rather than mount any serious offense. I'm sure the crowd appreciate those instructions... not.
Sadler is stalling here.
Sadler continues to stall. The referee tells him to work or he's going to break them up.
Sadler blocks a punch to the side of the head.
Sadler can't find room to land a body shot as Seng controls the action.
A quick uppercut on the inside from Seng.
The crowd applaud the fighters' efforts here as the round comes to an end.
Good body shot from Sadler.
Sadler can't break the clinch.
Seng digs a right hand into Sadler's ribs. Those have got to be taking their toll on Sadler's gas tank.
The referee is keeping an eye on Seng - much more stalling and he will separate the fighters.
Sadler is working Seng over against the cage.
And that is the end of the round. The fighters go back to their corners.
That was a close round but I would say that Keith Seng will probably get the nod.
That's the end of the interval. I'm sure that seemed a lot quicker than a minute for our two fighters! Back to the action.

Sadler walks forward and throws out a flicking leg kick. Seng checks it nicely though, as he moves to the side.
The fighters are starting to get sweaty, which will make takedowns a bit more tricky.
Seng lands a body shot.
Sadler uses good footwork to get in and out, landing a nice hook.
Sadler misses with an uppercut.
Seng uses good head movement to avoid the hook from Sadler.
Seng takes a shot right to the bread basket.
Seng tries to clinch up but Sadler circles away and keeps his distance.
Sadler displays some good footwork, moving neatly out of range as Seng throws out the jab.
Sadler thows a left - swing and a miss!
Seng tries to clinch but Sadler is having none of it.
Seng takes the fight into the clinch.
Seng misses with a shot to the kidneys.
Sadler tries to break free but Seng pushes him back against the cage.
We've had a slow start to the round here - hopefully the action picks up.
Seng tries to throw a body punch but Sadler avoids it by throwing Seng back against the cage.
A real battle for position is taking place between these two warriors.
Sadler lands with a short shot to the head.
Sadler controlling the action here for a moment.
Seng lands a shoulder strike.
That's one minute gone in the round.
Seng manages to get underhooks and slows down the pace for a moment.
Sadler misses with a short punch on the inside.
Sadler wants to break the clinch but can't.
A left hand lands to the body for Seng.
Sadler throws a punch but it's blocked by Seng.
Seng slowing the pace effectively.
Sadler can't find room to land a body shot as Seng controls the action.

Sadler manages to break the clinch.
Sadler needs to keep his hands up - Seng had a free shot at his head there.
Sadler misses the body punch
and Seng counters nicely by changing levels and landing a hook to the body.
We are yet to see a takedown attempt from Sadler in the fight. On paper you would think he is the more dominant ground fighter so let's see if these unusual tactics pay off.
Seng wants to clinch up but Sadler keeps it at a distance.
Sadler uses some good footwork to avoid the body shot by Seng.
Seng gets to the clinch - let's see what his plan is here.
Seng lands with a left to the head.
Sadler tries a body shot but Seng blocks it.
Seng misses with some punches.
Sadler is trying to slow down the pace in the clinch, to catch his breath.
Seng is leaning against Sadler and scores with a nice uppercut to the body.
Sadler is breathing heavily.
That's two minutes gone in the round.
Sadler is working hard here but doesn't seem to be able to control effectively, up against the cage.
Seng manages to break the clinch.
Sadler takes a thudding leg kick, right into the meat of the thigh.
Seng defending well as Sadler loads up on a big left hand.
The crowd are loving this. Great action here.
Seng forces Sadler back against the cage and clinches.
Sadler working aggressively here.
Seng tries to throw a body punch but Sadler avoids it by throwing Seng back against the cage.
Sadler looks like he'd prefer to be striking at range right now.
Seng scores with a hook to the body.
Seng blocks an uppercut.
Sadler tries to circle away but Seng has him pinned against the cage.
Seng misses with a shot to the kidneys.
Sadler tries to break free but Seng pushes him back against the cage.
Seng blocks a punch to the side of the head.
Sadler blocks a body shot from Seng.
Seng misses with some punches.
Sadler taking a breather.
Seng misses with a body punch.
With the fighters clinched against the cage, Seng creates a bit of distance for himself and scores with a nice uppercut.
That's three minutes gone in the round.
Seng tried to land a shot to the body but connects with Sadler's elbow.
Seng can't find room to land a body shot as Sadler controls the action.
The referee calls for Seng to work.
Seng working aggressively here.
Seng keeps control of Sadler as he tries to wriggle out of the double underhooks.
Seng blocking some punches.
Seng is leaning against Sadler and scores with a nice uppercut to the body.
Sadler wants to push off and get back to the center of the mat but Seng has him pressed against the cage.
Sadler misses with a punch to the body.
Seng tries to throw a body punch but Sadler avoids it by throwing Seng back against the cage.
Seng letting Sadler take a breather here.
Sadler prevents a body shot from Seng.
Seng lands a body punch - he's looking to wear down Sadler.
Seng fails to land with a short punch on the inside.
Sadler trying to stall but Seng improves his position.
Seng misses with a punch to the body.
Sadler is trying to slow down the pace of the fight but Seng is keeping busy.
Seng lands a right hand that snaps the head of Sadler backwards.
That's four minutes gone in the round.
Sadler wants to stall.
Seng looking to stall.
Seng scores with a hook to the body.
Seng lands a nice uppercut.
Sadler is trying to slow down the pace in the clinch, to catch his breath.
Seng stays in close to his opponent and throws a right hand to the body.
Seng scores with a shoulder strike.
Seng tries to stall but Sadler uses the opportunity to gain a better position.
Sadler taking a breather.
Sadler is trying to slow down the pace of the fight but Seng is keeping busy.
Sadler is trying to work out of this bad position, with his back against the cage.
A real battle for position is taking place between these two warriors.
Seng lands a right hand that snaps the head of Sadler backwards.
Sadler lands a right uppercut that snaps the head of Seng backwards.
The fans in attendance giving it up for the two fighters, who have really let it all hang out in the last minute or so!
Seng throws a hook to the body. More of an arm punch but it's all scoring with the judges.
And that is the end of the round. The fighters go back to their corners.
Keith Seng dominated that second round.
The corners get their ten second warning. Both fighters stand from their stools and stare each other down, ready to get back to the action. This is the final round!

Sadler fakes high and swings low for a body shot but Seng manages to avoid it.
Sadler misses with a wild body shot.
Seng moves out of range as Sadler strikes.
Seng pushes Sadler up against the cage in a clinch.
Seng goes for a body shot but it's blocked.
Sadler throws a head punch that misses.
Sadler misses with a punch to the body.
Sadler misses with some punches.
Seng breaks the clinch.
Seng staying out of range there.
Seng works the jab nicely.
Seng ducks under a wild hook from Sadler.
Sadler takes a punch right to his stomach. That took the wind out of him momentarily.
Seng swings for the body but Sadler moves out of range.
Jack Sadler seems to be getting the better of the standup.
We've had a slow start to the round here - hopefully the action picks up.
Seng is looking to clinch but Sadler is avoiding it.
Seng fails in his attempt to clinch.
Sadler shakes his hands off, looking to compose himself, but takes a jab to the jaw whilst he does it.
Sadler walks into a left hand.
Seng darts in and clinches Sadler up against the cage.
The fans in attendance giving it up for the two fighters, who have really let it all hang out in the last minute or so!
A head punch on the inside from Seng fails to land.
Sadler is trying to slow down the pace in the clinch, to catch his breath.
That's one minute gone in the round.
Seng prevents a body shot from Sadler.
Sadler presses Seng against the cage and delivers a mid-strength body shot.
Sadler misses with a short punch on the inside.
Seng lands a body punch.
Sadler is trying to force a seperation but Seng has the dominant position.
Sadler lands a left hand.
Sadler is trying to work out of this bad position, with his back against the cage.
Both guys are working to get underhooks.
Sadler trying to control the position but instead, Seng has worked for underhooks and has pushed Sadler into the cage.
Seng misses with a hook to the ribs.
Seng is working Sadler over against the cage.
Sadler blocking some punches.
Seng lands a body punch - he's looking to wear down Sadler.
Seng lands an uppercut.
Seng lands with a good tight uppercut to the head.
Sadler tries to work over Seng's body with a swooping hook but it only glances the target.
That's two minutes gone in the round.
Sadler has Seng pushed against the cage.
Sadler takes a big intake of breath there - he's definitely tired.
Seng tries to stall but Sadler uses the opportunity to gain a better position.
Sadler slows down the pace here.
Keith Seng has scored more points in the clinch so far.
Sadler misses with a hook to the ribs.
Seng throws a blind hook that connects with the side of Sadlers head.
Seng is working Sadler over against the cage.
A left hand lands to the body for Seng.
Seng struggles to land a body shot inside as Sadler controls his hands.
Seng misses with a shot to the kidneys.
Seng pushes Sadler back against the cage and unloads with a body punch.
Seng swings wildly with an uppercut but Sadler uses good head movement to avoid it.
The crowd are loving this. Great action here.
Sadler tries to land a shot to the body but it's blocked.
Seng lands a right uppercut that snaps the head of Sadler backwards.
Seng keeps control of Sadler as he tries to wriggle out of the double underhooks.
Seng lands on the inside with an uppercut.
That's three minutes gone in the round.
Seng lands with a quick shot inside that doesn't really do much damage.
Sadler is the more experienced fighter here and he's going to need to draw on some of that experience if he's going to pull this one out the bag.
Sadler pushes off and circles away, back to the middle of the mat.
Sadler takes a body kick right on the floating rib. Ouchie.
Seng is looking to take this fight into the clinch.
And an attempted straight right on the counter from Sadler! But no joy.
A low kick lands for Seng.
Seng moves into the clinch successfully.
Keith Seng is fighting for a decision here - he's started to take the cautious approach.
Sadler wants to break free. God knows he wants to breaaaak freeee.
The referee is keeping an eye on Sadler - much more stalling and he will separate the fighters.
Sadler misses with a body punch.
Sadler misses with a hook to the ribs.
Sadler tries a body shot but Seng blocks it.
Sadler has a couple of punches blocked by Seng.
That's four minutes gone in the round.
Seng throws a head punch that misses.
A head punch on the inside from Sadler fails to land.
Sadler lands a hook that snaps the head of Seng backwards.
Seng is really dominating this fight. Is there anything that Sadler can do to turn this around?
Seng lands with a quick shot inside that doesn't really do much damage.
Seng lands with a left to the head.
Sadler tries to work over Seng's body with a swooping hook but it only glances the target.
Sadler trying to stall but Seng improves his position.
Sadler misses with a short punch on the inside.
The fans in attendance giving it up for the two fighters, who have really let it all hang out in the last minute or so!
Sadler displaying some good clinch control by pressing Seng up against the cage.
Sadler taking a breather.
And that's the end of the fight!
Keith Seng showed his dominance in that final round.
Well I reckon that's a shut out for Seng, winning every round. Will the judges agree? They are the ones who matter, even if they are often depressingly incompetent. Over to the ring announcer for the scorecards.
Ladies and gentlemen, after 3 rounds of action, we go to the scorecards for a decision.
Judge Radbod Blank scores the fight for Keith Seng!
Judge Aafke Stam scores the fight for Keith Seng!
Judge Nard Betker scores the fight for Keith Seng!
Keith Seng wins by unanimous decision!
An out of breath Keith Seng thanked his loyal fans in his post fight interview, giving them credit for his success over the course of his career.
|
|
|
|
|
|
|
|
|
|
|
|
|
|
|
|
|
|
|
|
|
|
|
| S |
C
A |
G |
S |
C
B |
G |
|
S |
C |
G |
|
energy
A | B |
|
hype
A | B |
|
pop
A | B |
|
mgr
A | B |
|
FIGHT
RATING
65% |
|
|
|
|
|
|
