|
|
PBP Commentary |
Coming up we have a welterweight MMA rules bout between Needno Badges (ranked 2154 p4p, 2203 weight class) and Niklas Aho (ranked 271 p4p, 281 weight class). There are an array of beautiful celebrities at ringside tonight! I wonder if any of them paid for their tickets.
 |
|
 |
| 185 cm
25
177
8 - 3 - 0 |
|
184 cm
25
177
8 - 7 - 0 |
Good wrestling
Great elbows
Very quick |
|
Good wrestler
Excellent MT
Powerful |
|
| |
|
Ladies and gentlemen. This fight is 3 rounds, in the welterweight division.
Introducing the fighter to my left, fighting out of the red corner.
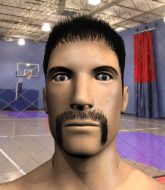
With a record of 8 - 3 - 0, fighting out of New York, Needno Badges!
And introducing the fighter to my right, fighting out of the blue corner.
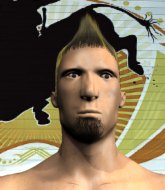
With a record of 8 - 7 - 0, fighting out of Las Vegas, Niklas Aho!
The judges for this bout are Richard Clark, Colin Fotheringham and Daniel Bishop.

The bell rings for round one and we are underway!
Aho shoots in for a takedown. "I don't think so" says Badges as he avoids it easily.
Badges cracks Aho with a good jab.
Badges misses with a straight left.
Aho drops down looking to force a counter takedown but Badges defends it well.
A looping hook to the body misses from Badges. Aho does a little dance to reset his feet.
Badges throws a hook to the body but it doesn't connect.
Aho is definitely looking for the counter takedowns here.
Badges throws a jab but it's blocked by Aho.
Badges stuffs a takedown. It's all about dictating where the fight takes place and Badges wants it to stay on the feet.
Aho fails with the takedown
and Badges counters with a stiff right hand.
Needno Badges has stuffed three takedown attempts in the round now. That's going to take a lot out of Niklas Aho.
We've had a slow start to the round here - hopefully the action picks up.
Badges looks to land a left hand but Aho moved out of range nicely.
Aho fakes high and shoots in for a takedown but Badges avoids it really well and circles away.

That's one minute gone in the round.
Badges misses with a wild body shot.
Badges cracks a nice hook into Aho's ribs.
Badges throws a looping overhand right but Aho ducks down to avoid it.
Aho drops down looking to force a counter takedown but Badges defends it well.
Badges tries to clinch up but Aho circles away and keeps his distance.
Horrible takedown attempt by Aho or perhaps it was just good defense by Badges, which made it look bad.
Badges works his jab well there, keeping his opponent at a distance.

Badges moves into range and clinches up with Aho.
Badges is pressed up against the cage. Aho has hold of a leg and is looking to drag Badges down to the mat. Badges avoids the attempt though and has circled away. We're back to striking at a distance.
Badges swings for the body but Aho moves out of range.
And Aho tries to counter it with a takedown but Badges pushes his down on his head and steps out.
Aho bobs and weaves well there to avoid the strikes.

That's two minutes gone in the round.
Aho on the wrong end of a nice jab.
Badges has Aho up against the cage in a clinch.

Aho jumps guard.
Aho looking to sweep using the butterfly guard but Badges puts pay to that idea as he passes nicely into half guard.
Aho tries to roll over but Badges keeps him under control.
Aho felt the need to train up his defensive grappling in the buildup to the fight. Presumably he was expecting to be in a difficult position like this, so let's see if he can get out of it.
Aho trying to control but Badges postures up.
We've seen a great period of action over the last minute or so - credit to both fighters for going all out!
Badges wants to stand but Aho has hold of a leg and an arm, so he's trapped for now.

Aho looking for submissions off his back.
Aho looking to work for a kimura from the bottom.

That's three minutes gone in the round.
Aho is looking for a sweep. Badges is wise to his cunning plan and keeps the top position.
Aho actively working from the bottom here.
Aho wants to get back to full guard.
Aho is working for an escape here. He's hooked one of Badges's legs and he's managed to sneak out and take Badges's back!
Aho tries to get the hooks in deep but Badges pushed the leg off.
Badges defending nicely against the rear naked choke attempt.
Badges is staying cool under pressure, defending well against the rear naked choke attempt from his opponent.

That's four minutes gone in the round.
Aho goes for a risky armbar from back mount and it's not paid off. Badges escapes and is now in half guard on top.
Aho looking for submissions off his back.
The crowd thankful this round is nearly over.

Badges decides to stand and escape the position.
And that is the end of the round. The fighters go back to their corners.
Needno Badges dominated that round.
That's time! Badges's corner gives him a slap on the ass as he gets ready to fight.

Badges dips down and scores with a jab to the body.
Badges is really dominating this fight. Is there anything that Aho can do to turn this around?
Badges wings a very wild body shot but it does the job and lands to the midsection.
Needno Badges seems to be the more aggressive standup fighter in this bout.
Badges tries to clinch up but Aho circles away and keeps his distance.
Aho defending well as Badges loads up on a big left hand.
Nice straight punches there by Badges. You know Roy Jones Jr respects the hands of Badges.
Badges throws an uppercut from half a mile away. Aho sees it coming and avoids it easily.
Aho is definitely looking for the counter takedowns here.
Aho tries for a takedown but Badges circles away easily
and Badges counters with a good right hand that lands right on the jaw.
We've had a slow start to the round here - hopefully the action picks up.
Aho slips under a jab from Badges.
Aho scores a trip takedown into side control. Nice.
Badges is positioning himself to get back to half guard.
That's one minute gone in the round.
Aho tries to move to full mount but Badges actually manages to regain half guard.
Aho is trying to work for a kimura. This could be trouble! No, Badges has managed to free his arm - good work.
Niklas Aho has got the better of the ground game so far.
Aho trying to control from half guard but Badges is working away.
Aho is looking for a kimura but he's never going to get it from there.
Badges wants to get back to full guard.
That's two minutes gone in the round.
The crowd are hurling abuse towards the fighters... You can hardly blame them though because there isn't a lot going on in the fight.
Aho is trying for a guillotine from the top but the pressure isn't in the right place so Badges is just riding it out for now. Aho eventually gives up the hold.
Badges is defending against the submission attempts here by Aho.
Aho is looking for a kimura but Badges is holding onto that half guard position, so it's hard for Aho to get the leverage.
Aho is looking for a kimura but Badges is holding onto that half guard position, so it's hard for Aho to get the leverage.
Aho is looking for a kimura. It's going to be difficult to finish that from half guard though and Badges defends it well.
That's three minutes gone in the round.
Aho is thinking about going for an arm triangle but he can't free his leg.
Badges works his way to full guard. Good work.
Aho trying to control the position from guard on top but Badges is wriggling around, looking for whatever he can.
Aho stopping the sweep attempt from Badges.
Aho stands up and looks to throw the legs aside to pass to side control. Badges swivels though and keeps the full guard.
That's four minutes gone in the round.
A lull in the action here being met with boos from the crowd.
Aho preventing the sweep.
Aho wants to pass the guard but Badges is keeping the position.
The referee claps his hands together and tells the fighters to work.

The referee has decided to stand the fighters back up, so we'll restart on the feet.
Badges throws out a token jab with nothing on it.
Aho shoots and misses
and Badges counters with a stiff right hand.
Badges lands an overhand left. A wild punch that just about connected.
Boooooooooooooooooooo!!! God, this has been a terrible round. Come on you two, sort yourselves out!
Badges connects with a looping right hand.
Badges moves in looking to clinch but Aho pushes him off.
Aho is definitely looking for the counter takedowns here.
Badges tries to clinch up.
And that is the end of the round. The fighters go back to their corners.
Needno Badges dominated that second round.
That's time! Back to the action! This is the final round!

Aho shoots in with a takedown attempt and he has Badges pinned against the cage. Badges gets the underhooks and manages to circle away.
Badges throwing a counter right hand but Aho manages to avoid it.
Aho closes the distance and takes a jab right on the nose as he does so.
Badges lands a head shot.
A telegraphed takedown attempt from Aho is defended easily by Badges.
Badges is trying to close the distance and clinch up, after that failed offence from Aho.
We've had a slow start to the round here - hopefully the action picks up.
A cross from Badges lands.
That's one minute gone in the round.
Aho avoids the body shot from Badges.
Badges fakes a head punch and goes low to the body. Nicely done.
Badges throws a body shot but no joy.
Badges wings a very wild body shot but it does the job and lands to the midsection.
Badges connects with a nice looking jab.
Aho bobs and weaves well there to avoid the strikes.
Aho tries a counter takedown but it's more of a dummy move, and he uses it to push himself away.
Badges throws a hook to the body but it doesn't connect.
Aho walks into a jab.
Aho closes the distance and looks for a trip takedown... aaaand he's got it - Aho lands in his opponent's guard.
Badges keeping full guard, as Aho tries to pass.
Niklas Aho has stepped it up - he knows he needs a finish here!
That's two minutes gone in the round.
Badges is trying to control the position but Aho postures up.
Aho wants to control from the top but Badges keeps moving.
Aho stands up and looks to throw the legs aside to pass to side control. Badges swivels though and keeps the full guard.
Aho postures up as if he's going to throw some strikes but drops back for an ankle! Badges is in big trouble! He looks ready to tap! But no, he's escaped and dives on top of Aho, into his guard.

That's three minutes gone in the round.
Aho is looking for a guillotine. You can't force these things though and Badges defends well.
Aho escapes his hips to the side and looks to be working for an armbar. Badges gives him a little smile and shakes his head. No chance.
Needno Badges is fighting for a decision here - he's started to take the cautious approach.
Aho has a loose triangle. He'll be looking to tighten that up but Badges can see exactly what he's planning and manages to posture up and free himself.
Aho is working an open guard here, looking to improve his position. No doubt that will leave him open to counters but at least he's being more offensive.
That's four minutes gone in the round.
A lull in the action here being met with boos from the crowd.
Aho looking for subs off his back but Badges has passed one foot through into half guard.
Aho looking for submissions from an awkward position here.
Aho looking for submissions from an awkward position here.
Boooooooooooooooooooo!!! God, this has been a terrible round. Come on you two, sort yourselves out!
Badges tries to stand and escape but Aho is controlling the position.
And that's the end of the fight!
Needno Badges showed his dominance in that final round.
Well I reckon that's a shut out for Badges, winning every round. Will the judges agree? They are the ones who matter, even if they are often depressingly incompetent. Over to the ring announcer for the scorecards.
Ladies and gentlemen, after 3 rounds of action, we go to the scorecards for a decision.
Judge Richard Clark scores the fight 30:27
Judge Colin Fotheringham scores the fight 30:27
Judge Daniel Bishop scores the fight 30:27
In favor of your winner, by unanimous decision... Needno Badges!
An out of breath and clearly excited Needno Badges thanked Brooklyn Apothecary for their help and support (and free stuff they sent him).
|
|
|
|
|
|
|
|
|
|
|
|
|
|
|
|
|
|
|
|
|
|
|
| S |
C
A |
G |
S |
C
B |
G |
|
S |
C |
G |
|
energy
A | B |
|
hype
A | B |
|
pop
A | B |
|
mgr
A | B |
|
FIGHT
RATING
31% |
|
|
|
|
|
|
