|
|
PBP Commentary |
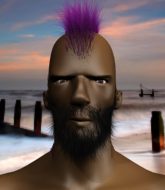
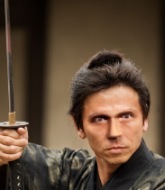
Coming up we have a lightweight MMA rules bout between Klaus Chugman (ranked 2091 p4p, 2365 weight class) and Rounin Hashima (ranked 264 p4p, 296 weight class). On his way into the ring it seems that Klaus Chugman has been attacked by a crazed fan! It looks like it might have been the just bleed guy! Luckily Klaus Chugman seems to be OK! I thought that lunatic was in prison!?
 |
|
 |
| 150 cm
41
130
34 - 32 - 0 |
|
170 cm
27
135
12 - 13 - 0 |
BJJ Red Belt
World class boxer
Insanely flexible |
|
Olympic wrestler
World class MT
Good gas tank |
|
| |
|
Ladies and gentlemen. This fight is 3 rounds, in the lightweight division.
Introducing the fighter to my left, fighting out of the red corner.
With a record of 34 - 32 - 0, fighting out of Los Angeles, Klaus Chugman!
And introducing the fighter to my right, fighting out of the blue corner.
With a record of 12 - 13 - 0, fighting out of London, Rounin Hashima!
The judges for this bout are Percy O'Donnell, Jack Bonds and Don Winkell.

The bell rings for round one and we are underway!
Chugman shoots and misses
and Hashima cracks him with a counter punch right on the button.
Hashima waving his hands out in front of him, looking to distract Chugman.
Hashima throws a hook but Chugman blocks it.
Hashima throws a body punch but Chugman moves out of range.
Hashima throws a chopping leg kick but Chugman manages to avoid taking any serious damage.
Chugman drops down looking for a counter takedown but Hashima sprawls and moves away.
Hashima misses the shot to the body.
Hashima fakes a jab and scores with a low kick.
Hashima throws a shot from downtown. Chugman moves away and avoids it.
Hashima avoids the clinch attempt nicely.
We've had a slow start to the round here - hopefully the action picks up.
Chugman shoots in with a takedown attempt and he has Hashima pinned against the ropes. Hashima gets the underhooks and manages to circle away.
Hashima tries to land with a swinging hook to the body but Chugman was well out of range. Poor timing from Hashima.

That's one minute gone in the round.
No joy there for Hashima, who threw a few shots but didn't land.
The fighters circling - Hashima throws out the jab but it was never going to land.
Rounin Hashima seems to be the more aggressive standup fighter in this bout.
Hashima bobs and weaves and unloads with a good uppercut.
Chugman fails with the takedown.
That's three failed takedown attempts in the round for Klaus Chugman. That's going to take a lot out of him.
Chugman avoids the body shot from Hashima.
Hashima misses with a wild body shot.
Chugman changes levels looking for a counter takedown but doesn't commit.
The sound of bone on bone echoes around the arena as Chugman checks a leg kick.
A looping hook to the body misses from Hashima. Chugman does a little dance to reset his feet.
Hashima lands a leg kick that knocks Chugman off balance momentarily.
Hashima looks to land a body kick but Chugman moved away.
Chugman avoids the body shot from Hashima.
Chugman changes levels looking for a counter takedown but doesn't commit.

That's two minutes gone in the round.
Chugman fakes high and shoots in for a takedown but Hashima avoids it really well and circles away.
Chugman shoots and misses
and Hashima counters with a crisp hook to the side of the head.
Chugman tries to score a power double leg takedown but Hashima sees that one coming and sprawls well. That will dishearten Chugman somewhat.
Chugman swings and misses with a hook to the body.
Chugman displays some good footwork, moving neatly out of range as Hashima throws out the jab.
Chugman slips under a jab from Hashima.
Hashima throws a jab when Chugman was well out of range.
Chugman tries to counter with a takedown but Hashima is quick to defend against it.

That's three minutes gone in the round.
Well, he's not going to score with shots like that. A lazy body kick attempt from Hashima.

Chugman has taken the fight to the clinch.
Hashima throws a punch but it's blocked by Chugman.
A head punch blocked on the inside by Chugman.
Hashima misses with a short punch on the inside.
A head punch on the inside from Hashima fails to land.
Chugman stalling in the clinch but Hashima improves position.
Hashima doesn't land with the attempted body shot.
Chugman is stalling here.
Chugman tries to jump guard but he falls flat on his backside. Hashima smiles and moves away.
Hashima swings away with a leg kick that misses.
A low kick lands for Hashima.
Chugman tries to clinch there but Hashima circles away.
Hashima throws out a counter right but Chugman avoids it with no problem.
Hashima throws a feint and then finishes with a kick to the body.

That's four minutes gone in the round.
Chugman moves to clinch but Hashima breaks away
and Hashima counters with a nice low kick that buckles Chugman's knee momentarily.
Hashima just misses with a punch to the body.
Chugman half commits to a counter takedown before pushing away, out of range.
Hashima jabbing away but nothing is landing.
Chugman darts in and clinches Hashima up against the ropes.
A head punch on the inside from Hashima fails to land.
Chugman blocks a body shot from Hashima.
Chugman goes for a body shot but it's blocked.
Hashima swings away with an uppercut that misses.
Hashima tries a body shot but Chugman blocks it.
Hashima has a couple of punches blocked by Chugman.
We've seen a great period of action over the last minute or so - credit to both fighters for going all out!
Chugman has Hashima pressed up against the ropes and is working for takedown. Hashima manages to improve position though and keeps the fight standing.

Chugman pulls guard.
Hashima is taking a break and basically stalling. The referee will not allow him to do that for long.
Chugman tries to land a sweep but no joy.
And that is the end of the round. The fighters go back to their corners.
Rounin Hashima dominated that round.
That's the end of the round. The referee orders the cornermen out of the ring so we can get back down to business.

Chugman closes this distance looking for a takedown but Hashima circles away.
A nice leg kick lands there from Hashima.
Hashima misses with a head kick.
Chugman attempts a counter takedown but Hashima avoids it well and moves away.
Hashima thuds a left hand into Chugman's body.
Hashima lands a straight punch to the body, keeping Chugman at a distance.
Chugman defending well as Hashima loads up on a big left hand.
A big left from Hashima misses.
Chugman feinted with a counter takedown.
Hashima ducks down and throws a hook to the body but Chugman moves away.
We've had a slow start to the round here - hopefully the action picks up.
Chugman keeping a good distance there, avoiding the body shot.
Chugman feinted with a counter takedown.
Hashima motions for Chugman to come forward. Hashima throws a leg kick but it misses it's target.
Chugman changes levels looking for a counter takedown but doesn't commit.
Chugman has closed the distance and engaged Hashima in a clinch.
Hashima lands with a good tight uppercut to the head.
That's one minute gone in the round.
Hashima tries to throw a body punch but Chugman avoids it by throwing Hashima back against the ropes.
Hashima gets through Chugman's defenses to land a nice punch to the side of the head.
Hashima can't find room to land a body shot as Chugman controls the action.
Hashima lands with a short punch from the clinch.
Hashima prevents the takedown attempt.
A head punch on the inside from Hashima fails to land.
Chugman looking for a takedown.
That's three failed takedown attempts in the round for Klaus Chugman. That's going to take a lot out of him.
Chugman blocks a punch to the side of the head.
Chugman tries to pull guard but Hashima won't allow it.
Hashima misses with the head strike.
Hashima lands with a short head shot on the inside.
Hashima misses with a hook to the ribs.
Chugman goes for a takedown attempt but Hashima pushes him away and we're back to fighting at a distance.
Chugman takes an uppercut right on the button but keeps his composure.
That's two minutes gone in the round.
A low kick from Hashima is predictable there
and Chugman counters with a takedown into side control.
We've seen a great period of action over the last minute or so - credit to both fighters for going all out!
Hashima is positioning himself to get back to half guard.
Hashima taking punishment in the form of punches.
Hashima takes a big shot right to the temple there but he's taken it well.
Hashima can't do much from the bottom here.
Hashima parries the strikes from Chugman easily there. Chugman is wary of posturing up too much because it might enable Hashima to escape.
Hashima gets one leg under and gets the fight to half guard.
Hashima wants to get back to his feet.
We've been hearing that Chugman has been drilling a lot of ground and pound in training, so let's see if he get the finish.
Hashima is controlling Chugman's trapped leg to prevent Chugman from advancing to side control.
The fighters are starting to perspire pretty heavily.
Chugman is working hard to pass the guard. He's done it - he's now in full mount! Trouble for Hashima!
That's three minutes gone in the round.
Chugman cracks Hashima with a nasty head shot there - the crowd let out an audible gasp there, as the noise reverberated around the arena.
Hashima tries to reverse the position but Chugman maintains control.
Hashima keeps trying to improve his position.
Chugman has his opponent pinned against the ropes, landing some nasty ground and pound that is really making a bit of a mess out of Hashima's face.
Hashima tries to reverse the position but Chugman maintains control.
Chugman landing punches.
Hashima tries to hold on but Chugman pushes him away.
Hashima might have to switch it up a bit here because his efforts to control Chugman haven't been going to plan, at least at the current moment in time.
Hashima bucks up and manages to get a nice reversal! He's in guard on the top - nicely done!
Hashima advances to half guard.
That's four minutes gone in the round.
Hashima tries to stand but his hand is stuck under Chugman.
Chugman wants to sweep but Hashima has passed to side control!
Hashima tries to advance to mount but Chugman denies him.
Klaus Chugman overall seems to be getting the better of the ground position in the fight so far.
You can see the frustration on Chugman's face, being in this tough position on the bottom.
We've seen a great period of action over the last minute or so - credit to both fighters for going all out!
Chugman is looking to regain half guard here but Hashima keeps moving and retains side control.
Hashima wants to control but Chugman is keeping him busy.
Chugman is trying to get back to half guard.
And that is the end of the round. The fighters go back to their corners.
Rounin Hashima showed his class in that round. I'd imagine he'll take it on all the scorecards.
That's time! Back to the action! This is the final round!

Chugman steps to the side to avoid the strikes from Hashima.
Chugman attempts a counter takedown but Hashima avoids it well and moves away.
Hashima is looking to slow Chugman down with leg kicks.
Hashima throws a body kick that sends a sickening thudding noise reverberating around the arena.
Hashima throws a hard body shot but it just misses.
Chugman drops down looking for a counter takedown but Hashima sprawls and moves away.
Hashima has been the more effective fighter overall so far.
A looping hook to the body misses from Chugman. Hashima does a little dance to reset his feet.
Chugman avoids a lazy jab quite easily.
Hashima throws an uppercut from half a mile away. Chugman sees it coming and avoids it easily.
Chugman shoots in and bounces Hashima off the ropes to secure the takedown into guard.
We've had a slow start to the round here - hopefully the action picks up.
Hashima wants to stand but Chugman is controlling the position.
Hashima trying to control the position.
That's one minute gone in the round.
Chugman has been looking to land a fair amount of strikes on the ground. He might be looking to soften his opponent up in order to work for a submission.
Chugman trying to control but Hashima is working from the bottom.
Hashima trying to control the position.
Chugman throws an elbow that misses. Hashima uses the momentum to reverse the position. He's now in Chugman's guard. Nice move by Hashima!

Chugman trying to keep a closed guard but Hashima is proving a slippery customer.
Hashima trying to control but Chugman is working from the bottom.
Chugman wants to sweep here but Hashima controlling him for the moment.
Hashima must be cautious of submissions here, given that his opponent has the superior Jiu Jitsu.
That's two minutes gone in the round.
A lull in the action here being met with boos from the crowd.

Chugman is looking for a guillotine. You can't force these things though and Hashima defends well.
Hashima controlling from the top position.
Hashima is continuing to stall.
Chugman pulls Hashima in to control the position.
That's three minutes gone in the round.
Chugman working from the bottom, still in full guard. He's managed to get a loose triangle. Hashima doesn't seem to be doing much to defend here, obviously he feels comfortable in the position. Hashima manages to throw the legs off his shoulder and he's back into guard - no problem.
Hashima wants to control from the top but Chugman keeps moving.
Chugman looking for a guillotine here but Hashima defends easily.
The fighters are trapped in the ropes so we're going to have a reposition here. The ref calls for a break and repositions the fighters in the center of the ring.
Chugman wants to control here, rather than go for any submissions from the bottom. At least for now.
Chugman is working from a closed guard but he's struggling to control his opponent.

The ref stands the fighters back up due to a lack of activity.
Rounin Hashima is fighting for a decision - hopefully he's judged it right and he's actually winning the fight.
That's four minutes gone in the round.
Neither fighter has done anything of merit for a good minute or two here and the crowd are not happy about it.
Chugman drives through with a takedown into Hashima's guard. Let's see what he can do from the top position.
Chugman content to strike from guard, landing some decent shots.
Hashima is trying to keep Chugman in close.
Hashima wants to control but Chugman passes easily into half guard.
Hashima wants to control but Chugman is keeping busy and won't allow it.
Hashima felt the need to train up his defensive grappling in the buildup to the fight. Presumably he was expecting to be in a difficult position like this, so let's see if he can get out of it.
Chugman is looking for a kimura but Hashima is holding onto that half guard position, so it's hard for Chugman to get the leverage.
Hashima is refusing to be controlled, as Chugman sits in half guard.
Boooooooooooooooooooo!!! God, this has been a terrible round. Come on you two, sort yourselves out!
Hashima keeps control of the position for the meantime.
Klaus Chugman has stepped it up - he knows he needs a finish here!
Chugman missing with the ground and pound from half guard.
And that's the end of the fight!
Klaus Chugman showed his dominance in that final round.
I think Hashima has won this one but let's see whether the judges agree with me. Over to the ring announcer for the scorecards.
Ladies and gentlemen, after 3 rounds of action, we go to the scorecards for a decision.
Judge Percy O'Donnell scores the fight 28:29
Judge Jack Bonds scores the fight 28:29
Judge Don Winkell scores the fight 28:29
In favor of your winner, by unanimous decision... Rounin Hashima!
Rounin Hashima was full of energy after the big win and talked about how he thinks he can do big things in this sport. The crowd were appreciative of his determination to succeed.
|
|
|
|
|
|
|
|
|
|
|
|
|
|
|
|
|
|
|
|
|
|
|
| S |
C
A |
G |
S |
C
B |
G |
|
S |
C |
G |
|
energy
A | B |
|
hype
A | B |
|
pop
A | B |
|
mgr
A | B |
|
FIGHT
RATING
38% |
|
|
|
|
|
|
