|
|
Stepping Stone 44 PBP Commentary |
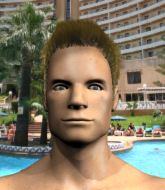
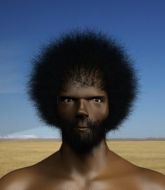
This TWGC bout is 1 fifteen minute round in the super heavyweight division. Introducing today's competitors. In the red corner, competing out of Las Vegas, with a TWGC record of 4 wins and 3 losses; Jackson Hole! And in the blue corner, fighting out of Rio de Janeiro, with a TWGC record of 6 wins and 5 losses; Barthelemy Boganda!
The judges for this bout are Dean Styles, John Kavanagh and David Schapiro.
The official calls the fighters to the middle and the contest is under way.

Hole moves into range and clinches up with Boganda.
Boganda goes for a takedown attempt but Hole pushes him away and we're back to fighting at a distance.
Boganda shoots in for a takedown but doesn't get it.
Boganda tries to keep at a distance but Hole has taken the fight into the clinch.
Hole is trying to drag Boganda to the mat but Boganda just about manages to keep his footing. He used the cage to his advantage there.

Boganda lands a takedown into guard.
Score +2 for takedown into guard / half guard: Hole (0) vs (2) Boganda
Hole looking to sweep here. No luck so far.
Boganda trying to control but Hole is working from the bottom.
We've had a slow start to the round here - hopefully the action picks up.
Hole is working an open guard here, looking to improve his position. No doubt that will leave him open to counters but at least he's being more offensive.
Boganda trying to control but Hole is working from the bottom.
Hole might be looking to lock onto one of his opponent's long limbs for a submission, whilst we're on the ground.

That's one minute gone in the round.

Boganda thinks about going for a leg but decides against it, in order to maintain the position.
Hole not looking particularly offensive just at the moment.
Hole tries to land a sweep but no joy.
The fighters are pressed up against the cage, both looking to find a bit of space to work.
Boganda wants to control from the top but Hole keeps moving.
Hole has his hands on Boganda's head, controlling the position.
Hole keeping moving, preventing Boganda from controlling successfully.
Hole looking for a sweep. Not yet Hole, not yet.
Hole has Boganda pulled in close to control his posture.
The ref warns both fighters not to hold the cage as they work up against the meshing.
Boganda stands and throws Hole's legs to the side, diving into side control. Score +3 for passing guard: Hole (0) vs (5) Boganda

That's two minutes gone in the round.
Hole can't do much from the bottom here.
Boganda advances to full mount. Score +2 for reaching mount: Hole (0) vs (7) Boganda
Boganda wants to finish this one by submission but Hole is holding onto his waist, trying to prevent any attacks from Boganda.
The fighters are starting to get a bit slippery now, which will make submissions a bit more difficult.
Hole slips a leg in and gets back to half guard.
Hole wants to improve his position but Boganda is controlling well.
Boganda is working for a submission of some sort.
Boganda controlling the action here.
Hole is looking to improve his position.

That's three minutes gone in the round.
Hole controlling the leg, holding on to half guard.
Boganda wants to lay and pray for a moment but Hole keeps working.
Hole wants to improve his position but Boganda is controlling well.
Well, if Boganda is going to just lie there, perhaps we should talk about what we're having for dinner tonight� I'm having a ham and pineapple pizza� Yum. Can't wait.
Boganda seems to be looking for submissions.
Hole is working for an escape here. He's hooked one of Boganda's legs and he's managed to sneak out and take Boganda's back! Score +4 for clean sweep to past guard: Hole (4) vs (7) Boganda
Boganda tries to break free.
Hole could do with losing a few pounds - he looks very soft around the mid section, to put it politely.
Hole is controlling his opponent, waiting for an opportunity to finish.

That's four minutes gone in the round.
Boganda wants to control his opponent's hands but Hole gets his hands free.
Boganda tries to roll but Hole sticks to his back.

Boganda preventing the rear naked choke attempt from Hole.
Boganda can't escape the position.
Hole controls the position.
Boganda is trying to break free.

That's five minutes gone in the round.
Boganda breaks Hole's hooks off and manages to turn into his guard.
Score +2 for sweep to guard / half guard: Hole (4) vs (9) Boganda
Boganda is stalling in the full guard.
Boganda works a leg free and moves into half guard.
Hole wants to improve his position but Boganda is controlling well.
Hole is refusing to be controlled, as Boganda sits in half guard.
My spies in Alpha Brasil inform me that Boganda has been getting involved in the gym's BJJ sparring sessions. Let's see whether that pays dividends!
Hole makes his way to full guard. A much better position for Hole.
Boganda controlling from the top position.
Boganda sneaks a leg through and gets to half guard. That was like a knife through butter how easily he passed Hole's guard.
Boganda is keen to just control but Hole is a slippery customer.
Hole trying to control but Boganda postures up.

That's six minutes gone in the round.
Hole tries to get to full guard but Boganda has control of the leg.
Boganda wants to pass the guard but Hole is defending well.
Boganda works his foot free and advances to mount. Score +3 for passing guard: Hole (4) vs (12) Boganda
Boganda fails to advance to Hole's back.
Boganda trying to control but Hole is having none of it.
Boganda might have to switch it up a bit here because his efforts to control Hole haven't been going to plan, at least at the current moment in time.
Hole is wriggling around trying to escape.

That's seven minutes gone in the round.
Boganda can't quite control the action as he would like just now, as Hole is looking to escape.
Boganda with some aggressive grappling here. He's looking for submissions here, rather than waiting for the opportunity to counter.
Hole can't escape the position.
Hole is squirming around, avoiding Boganda's attempts to control the action.
Hole is wriggling around trying to escape.
Hole slips a leg in and gets back to half guard.
Hole works his way to full guard. Good work.
Hole looking to hit a scissor sweep but Boganda is one step ahead there.
Boganda trying to control the position from guard on top but Hole is wriggling around, looking for whatever he can.

That's eight minutes gone in the round.
Boganda stands up and looks to throw the legs aside to pass to side control. Hole swivels though and keeps the full guard.
Hole wants to improve his position but instead Boganda has moved into half guard.
Hole is defending against the submission attempts here by Boganda.
Hole makes his way to full guard. A much better position for Hole.
Boganda wants to control from the top but Hole keeps moving.
Hole has his foot on Boganda's thigh. He's trying to push off and get in position for a triangle, I think. Boganda works his way back into a safe position though.
Boganda wants to control from the top but Hole keeps moving.

That's nine minutes gone in the round.
Boganda is in a good position here but he's just trying to control... And he's not even managing to do that successfully.
Boganda wants to pass the guard but Hole is keeping the position.
Boganda is pushing down on Hole's leg trying to pass to half guard. Hole is fighting to maintain full guard but Boganda has managed to sneak the leg through.
Boganda looking for a kimura but he'll have to free his other leg if he wants to finish that. Perhaps he's just using it as a distraction technique.
Boganda is trying to control. Hole wants to improve his position but can't escape this time.
Boganda is trying to work for a kimura. This could be trouble! No, Hole has managed to free his arm - good work.
Boganda is working hard to pass the guard. He's done it - he's now in full mount! Trouble for Hole! Score +3 for passing guard: Hole (4) vs (15) Boganda

That's ten minutes gone in the round.
Boganda looking to control but Hole is working nicely, looking to advance position himself.
Hole regains half guard.
Hole is doing well to control the position and prevent Boganda from advancing to side control.
Hole makes his way to full guard. A much better position for Hole.
Hole looking to hit a scissor sweep but Boganda is one step ahead there.
Boganda passes Hole's left leg - he's now in half guard.
Hole is not content to let Boganda control the position.
Boganda prevents Hole from improving his position.

That's eleven minutes gone in the round.
Boganda is looking to take a break and control but Hole is keeping him honest, looking to work from the bottom.
The fighters are battling for position here. Hole manages to regain full guard. Nice work.
Hole has Boganda pulled in close to control his posture.
Boganda wants to control from the top but Hole keeps moving.
Hole looking for a sweep. Not yet Hole, not yet.
Boganda is pushing down on Hole's leg trying to pass to half guard. Hole is fighting to maintain full guard but Boganda has managed to sneak the leg through.
The referee calls for the fighters to work.
Boganda is keen to just control but Hole is a slippery customer.
Hole is looking for a sweep. Boganda is wise to his cunning plan and keeps the top position.
Boganda seems very keen to just sit and control from half guard but Hole does not like that idea so much and is remaining active off his back.
Boganda seems to be looking for submissions.

That's twelve minutes gone in the round.
Hole gets full guard.
Hole lands a beautiful sweep and he's now moved into his opponent's guard. Score +2 for sweep to guard / half guard: Hole (6) vs (15) Boganda
Boganda can't do much from the bottom at the moment, as Hole controls the pace.
Boganda looking for submissions off his back, moving his hips, looking for an opening.
Hole stands up and looks to throw the legs aside to pass to side control. Boganda swivels though and keeps the full guard.
Hole trying to control the position from guard on top but Boganda is wriggling around, looking for whatever he can.
Hole won't allow Boganda to sweep him here.
Boganda working from the bottom, still in full guard. He's managed to get a loose triangle. Hole doesn't seem to be doing much to defend here, obviously he feels comfortable in the position. Hole manages to throw the legs off his shoulder and he's back into guard - no problem.
Boganda has his foot on Hole's thigh. He's trying to push off and get in position for a triangle, I think. Hole works his way back into a safe position though.

That's thirteen minutes gone in the round.
Boganda is working an open guard here, looking to improve his position. No doubt that will leave him open to counters but at least he's being more offensive.
Hole is intent on slowing down the pace of the fight, simply looking to control.
Boganda is trying to control the position from the bottom.
Boganda being controlled here, momentarily.
Hole wants to pass the guard but Boganda is keeping the position.
Boganda is trying to control the position but Hole postures up.
Hole tries to free his leg and advance position but Boganda is retaining full guard.
Boganda not looking particularly offensive just at the moment.
Hole avoids a guillotine attempt easily.
Hole postures up.

That's fourteen minutes gone in the round.
Hole is frustrating his opponent with some stalling tactics from top position.
Boganda working from the bottom, still in full guard. He's managed to get a loose triangle. Hole doesn't seem to be doing much to defend here, obviously he feels comfortable in the position. Hole manages to throw the legs off his shoulder and he's back into guard - no problem.
Hole showing good wrestling skills to control the position.
Boganda working for a triangle but Hole defends it easily.
Boooooooooooooooooooo!!! God, this has been a terrible round. Come on you two, sort yourselves out!
Hole is intent on slowing down the pace of the fight, simply looking to control.
Boganda looking for submissions off his back, moving his hips, looking for an opening.
And that's the end of the fight!
Boganda wins on points by 15 to 6.
An out of breath Barthelemy Boganda thanked his loyal fans in his post fight interview, giving them credit for his success over the course of his career. |
|
|
|
|
|