|
|
PBP Commentary |
Coming up we have a heavyweight MMA rules bout between Zahn Dingo (ranked 704 p4p, 1193 weight class) and Ryder Young (ranked 103 p4p, 161 weight class). Young comes into a darkened arena with his song building. Of Monsters and Men - Destroyer kicks in, the lights come on and the crowd goes wild! What a showman! I can't wait for this one - let's get the fighter introductions out of the way and get this one started!
 |
|
 |
| 198 cm
28
265
11 - 5 - 0 |
|
197 cm
28
275
8 - 3 - 0 |
BJJ White Belt
Excellent boxer
Granite chin |
|
Decent wrestler
Excellent boxer
Good gas tank |
|
| |
|
Ladies and gentlemen. This fight is 3 rounds, in the heavyweight division.
Introducing the fighter to my left, fighting out of the red corner.
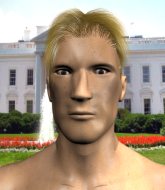
With a record of 11 - 5 - 0, fighting out of Las Vegas, Zahn Dingo!
And introducing the fighter to my right, fighting out of the blue corner.
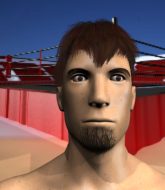
With a record of 8 - 3 - 0, fighting out of Sydney, Ryder Young!
The judges for this bout are James Ackerman, Colin Fotheringham and Daniel Bishop.

The bell rings for round one and we are underway!
An inside leg kick from Dingo misses.
Dingo avoids the clinch attempt nicely.

Young drives through and clinches with Dingo against the cage.
Dingo lands a body punch in the clinch.
Dingo misses with some punches.
Dingo misses with a punch to the body.

Young jumps into guard, dragging Dingo to the mat.
Dingo tries to stand but Young is controlling from the bottom.
We've had a slow start to the round here - hopefully the action picks up.
Young is adopting a defensive guard.
Dingo wanted to stand there but Young had control of the position.

That's one minute gone in the round.
Young has a closed guard, preventing anything of note from happening. Perhaps he's looking to stall.

The referee decides to stand the fighters back up.
We've been told by Dingo's head coaches at The Jungle Room that he's been working on his takedown defense in preparation for this fight.
Dingo throws out a loose jab but Young uses good head movement to avoid it.
Young lets it all go there with a big combo counter but none of the punches connected.
Young shoots in for a takedown but Dingo shows good takedown defense.
Young displays some good footwork, moving neatly out of range as Dingo throws out the jab.
Young tries to clinch but is not successful on this occasion.
Dingo lands with a good body shot.
Nice sprawl there from Dingo as Young shoots in.
Young moves away from the strike by Dingo.
Young looked like he wanted to counter with a punch but didn't throw it.
Dingo tests Young's chin there with a solid looking shot.
Dingo misses with a few strikes there.
Young wants to clinch up but Dingo keeps it at a distance.
Dingo swung with a counter right hand that didn't connect.
Young gets to the clinch - let's see what his plan is here.
Dingo lands a right uppercut that snaps the head of Young backwards.
Young has Dingo pressed against the cage, preventing Dingo from circling away and getting back to striking at range.

That's two minutes gone in the round.
Young fails to pull guard.
Zahn Dingo has stuffed three takedown attempts in the round now. That's going to take a lot out of Ryder Young.
Young tries to throw a body punch but Dingo avoids it by throwing Young back against the cage.
Young scores with a shoulder strike.
Young swings away with an uppercut that misses.
A short right from Young on the inside.
We've seen a great period of action over the last minute or so - credit to both fighters for going all out!
Dingo tries to work over Young's body with a swooping hook but it only glances the target.
Young taking a breather.
Dingo swings wildly with an uppercut but Young uses good head movement to avoid it.
Young blocks a body shot from Dingo.
Young blocks a punch to the side of the head.
Dingo misses with a shot to the kidneys.
Dingo wants to break free but Young has control.
Young blocks a punch to the side of the head.
A head punch blocked on the inside by Young.
Young wants to take the fight to the mat but Dingo manages to get underhooks and keep the fight in the clinch.
Dingo blocks an uppercut.

That's three minutes gone in the round.
Still in the clinch, Young scores with a nice short uppercut.
A short left from Young.
Young has dropped down and is looking to force the takedown but it's defended by Dingo after a bit of a struggle.
Young blocks a couple of punches on the inside.
Young looks more muscular than last time we saw him. He must have been on the weights.
Young working some nice short punches in the clinch.
Dingo misses with a shot to the kidneys.
Dingo misses with a hook from the clinch.
Dingo lands a hook to the body. It's hard to tell if that hurt Young or not.
Young drags the fight down to the ground.
Young manages to sweep nicely, so he's now on top. Dingo manages to get himself to full guard.

Young is taking a break and basically stalling. The referee will not allow him to do that for long.
Dingo is looking to sweep but instead, Young has passed into half guard.
Young with a momentary lay and pray from half guard.

That's four minutes gone in the round.
The fighters are pressed up against the cage, both looking to find a bit of space to work.
And that is the end of the round. The fighters go back to their corners.
A close round but Ryder Young will probably get the nod.
The fighters get back to their feet, the hooter sounds and we're back to the action!

Young drives through and clinches with Dingo against the cage.
Young decides to pull guard.
Dingo trying to stand up but can't free himself from Young's guard.
Young bucks up whilst keeping hold of a body lock, managing to reverse the position. Now he's in top in Dingo's guard.
We've had a slow start to the round here - hopefully the action picks up.
Young seems content to control from guard here. He's going to have to remain active though if he doesn't want to get stood back up.
That's one minute gone in the round.
Dingo keeping full guard, as Young tries to pass.
Young is intent on slowing down the pace of the fight, simply looking to control.
Dingo can't keep his opponent in guard - Young advances to half guard, no doubt looking to mount.
The ref warns both fighters not to hold the cage as they work up against the meshing.
Young keeping composed on the top, looking to control the action.
Dingo is doing well to control the position and prevent Young from advancing to side control.
Neither fighter is being very active at the moment, with Young in particular looking to stall.
That's two minutes gone in the round.
The crowd are hurling abuse towards the fighters... You can hardly blame them though because there isn't a lot going on in the fight.
Young wants to pass to mount but Dingo is defending the position.
Neither fighter is being very active at the moment, with Young in particular looking to stall.
The referee has decided to stand the fighters back up, so we'll restart on the feet.
Young has been the more effective fighter overall so far.
Young tries to drive through with a takedown attempt but Dingo defends well and Young ends up having to push Dingo into the cage where they will battle it out in the clinch.
Dingo lands a nice shot that snaps Young's head back.
Young fakes with an overhand right and moves in to clinch with Dingo, pushing him back against the cage.
That's three minutes gone in the round.
The pace really dropping off here, momentarily.
Young gets control of Dingo's arms and successfully pulls guard. Young will no doubt be looking for submissions off his back.
Dingo wants to stand and escape but instead Young has hit a sweep and he's now on top in guard.
Young controls from within his opponent's guard.
Young's corner are shouting for him to control the position and he seems happy to oblige.
Young stops Dingo from standing up.
That's four minutes gone in the round.
Young controlling from the top position.
Boooooooooooooooooooo!!! God, this has been a terrible round. Come on you two, sort yourselves out!
And that is the end of the round. The fighters go back to their corners.
Ryder Young showed his class in that round. I'd imagine he'll take it on all the scorecards.
The corners get their ten second warning. Both fighters stand from their stools and stare each other down, ready to get back to the action. This is the final round!

Young looks for a takedown but Dingo sprawls well.
Dingo throws a leg kick but Young sees it coming and moves out of range.
Young shoots in for a takedown. He's persisting with it as Dingo sprawls well. Dingo wins this battle and keeps the fight standing. Young gets slowly back to his feet.
Young shoots in but doesn't get the takedown
and Dingo counters with a two punch combo.
Zahn Dingo has stuffed three takedown attempts in the round now. That's going to take a lot out of Ryder Young.
Young walks into a straight right hand from Dingo.
Dingo just misses with a punch to the body.
Young throws out a counter right but Dingo avoids it with no problem.
Ryder Young is looking to throw some combinations by the looks of things.
Young fails to land the takedown.
We've had a slow start to the round here - hopefully the action picks up.
Dingo defends well against a solid takedown attempt from Young.
It looked like Dingo wanted to counter with a hook but didn't fully commit.
Young takes a big intake of breath there - he's definitely tired.
Dingo connects with a crisp jab.
Young moves out of range of the strikes.
Zahn Dingo seems to be the more aggressive standup fighter in this bout.
Dingo circles away from the clinch attempt.
That's one minute gone in the round.
Young misses with a takedown
and Dingo counters with a lovely straight right hand!
A cross from Dingo lands.
Young fails with a takedown attempt from distance.
Dingo misses with a body shot
and Young counters with a three punch combo that has Dingo backing up. Dingo nods at Young to acknowledge the strikes.
Young takes a punch to the jaw and another one to the bread basket.
Dingo misses with a wild combination.
Dingo throws a chopping leg kick but Young manages to avoid taking any serious damage.
Dingo thuds his right hand into Young's forehead from close range. That could be painful for both fighters.
Young has managed to clinch.
We've seen a great period of action over the last minute or so - credit to both fighters for going all out!
Dingo tries to circle away but Young has him pinned against the cage.
A short left from Young.
Young tried to land a shot to the body but connects with Dingo's elbow.
Young misses with a short punch on the inside.
Dingo goes for a body shot but it's blocked.
That's two minutes gone in the round.
Dingo misses with a hook to the ribs.
Young prevents a body shot from Dingo.
Young is trying to stall.
Dingo tries to break free but Young pushes him back against the cage.
Ryder Young seems to be working more effectively in the clinch in the fight so far.
Young blocks an uppercut.
Dingo looks like he'd prefer to be striking at range right now.
Dingo misses with a hook to the ribs.
Ryder Young is fighting for a decision - hopefully he's judged it right and he's actually winning the fight.
Young tries to take the fight to the ground by pulling guard but can't manage it.
Young has managed to pull guard. Let's see whether he can work an aggressive guard. It will also be interesting to see what tactics Dingo uses from the top position.
Zahn Dingo has stepped it up - he knows he needs a finish here!
Young pulls Dingo in close to prevent any damage.
Dingo would like to get this fight back to the feet but can't get free from the closed guard.
Dingo has to be careful here, sitting in the guard of a superior BJJ player.
That's three minutes gone in the round.
Young looking to control the pace of the fight rather than finish it.
Dingo working some ground and pound from guard but it's not doing any damage.
Young pulls Dingo in to control the position.
Dingo has decided he wants to stand but the closed guard of Young is proving hard to escape from.
Dingo trying to land body shots but he keeps hitting the mat.
Ryder Young has got the better of the ground game so far.
Young lands a beautiful sweep and he's now moved into his opponent's guard.
Dingo wants to sweep here but Young controlling him for the moment.
Young engaging in some classic timewasting tactics.
That's four minutes gone in the round.
A lull in the action here being met with boos from the crowd.

Young stands up from guard. Let's bang!
Young shoots in for a takedown but Dingo shows good takedown defense there and keeps this one on the feet.
Young fails with a takedown attempt.
And that's the end of the fight!
Zahn Dingo showed his dominance in that final round.
I think Young has won this one but let's see whether the judges agree with me. Over to the ring announcer for the scorecards.
Ladies and gentlemen, after 3 rounds of action, we go to the scorecards for a decision.
Judge James Ackerman scores the fight 28:29
Judge Colin Fotheringham scores the fight 28:29
Judge Daniel Bishop scores the fight 28:29
In favor of your winner, by unanimous decision... Ryder Young!
Ryder Young gave a mention to Highland Clothing in his post fight interview. That will please them (and hopefully generate some sales).
|
|
|
|
|
|
|
|
|
|
|
|
|
|
|
|
|
|
|
|
|
|
|
| S |
C
A |
G |
S |
C
B |
G |
|
S |
C |
G |
|
energy
A | B |
|
hype
A | B |
|
pop
A | B |
|
mgr
A | B |
|
FIGHT
RATING
33% |
|
|
|
|
|
|
