|
|
PBP Commentary |
Coming up we have a bantamweight MMA rules bout between Sonny Barella (ranked 3672 p4p, 23759 weight class) and Tim Riggins (ranked 198 p4p, 257 weight class). These two fighters really are very evenly matched on the feet - it will be fascinating to see who can assert themselves in that aspect of the fight.
 |
|
 |
| 167 cm
24
135
4 - 9 - 0 |
|
180 cm
22
140
2 - 3 - 0 |
Powerful takedowns
Excellent boxer
Cardio machine |
|
BJJ Brown Belt
Decent boxing
Good gas tank |
|
| |
|
Ladies and gentlemen. This fight is 3 rounds, in the bantamweight division.
Introducing the fighter to my left, fighting out of the red corner.
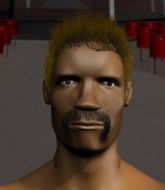
With a record of 4 - 9 - 0, fighting out of Helsinki, Sonny Barella!
And introducing the fighter to my right, fighting out of the blue corner.
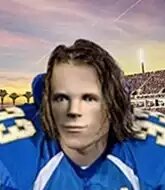
With a record of 2 - 3 - 0, fighting out of Las Vegas, Tim Riggins!
The judges for this bout are Wesley Smith, Frank Dennis and Stewart Dunkirk.

The bell rings for round one and we are underway!
Riggins swats away the attempt to clinch by Barella.
Barella moving in and out of range nicely, whilst landing the scoring shot.

Barella closes the distance, clinches up and gets a nice trip takedown into side control. Very smooth.
Barella trying to control the position but Riggins is working away.
Riggins is looking to regain half guard here but Barella keeps moving and retains side control.
Riggins manages to get back to half guard.

Barella is trying a forearm choke� I don't think that's going to do much at this level of the game.
Barella takes advantage of the dominant position to land a couple of big hammer fists.
Barella is trying to work for a kimura. This could be trouble! No, Riggins has managed to free his arm - good work.
Barella seems to be looking for submissions.
The ref warns both fighters not to hold the cage as they work up against the meshing.

That's one minute gone in the round.
Barella is looking for an arm triangle, whilst trying to pass to side control. Riggins doesn't seem that keen to cooperate though. No luck this time Barella.
Barella is trying for a guillotine from the top but the pressure isn't in the right place so Riggins is just riding it out for now. Barella eventually gives up the hold.
Riggins moves into full guard.
Barella pressing down on his opponent's thigh, looking to pass guard. Riggins is keeping the position for now.

That's two minutes gone in the round.
Well. There's a bit of a lull in the action here and the crowd are starting to get restless.
Barella drops back, looking for a kneebar! Riggins looks panicked! The fighters roll across the mat, one looking to finish, one looking to escape. Riggins looks to have wriggled free... Yes, he's got his leg free and he's dived into side control! Good work there from Riggins!

The fighters are starting to perspire pretty heavily.
Barella is trying to improve his position.
Riggins is looking to take a break and control but Barella is keeping him honest, looking to work from the bottom.

Riggins is trying to land an Americana. He has the arm isolated but Barella is keeping cool and he's avoided the danger for now.
Barella might be looking to lock onto one of his opponent's long limbs for a submission, whilst we're on the ground.
Barella is trying to get back to half guard.
Riggins tries for a kimura but Barella is defending well.
Barella sneaks a leg under to get back to half guard.

That's three minutes gone in the round.
Barella is looking for a sweep. Riggins is wise to his cunning plan and keeps the top position.
Barella connecting with a few gentle strikes.
Riggins is thwarting Barella's attempts to control the position.
Barella is working for an escape here. He's hooked one of Riggins's legs and he's managed to sneak out and take Riggins's back!
Riggins is trying to break free.
Riggins is keeping busy.
Barella looking for the choke but no joy.
Riggins is in a world of trouble here. He's outmatched on the ground here and he'd better get Barella off his back sharpish unless he wants to be submitted.
Barella lands a punch to the side of the head from the back.

That's four minutes gone in the round.
Riggins tries to escape the position - he's now mounted. Is that better or worse? Hard to tell!
Barella is in full mount, looking to secure a guillotine but Riggins is surviving well by controlling Barella's body position as best he can.
Barella working for a guillotine from mount but Riggins is in no mood to give up.
Barella is working on an americana here. Ooh, that looks pretty nasty! Nope, Riggins has managed to escape the submission attempt.
Barella goes for an armbar but he's fallen flat on his backside there and now Riggins is on top in guard.
Barella throwing some rather feeble looking strikes off his back.
The crowd thankful this round is nearly over.
Riggins stands up and looks to throw the legs aside to pass to side control. Barella swivels though and keeps the full guard.
This is a great period of action - very entertaining stuff!
Barella is looking for a triangle but Riggins pushes his legs off easily.
Barella looking for submissions off his back, moving his hips, looking for an opening.
And that is the end of the round. The fighters go back to their corners.
Sonny Barella dominated that round.
That's the end of the round. The referee orders the cornermen out of the cage so we can get back down to business.

Riggins keeping his hands up high there, blocking the jab from Barella.
Riggins defending well as Barella loads up on a big left hand.
Riggins changes levels for a counter takedown but doesn't follow through with his attempt.
Barella shuffles to his left behind two crisp jabs. Riggins eats them both and turns towards Barella to reposition himself and eats a stinging right hand-left hook combo.
Barella connects with a jab.
Barella tries to clinch but Riggins is having none of it.
A head kick by Barella misses

and Riggins counters with a nice double leg into half guard.
Riggins is trying to work for a kimura but Barella is defending well.
Barella looking for submissions from an awkward position here.
Riggins is trying to work for a kimura but Barella is defending well.
Barella is really dominating this fight. Is there anything that Riggins can do to turn this around?
Barella wants to get back to full guard.
Barella looking to work for a kimura from the bottom.
That's one minute gone in the round.
Riggins passes to full mount!
Barella is squirming around, avoiding Riggins's attempts to control the action.
Barella regains half guard.
Riggins uses his free foot to push down on Barella's thigh. Eventually he works his other foot free and he's advanced to mount - this is trouble for Barella.
Riggins can't quite control the action as he would like just now, as Barella is looking to escape.
Barella tries to hold on but Riggins pushes him away.
Barella sneaks a leg back under and regains half guard and is working straight away to try and get back to guard. He hasn't managed just yet though.
That's two minutes gone in the round.
Riggins is looking for a kimura. It's going to be difficult to finish that from half guard though and Barella defends it well.
Barella tries to roll over but Riggins keeps him under control.
Riggins passes the guard and advances to mount!
Barella sneaks a leg under to get to half guard.
Riggins wants to pass the guard but Barella is defending well.
Barella trying to hold on to Riggins's head to control him but Riggins postures up.
Barella tries to get to full guard but Riggins has control of the leg.
That's three minutes gone in the round.
Riggins is working for a submission of some sort.
Riggins trying to control from half guard but Barella is working away.
Barella looking for submissions off his back.
Barella actively working from the bottom here.
The fighters are pressed up against the cage, both looking to find a bit of space to work.
Barella regains full guard. Nicely done.
Riggins sneaks a leg through and gets to half guard. That was like a knife through butter how easily he passed Barella's guard.
That's four minutes gone in the round.
The crowd are showing their displeasure at the lack of action as loud boos ring out around the arena.
Riggins stalling away here and it's allowed Barella to slip out his trapped foot and regain full guard.
Riggins wants to control from the top but Barella keeps moving.
Barella looking for a guillotine here but Riggins defends easily.
Riggins wants to pass the guard but Barella is keeping the position.
The crowd thankful this round is nearly over.
Riggins is persisting with the attempt to improve his position.
Barella trying to keep a closed guard but Riggins is proving a slippery customer.
And that is the end of the round. The fighters go back to their corners.
A close second round but Tim Riggins will probably get the nod - 10:9.
The referee calls time. The cornermen exit stage left and we're back to business. Let's get this one finished - here comes the final round!

Barella moving in and out of range nicely, whilst landing the scoring shot.

The fight moves into the clinch position.
Barella is trying to force a seperation but Riggins has the dominant position.
Barella wants to get back to striking at distance but Riggins won't allow it.
Riggins drops down for a takedown but doesn't get it.
Barella pulls guard successfully.
Barella is trying to control the position from the bottom.
We've had a slow start to the round here - hopefully the action picks up.
Barella looking for submissions from the bottom here. Moving his hips around, possibly looking for an armbar.
Barella wants to stand up but Riggins is controlling him.
Barella looking for a guillotine here but Riggins defends easily.
That's one minute gone in the round.
Riggins avoids a guillotine attempt easily.
Riggins is a painfully thin specimen of a man. You do wonder whether a good body kick would snap him clean in two.
Riggins pressing down on his opponent's thigh, looking to pass guard. Barella is keeping the position for now.
Barella looks to be working for a triangle here. Oh, it looks like he might have it! Riggins has picked Barella up and slammed him! Barella can't keep hold of the triangle and Riggins manages to pass to side control!
Barella manages to land a sweep and he's now on top! Lovely Jiu Jitsu!
Barella seems to be looking for submissions.
Both fighters are breathing heavily.
Barella throws a big elbow that misses, also allowing Riggins to regain full guard.
Barella in full guard, throwing the ground and pound. No damage this time.
That's two minutes gone in the round.
Riggins is looking for a triangle but Barella pushes his legs off easily.
Barella tries to free his leg and advance position but Riggins is retaining full guard.
Riggins has momentary wrist control but Barella slips an elbow through the middle.
Barella wants to control from the top but Riggins keeps moving.
Barella stopping the sweep attempt from Riggins.
Riggins is still trying to improve position.
Sonny Barella overall seems to be getting the better of the ground position in the fight so far.
Barella makes a bit of distance and scores with some ground and pound, still in guard.
Barella wants to pass the guard but Riggins is keeping the position.
Riggins lands a beautiful sweep and he's now moved into his opponent's guard.
Riggins looking to sit in guard and control but Barella gets the butterfly guard and sweeps. He's now in the guard on the top.

That's three minutes gone in the round.
Barella throws a big right hand that misses.
Barella slips nicely into half guard.
Riggins gets back to full guard.
Barella trying to control but Riggins is working from the bottom.
Riggins is working the butterfly guard. He manages to land a nice scissor sweep and is now in half guard on the top. Nice move.
Barella is looking to regain full guard. Not this time though.
Riggins tries to pass the half guard into mount. Barella knows what he's doing though and prevents the attempt.
That's four minutes gone in the round.
Barella is looking to sinch up a guillotine here but Riggins pulls his head out easily.
Barella is looking to improve his position.
Riggins looking to pass the half guard. Not this time.
Riggins trying to control from Barella's half guard. Barella has other ideas though and has regained full guard.
Barella escapes his hips to the side and looks to be working for an armbar. Riggins gives him a little smile and shakes his head. No chance.
The crowd thankful this round is nearly over.
Barella had isolated an arm as going for a kimura. Riggins defends it easily.
Barella looking for submissions from the bottom here. Moving his hips around, possibly looking for an armbar.
And that's the end of the fight!
Sonny Barella showed his dominance in that final round.
Well Barella has outscored his opponent in every aspect of the fight today. Only a scarily incompetent judge or two will keep him from a well deserved win... Over to the ring announcer for the scorecards.
Ladies and gentlemen, after 3 rounds of action, we go to the scorecards for a decision.
Judge Wesley Smith scores the fight 29:28
Judge Frank Dennis scores the fight 29:28
Judge Stewart Dunkirk scores the fight 29:28
In favor of your winner, by unanimous decision... Sonny Barella!
A very excited looking Sonny Barella made sure he remembered to thank all the fans both in the arena and on the internet. He said all the coolest people spend all day on MMA websites, which got a big reaction.
|
|
|
|
|
|
|
|
|
|
|
|
|
|
|
|
|
|
|
|
|
|
|
| S |
C
A |
G |
S |
C
B |
G |
|
S |
C |
G |
|
energy
A | B |
|
hype
A | B |
|
pop
A | B |
|
mgr
A | B |
|
FIGHT
RATING
34% |
|
|
|
|
|
|
