|
|
PBP Commentary |
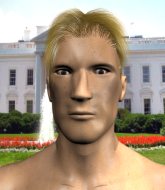
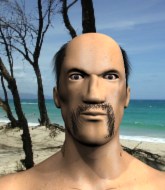
Coming up we have a lightweight MMA rules bout between Hiro Hitori (ranked 4594 p4p, 6151 weight class) and Bryce Mildred (ranked 481 p4p, 519 weight class). Hiro Hitori could well score a knockout today. He has the power to get to Bryce Mildred's chin.
 |
|
 |
| 168 cm
18
158
0 - 0 - 0 |
|
166 cm
18
160
0 - 1 - 0 |
BJJ White Belt
Excellent MT
Granite chin |
|
BJJ Blue Belt
Brawler
Inexperienced |
|
| |
|
Ladies and gentlemen. This fight is 3 rounds, in the lightweight division.
Introducing the fighter to my left, fighting out of the red corner.
With a record of 0 - 0 - 0, fighting out of Montreal, Hiro Hitori!
And introducing the fighter to my right, fighting out of the blue corner.
With a record of 0 - 1 - 0, fighting out of New York, Bryce Mildred!
The judges for this bout are Steve Smith, William Peck and Elvis Blanc.

The bell rings for round one and we are underway!

Mildred drops down and drives through with a powerful takedown into guard.
Hitori knows he needs to get back to his feet asap. He's simply no match for Mildred on the ground.
Mildred is frustrating his opponent with some stalling tactics from top position.

Mildred decides to stand up and beckons his opponent to follow.
Hitori shoots in for a double leg but Mildred sprawls well. That's going to sap some energy.
Mildred avoids the head kick by Hitori.

Hitori gets tackled into the cage by Mildred. Mildred maintains the clinch.
Mildred has dropped down and is looking to force the takedown but it's defended by Hitori after a bit of a struggle.

Hitori breaks the clinch and we return to the middle of the mat.
Mildred should think about turning a few of those tyres round his middle into muscle if he wants people to take him seriously as an athlete.
We've had a slow start to the round here - hopefully the action picks up.

Mildred tries to keep at a distance but Hitori has taken the fight into the clinch.
Mildred wants to strike at distance but he can't break free of the clinch.
Mildred is trying to pull guard but being pressed up against the cage enables Hitori to keep the fight standing.

That's one minute gone in the round.
Hitori breaks the clinch and we return to the middle of the mat.
Hitori shoots in but no luck this time.
Mildred drops down looking to force a counter takedown but Hitori defends it well.
Mildred ducks down and throws a hook to the body but Hitori moves away.
Hitori tries to clinch but Mildred is having none of it.
Mildred throws a head kick but Hitori moves out of range.
Mildred fails with a takedown attempt from distance.
Hiro Hitori has stuffed three takedown attempts in the round now. That's going to take a lot out of Bryce Mildred.
Hitori shoots in looking for a takedown but Mildred manages to keep the fight standing, pushing Hitori's face into the canvas for good measure before circling away.
Hitori throws out a loose jab but Mildred uses good head movement to avoid it.
Mildred defends well against a solid takedown attempt from Hitori.
Hitori tries a switch kick but it misses it's target.
Mildred moves into the clinch successfully.
Hitori breaks the clinch.
Mildred misses with a takedown attempt - Hitori sprawls well and throws a nice strike on the way out which just misses.

That's two minutes gone in the round.
Mildred fails to land the takedown.
Hitori is looking for a counter combo.
Hitori shoots in looking for a takedown but Mildred manages to keep the fight standing, pushing Hitori's face into the canvas for good measure before circling away.
Hitori closes the distance and presses his opponent up against the cage.
Mildred is trying to drag Hitori to the mat but Hitori just about manages to keep his footing. He used the cage to his advantage there.
Hitori has a body lock and is looking for a takedown. Mildred is bouncing around trying to prevent the takedown and somehow he has indeed managed to stay on his feet.
Mildred can't find room to land a body shot as Hitori controls the action.
Hitori tries to take the fight to the ground by pulling guard but can't manage it.
Hitori has Mildred pressed against the cage, preventing Mildred from circling away and getting back to striking at range.
Hitori content to slow the pace in the clinch.

That's three minutes gone in the round.
Hitori pushes off and circles away, back to the middle of the mat.
Mildred looking for a takedown here - he's got it.
Hitori is looking to stand back up... there's a bit of a scramble and Mildred dives into side control.

Mildred remains in side control and seems content to stay there. It's a versatile position from which he can work both strikes and submissions, whilst maintaining that control, so maybe he'll sit here for a while.
Hitori tries to improve position but can't.
Hitori can't do much from the bottom here.

That's four minutes gone in the round.
Hitori trying his best to control but Mildred has mounted him.
Mildred throwing strikes here but Hitori is writhing around nicely and avoiding any serious damage.
Hitori tries to hold on but Mildred postures up.
Hitori is working to get back to half guard.
Mildred looking to control but Hitori is working nicely, looking to advance position himself.
Mildred avoids the attempt from Hitori to control.

Mildred is in full mount, looking to secure a guillotine but Hitori is surviving well by controlling Mildred's body position as best he can.
And that is the end of the round. The fighters go back to their corners.
Bryce Mildred dominated that round.
The minute break is over - no more time for sponges and pep talks - back to the action!

Hitori shoots for a double leg takedown but Mildred sprawls well. He's pushed Hitori's face into the mat and manages to get back to his feet relatively easily.
Mildred looks to score with a jab to the body but Hitori is just out of range.
Hitori has a takedown stuffed.
Mildred tries a counter takedown but it's more of a dummy move, and he uses it to push himself away.
Hitori darts in looking for a takedown but Mildred gets double underhooks and turns Hitori into the cage.
That's three failed takedown attempts in the round for Hiro Hitori. That's going to take a lot out of him.
Both guys are working to get underhooks.
Mildred jumps guard but Hitori stands there with Mildred around his waist. Mildred gives up and drops back to his feet. We remain in the clinch.

Mildred breaks from the clinch.
We've had a slow start to the round here - hopefully the action picks up.
Mildred feints and as Hitori raises his hands in defense, Mildred changes levels and drives through with a takedown into guard.
Hitori is looking to stand back up... there's a bit of a scramble and Mildred dives into side control.
Bryce Mildred has got the better of the ground game so far.
Mildred stands up and we're back to a striking position.
That's one minute gone in the round.
Hitori tries to clinch up against the cage, rushing in to close the distance. Mildred manages to break the clinch and circles back to the middle of the mat.
Hitori avoids a low kick by using good footwork.
Hitori has a takedown stuffed.
Mildred slips a jab and a cross from Hitori.
Hitori wants to clinch up but Mildred keeps it at a distance.
Bryce Mildred seems to be getting the better of the standup.
Hitori blocks a jab.
Hitori shoots in but doesn't get the takedown
and Mildred holds on and brings the fighters into a clinch.
Mildred is pressed up against the cage. Hitori has hold of a leg and is looking to drag Mildred down to the mat. Mildred avoids the attempt though and has circled away. We're back to striking at a distance.
Hitori gets caught napping as Mildred dives in and scores a takedown. Hitori manages to retain guard.
Mildred trying to control the position from guard on top but Hitori is wriggling around, looking for whatever he can.
That's two minutes gone in the round.
Hitori trying to punch from his back but it's not doing any damage.
Mildred gets to his feet. Hitori looking to butt scoot but the ref puts an end to that. On your feet son!
Hitori has closed the distance and engaged Mildred in a clinch.
Mildred is trying to drag Hitori to the mat but Hitori just about manages to keep his footing. He used the cage to his advantage there.
Hitori wants a takedown.
Mildred is trying to slow down the pace of the fight but Hitori is keeping busy.
Hitori tries to land a shot to the body but it's blocked.
That's three minutes gone in the round.
Hitori fails to pull the fight into his guard.
Hitori taking a breather.
Mildred ties up his opponent against the cage and manages to drag the fight down to the ground. Mildred no doubt will be looking to work submissions from his guard.
Mildred controls Hitori momentarily but Hitori frees himself.
Hitori trying to pass the guard but can't manage it just yet.
Mildred looking to hit a scissor sweep but Hitori is one step ahead there.
Hitori has to be careful here, sitting in the guard of a superior BJJ player.
There's a bit of a scramble here and now Mildred is on top in guard.

That's four minutes gone in the round.

Hitori is looking for a triangle but Mildred pushes his legs off easily.
Mildred preventing the sweep.
Mildred is just sitting in guard, looking to avoid any submissions.
Mildred passes easily into side control. Nice work.
The crowd thankful this round is nearly over.
Mildred has knee on belly and now moves to full mount! Trouble for Hitori!
And that is the end of the round. The fighters go back to their corners.
Bryce Mildred showed his class in that round. I'd imagine he'll take it on all the scorecards.
Well, the break between rounds is over. Let's get back to the scrappin! This is the final round!

Hitori fakes high and shoots in for a takedown but Mildred avoids it really well and circles away.
Nice takedown defense from Hitori. No joy for Mildred on that attempt.
Hitori misses with a head kick.
Mildred swats away the attempt to clinch by Hitori.
Hitori shoots in looking for a takedown. Mildred tries to sprawl out of it but Hitori keeps driving through. The fighters are pinned against the cage. Mildred manages to get underhooks and after a bit of a struggle, circles away and we're back to standing.
We've had a slow start to the round here - hopefully the action picks up.
Hitori fails with a takedown attempt.
That's three failed takedown attempts in the round for Hiro Hitori. That's going to take a lot out of him.
The sound of bone on bone echoes around the arena as Mildred checks a leg kick.
That's one minute gone in the round.
Hitori tries to close the distance and clinch up against the cage but Mildred paws at him with a jab and circles away.
Hiro Hitori is looking to throw some combinations by the looks of things.
Hitori tries to score a power double leg takedown but Mildred sees that one coming and sprawls well. That will dishearten Hitori somewhat.
A really sloppy takedown attempt there from Mildred.
Mildred shoots in for a takedown and gets it. Let's see what he's got on the mat.
Hitori wants to get back to his feet but Mildred passes into half guard.
Mildred trying to control from half guard but Hitori is working away.
Mildred has been the more effective fighter overall so far.
That's two minutes gone in the round.
Mildred not throwing his punches with enough precision this time.
Mildred is looking for a kimura but Hitori is holding onto that half guard position, so it's hard for Mildred to get the leverage.
Hitori is looking to improve his position.
Hitori is trying to control but can't.
Hitori blocking the ground and pound attempt from Mildred.
Mildred is figuring out what he wants to do next.
Hitori tries to roll over but Mildred keeps him under control.
That's three minutes gone in the round.
Mildred is looking for a kimura here.
Mildred decides he's had enough of the ground and stands up.
Hitori just misses with a punch to the body.
Mildred changes levels for a counter takedown but doesn't follow through with his attempt.
Mildred shoots in and bounces Hitori off the cage to secure the takedown into guard.
Mildred takes a big intake of breath there - he's definitely tired.
Hitori is trying to control the position from the bottom.
That's four minutes gone in the round.
Mildred trying to control but Hitori is working from the bottom.
Hitori looking to control the pace of the fight rather than finish it.
Boooooooooooooooooooo!!! God, this has been a terrible round. Come on you two, sort yourselves out!
Mildred preventing the sweep.
And that's the end of the fight!
Bryce Mildred comfortably won the final round on my scorecard.
I've got Mildred winning every round here. Surely the decision will go his way and he'll pick up a well deserved decision victory. Over to the ring announcer for the scorecards.
Ladies and gentlemen, after 3 rounds of action, we go to the scorecards for a decision.
Judge Steve Smith scores the fight 27:30
Judge William Peck scores the fight 27:30
Judge Elvis Blanc scores the fight 27:30
In favor of your winner, by unanimous decision... Bryce Mildred!
|
|
|
|
|
|
|
|
|
|
|
|
|
|
|
|
|
|
|
|
|
|
|
| S |
C
A |
G |
S |
C
B |
G |
|
S |
C |
G |
|
energy
A | B |
|
hype
A | B |
|
pop
A | B |
|
mgr
A | B |
|
FIGHT
RATING
31% |
|
|
|
|
|
|
