|
|
PBP Commentary |
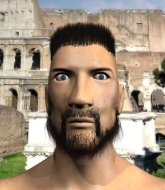
Coming up we have a welterweight MMA rules bout between Blitzkrieg Rage (ranked 0 p4p, 0 weight class) and Paul Baley (ranked 0 p4p, 0 weight class). Blitzkrieg Rage has the better chin. Will he look to stand and bang today?
 |
|
 |
| 180 cm
23
172 lbs
2 - 2 - 1 |
|
176 cm
20
184 lbs
2 - 2 - 1 |
BJJ Purple Belt
Brawler
Big heart |
|
BJJ Blue Belt
Counter striker
Powerful |
|
| |
|
Ladies and gentlemen. This fight is 3 rounds, in the welterweight division.
Introducing the fighter to my left, fighting out of the red corner.
With a record of
2 - 2 - 1, fighting out of Hilo, Blitzkrieg Rage!
And introducing the fighter to my right, fighting out of the blue corner.
With a record of
2 - 2 - 1, fighting out of Hilo, Paul Baley!
The judges for this bout are , and .

The bell rings for round one and we are underway!
Rage is looking to take this fight into the clinch.
Baley circles away from the clinch attempt.
Baley lands a with a good body shot.
Baley lands a head shot.
Rage fails in his attempt to clinch.
Baley misses with a straight left.
Rage checks a leg kick.
Baley misses with a series of wild punches.
Rage has his head snapped back a nice jab. A little nod from Rage there as he acknowledges the shot.

Rage bobs and weaves into range and then changes levels and scores with a nice takedown into side control.
We've seen a great period of action over the last minute or so - credit to both fighters for going all out!

Rage stands up.
Rage throws a sloppy body shot
and Baley counters with a lovely straight right hand!

It looks like Blitzkrieg Rage has been cut.

That's one minute gone in the round.
Rage shoots in but doesn't get the takedown
and Baley counters with a good right hand that lands right on the jaw.
Rage is breathing heavily.
Rage doesn't succeed with the takedown

and Baley counters with a left and a right that hurts Rage! He wobbles and falls to the floor - he's in big trouble! Baley jumps into full mount!

Rage is rocked!
Baley looking to control but Rage is working nicely, looking to advance position himself.
Baley gets to his feet and calls his opponent to stand. Here come the fireworks!
Paul Baley is looking to keep the fight on the feet at all costs.
Rage fails with a takedown attempt from distance.
That's three failed takedown attempts in the round for Blitzkrieg Rage. That's going to take a lot out of him.
Baley tries a switch kick but it misses it's target.
Baley takes a step towards his opponent and connects with a left hand, before circling away.
This has been an exciting period of action!
Baley lands a big shot that drops Rage! Can he finish him?
Oh Rage is still in real trouble! Will he be able to recover?!!

That's two minutes gone in the round.
Baley stands up from Rage's guard - Baley perhaps looking for a knockout.
Rage seems to have got his legs back now.
Rage showing good head movement there, avoiding the strikes from Baley.
Baley stuffs the takedown attempt from Rage. Rage gets slowly back to his feet.
Rage throws a looping left and ducks down for a takedown. He's got his arms around Baley's waist but Baley gets an underhook and avoids the takedown by throwing Rage off to one side.
Baley swings and misses with a hook to the body.
Rage is trying hard to land a takedown here. Baley sprawls well and keeps this one on the feet.
Rage on the wrong end of an overhand right that came out of nowhere.
Blitzkrieg Rage seems to be the more aggressive standup fighter in this bout.

That's three minutes gone in the round.
Nice defenses there by Rage.
Baley moving in and out of range nicely, whilst landing the scoring shot.
Baley displays good takedown defense there as he swats away a double leg from Rage.
Baley lands a powerful looking uppercut that connected with his opponent's jaw.
Baley swinging wilding here.
Baley scores with a jab to the jaw of his opponent.
Baley swings wildly with a right hand that was never going to find it's target.
Baley throws an uppercut from half a mile away. Rage sees it coming and avoids it easily.

That's four minutes gone in the round.
Baley throws a right and a left that Rage avoids nicely.
Baley misses the shot to the body.
Baley tries to bum rush Rage with a series of wild strikes but Rage uses good footwork to avoid the assault.
Rage avoids the head kick by Baley.
A really sloppy takedown attempt there from Rage.
Baley looks to score with a jab to the body but Rage is just out of range.
Rage misses with the combination.
The crowd are going absolutely nuts as the round comes to an end - what a fantastic round of action!
Rage shoots in and gets a takedown into half guard. Rage showed some decent athleticism there.
And that�s the end of the round � the fighters go back to their corners.
Paul Baley dominated that round.
The cut man is working on Blitzkrieg Rage's cut.
That's the end of the interval. I'm sure that seemed a lot quicker than a minute for our two fighters! Back to the action.

Rage shoots in looking for a single leg takedown. Baley is trying to defend but Rage finishes it well and ends up in half guard. Let's see if he can advance position further.
Rage seems to have lost interest with the ground game and is thinking about standing back up.
Rage prevents Baley from standing back up.
Rage wants to control but Baley is keeping him busy.
Both fighters are absolutely exhausted here.
Rage winds up and cracks Baley with a swinging punch to the side of the head.
Baley is trying to stand back up but Rage is controlling him
Rage wants to control but Baley is keeping him busy.
That's one minute gone in the round.
Rage thumps the canvas. Not on purpose obviously - he just missed Baley's head.

Well, the referee has seen enough. Neither fighter is active enough on the ground so he's stood them back up.
Rage looking for a takedown here - he's got it.
Baley wriggles free and stands up.
Baley misses with a low kick.
Horrible takedown by Rage or perhaps it was just good defense by Baley which made him look bad.
Baley sets himself and throws a head kick that knocks Rage to the ground! Baley dives into full mount looking to finish!
Baley stands up from mount. Strange move.
That's two minutes gone in the round.
Rage slips under a jab from Baley.
Baley loads up on a big right hand but Rage slips the punch.
Rage avoids a lazy jab quite easily.
Rage is the aggressor but that punch slipped nicely by Baley.
Rage fails in his attempt to clinch.
Rage closes the distance looking to clinch
and Baley counters with a nice uppercut.
Wooooo! Give it up for these two warriors! They are putting on a show!
Rage fails to land the takedown.
Baley stuffs the takedown attempt from Rage. Rage gets slowly back to his feet.
That's three failed takedown attempts in the round for Blitzkrieg Rage. That's going to take a lot out of him.
That's three minutes gone in the round.
Baley ducks down and throws a hook to the body but Rage moves away.
Baley tries a switch kick but it misses it's target.
Rage tries to score a power double leg takedown but Baley sees that one coming and sprawls well. That will dishearten Rage somewhat.
Rage tries to clinch there but Baley circles away.
Rage shoots in for a takedown from distance. He catches Baley napping and manages to drive through into side control!
Rage sitting in side control, looking to soften his opponent up with elbows and hammerfists but Baley is avoiding damage well and looking to escape the position.
Baley wants to get back to his feet but Rage drags him back down.
That's four minutes gone in the round.
The fighters are starting to perspire pretty heavily.
Rage controls the position.
Baley is looking to work his way out of this bad position but Rage is controlling him well.
The referee has ruled that neither fighter is active enough on the ground and has stood them back up.
The fighters circle momentarily. Baley darts into range and connects with a nice straight punch.
Rage closes the distance looking to clinch
and Baley counters with a stiff right hand.
And that�s the end of the round � the fighters go back to their corners.
A close second round but Paul Baley will probably get the nod - 10:9.
The cut man is working on Blitzkrieg Rage's cut.
OK. That's time! The bell goes and we're back to the action. And we move into the final round!

Rage closes the distance but Baley moves to the side
and he gets countered with a snapping leg kick.
Rage checks a low kick from Baley.
Paul Baley seems to be getting the better of the standup.
Rage drops down and drives through with a powerful takedown into guard.
Rage trying to control the position from guard on top but Baley is wriggling around, looking for whatever he can.
Rage wanted to stand there but Baley had control of the position.
Rage looking to pass the guard.
Both fighters are breathing heavily.
Rage is taking a break and basically stalling. The referee will not allow him to do that for long.
The fighters are pressed up against the cage, both looking to find a bit of space to work.
That's one minute gone in the round.
Baley wants to stand but Rage is controlling the position.
Rage gets to his feet - Baley follows without any prompting.
Rage changes levels and looks for a double leg takedown. Baley tries to avoid it but Rage manages to keep hold of a leg and drag Baley to the ground. Baley escapes though and pops straight back up to his feet.
Baley throws a jab but it's blocked by Rage.
Blitzkrieg Rage is looking to throw some combinations by the looks of things.
Baley misses the body punch
and Rage counters with a takedown into full mount! That could mean trouble for Baley!
Baley's corner are shouting for him to stand up but that's bad cornering - how is he meant to stand up when he's mounted? He should be looking to improve his position on the ground before trying to stand back up.
Baley is in a horrible position here, under a barrage of strikes, he's managing to avoid any damage.
Baley wants to use the cage to get back to his feet here.
Rage working away from the top, dropping strikes.
That's two minutes gone in the round.
Rage trying to control but he's not successful this time.
Rage landing strikes from the mount.
Baley has given up his back, trying to stand up. Not clever.
Baley holding both Rage 's hands and preventing any damage.
Rage has been looking to land a fair amount of strikes on the ground. He might be looking to soften his opponent up in order to work for a submission.
Rage controlling the position well here. Baley rolled but Rage kept the hooks locked in and stayed in the dominant position.
Blitzkrieg Rage overall seems to be getting the better of the ground position in the fight so far.
Baley is trying to get back to his feet but Rage has full control of the position and if anything, Baley has just worked his way into a worse spot.
That's three minutes gone in the round.
Rage has his opponent trapped and is landing shots. Not a good position for Baley.
Rage controls the action.
Baley is taking damage to the body and head.
Baley is trying to stand back up.
That's four minutes gone in the round.
The crowd are hurling abuse towards the fighters... You can hardly blame them though because there isn't a lot going on in the fight.
Rage is punishing Baley with strikes - can he finish him?!
Rage lands a shot to the body.

Rage patiently working for the choke. Which fighter will keep their nerve here?
Rage somehow managing to miss with a strike from the back.
Baley is trying to get back to his feet but Rage has full control of the position and if anything, Baley has just worked his way into a worse spot.
Rage throwing wild punches that miss their target.
Rage tries to keep control of the position but Baley is staying busy.
Rage has his hand under the chin of his opponent looking for the choke. He's nearly got it! This one could be all over! But no, Baley has freed his hand and lives to survive another� well, another couple of seconds at least!
Baley holding both Rage 's hands and preventing any damage.
And that's the end of the fight!
Blitzkrieg Rage showed his dominance in that final round.
I think Baley has won this one but let's see whether the judges agree with me. Over to the ring announcer for the scorecards.
Ladies and gentlemen, after 3 rounds of action, we go to the scorecards for a decision.
Judge Andi Peters scores the fight for Paul Baley!
Judge Gordon Ramsey scores the fight for Paul Baley!
Judge Frank Skinner scores the fight for Paul Baley!
Paul Baley wins by unanimous decision!
|
|
|
|
|
|
|
|
|
|
|
|
|
|
|
|
|
|
|
|
|
|
|
| S |
C
A |
G |
S |
C
B |
G |
|
S |
C |
G |
|
energy
A | B |
|
hype
A | B |
|
pop
A | B |
|
mgr
A | B |
|
FIGHT
RATING
73% |
|
|
|
|
|
|
