|
|
PBP Commentary |
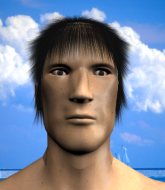
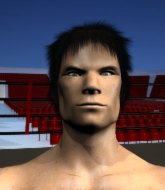
Coming up we have a light heavyweight MMA rules bout between Takashi Morimoto (ranked 1473 p4p, 2009 weight class) and Kenji Yamazaki (ranked 210 p4p, 267 weight class). Takashi Morimoto has the edge in experience - let's see if he can make that count tonight.
 |
|
 |
| 186 cm
24
205
7 - 1 - 0 |
|
188 cm
19
205
5 - 1 - 0 |
Good wrestling
Brawler
Granite chin |
|
Good wrestler
Brawler
Heavy handed |
|
| |
|
Ladies and gentlemen. This fight is 5 rounds, for the light heavyweight championship of the world!
Introducing the champion to my left, fighting out of the red corner.
With a record of 7 - 1 - 0, fighting out of New York, Takashi Morimoto!
And introducing the challenger to my right, fighting out of the blue corner.
With a record of 5 - 1 - 0, fighting out of Sydney, Kenji Yamazaki!
The judges for this bout are Russell Pearce, Eddie Farnsworth and Anthony Taglia.

The bell rings for round one and we are underway!
Morimoto shoots in looking for a takedown but Yamazaki manages to keep the fight standing, pushing Morimoto's face into the canvas for good measure before circling away.
Yamazaki throws out a counter right but Morimoto avoids it with no problem.
Morimoto gets his head snapped back by a nice shot there.
Nice uppercut there from Yamazaki.

Yamazaki closes the distance and presses his opponent up against the cage.
Yamazaki lands a nice uppercut.
Yamazaki gets through Morimoto's defenses to land a nice punch to the side of the head.
A short uppercut from Yamazaki.
Morimoto looking for a takedown.
Morimoto is looking for a takedown.
That's three failed takedown attempts in the round for Takashi Morimoto. That's going to take a lot out of him.
Morimoto takes a shot to the head.
A right hook to the body lands for Yamazaki.
Yamazaki pushes Morimoto back against the cage and lands a hook to the side of the head.
The crowd cheering loudly, showing their appreciation for the quality fight we're seeing here.
Morimoto is working for takedown but Yamazaki is calmly controlling the position for now.
Morimoto wants to take the fight to the mat but Yamazaki manages to get underhooks and keep the fight in the clinch.
Morimoto is looking to take this one to the mat.
Yamazaki lands a right hand.

That's one minute gone in the round.
Yamazaki lands with a short head shot on the inside.
A short uppercut from Yamazaki.
Yamazaki lands on the inside with an uppercut.
Morimoto definitely looks more muscular than last time we saw him fight.
Morimoto takes a shot to the head.
Yamazaki gets through Morimoto's defenses to land a nice punch to the side of the head.
Yamazaki scores with a nice hook to the head.
Yamazaki lands a shoulder strike that jolts his opponent's head backwards.
Yamazaki working aggressively here.
Morimoto is working for a takedown up against the cage. He can't get it on this occasion though.
Yamazaki lands a right hand.
Yamazaki is defending well against a takedown attempt.
Morimoto is trying to break the clinch but Yamazaki has him pressed against the cage.
Morimoto drops to a knee looking for a takedown but Yamazaki gets the underhooks and prevents it.
Yamazaki lands with a short punch from the clinch.
This has been an exciting period of action!
Yamazaki lands a nice uppercut.

That's two minutes gone in the round.
Yamazaki scores with an uppercut up the middle.
Morimoto tries for a takedown but Yamazaki manages to get underhooks.
Yamazaki trying to land knees to the body.
Yamazaki lands with a good tight uppercut to the head.
Morimoto has hold of a leg and is looking for a trip takedown. Yamazaki avoids it nicely though and we remain in the clinch.
Yamazaki scores with a shoulder strike.
Yamazaki lands a left hand.
Morimoto is looking to take this one to the mat.
Morimoto drops down for a takedown but doesn't get it.
Still in the clinch, Yamazaki scores with a nice short uppercut.
Morimoto blocks a knee to the body. He'll have a nicely bruised forearm in the morning.
Yamazaki lands a hook that snaps the head of Morimoto backwards.
Morimoto wants to break free. God knows he wants to breaaaak freeee.
Yamazaki gets through Morimoto's defenses to land a nice punch to the side of the head.
Yamazaki lands with a right to the head.

That's three minutes gone in the round.
Yamazaki lands with a good tight uppercut to the head.
Morimoto has Yamazaki pressed up against the cage and is working for takedown. Yamazaki manages to improve position though and keeps the fight standing.
Yamazaki lands with a good tight uppercut to the head.
Yamazaki lands a body punch in the clinch.
Yamazaki lands punches inside but they're not really causing much damage.
Morimoto is working for takedown but Yamazaki is calmly controlling the position for now.
Morimoto wants to break free. God knows he wants to breaaaak freeee.
Morimoto is working on a leg, looking for a takedown but Yamazaki is defending well.
Morimoto is breathing heavily.
Yamazaki lands a short shot on the inside that snaps the head of Morimoto backwards.
Yamazaki lands an uppercut.
Morimoto wants to push off and get back to the center of the mat but Yamazaki has him pressed against the cage.
Morimoto on the defensive, avoiding the knees to the body.
Yamazaki softening up his opponent with strikes, against the cage.
Morimoto has a body lock and is looking for a takedown. Yamazaki is bouncing around trying to prevent the takedown and somehow he has indeed managed to stay on his feet.
Morimoto drops to a knee looking for a takedown but Yamazaki gets the underhooks and prevents it.
We've been informed that Yamazaki has been working hard on his conditioning in the buildup to the fight.
A short right from Yamazaki.

That's four minutes gone in the round.
A shot in the inside from Yamazaki.
Wooooo! Give it up for these two warriors! They are putting on a show!
Yamazaki stops a takedown attempt from Morimoto.
Morimoto takes a shot to the head.
Yamazaki lands a left hand that snaps the head of Morimoto backwards.
Morimoto has dropped down and is looking to force the takedown but it's defended by Yamazaki after a bit of a struggle.
Morimoto drops down looking for an ankle pick but Yamazaki pulls his leg out and moves away.
Yamazaki closes the distance and pushes Morimoto back into the cage.
Yamazaki lands a left hand.
The crowd applaud the fighters' efforts here as the round comes to an end.
A short right hand to the side of the head by Yamazaki.
Yamazaki lands punches inside but they're not really causing much damage.
Yamazaki tries to land a knee to the body but he is off balance and Morimoto avoids it.
Yamazaki scores with a shot to the side of Morimoto's head.
A nice right hand lands inside from Yamazaki.
And that is the end of the round. The fighters go back to their corners.
Kenji Yamazaki dominated that round.
That's time! Morimoto's corner gives him a slap on the ass as he gets ready to fight.

Yamazaki closes the distance and presses his opponent up against the cage.
Yamazaki works on Morimoto's body with a couple of short punches.
Morimoto has a body lock and is looking for a takedown. Yamazaki is bouncing around trying to prevent the takedown and somehow he has indeed managed to stay on his feet.
Morimoto on the defensive, avoiding the knees to the body.
A shot in the inside from Yamazaki.
Yamazaki trying to land knees to the body.
Yamazaki scores with an uppercut up the middle.
Yamazaki stops a takedown attempt from Morimoto.
Yamazaki lands with a short head shot on the inside.
Morimoto drops down looking for an ankle pick but Yamazaki pulls his leg out and moves away.
That's three failed takedown attempts in the round for Takashi Morimoto. That's going to take a lot out of him.
Yamazaki instigates a clinch.
We've had a slow start to the round here - hopefully the action picks up.
Morimoto's head jolts backwards as he takes an uppercut right on the button!
Yamazaki lands with a short punch from the clinch.
Yamazaki has been the more effective fighter overall so far.
Yamazaki lands with a short head shot on the inside.
This has been an exciting period of action!
Morimoto tries to circle away but Yamazaki has him pinned against the cage.
That's one minute gone in the round.
A short uppercut from Yamazaki.
Morimoto drops to a knee looking for a takedown but Yamazaki gets the underhooks and prevents it.
With the fighters clinched against the cage, Yamazaki creates a bit of distance for himself and scores with a nice uppercut.
Yamazaki lands with a right to the head.
Morimoto looking for a takedown.
Yamazaki lands a left hand.
A short right hand to the side of the head by Yamazaki.
Yamazaki is defending well against a takedown attempt.
Morimoto managing to block the knees to the body from Yamazaki.
Kenji Yamazaki seems to be working more effectively in the clinch in the fight so far.
Yamazaki lands a short shot on the inside that snaps the head of Morimoto backwards.
Yamazaki pushes Morimoto back against the cage and lands a hook to the side of the head.

Morimoto is rocked!
Morimoto wants to take the fight to the mat but Yamazaki manages to get underhooks and keep the fight in the clinch.
Oh Morimoto is still all over the place! His legs are completely gone! Will he be able to recover?!!
Both fighters are absolutely exhausted here.
Morimoto wants a takedown.
Morimoto seems to have got his legs back now.
Yamazaki gets underhooks to prevent Morimoto's takedown attempt.
That's two minutes gone in the round.
A body shot lands from Yamazaki.
Yamazaki lands with a right to the head.
The crowd are loving this. Great action here.
Yamazaki lands a hook that snaps the head of Morimoto backwards.
Yamazaki lands with a light punch inside.
Yamazaki throws a hook to the body. More of an arm punch but it's all scoring with the judges.
Morimoto on the defensive, avoiding the knees to the body.
Morimoto is looking for a takedown.
Morimoto can't get the takedown.
A short uppercut from Yamazaki.
Morimoto working hard to break the clinch.
A short right from Yamazaki.
Yamazaki lands with a short punch from the clinch.
Yamazaki softening up his opponent with strikes, against the cage.
Morimoto on the defensive, avoiding the knees to the body.
Morimoto tries for a takedown but Yamazaki manages to get underhooks.
A short right from Yamazaki on the inside.
That's three minutes gone in the round.
Morimoto tries to break free but Yamazaki pushes him back against the cage.
Morimoto working hard to break the clinch.
Yamazaki lands a shoulder strike.
Morimoto has had enough of the clinch but Yamazaki keeps him there for the moment.
Morimoto drops to a knee looking for a takedown but Yamazaki gets the underhooks and prevents it.
Yamazaki lands an uppercut.
A nice left hand lands by Yamazaki.
Yamazaki works on Morimoto's body with a couple of short punches.
Yamazaki lands with a left to the head.
Yamazaki lands with a short head shot on the inside.
Morimoto is trying to drag Yamazaki to the mat but Yamazaki just about manages to keep his footing. He used the cage to his advantage there.
Yamazaki has Morimoto pressed against the cage, preventing Morimoto from circling away and getting back to striking at range.
Yamazaki presses Morimoto against the cage and delivers a mid-strength body shot.
That's four minutes gone in the round.
Morimoto wants to push off and get back to the center of the mat but Yamazaki has him pressed against the cage.
A short right from Yamazaki.
Yamazaki lands a hook to the side of the head.
Yamazaki lands a hook that snaps the head of Morimoto backwards.
This has been an exciting period of action!
A quick uppercut on the inside from Yamazaki.
Yamazaki lands a left hand that snaps the head of Morimoto backwards.
Yamazaki lands with a good tight uppercut to the head.
Yamazaki lands with a short punch from the clinch.
Yamazaki digs a right hand underneath Morimoto's ribcage. Morimoto let out a lung full of air as it connected.
Yamazaki lands with a short head shot on the inside.
Yamazaki lands a right hand that snaps the head of Morimoto backwards.
Yamazaki lands a body shot.
Yamazaki working some nice short punches in the clinch.
Morimoto can't break the clinch.
Yamazaki lands with a light punch inside.
The crowd applaud the fighters' efforts here as the round comes to an end.
Yamazaki lands a shoulder strike that jolts his opponent's head backwards.
And that is the end of the round. The fighters go back to their corners.
Kenji Yamazaki showed his class in that round. I'd imagine he'll take it on all the scorecards.
The referee calls time. The cornermen exit stage left and we're back to business.

Morimoto switches off momentarily and Yamazaki cracks him with a monster right hand! Morimoto topples backwards and makes a semi conscious attempt to cover up, as Yamazaki dives in to land one more shot, before the referee has time to call the fight. What a finish by Yamazaki!
Ladies and gentlemen, after 0:05 of round 3, we have a winner by way of KO (Punch). Kenji Yamazaki!
Kenji Yamazaki is the new light heavyweight champion!
|
|
|
|
|
|
|
|
|
|
|
|
|
|
|
|
|
|
|
|
|
|
|
| S |
C
A |
G |
S |
C
B |
G |
|
S |
C |
G |
|
energy
A | B |
|
hype
A | B |
|
pop
A | B |
|
mgr
A | B |
|
FIGHT
RATING
63% |
|
|
|
|
|
|
