|
|
PBP Commentary |
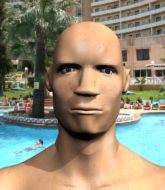
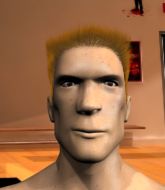
Coming up we have a featherweight MMA rules bout between Duke Cottingham (ranked 0 p4p, 0 weight class) and Tony Stark (ranked 0 p4p, 0 weight class). Duke Cottingham looks tired to me. Hopefully he has got enough gas left in the tank to put in a good performance.
 |
|
 |
| 161 cm
22
145 lbs
1 - 0 - 0 |
|
163 cm
18
145 lbs
0 - 1 - 0 |
Good wrestling
Counter striker
Self confident |
|
BJJ White Belt
Brawler
Granite chin |
|
| |
|
Ladies and gentlemen. This fight is 3 rounds, in the featherweight division.
Introducing the fighter to my left, fighting out of the red corner.
With a record of
1 - 0 - 0, fighting out of Sydney, Duke Cottingham!
And introducing the fighter to my right, fighting out of the blue corner.
With a record of
0 - 1 - 0, fighting out of Sydney, Tony Stark!
The judges for this bout are Bruno Hogan, Winston Howard and Summer Carpenter.

The bell rings for round one and we are underway!
Stark throws a combination but it was largely blocked by Cottingham.
Cottingham could do with loosing a few pounds - he looks very soft around the mid section, to put it politely.
Stark thuds his shin into the meat of Cottingham's side.
Cottingham is breathing heavily.
Stark throws a right and a left that both miss.
Stark fails in his attempt to clinch.
A decent looking body kick lands there for Stark.
Stark looks to land a left hand but Cottingham moved out of range nicely.
A big left from Stark misses.
Stark throws a nice looking combination but Cottingham bobs and weaves to avoid any damage.
Stark moves in looking to clinch but Cottingham pushes him off.
Tony Stark seems to be the more aggressive standup fighter in this bout.
Stark swings away but doesn't land with a series of punches.

Stark has Cottingham up against the cage in a clinch.
Stark crunches a lovely knee into Cottingham's ribcage.
Stark crunches a lovely knee into Cottingham's ribcage.
This is a great period of action - very entertaining stuff!
Stark digs a right hand underneath Cottingham's ribcage. Cottingham let out a lung full of air as it connected.
Stark lands a knee to the head there! That was nasty!
Stark landing knees to the head.

Stark's corner calls for him to break the clinch, which he does.
Cottingham keeping his hands up high there, blocking the jab from Stark.
Cottingham takes a kick to the side of the head.

That's one minute gone in the round.
Stark slaps away a takedown attempt from Cottingham, before circling back to the center of the mat.
Stark tries a switch kick but it misses it's target.
Stark closes the distance and presses his opponent up against the cage.
Cottingham blocks a knee to the body. He'll have a nicely bruised forearm in the morning.
Stark utilising his Muay Thai to score with a knee to the body.
Cottingham on the defensive, avoiding the knees to the body.
Cottingham tries for a takedown. No joy.
Stark lands a hook to the side of the head.
Cottingham blocks a knee to the body. He'll have a nicely bruised forearm in the morning.
Stark lands a hook to the body. It's hard to tell if that hurt Cottingham or not.
Stark stays in close to his opponent and throws a right hand to the body.
Stark is trying to wear down his opponent with knees to the body.
Stark lands a shoulder strike that jolts his opponent's head backwards.
Stark misses the knee to the body. Nice hip positioning from Cottingham.

That's two minutes gone in the round.
Stark pushes Cottingham back against the cage and unloads with a body punch.

Stark jumps guard and drags Cottingham to the mat. He's obviously going to be looking for submissions off his back.
The fighters are pressed up against the cage, both looking to find a bit of space to work.

Cottingham is holding a leg here, probably looking for an ankle lock - he drops back and goes for it! Stark is in trouble! Is it all over??? No! Stark has escaped and now he's on top!
Cottingham throwing his legs up looking for a triangle.
Stark avoids a guillotine attempt easily.
Cottingham is looking for a guillotine. You can't force these things though and Stark defends well.

That's three minutes gone in the round.
Stark tries to free his leg and advance position but Cottingham is retaining full guard.
Cottingham working from the bottom, still in full guard. He's managed to get a loose triangle. Stark doesn't seem to be doing much to defend here, obviously he feels comfortable in the position. Stark manages to throw the legs off his shoulder and he's back into guard - no problem.
Stark loading up with the ground and pound but he's missing more than he's landing in this flurry.

That's four minutes gone in the round.
The crowd are showing their displeasure at the lack of action as loud boos ring out around the arena.
Stark won't allow Cottingham to sweep him here.

The referee decides to stand the fighters back up.
Stark scores a trip takedown into side control. Nice.
Cottingham on his back here. We all know that wrestlers don't like being on their back so let's see if Cottingham tries to get out of the position.
Cottingham looking for a sweep but Stark has passed into full mount! Oh no!
Stark really doesn't want to stay on the ground with Cottingham. If he can't get it back to his feet, it's only a matter of time before he'll be tapping out.
Stark looking to control but Cottingham is working nicely, looking to advance position himself.
Cottingham is desperately trying to improve his position but Stark has a good base and remains in mount.
The crowd applaud the fighters efforts here as the round comes to an end.
And that�s the end of the round � the fighters go back to their corners.
Tony Stark dominated that round.
The fighters' corners scream their final instructions, as the referee calls time. Here we go, back to the action!

Stark wants to clinch up but Cottingham keeps it at a distance.
Stark keeps the fight on the outside.
Stark misses with a wild combination.
Stark moves into range and lands a nice body kick.
Stark closes the distance but Cottingham moves to the side
and Cottingham counters with a shoot takedown into half guard.
Cottingham is thwarting Stark's attempts to control the position.
The ref warns both fighters not to hold the cage as they work up against the meshing.
Stark blocking the ground and pound attempt from Cottingham.
Both fighters are absolutely exhausted here.
Stark is pressing down on Cottingham's left leg trying to get back to full guard. He's managed it.
Stark looking to control.
Cottingham thows a big elbow that misses.
That's one minute gone in the round.
Cottingham loading up with the ground and pound but he's missing more than he's landing in this flurry.
Stark has Cottingham pulled in close to control his posture.
Cottingham trying to land body shots but he keeps hitting the mat.
Stark is trying to control the position from the bottom.
A big thud reverberates around the arena there as Cottingham accidentally thumps the mat. Hopefully he's not broken his hand.
Cottingham postures up as if he's going to throw some strikes but drops back for an ankle! Stark is in big trouble! He looks ready to tap! But no, he's escaped and dives on top of Cottingham, into his guard.
Cottingham doesn't do any damage with a couple of strikes from the bottom.
Cottingham has been looking to land a fair amount of strikes on the ground. He might be looking to soften his opponent up in order to work for a submission.
That's two minutes gone in the round.
The crowd are starting to boo a lack of action.
Cottingham is throwing his legs up, looking for submissions. Stark is aware though and is defending well.
Cottingham working from the bottom, still in full guard. He's managed to get a loose triangle. Stark doesn't seem to be doing much to defend here, obviously he feels comfortable in the position. Stark manages to throw the legs off his shoulder and he's back into guard - no problem.
Cottingham looking for a guillotine here but Stark defends easily.
Stark trying to control but Cottingham is working from the bottom.
That's three minutes gone in the round.
Cottingham working for a triangle but Stark defends it easily.
Cottingham working away from the bottom but not quite defensive enough there because Stark has passed into half guard!
That's four minutes gone in the round.
The crowd are starting to boo a lack of action.
Cottingham actively working from the bottom here.
Cottingham looking for submissions off his back.
Cottingham is looking to sinch up a gullotine here but Stark pulls his head out easily.
The crowd thankful this round is nearly over.
Cottingham looking for submissions from an awkward position here.
And that�s the end of the round � the fighters go back to their corners.
That was a close second round but I would say that Duke Cottingham will probably get the nod.
That's the end of the round. The referee orders the cornermen out of the cage so we can get back down to business. This is the final round!

Stark closes the distance but Cottingham moves to the side
and Cottingham counters with a shoot takedown into half guard.
Cottingham is thinking about going for an arm triangle but he can't free his leg.
Stark wants to control but Cottingham is keeping busy and won't allow it.
Cottingham missing with some ground and pound from the half guard.
Stark is trying to maintain the position but Cottingham is very close to passing his half guard.
Both fighters are breathing heavily.
That's one minute gone in the round.
Cottingham seems to be working for a kimura but Stark defends the submission attempt.
Stark trying to control but Cottingham postures up.
The referee decides to stand the fighters back up.
Stark rushes forward with a series of wild hooks but Cottingham moves out of range and avoids them all easily.
Stark throws an overhand right that lands on Cottingham's shoulder, as Cottingham tries to avoid the shot.
Cottingham slips a jab and a cross from Stark.
Cottingham misses with a body kick.
Stark misses with a wild combination.
Stark on the wrong end of an overhand right that came out of nowhere.
That's two minutes gone in the round.
Well. There's a bit of a lull in the action here and the crowd are starting to get restless.
Cottingham lands a slapping body shot.
Stark throws a head kick that misses.
Cottingham shoots in and bounces Stark off the cage to secure the takedown into guard.
Cottingham in full guard, throwing the ground and pound. No damage this time.
Cottingham chips away with some ground and pound.
Cottingham is trying to work a guillotine from the top, or something like that? Don't know how he thinks he's going to get a finish from there.
Cottingham loading up with the ground and pound but he's missing more than he's landing in this flurry.
That's three minutes gone in the round.
Stark throws a couple of shots from the bottom but they don't land.
Stark working the defensive guard well to avoid strikes from Cottingham.
Cottingham is holding a leg here, probably looking for an ankle lock - he drops back and goes for it! Stark is in trouble! Is it all over??? No! Stark has escaped and now he's on top!
Cottingham working from the bottom, still in full guard. He's managed to get a loose triangle. Stark doesn't seem to be doing much to defend here, obviously he feels comfortable in the position. Stark manages to throw the legs off his shoulder and he's back into guard - no problem.
Stark got a little sloppy there for a moment and Cottingham has worked his way into a loose triangle - can he finish it?! No, Stark has managed to get both his arms back between Cottingham's legs - danger averted.
That's four minutes gone in the round.
Well. There's a bit of a lull in the action here and the crowd are starting to get restless.
Cottingham is looking for a guillotine. You can't force these things though and Stark defends well.
Stark trying to control but Cottingham is working from the bottom.
Cottingham working from the bottom, still in full guard. He's managed to get a loose triangle. Stark doesn't seem to be doing much to defend here, obviously he feels comfortable in the position. Stark manages to throw the legs off his shoulder and he's back into guard - no problem.
The crowd thankful this round is nearly over.
Cottingham working for a triangle but Stark defends it easily.
And that's the end of the fight!
Duke Cottingham showed his dominance in that final round.
I think Cottingham has won this one but let's see what the judges have to say. Over to the ring announcer for the scorecards.
Ladies and gentlemen, after 3 rounds of action, we go to the scorecards for a decision.
Judge Bruno Hogan scores the fight 28:28
Judge Winston Howard scores the fight 28:29
Judge Summer Carpenter scores the fight 28:28
The fight is ruled a majority draw!
|
|
|
|
|
|
|
|
|
|
|
|
|
|
|
|
|
|
|
|
|
|
|
| S |
C
A |
G |
S |
C
B |
G |
|
S |
C |
G |
|
energy
A | B |
|
hype
A | B |
|
pop
A | B |
|
mgr
A | B |
|
FIGHT
RATING
41% |
|
|
|
|
|
|
