|
|
GFY 30 - Over The Hill PBP Commentary |
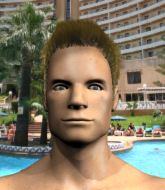
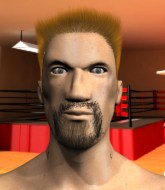
This TWGC bout is 1 fifteen minute round in the super heavyweight division. Introducing today's competitors. In the red corner, competing out of Las Vegas, with a TWGC record of 11 wins and 13 losses; Jackson Hole! And in the blue corner, fighting out of St Petersburg, with a TWGC record of 2 wins and 9 losses; Gunner Mason!
The judges for this bout are Stewart Dunkirk, Cecil Peabody and Gwen Towbar.
The official calls the fighters to the middle and the contest is under way.
Hole misses with a takedown attempt - Mason sprawls well and throws a nice strike on the way out which just misses.
Mason stuffs the takedown.

Hole tries to keep at a distance but Mason has taken the fight into the clinch.

Mason has hold of one of Hole's legs. Hole is fighting the takedown attempt but Mason gets the trip and lands the takedown into guard. Score +2 for takedown into guard / half guard: Hole (0) vs (2) Mason

Hole working from the bottom, still in full guard. He's managed to get a loose triangle. Mason doesn't seem to be doing much to defend here, obviously he feels comfortable in the position. Mason manages to throw the legs off his shoulder and he's back into guard - no problem.
Mason trying to control but Hole is working from the bottom.
Mason must be cautious of submissions here, given that his opponent has the superior Jiu Jitsu.
We've had a slow start to the round here - hopefully the action picks up.
Mason stopping the sweep attempt from Hole.
Hole pulls Mason in close to his closed guard and prevents Mason from doing any damage or advancing position.
Hole keeping moving, preventing Mason from controlling successfully.

That's one minute gone in the round.
Hole is pulling down on Mason's head to control his posture.
Hole has a loose triangle. He'll be looking to tighten that up but Mason can see exactly what he's planning and manages to posture up and free himself.
Hole pulls Mason in close to prevent any damage.

That's two minutes gone in the round.
Mason preventing the sweep.
Hole manages to sweep nicely, so he's now on top. Mason manages to get himself to full guard.
Score +2 for sweep to guard / half guard: Hole (2) vs (2) Mason
Mason looking to sweep here. No luck so far.
Hole forces his way into half guard.
Hole slows the pace down in half guard.

That's three minutes gone in the round.
Mason trying to control here.
Mason tries to roll over but Hole keeps him under control.
Mason wants to control but Hole is keeping busy.
Hole controlling the pace.
Hole is trying to work for a kimura. This could be trouble! No, Mason has managed to free his arm - good work.
Hole is looking for an arm triangle, whilst trying to pass to side control. Mason doesn't seem that keen to cooperate though. No luck this time Hole.
Hole controlling the pace.

That's four minutes gone in the round.
Mason is trying to get back to full guard.
We get told so often about how wrestlers don't like to be on their backs. Let's see if Mason can do anything to dispel that myth.
Mason is in trouble now - Hole has advanced to mount! Score +3 for passing guard: Hole (5) vs (2) Mason
Hole controlling the position easily from mount.

That's five minutes gone in the round.
Mason tries to hold on but Hole pushes him away.
Hole controlling the position easily from mount.
Mason is desperately trying to get back to half guard.
Hole controlling from the full mount.

That's six minutes gone in the round.
Hole's ground tactics aren't going to win him many fans. Let's hope he's got fireworks for us if he gets back to his feet because he's not doing much on the ground.
Hole jumps to side control looking for an arm triangle but Mason manages to avoid the submission attempt.
Hole taking a breather here.

That's seven minutes gone in the round.
Hole seems to have a rather negative gameplan on the ground. He seems keen to just score the takedown and hold down Mason for as long as he can get away with.
Hole tries to move into full mount but can't pass Mason's legs.
Hole is moving around in side control but his primary objective seems to be to maintain the position.
Hole has controlled the position for a good 20 seconds, which will no doubt be starting to frustrate his opponent.

That's eight minutes gone in the round.
Hole continues to stall.
Mason is trying to improve his position.
Hole content to control the pace. The referee will try and keep them active though.
Hole advances to full mount. Score +2 for reaching mount: Hole (7) vs (2) Mason
Hole content just to control the position here.

That's nine minutes gone in the round.
Hole goes for an armbar but he's not got it� Mason turns into him and now he's in Hole's guard.
Score +2 for sweep to guard / half guard: Hole (7) vs (4) Mason
Mason being controlled here momentarily.
The fighters are tangled up in the ropes here. We might need a restart if the fighters can't break free themselves.
Hole is working the butterfly guard. He manages to land a nice scissor sweep and is now in half guard on the top. Nice move. Score +2 for sweep to guard / half guard: Hole (9) vs (4) Mason
Hole sitting and controlling from the half guard.

That's ten minutes gone in the round.
Mason wants to get back to full guard.
Hole content to control rather than advance.
Hole is trying to work for a kimura but Mason is defending well.
Mason is looking to regain full guard. Not this time though.
Hole controlling the action here.

That's eleven minutes gone in the round.
Hole wants to pass to mount but Mason is defending the position.
Hole keeping composed on the top, looking to control the action.
The fighters are trapped in the ropes so we're going to have a reposition here. The ref calls for a break and repositions the fighters in the center of the ring.
Hole is looking for a kimura. It's going to be difficult to finish that from half guard though and Mason defends it well.
Hole seems content to maintain position for now, rather than mounting any offense.

That's twelve minutes gone in the round.
Hole has freed up his trapped foot and advances to mount. Score +3 for passing guard: Hole (12) vs (4) Mason
Hole takes a little breather and maintains the position. The referee will be looking for him to stay active from such a dominant position though.
Hole prevents Mason from getting the reversal.
Hole controlling the position easily from mount.

That's thirteen minutes gone in the round.
This is a sustained period of stalling by Hole.

That's fourteen minutes gone in the round.
Mason tries to hold on but Hole postures up.
Hole takes a little breather and maintains the position. The referee will be looking for him to stay active from such a dominant position though.
Further stalling from Hole.
Boooooooooooooooooooo!!! God, this has been a terrible round. Come on you two, sort yourselves out!
More hug and hope from Hole.
And that's the end of the fight!
Hole takes the fight on points by 12 to 4.
Jackson Hole really struggled to get his t-shirt on before his hand was raised. Making sure that The Huntington New Age Wellness Community logo gets some air time is pretty tricky when you're all sweaty. |
|
|
|
|
|